代码地址 https://github.com/guainttt/ttttest
1 使用noahbuscher/macaw 构建路由
1.1 创建网站目录
mkdir ttttest
在根目录下新建一个文件composer.json
{
	"require":{
		"noahbuscher/macaw":"dev-master"
	}
}
执行命令
composer install
1.2 配置nginx
ttttest.conf
加载.htaccess
server {
    listen       80;
    server_name  localhost;
    root /usr/share/nginx/html/ttttest; #nginx容器的目录
    index index.php index.html index.htm;
    include        "/usr/share/nginx/html/ttttest/.htaccess";


    location / {
        try_files $uri $uri/ =404;
    }

    location ~ .php$ {
	root		/var/www/html/ttttest; #php-fpm目录
        fastcgi_pass   172.17.0.2:9000;
        fastcgi_index  index.php;
        fastcgi_param  SCRIPT_FILENAME  $document_root$fastcgi_script_name;
        include        fastcgi_params;

    }

    location ~ /.ht {
        deny  all;
    }
}
1.3 添加.htaccess文件
配置见:http://packagist.p2hp.com/packages/noahbuscher/macaw
2 构建框架的控制器
方式1:
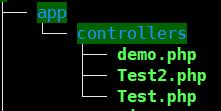
2.1 编写控制器

tttestappcontrollers est.php


<?php
namespace controllers;
class Test
{
    function index()
    {
        echo "this is test's index";
    }
    function hello()
    {
        echo "this is hello";
    }
}
index.php
Macaw::get('index2',"controllersTest@index");
2.2 创建类的自动加载
tttestcomposer.json
{
    "require":{
        "noahbuscher/macaw":"dev-master"
    },
    "autoload":{
        "classmap":[
            "app/controllers"
        ]
    }
}
2.3 执行composer命令
composer dump-autoload

执行成功后会产生一个文件: tttestvendorcomposerautoload_classmap.php
return array(
    'Composer\InstalledVersions' => $vendorDir . '/composer/InstalledVersions.php',
    'controllers\Demo' => $baseDir . '/app/controllers/demo.php',
    'controllers\Test' => $baseDir . '/app/controllers/test.php',
);
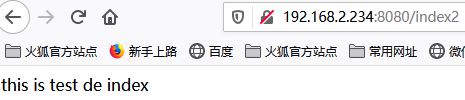
2.4 可以访问控制器了
访问http://192.168.2.234:8080/index2
方式2:(推荐)
由于方式一每新增一个controller就要执行一次composer dump-autoload 这样太麻烦了
2.5 采用psr-4方式创建类的自动加载
    "autoload":{
        "psr-4":{
            "controllers\":"app/controllers/"
        }
    }
2.6 执行composer命令
composer dump-autoload
执行后产生文件 tttestvendorcomposerautoload_psr4.php
return array(
    'controllers\' => array($baseDir . '/app/controllers'),
    'NoahBuscher\Macaw\' => array($vendorDir . '/noahbuscher/macaw'),
);
 控制器类名要符合规范 首字母要大写
3 单个文件的加载
3.1 创建助手类
tttestapphelpers.php
<?php
if(!function_exists("dd")){
   function dd(...$args){
       http_response_code(500);
       foreach ($args as $x){
           var_dump($x);
           echo "</br>";
       }
       die('byebye :dd');
   }

}
3.2 添加conposer.json单个文件的自动加载
    "autoload":{
        "psr-4":{
            "controllers\":"app/controllers/"
        },
        "files":[
            "app/helpers.php"
        ]
    }
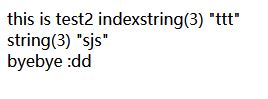
3.3 就可以在控制器自动使用了
function index()
    {
        echo "this is test2  index";
        $a = 'sjs';
        dd('ttt',$a);
    }
4 使用Twig/Twig创建视图
composer require "twig/twig"

4.1 封装接口
tttestappcontrollersBaseControllers.php
<?php
namespace controllers;
class BaseControllers
{
    protected $twig;
    protected $data=array();

    public function __construct()
    {
        $loader = new TwigLoaderFilesystemLoader(dirname(__DIR__).'/views');
        $this->twig = new TwigEnvironment($loader, [
          //是否开启模板缓存
         // 'cache' => '/path/to/compilation_cache',
        ]);
    }

    public function display($template)
    {
        echo $this->twig->render($template.'.html', $this->data);
    }
    public  function assign($key,$value=null)
    {
        if(is_array($value)){
          $this->data[$key] = array_merge($value);
        }else{
            $this->data[$key] = $value;
        }
    }

    function success($url,$mess)
    {
        echo "<script>";
        echo "alert('{$mess}')";
        echo "localhost.href='{$url}'";
        echo "</scipt>";
    }

}
4.2 controller 调用
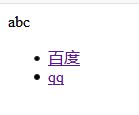
function index()
    {
//        $this->assign('one','abc');
        $one = 'abc';
        $two = 'def';
        $three = array('a'=>'a','b'=>'b');
        $data = compact('one','two','three');
        $this->assign('data',$data);
        $list = [
          ['href'=>'www.baidu.com','name'=>'百度'],
          ['href'=>'www.qq.com','name'=>'qq']
        ];
        $this->assign('list',$list);
        $this->assign('title','我的视图');
//        dd($this->data);
        $this->display('index');
    }
4.3view调用
tttestappviewsindex.html
<!DOCTYPE html>
<html lang="en">
<head>
    <meta charset="UTF-8" >
    <title>{{title}}</title>
</head>
<body>
{{data.one}}


<ul id="navigation">
    {% for item in list %}
    <li><a href="https://{{ item.href }}">{{ item.name }}</a></li>
    {% endfor %}
</ul>
</body>
</html>
5 Medoo制作ORM数据库映射模型
composer require "catfan/medoo"
composer dump-autoload
5.1 封装基类
tttestappmodelsBaseDao.php
<?php
namespace models;
use MedooMedoo;
class BaseDao  extends Medoo
{
    function __construct()
    {
        $database = [
          'database_type'   => 'mysql',
          'database_name'   => 'ttttest',
          'server'          => '192.168.2.234',
          'username'        => 'root',
          'password'        => '123456',
          'prefix'          =>'tt_',//表前缀
          'port'            =>'3306'
        ];
        parent::__construct($database);
    }
}
5.2 模型类的自动加载
    "autoload":{
        "psr-4":{
            "controllers\":"app/controllers/",
            "models\":"app/models/"
        },
        "files":[
            "app/helpers.php"
        ]
    }
5.3 模型类
tttestappmodelsUser.php
<?php
namespace models;
class User extends BaseDao
{

}
5.4 controller使用
tttestappcontrollersTest.php
<?php
namespace controllers;
use IlluminateTranslationArrayLoader;
use modelsUser;

class Test extends BaseControllers
{
    function get_user()
    {
        $user = new User();
        $user->insert('user', [
          'name' => 'foo',
          'date_time' => date("Y-m-d H:i:s")
        ]);
        $data = $user->select("user","*");

        dd($data);
    }

}
6 文件上传类
composer require slince/upload
参考资料
PHP Composer 教程,搭建自己的PHP开发框架(bilibili讲课视频)