本系列主要翻译官方的教程,因为国内目前这方面的资料太少了,但也不一定和官网的一样,反正就是自己想到哪就写到哪。
如果我没有说明,默认情况下index.html始终包含这段代码,后面将不会再贴上来。
<head>
	<meta charset="UTF-8">
	<title>Document</title>
	<!-- 这是一个基础版的兼容库 -->
	<script src="webcomponents-lite.min.js"></script>
	<!-- 将rel修改为import可以引入另外一个HTML,它将会被执行 -->
    <link rel="import" href="./template/template.html">
</head>
template.html始终包含
<link rel="import" href="../polymer-1.7.0/polymer.html">
我们可以创建一个自定义元素,并向这个自定义元素添加属性和方法,不过值得注意的是:自定义元素的名称必须包含一个“-”。
template.html
<script>
  Polymer({
    is: "proto-element",
    ready: function() {
      this.textContent = "I'm a proto-element. Check out my prototype!"
    }
  });
</script>
is:创建一个自定义元素,必须包含“-”,也就是你要的标签名。
ready:当在页面中创建了proto-element这个元素后将会调到这个方法,this表示当前这个元素,this.textContent设置内容。
index.html
<proto-element></proto-element>
就是用is定义的那个名字
效果

添加本地DOM
template.html
<dom-module id="dom-element">

  <template>
    <p>I'm a DOM element. This is my local DOM!</p>
  </template>

  <script>
    Polymer({
      is: "dom-element"
    });
  </script>

</dom-module>
用dom-module来添加原生dom,如果用这种方式需要给它加一个id使用的时候就用这个id当做标签名。
template用来包含css、html
index.html
<dom-element></dom-element>
效果:

与原生DOM结合
template.html
<dom-module id="picture-frame">

  <template>
    <style>
      div {
        display: inline-block;
        background-color: #ccc;
        border-radius: 8px;
        padding: 4px;
      }
    </style>
    <div>
      <content></content>
    </div>
  </template>

  <script>
    Polymer({
      is: "picture-frame",
    });
  </script>

</dom-module>
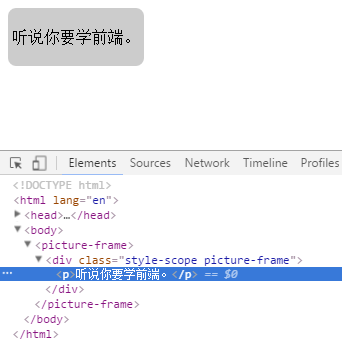
如果希望在自定义组件中插入内容就需要用到content标签,它会将我们写的标签插入到content中。
index.html
<picture-frame>
  <p>听说你要学前端。</p>
</picture-frame>
效果
提示:将style放在template中,它之会影响template里面的元素。
数据绑定
template.html
<dom-module id="name-tag">
  <template>
  	<!-- 将owner绑定到property上 -->
    This is <b>{{owner}}</b>'s name-tag element.
  </template>

  <script>
  Polymer({
    is: "name-tag",
    // 当元素准备好的时候将owner属性的值设置为"Daniel"
    ready: function() {
      this.owner = "Daniel";
    }
  });
  </script>
</dom-module>
index.html
<name-tag></name-tag>

声明一个属性
template.html
<dom-module id="configurable-name-tag">

  <template>
    This is <b>{{owner}}</b>'s configurable-name-tag element.
  </template>

  <script>
    Polymer({
      is: "configurable-name-tag",
      properties: {
        owner: {
          type: String,
          value: "Daniel"
        }
      }
    });
  </script>

</dom-module>
通过properties声明一个自定义属性,type属性类型,value属性默认内容(如果自定义元素没有写这个属性的话)。
index.html
<configurable-name-tag owner="Scott"></configurable-name-tag>
效果

双向数据绑定
template.html
<link rel="import" href="https://polygit2.appspot.com/components/iron-input/iron-input.html">

<dom-module id="editable-name-tag">

  <template>
    <p>
    This is a <strong>{{owner}}</strong>'s editable-name-tag.
    </p>
    <!-- iron-input exposes a two-way bindable input value -->
    <input is="iron-input" bind-value="{{owner}}" placeholder="Your name here...">
  </template>

  <script>
    Polymer({
      is: "editable-name-tag",
      properties: {
        owner: {
          type: String,
          value: "Daniel"
        }
      }
    });
  </script>

</dom-module>
注意这里不要把polymer.html引进来,iron-input.html是一个对input的扩展库。
index.html
<editable-name-tag></editable-name-tag>
效果

本节完,后面会更加详细的介绍,但是本人也是刚刚接触这个,难免有解释不太清楚的,还请见谅。