1,安装vim,你可以使用ubuntu 自带的apt-get 工具安装。
apt-get install vim-gnome
2,安装成功后,进行配置
1>首先进行自动提示补全的配置(pydiction)
从官方上下载http://www.vim.org/scripts/script.php?script_id=850最新的即可,解压缩后,进入解压缩后的目录,执行如下命令
# cp python_pydiction.vim  /usr/share/vim/vim74/ftplugin
# mkdir  /usr/share/vim/vim74/pydiction
# cp complete-dict  pydiction.py  /usr/share/vim/vim74/pydiction/
# vi ~/.vimrc
讲解:
第一行 就是复制下载的文件 到/usr/share/vim/vim74/ftplugin
第二行 就是在/usr/share/vim/vim74/目录下创建文件夹pydiction
第三行 复制 complete-dict pydiction.py 这两个文件到
第四行 打开 .vimc配置文件

然后把下面的三行代码复制到里面
然后保存,应该都会吧。单击Esc后,执行:wq,保存
let g:pydiction_location = '/usr/share/vim/vim74/pydiction/complete-dict'
let g:pydiction_menu_height = 20
autocmd FileType python set omnifunc=pythoncomplete#Complete
2>安装python_fold自动折叠插件
从官方下载http://www.vim.org/scripts/script.php?script_id=515最新的插件,解压缩后,进入解压缩后的目录,执行如下命令
# cp python_fold.vim  /usr/share/vim/vim74/plugin/
# vi ~/.vimrc
讲解:
第一行 就是复制下载的文件 到/usr/share/vim/vim74/plugin
第二行  打开 .vimc配置文件

然后把下面的一行代码复制到里面
set foldmethod=indent
3> 安装自动高亮插件
从官方上下载:http://www.vim.org/scripts/script.php?script_id=790,下载最新的插件,解压缩后,进入解压缩后的目录,执行如下命令
mv /usr/share/vim/vim74/syntax/python.vim  /usr/share/vim/vim74/syntax/python.vim_backup
cp python.vim  /usr/share/vim/vim74/syntax
讲解:
第一行 就是将python.vim 备份
第二行 复制python.vim 到/usr/share/vim/vim74/syntax 目录下


4> 生成 ctag  序列
进入到 python 程序脚本(项目)所在的目录,在该目录下执行:
ctags -R *
如果提示没有安装ctags,执行apt-get install ctags即可。
生成一个 ctags 文件,该文件记录了程序/项目的函数、类等的分析序列记录。有关 ctag 的详细用法请阅读 ctag 的 manpage。
5>安装taglist 插件
从官方上下载插件:http://www.vim.org/scripts/script.php?script_id=273 ,用最新的即可,解压缩后,进入解压缩后的目录,执行如下命令。
# cp plugin/taglist.vim  /usr/share/vim/vim74/plugin/
# cp doc/taglist.txt  /usr/share/vim/vim74/doc/
# vi
执行下面的命令
:helptags  /usr/share/vim/vim74/doc
:help  taglist.txt
第一行 生成 taglist 帮助文件列表
第二行 查看 taglist 帮助信息

配置 vimrc, vi ~/.vimrc,在后面添加如下代码
let Tlist_Show_One_File = 1
let Tlist_Exit_OnlyWindow = 1
let Tlist_Use_Right_Window = 1
let Tlist_Auto_Open=1
let Tlist_File_Fold_Auto_Close=1
讲解:
第一行 不同时显示多个文件的tag,只显示当前文件的。
第二行 如果 taglist 窗口是最后一个窗口,则退出 vim。
第三行 在右侧窗口中显示 taglist 窗口。
第四行 在启动 vim 后,自动打开 taglist 窗口。
第五行 只显示当前文件 tag,其它文件的tag折叠。
最后的配置结果截图如下:
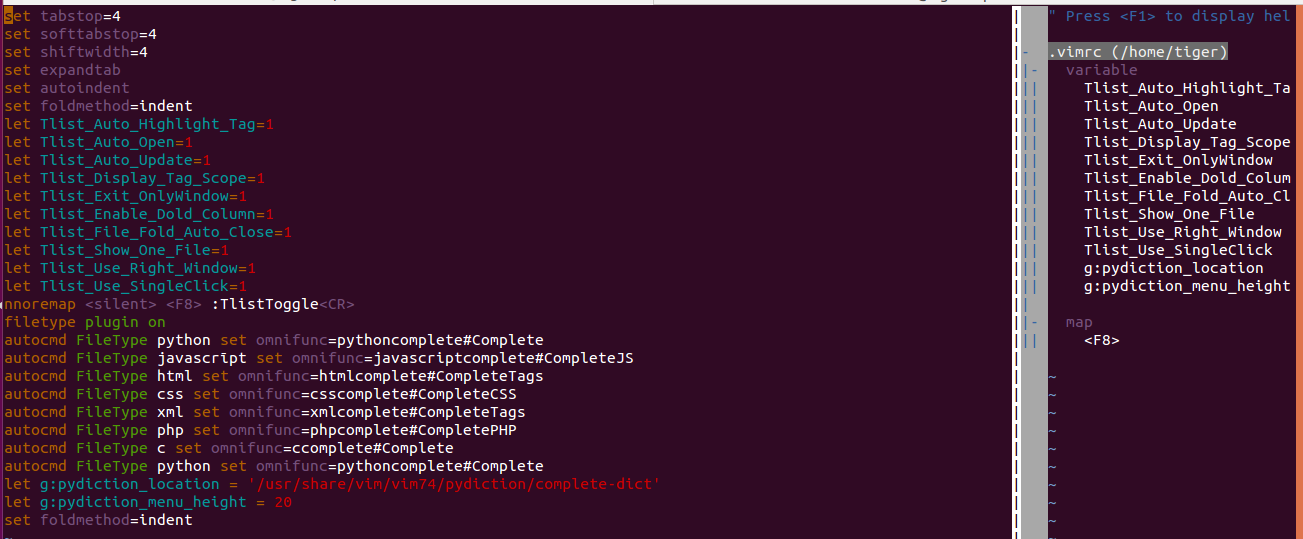
配置文件内容如下:需要的可复制。
set tabstop=4
set softtabstop=4
set shiftwidth=4
set expandtab
set autoindent
set foldmethod=indent
let Tlist_Auto_Highlight_Tag=1
let Tlist_Auto_Open=1
let Tlist_Auto_Update=1
let Tlist_Display_Tag_Scope=1
let Tlist_Exit_OnlyWindow=1
let Tlist_Enable_Dold_Column=1
let Tlist_File_Fold_Auto_Close=1
let Tlist_Show_One_File=1
let Tlist_Use_Right_Window=1
let Tlist_Use_SingleClick=1
nnoremap <silent> <F8> :TlistToggle<CR>
filetype plugin on
autocmd FileType python set omnifunc=pythoncomplete#Complete
autocmd FileType javascrīpt set omnifunc=javascriptcomplete#CompleteJS
autocmd FileType html set omnifunc=htmlcomplete#CompleteTags
autocmd FileType css set omnifunc=csscomplete#CompleteCSS
autocmd FileType xml set omnifunc=xmlcomplete#CompleteTags
autocmd FileType php set omnifunc=phpcomplete#CompletePHP
autocmd FileType c set omnifunc=ccomplete#Complete
autocmd FileType python set omnifunc=pythoncomplete#Complete
let g:pydiction_location = '/usr/share/vim/vim74/pydiction/complete-dict'
let g:pydiction_menu_height = 20
set foldmethod=indent
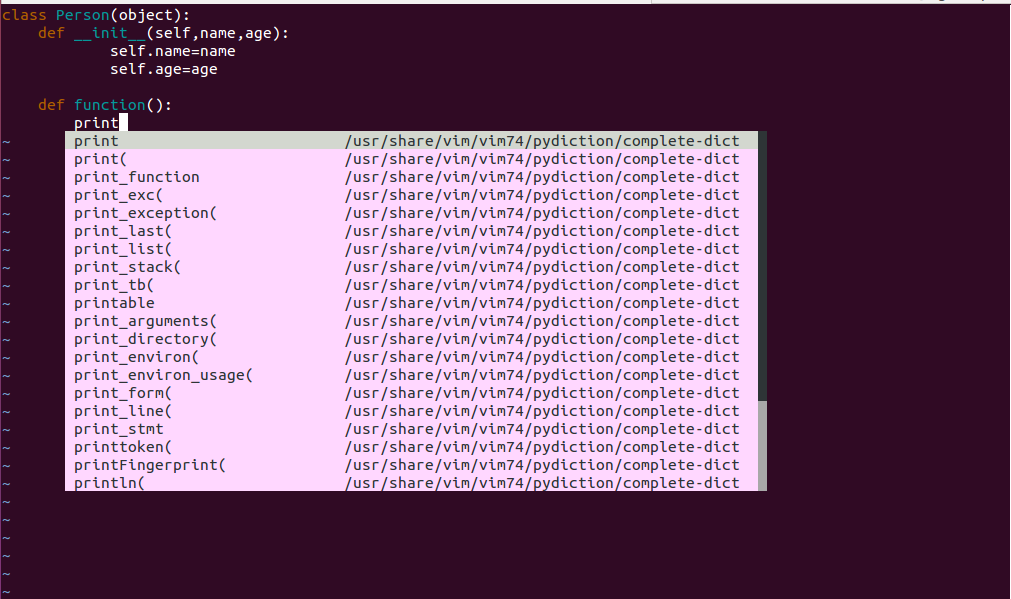
配置后,文件编辑结果如下:
备注:本文参考了部分网友的博客。