django实现图片瀑布流布局
我们在一些图片网站上经常会看到,满屏都是图片,而且图片都大小不一,却可以按空间排列。默认一个div是占用一行,当想把div里的图片并排显示的时候,只能使用float属性,但是,如果两张图片大小不一,那么第二行图片会以第一张最大的图片占用的空间为基准,进行第二行显示,这样的图片布局就非常难看,今天实现的就是瀑布流的形式
实现效果:

一般我们做图片布局的时候,都是采用div中加入img,然后将div float起来,这样图片就会并排显示。实现瀑布流的原理就是,我们换一种布局方式,首先定义好需要显示多少列图片,多少列就是多少和div,然后在每列的div中去加入div包着的图片,由于图片外的div是行标签,所以默认独占一行,所以,在本列的div中,图片就无缝的向下排列了,同理,其他列也是,这样总体布局就出现了,看下图
 

具体html代码 不在说明,下面说一下 如何结合模版语言去,动态展示瀑布里图片
- view代码
def student(request):
    img_list = [
        {'src': '1.jpg', 'title': 'asdfasdfasdf','content': 'asdf'},# 1
        {'src': '2.jpg', 'title': 'asdfasdfasdf','content': 'asdf'},# 2
        {'src': '3.jpg', 'title': 'asdfasdfasdf','content': 'asdf'},
        {'src': '4.jpg', 'title': 'asdfasdfasdf','content': 'asdf'},
        {'src': '5.jpg', 'title': 'asdfasdfasdf','content': 'asdf'},# 5
        {'src': '6.jpg', 'title': 'asdfasdfasdf','content': 'asdf'},
    ]

    return render(request, 'student.html', {"img_list":img_list})
首先分析,现在以四列布局 div分别是a、b、c、d, 那么图片1就在div a中,图片2就在div b中,图片3就在div c中,图片4就在div d中,到图片5时,就继续从div a中开始,后面依次。发现,其中的规律就是第多少张图片 n 除以 4,的余数m 就是第m个div。根据这个规律,我们可以使用模版语言中自定义的方法去进行判断,如果本图片 除以4,正好等于所比较的div 号,那么就放进去
代码:
from django import template
register = template.Library()

@register.filter
def detail1(value,arg):

    """
    查看余数是否等于remainder arg="1,2"
    :param counter:
    :param allcount:
    :param remainder:
    :return:
    """
    allcount, remainder = arg.split(',')
    allcount = int(allcount)
    remainder = int(remainder)
    if value%allcount == remainder:
        return True
    return False
- html 代码
{% load xx %}
<!DOCTYPE html>
<html lang="en">
<head>
    <meta charset="UTF-8">
    <title></title>
    <style>
        .container{
            width: 980px;
            margin: 0 auto;
        }
        .container .column{
            float: left;
            width: 245px;
        }
        .container .item img{
            width: 245px;
        }
    </style>
</head>
<body>

    <div class="container">
        <div class="column">
            {% for i in img_list %}
                {% if forloop.counter|detail1:"4,1" %}
                    <div class="item">
                        {{ forloop.counter }}
                        <img src="/static/{{ i.src }}">
                    </div>
                {% endif %}
            {% endfor %}
        </div>
        <div class="column">
            {% for i in img_list %}
                {% if forloop.counter|detail1:"4,2" %}
                    <div class="item">
                        {{ forloop.counter }}
                        <img src="/static/{{ i.src }}">
                    </div>
                {% endif %}
            {% endfor %}
        </div>
        <div class="column">
            {% for i in img_list %}
                {% if forloop.counter|detail1:"4,3" %}
                    <div class="item">
                        {{ forloop.counter }}
                        <img src="/static/{{ i.src }}">
                    </div>
                {% endif %}
            {% endfor %}
        </div>
        <div class="column">
            {% for i in img_list %}
                {% if forloop.counter|detail1:"4,0" %}
                    <div class="item">
                        {{ forloop.counter }}
                        <img src="/static/{{ i.src }}">
                    </div>
                {% endif %}
            {% endfor %}
        </div>
    </div>

</body>
</html>
上面只是简单的利用模版语言 实现了瀑布流布局,但是会发现图片列表需要循环四次,这样效率不好,一般情况下,可以使用ajax,先获取到图片列表,然后js去循环列表,然后在循环中,将当前循环的元素索引 去和4相除,拿到余数,最后使用jquery 根据余数进行直接定位到对应的div
django实现组合搜索
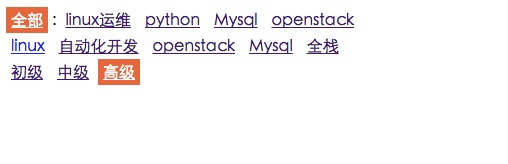
案例:

-
表设计
根据上面的案例,第一行为总的方向,第二行为方向下的分类,第三行为分类下的级别,- 1.总的方向和分类的关系为,一个分类可能属于多个方向,一个方向下有多个分类,所以属于多对多的关系
- 2. 分类下应该有多个数据,数据应该只属于一个分类,所以数据和分类的关系为一对多的关系
- 3. 级别应该是数据的一个字段
根据以上分析,下面是表结构:
from django.db import models

# Create your models here.
# 技术方向,
class Direction(models.Model):
    name = models.CharField(verbose_name='名称', max_length=32)

    classification = models.ManyToManyField('Classification')

    class Meta:
        db_table = 'Direction'
        verbose_name_plural = u'方向(视频方向)'

    def __str__(self):
        return self.name


# 技术分类、语言
class Classification(models.Model):
    name = models.CharField(verbose_name='名称', max_length=32)

    class Meta:
        db_table = 'Classification'
        verbose_name_plural = u'分类(视频分类)'

    def __str__(self):
        return self.name

# 技术视频,
class Video(models.Model):

    level_choice = (
        (1, u'初级'),
        (2, u'中级'),
        (3, u'高级'),
    )
    level = models.IntegerField(verbose_name='级别', choices=level_choice, default=1)

    classification = models.ForeignKey('Classification', null=True, blank=True)

    title = models.CharField(verbose_name='标题', max_length=32)
    summary = models.CharField(verbose_name='简介', max_length=32)
    img = models.ImageField(verbose_name='图片', upload_to='./static/images/Video/')
    href = models.CharField(verbose_name='视频地址', max_length=256)

    create_date = models.DateTimeField(auto_now_add=True)

    class Meta:
        db_table = 'Video'
        verbose_name_plural = u'视频'

    def __str__(self):
        return self.title
-
html 设计
案例中的方向、分类、和级别都是直接从数据库中拿到的数据,所以,这里就应用到了模版语言,下面是html代码,里面使用了自定义的tag方法
{% load xx %}
<!DOCTYPE html>
<html lang="en">
<head>
    <meta charset="UTF-8">
    <title></title>
    <style>
        .condition a{
            display: inline-block;
            padding: 5px;
        }
        .condition a.active{
            background-color: coral;
            color: white;
        }
    </style>
</head>
<body>
    <div class="condition">
        <div>
            {% all_menu current_url %} :
            {% for i in dList %}
                {% ac1 current_url i.id i.name %}
            {% endfor %}
        </div>
        <div>
            {% for i in cList %}
                {% ac2 current_url i.id i.name %}
            {% endfor %}
        </div>
        <div>
            {% for i in lList %}
                {% ac3 current_url i.0 i.1 %}

            {% endfor %}
        </div>
    </div>

</body>
</html>
- view 设计
from django.shortcuts import render
from app01 import models
# Create your views here.

def video(request,**kwargs):
    print(kwargs)
    print(request.path_info)
    current_url = request.path_info         #获取当前url
    direction_id = kwargs.get('direction_id','0')
    classfication_id = kwargs.get('classfication_id', '0')
    q = {}
    # 方向是0
    if direction_id == '0':
        cList = models.Classification.objects.values('id', 'name')
        # 分类是0
        if classfication_id == '0':
            # video-0-0
            pass
        else:
            # video-0-1
            # 选中了某个分类
            q['classification__id'] = classfication_id
    else:
        obj = models.Direction.objects.get(id=direction_id)
        temp = obj.classification.all().values('id','name')
        id_list = list(map(lambda x:x['id'],temp))

        cList = obj.classification.all().values('id','name')

        if classfication_id == '0':
            # video-1-0
            # 根据风向ID,找到所属的分类ID

            print(id_list)
            q['classification__id__in'] = id_list
        else:
            # video-1-1
            if int(classfication_id) in id_list:
                q['classification__id'] = classfication_id
            else:
                q['classification__id__in'] = id_list
                url_list = current_url.split('-')
                url_list[2] = "0"
                current_url = '-'.join(url_list)
    level_id = kwargs.get('level_id',None)
    if level_id != '0':
        q['level'] = level_id

    result = models.Video.objects.filter(**q)

    dList = models.Direction.objects.values('id', 'name')

    lList = models.Video.level_choice
    # level_choice = (
    #     (1, u'初级'),
    #     (2, u'中级'),
    #     (3, u'高级'),
    # )
    return render(request, 'video.html', {"dList":dList,
                                            'cList': cList,
                                            'lList': lList,
                                          'current_url': current_url})
- 模版语言自定义方法
from django import template
from django.utils.safestring import mark_safe

register = template.Library()
@register.simple_tag
def action1(current_url, nid):
    # /video-2-1-3.html
    url_list = current_url.split('-')
    url_list[1] = str(nid)

    return '-'.join(url_list)

@register.simple_tag
def action2(current_url, nid):
    # /video-2-1-3.html
    url_list = current_url.split('-')
    url_list[2] = str(nid)

    return '-'.join(url_list)

@register.simple_tag
def action3(current_url, nid):
    # /video-2-1-3.html
    url_list = current_url.split('-')
    url_list[3] = str(nid) + '.html'

    return '-'.join(url_list)

@register.simple_tag
def ac1(current_url, nid, name):
    # # /video-2-1-3.html
    url_list = current_url.split('-')
    old = url_list[1]
    if old == str(nid):
        temp = '<a class="active" href="%s">%s</a>'
    else:
        temp = '<a href="%s">%s</a>'

    url_list[1] = str(nid)
    tag = temp %('-'.join(url_list),name)

    return mark_safe(tag)


@register.simple_tag
def ac2(current_url, nid, name):
    # # /video-2-1-3.html
    url_list = current_url.split('-')
    old = url_list[2]
    if old == str(nid):
        temp = '<a class="active" href="%s">%s</a>'
    else:
        temp = '<a href="%s">%s</a>'

    url_list[2] = str(nid)
    tag = temp %('-'.join(url_list),name)

    return mark_safe(tag)


@register.simple_tag
def ac3(current_url, nid, name):
    # # /video-2-1-3.html
    url_list = current_url.split('-')
    old = url_list[3]
    if old == str(nid) + '.html':
        temp = '<a class="active" href="%s">%s</a>'
    else:
        temp = '<a href="%s">%s</a>'

    url_list[3] = str(nid) +  '.html'
    tag = temp %('-'.join(url_list),name)

    return mark_safe(tag)

@register.simple_tag
def all_menu(current_url):
    # video-0-10-0.html
    url_list = current_url.split('-')
    if url_list[1] == '0':
        temp = '<a class="active" href="%s">全部</a>'
    else:
        temp = '<a  href="%s">全部</a>'

    url_list[1] = '0'
    temp = temp %('-'.join(url_list))

    return mark_safe(temp)
- url 设计:
urlpatterns = [
    url(r'^admin/', admin.site.urls),
    url(r'^video-(?P<direction_id>d+)-(?P<classfication_id>d+)-(?P<level_id>d+).html', views.video),

]
django实现阶梯评论
data = [
    (None,'A'),
    ('A','A1'),
    ('A','A1-1'),
    ('A1','A2'),
    ('A1-1','A2-3'),
    ('A2-3','A3-4'),
    ('A1','A2-2'),
    ('A2','A3'),
    ('A2-2','A3-3'),
    ('A3','A4'),
    (None,'B'),
    ('B','B1'),
    ('B1','B2'),
    ('B1','B2-2'),
    ('B2','B3'),
    (None,'C'),
    ('C','C1'),

]

def tree_search(d_dic,parent,son):
    #一层一层找,先拨第一层,一层一层往下找
    for k,v in d_dic.items():
        #举例来说我先遇到A,我就把A来个深度查询,A没有了在找B
        if k == parent:#如果等于就找到了parent,就吧son加入到他下面
            d_dic[k][son] = {} #son下面可能还有儿子
            #这里找到就直接return了,你找到就直接退出就行了
            return
        else:
            #如果没有找到,有可能还有更深的地方,的需要剥掉一层
            tree_search(d_dic[k],parent,son)


data_dic = {}

for item in data:
    # 每一个item代表两个值一个父亲一个儿子
    parent,son = item
    #先判断parent是否为空,如果为空他就是顶级的,直接吧他加到data_dic
    if parent is None:
        data_dic[son] = {}  #这里如果为空,那么key就是他自己,他儿子就是一个空字典
    else:
        '''
        如果不为空他是谁的儿子呢?举例来说A3他是A2的儿子,但是你能直接判断A3的父亲是A2你能直接判断他是否在A里面吗?你只能到第一层.key
        所以咱们就得一层一层的找,我们知道A3他爹肯定在字典里了,所以就得一层一层的找,但是不能循环找,因为你不知道他有多少层,所以通过递归去找
        直到找到位置
        '''
        tree_search(data_dic,parent,son) #因为你要一层一层找,你的把data_dic传进去,还的把parent和son传进去


for k,v in data_dic.items():
    print(k,v)
执行结果:
('A', {'A1': {'A2': {'A3': {'A4': {}}}, 'A2-2': {'A3-3': {}}}, 'A1-1': {'A2-3': {'A3-4': {}}}})
('C', {'C1': {}})
('B', {'B1': {'B2-2': {}, 'B2': {'B3': {}}}})
另一种方法:
def SearchParentNode(comment,CommentTree):
    '''
    功能:查找本条评论的父评论
    '''
    for i in CommentTree:
        if comment['reply_id'] == i['cid']:   #如果reply_id和本节点cid一样,则找到父节点
            CommentTree[CommentTree.index(i)]['childs'].append(comment)
        else:
            SearchParentNode(comment, CommentTree[CommentTree.index(i)]['childs'])

comment_lists = models.Comment.objects.filter(news_id=news_id).values('cid',
                                                                            'user__username',
                                                                            'content',
                                                                            'ctime',
                                                                            'ups',
                                                                            'downs',
                                                                            'news_id',
                                                                            'reply_id',)
        comment_lists = list(comment_lists)
        comment_tree = []       #为每个comment添加一个child字段
        for comment in comment_lists:
            comment['childs'] = []
            if not comment['reply_id']:         #如果reply_id为空,表示为根评论
                comment_tree.append(comment)
            else:
                SearchParentNode(comment,comment_tree)  #否则,递归查找父节点
        result = {'TotalCount':len(comment_lists),'CommentTree':comment_tree}
        print(result)
        return HttpResponse(json.dumps(result,cls=commons.JsonCustomEncoder))
django实现验证码
验证码需要考虑的问题:
1:系统产生的验证码文本内容记录在哪?
储存到session,每次比对的验证码应该是上次产生的验证。而不是这次产生的验证比对。session具有独立性。因为每个人产生的session的随机字符串是不一样,也就意味着每个用户有单独的session。所以将验证码储存在session。保证每次比对的是同一个用户的验证码。
2:验证码产生的形式?文本还是图片?
验证码的作用:就是为了避免不法用户ddos攻击网站,通过网站的验证码,可以降低攻击速率。如果是文本的话,我们可以 用脚本可以抓取相应的标签内的验证码。所以验证码不能为文本。由于识别图片的成本较高,而且速度也不快。所以采用图片的形式储存验证码。
3:点击验证码图片要保证更新图片内容,怎么实现?
保证每次请求的url是不一样,比如:通过加?问号来保证每次请求的url是不一样,让系统产生的不同验证码。
需要安装Pillow模块:
pip3.5.exe install Pillow
- 产生图片和验证码代码:
#!/usr/bin/env python
#coding:utf-8

import random
from PIL import Image, ImageDraw, ImageFont, ImageFilter

_letter_cases = "abcdefghjkmnpqrstuvwxy"  # 小写字母,去除可能干扰的i,l,o,z
_upper_cases = _letter_cases.upper()  # 大写字母
_numbers = ''.join(map(str, range(3, 10)))  # 数字
init_chars = ''.join((_letter_cases, _upper_cases, _numbers))

def create_validate_code(size=(120, 30),
                         chars=init_chars,
                         img_type="GIF",
                         mode="RGB",
                         bg_color=(255, 255, 255),
                         fg_color=(0, 0, 255),
                         font_size=18,
                         font_type="Monaco.ttf",
                         length=4,
                         draw_lines=True,
                         n_line=(1, 2),
                         draw_points=True,
                         point_chance = 2):
    '''
    @todo: 生成验证码图片
    @param size: 图片的大小,格式(宽,高),默认为(120, 30)
    @param chars: 允许的字符集合,格式字符串
    @param img_type: 图片保存的格式,默认为GIF,可选的为GIF,JPEG,TIFF,PNG
    @param mode: 图片模式,默认为RGB
    @param bg_color: 背景颜色,默认为白色
    @param fg_color: 前景色,验证码字符颜色,默认为蓝色#0000FF
    @param font_size: 验证码字体大小
    @param font_type: 验证码字体,默认为 ae_AlArabiya.ttf
    @param length: 验证码字符个数
    @param draw_lines: 是否划干扰线
    @param n_lines: 干扰线的条数范围,格式元组,默认为(1, 2),只有draw_lines为True时有效
    @param draw_points: 是否画干扰点
    @param point_chance: 干扰点出现的概率,大小范围[0, 100]
    @return: [0]: PIL Image实例
    @return: [1]: 验证码图片中的字符串
    '''

    width, height = size # 宽, 高
    img = Image.new(mode, size, bg_color) # 创建图形
    draw = ImageDraw.Draw(img) # 创建画笔

    def get_chars():
        '''生成给定长度的字符串,返回列表格式'''
        return random.sample(chars, length)

    def create_lines():
        '''绘制干扰线'''
        line_num = random.randint(*n_line) # 干扰线条数

        for i in range(line_num):
            # 起始点
            begin = (random.randint(0, size[0]), random.randint(0, size[1]))
            #结束点
            end = (random.randint(0, size[0]), random.randint(0, size[1]))
            draw.line([begin, end], fill=(0, 0, 0))

    def create_points():
        '''绘制干扰点'''
        chance = min(100, max(0, int(point_chance))) # 大小限制在[0, 100]

        for w in range(width):
            for h in range(height):
                tmp = random.randint(0, 100)
                if tmp > 100 - chance:
                    draw.point((w, h), fill=(0, 0, 0))

    def create_strs():
        '''绘制验证码字符'''
        c_chars = get_chars()
        strs = ' %s ' % ' '.join(c_chars) # 每个字符前后以空格隔开

        font = ImageFont.truetype(font_type, font_size)
        font_width, font_height = font.getsize(strs)

        draw.text(((width - font_width) / 3, (height - font_height) / 3),
                    strs, font=font, fill=fg_color)

        return ''.join(c_chars)

    if draw_lines:
        create_lines()
    if draw_points:
        create_points()
    strs = create_strs()

    # 图形扭曲参数
    params = [1 - float(random.randint(1, 2)) / 100,
              0,
              0,
              0,
              1 - float(random.randint(1, 10)) / 100,
              float(random.randint(1, 2)) / 500,
              0.001,
              float(random.randint(1, 2)) / 500
              ]
    img = img.transform(size, Image.PERSPECTIVE, params) # 创建扭曲

    img = img.filter(ImageFilter.EDGE_ENHANCE_MORE) # 滤镜,边界加强(阈值更大)

    return img, strs
如上模块返回的是图片对象和验证码。
- 后台验证码coder:
def check_code(request):
    import io
    from backend import check_code as CheckCode

    stream = io.BytesIO()#在内存中产生
    # img图片对象,code在图像中写的内容
    img, code = CheckCode.create_validate_code()
    img.save(stream, "png")#将验证码图片保存在内存里的文件中

    request.session["CheckCode"] = code
    return HttpResponse(stream.getvalue())#从内存中取出图片返回给前端。

    # 代码:生成一张图片,在图片中写文件
    # request.session['CheckCode'] =  图片上的内容

    # 自动生成图片,并且将图片中的文字保存在session中
    # 将图片内容返回给用户

def login(request):
    if request.method == 'POST':
        input_code = request.POST.get('check_code')#验证码的比对
        print(input_code.upper(),request.session['CheckCode'].upper())
    return render(request, 'login.html')
- 前端
<!DOCTYPE html>
<html lang="en">
<head>
    <meta charset="UTF-8">
    <title></title>
</head>
<body>
    <form action="/login/" method="POST">
        <input type="text" name="username" />
        <input type="text" name="pwd" />
        <input type="text" name="check_code" />
        <img src="/check_code/" onclick="ChangeCode(this);">
        <input type="submit" />
    </form>
    <script>
        function ChangeCode(ths){
            ths.src = ths.src + '?';//保证用户在点击验证码图片的时候,进行更新。保证每次请求的url是不同的。
        }
    </script>
</body>
</html>