python_way day 14
HTML
一,标签
二、特殊字符
三,css
<!DOCTYPE html>
<html lang="en">
<head>
    <meta charset="UTF-8">


    <title>Title</title>
</head>
<body>
    中间写的都是页面上能看到的效果
</body>
</html>
一 标签:
head中的标签
<meta charset="UTF-8"> 字符集
<meta http-equiv="Refresh" content="5" /> 每5秒刷新一次
<meta http-equiv="Refresh" content="5, url=https://www.baidu.com" /> 刷新后跳转至url指定的地址
<meta name="keywords" content="星际2,萧瑟,专访"> 关键字,理论上可以增加爬虫搜索对应关键字的概率
<meta http-equiv="X-UA-COMPATIBLE" content="IE-edge"> 不用用户在浏览器上选择,自动使用ie最新引擎渲染,老版本的ie与其他浏览器没有效果。
<link rel="stylesheet" type="text/css" href="css/common.css" > 引入css
<link rel="shortcut icon" href="img/favicon.iec"> html的角标
body中的标签
作用:可以在标签属性中对标签包含的内容进行修改。并且标签是可以嵌套标签的。
一共分两类,一类是块级标签,一类是内联标签
块级标签,不管内容有多少,直接占一整行 :div,h1,p
内联标签(行内标签),内容有多少就占多少 :span,a,select,input
<body>
    <div style="background-color: cornflowerblue"> 我是div标签 </div>
    <span style="background-color: aqua">我是 span标签 </span>
</body>
图解:

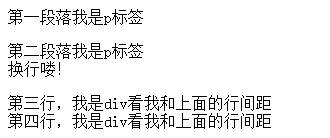
1、p : 段落 自动换一样,其和上下行有一样的空隙
2、br:换行
<body>
    <p>第一段落我是p标签</p>
    <p>第二段落我是p标签<br/>换行喽!</p>
    <div>第三行,我是div看我和上面的行间距</div>
    <div>第四行,我是div看我和上面的行间距</div>
</body>
效果:
3、a : 跳转,矛
- 跳转
a 标签特殊属性,href,target
<body>
    <a href="https://www.baidu.com">百度</a>
</body>
效果:
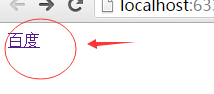
点击以后是在当前浏览器也面跳转到所跳转的页面
target="_blank"
<body>
    <a href="https://www.baidu.com" target="_blank">百度</a>
</body>
这样写就是点击百度后会新生成一个页面打开跳转页面
- 矛 :网页内跳转
<body>
    <a href="#i1" target="_blank">标题一</a>
    <a href="#i2" target="_blank">标题二</a>
    <a href="#i3" target="_blank">标题三</a>
    <div id="i1" style="height: 500px;">标题一内容</div>
    <div id="i2" style="height: 500px;">标题二内容</div>
    <div id="i3" style="height: 500px;">标题三内容</div>
</body>
href="#i1" 寻找页面中id=i1的标签,将其标签放置在页面顶部
效果:
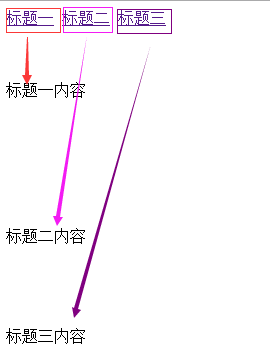
注意:在页面中,每个id号都是唯一的。
4、H:默认字体区分从h1~h6
<body>
    <h1>哈哈</h1>
    <h2>哈哈</h2>
    <h3>哈哈</h3>
    <h4>哈哈</h4>
    <h5>哈哈</h5>
    <h6>哈哈</h6>
</body>
图示:

5、input 让用户输入内容
- 输入字符 text password
<body>
    <div style="background-color: aliceblue">
        <p><input type="text"/></p>
        <p><input type="password"/></p>
    </div>
</body>
图示

- 上传文件 file
<body>
    <div style="background-color: aliceblue">
       <p>上传文件
           <input type="file">
       </p>
    </div>
</body>
图示:

- 互斥选择 radio
<body>
    <div style="background-color: aliceblue">
        <p>性别:
            <br/>男:<input type="radio" name="g"/>
            <br/>女:<input type="radio" name="g"/>
        </p>
    </div>
</body>
name 作用就是互斥,=号后面的值一样就可以达到互斥的效果
图示:

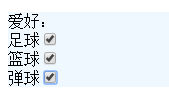
- 多选 checkbox
<body>
    <div style="background-color: aliceblue">
        <p>爱好:
            <br/> 足球<input type="checkbox" />
            <br/> 篮球<input type="checkbox" />
            <br/> 弹球<input type="checkbox" />
        </p>
    </div>
</body>
图示
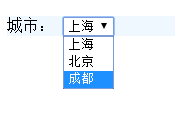
6、 select 下拉框用户选择
<body>
    <div style="background-color: aliceblue">
       <p>城市:
           <select>
               <option>上海</option>
               <option>北京</option>
               <option>成都</option>
           </select>
       </p>
    </div>
</body>
效果:
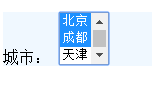
同时展示多个
<body>
    <div style="background-color: aliceblue">
       <p>城市:
           <select multiple size="3">
               <option>上海</option>
               <option>北京</option>
               <option>成都</option>
               <option>天津</option>
               <option>兰州</option>
               <option>南京</option>
           </select>
       </p>
    </div>
</body>
#multiple 支持多选, size:同时显示3个
效果:
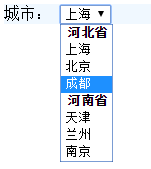
分组:
效果:
<body>
    <div style="background-color: aliceblue">
       <p>城市:
           <select>
               <optgroup label="河北省"></optgroup>
                   <option>上海</option>
                   <option>北京</option>
                   <option>成都</option>
               <optgroup label="河南省"></optgroup>
                   <option>天津</option>
                   <option>兰州</option>
                   <option>南京</option>
           </select>
       </p>
    </div>
</body>
7、文本输入 textarea 备注
<body>
    <div style="background-color: aliceblue">
       <p>备注:
            <textarea>输入文本</textarea>
       </p>
    </div>
</body>
效果:

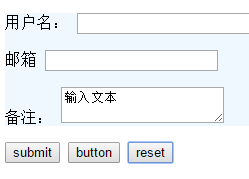
8、提交(也输入input标签中) submit、 button、 reset ---- 配合form标签使用
submit :提交
button:普通的按钮
reset: 重置
以上这些按钮所提交的范围需要使用一个form标签来圈定
<body>
    <form>   #这个form中有一个提交,就说明提交这个按钮只能提交这个form范围中的内容

        <div style="background-color: aliceblue">
          <p>用户名:
              <input type="text" />
          </p>
          <p>邮箱
              <input type="email" />
          </p>
          <p>备注:
                <textarea>输入文本</textarea>
          </p>
        </div>
        <input type="submit" value="submit">
        <input type="button" value="button">
        <input type="reset" value="reset">
    </form>     #这个form中有一个提交,就说明提交这个按钮只能提交这个form范围中的内容
</body>
效果:
9、将输入的数据提交
input提交:
<body>
    <form action="https://www.sogou.com/web?" method="get">    #form标签中的action就是要提交的地址
        <div style="background-color: aliceblue">
          <p>用户名:
              <input type="text" name="query"/>   #input标签中的name就表示你要把内容以字典的形式提交,字典的key就是name后面的值
          </p>
          <p>邮箱
              <input type="email" name="e"/>    #这里也一样
          </p>
           <p>备注:
                <textarea name="t">输入文本</textarea>
           </p>
        </div>
        <input type="submit" value="submit">
        <input type="button" value="button">
        <input type="reset" value="reset">
    </form>
</body>

第一个text类型提交内容就是 {"query":"洪荒之力"},服务器接到这个数据后就可以取到相应的值
a = {"query":"洪荒之力"}
test = a["query"]
print(test)
洪荒之力

#这样方式的提交默认是以get方式提交,还有一种方式是 post
radio 和 checkbox 提交
<body>
    <form action="https://www.sogou.com/web?" method="get">
        <div style="background-color: aliceblue">
          <p>用户名:
              <input type="text" name="query"/>
          </p>
          <p>性别:
              男:<input type="radio" name="g" value="1"/>  #这里就要定义一个值,来对应你定义的内容
              nv:<input type="radio" name="g" value="0"/>
          </p>
          <p>
              篮球:<input name="favor" type="checkbox" value="0"/>
              足球:<input name="favor" type="checkbox" value="1"/>
              弹球:<input name="favor" type="checkbox" value="2"/>
          </p>
           <p>备注:
                <textarea name="t">输入文本</textarea>
           </p>
        </div>
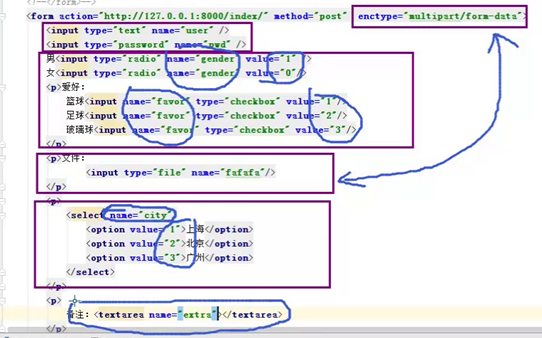
图示:
radio
![]()
favor
![]()
file 上传文件
<body>
    <form action="https://www.sogou.com/web?" method="get" enctype="multipart/form-data">   #这里必须定义enctype,定义这个文件才能分块上传到服务器。
        <div style="background-color: aliceblue">
           <p>
               <input type="file" name="f"/>   #这里也别忘了定义name,用来接收字典的key
           </p>
        </div>
    </form>
select 多选提交
<p>
         <select name="city">
               <option value="1">上海</option>
               <option value="2">北京</option>
               <option value="3">广州</option>
         </select>
</p>
testarea 备注提交
<p>
     <textarea name="t"></textarea>
</p>
注意:
10、hr标签:生成横线
<hr />
11、label 提升用户体验,用户在点击要输入的位置时,可以点击相对应的文字
<label for="name2">
    <p>用户名:
        <input id="name2" type="text" name="query"/>
    </p>
</label>
图示:

for 对应着id ,这样我只要点击用户名这块区域,后面就可以输入值了
12、 ul、 ol、 dl
ul: 每行自定加上个 点
<div>
    <ul>
       <li>1</li>
       <li>2</li>
       <li>3</li>
    </ul>
</div>
图示:
ol: 每行自动加上行号
<ol>
    <li>1</li>
    <li>2</li>
    <li>3</li>
</ol>
图示:

dl: 以标题和内的形式展示
<dl>
         <dt>标题1</dt>
         <dd>内容1</dd>
         <dd>内容2</dd>
         <dt>标题2</dt>
         <dd>内容1</dd>
</dl>
图示:

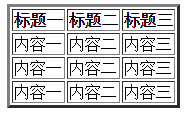
13、 table 表格
        <div>
            <table border="3">  #border内的数值表示的是表格的样式
                <tr>
                    <th>标题一</th>
                    <th>标题二</th>
                    <th>标题三</th>
                </tr>
                <tr>
                    <td>内容一</td>
                    <td>内容二</td>
                    <td>内容三</td>
                </tr>
          。
          。
               。
            </table>
        </div>

#th表示表头
#td表示内容
图示:
合并单元格
- 行合并
<table border="3">
    <tr>
        <th colspan="2">标题一</th>  #我们让这个标题占2格
        <th>标题二</th>
        <th>标题三</th>
        <th>标题三</th>
    </tr>
    <tr>
        <td>内容一</td>
        <td>内容二</td>
        <td>内容三</td>
        <td>内容三</td>
    </tr>
    <tr>
        <td>内容一</td>
        <td>内容二</td>
        <td>内容三</td>
        <td>内容三</td>
    </tr>
</table>
图示
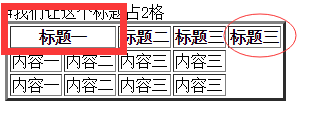
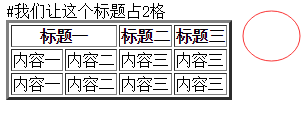
标题一占了2格, 标题三就被挤出来了,所以我们就要把标题三去掉
<table border="3">
    <tr>
        <th colspan="2">标题一</th>  #我们让这个标题占2格
        <th>标题二</th>
        <th>标题三</th>     #去掉了出来的标题
    </tr>
    <tr>
        <td>内容一</td>
        <td>内容二</td>
        <td>内容三</td>
        <td>内容三</td>
    </tr>
    <tr>
        <td>内容一</td>
        <td>内容二</td>
        <td>内容三</td>
        <td>内容三</td>
    </tr>
</table>
图示:
- 列合并
<table border="3">
    <tr>
        <th colspan="2">标题一</th>
        <th>标题二</th>
        <th>标题三</th>
    </tr>
    <tr>
        <td rowspan="2">内容一</td>   #这里是列合并
        <td>内容二</td>
        <td>内容三</td>
        <td>内容三</td>
    </tr>
    <tr>
        <td>内容一</td>
        <td>内容二</td>
        <td>内容三</td>
        <td>内容三</td>
    </tr>
</table>
图示
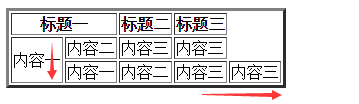
内容的第一行向下合并了,结果把内容的第二行的内容三挤出来了
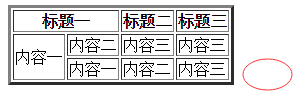
所以我们就把被挤出来的删除就ok了
<table border="3">
    <tr>
        <th colspan="2">标题一</th>
        <th>标题二</th>
        <th>标题三</th>
    </tr>
    <tr>
        <td rowspan="2">内容一</td>
        <td>内容二</td>
        <td>内容三</td>
        <td>内容三</td>
    </tr>
    <tr>
        <td>内容一</td>
        <td>内容二</td>
        <td>内容三</td>
        #把这里的删除了
    </tr>
</table>
图示:
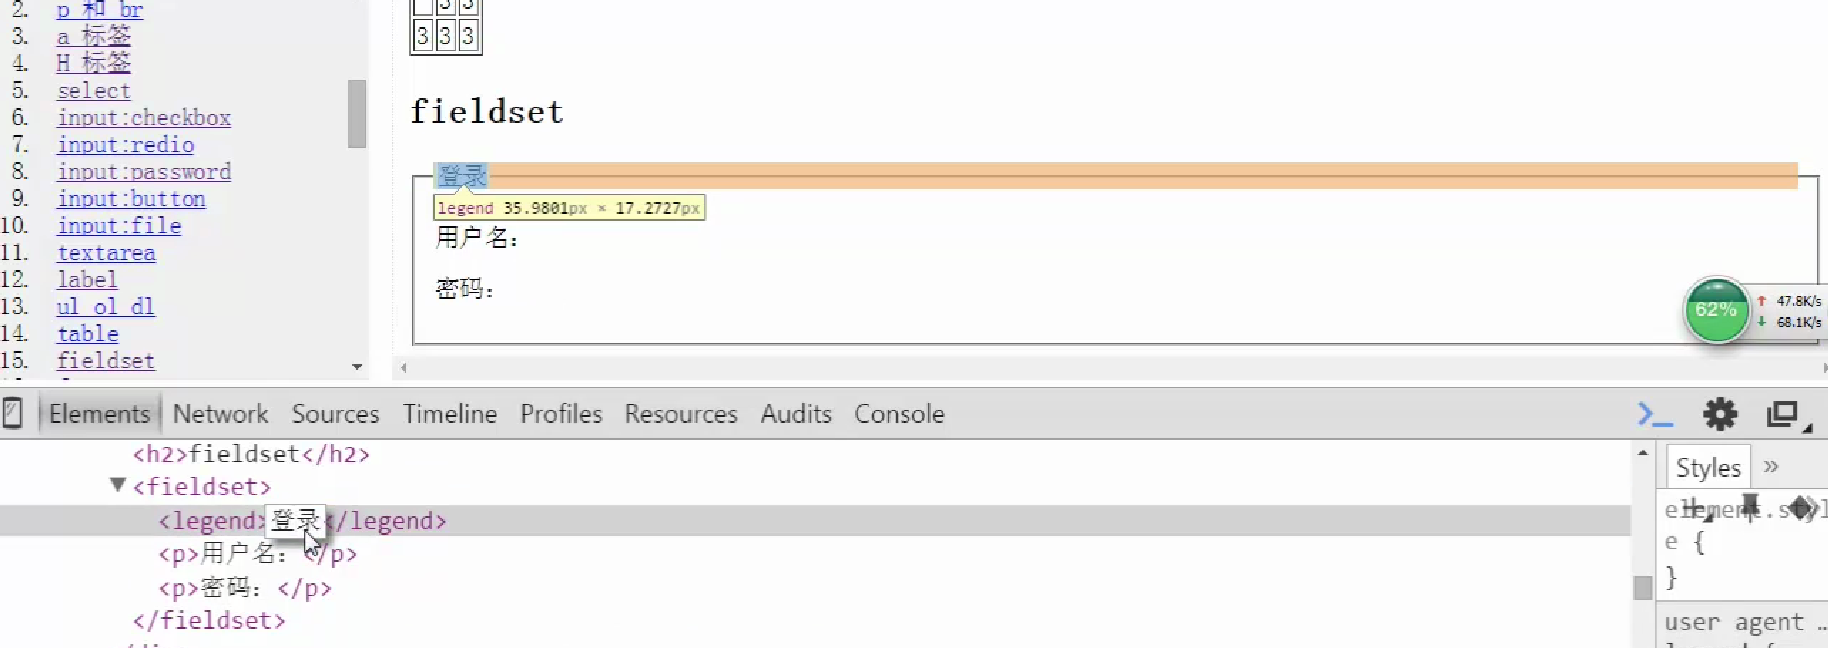
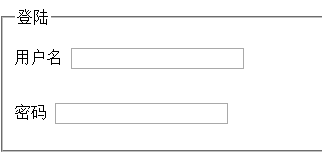
14、 fieldest & legend : 框
<fieldset>     #这个就是框
   <legend>登陆</legend>   #这里面就是框上面的文字
       <p>
           用户名 <input type="text">
       </p>
       <p>
           <br/>密码   <input type="password">
       </p>
</fieldset>
图示:
15、iframe 链接
<body>
    <h1>我的衣可服装</h1>
    <iframe style=" 100%; height: 2000px;" src="http://www.ykhome.com.cn/"></iframe>
</body>

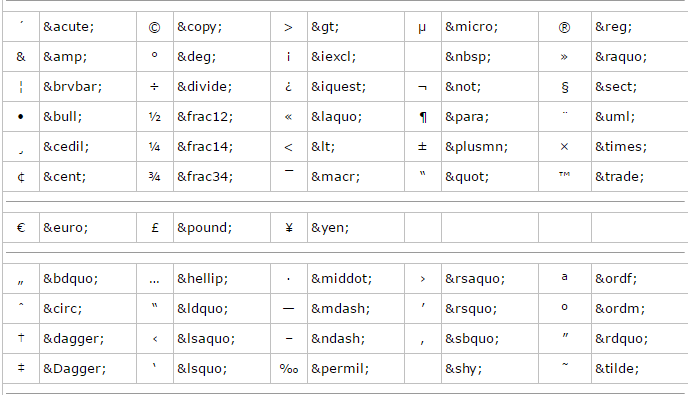
二、特殊字符
<body>
    <div style="background-color: cornflowerblue"> 我是div标签 </div>
    <span style="background-color: aqua">我是 span标签 </span>
    <   #当我们写上一个尖括号的时候下面再html阅览中能看到这个符号
</body>
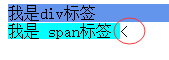
<body>
    <div style="background-color: cornflowerblue"> 我是div标签 </div>
    <span style="background-color: aqua">我是 span标签 </span>
    <a     #但我们要是想显示成这样,阅览器就会认为这个是html中一个没有写完整的标签。在阅览器中就会不显示
</body>
我们怎么能解决这个问题呢?
这就要使用到特殊字符了
<body>
    <div style="background-color: cornflowerblue"> 我是div标签 </div>
    <span style="background-color: aqua">我是 span标签 </span>
    <p><a></p>  # 这样就可以了
</body>

特殊字符会有很多,我们可以从这里查找
http://www.cnblogs.com/web-d/archive/2010/04/16/1713298.html