第一步创建一个表
 1 create database liyongzhendb default character set utf8 collate utf8_bin;
 2
 3 CREATE TABLE IF NOT EXISTS student (
 4     id INT AUTO_INCREMENT,
 5     name VARCHAR(255) NOT NULL,
 6     password VARCHAR(255) NOT NULL,
 7     date_of_birth DATE,
 8     description TEXT,
 9     PRIMARY KEY (id)
10 )ENGINE=InnoDB
第二步创建一个Web工程,工程名叫jsp_jdbc_mysql_curd。
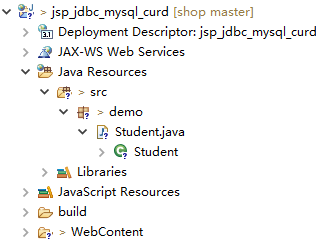
第三步创建一个POJO
创建一个名为student.java的POJO。
 1 package com.liyongzhen.jspcurd;
 2
 3 import java.util.Date;
 4
 5 public class Student {
 6
 7     private int id;
 8     private String name;
 9     private String password;
10     private Date dateOfBirth;
11     private String description;
12
13     public Student() {
14     }
15
16     public int getId() {
17         return id;
18     }
19
20     public void setId(int id) {
21         this.id = id;
22     }
23
24     public String getName() {
25         return name;
26     }
27
28     public void setName(String name) {
29         this.name = name;
30     }
31
32     public String getPassword() {
33         return password;
34     }
35
36     public void setPassword(String password) {
37         this.password = password;
38     }
39
40     public Date getDateOfBirth() {
41         return dateOfBirth;
42     }
43
44     public void setDateOfBirth(Date dateOfBirth) {
45         this.dateOfBirth = dateOfBirth;
46     }
47
48     public String getDescription() {
49         return description;
50     }
51
52     public void setDescription(String description) {
53         this.description = description;
54     }
55
56 }
第四步实现添加功能
用JSP创建添加表单add.jsp
 1 <%@ page language="java" contentType="text/html; charset=utf-8"
 2     pageEncoding="utf-8"%>
 3 <!DOCTYPE html PUBLIC "-//W3C//DTD HTML 4.01 Transitional//EN" "http://www.w3.org/TR/html4/loose.dtd">
 4 <html>
 5 <head>
 6 <meta http-equiv="Content-Type" content="text/html; charset=UTF-8">
 7 <title>添加学生</title>
 8 <link rel="stylesheet"
 9     href="https://maxcdn.bootstrapcdn.com/bootstrap/3.3.7/css/bootstrap.min.css">
10 <style type="text/css">
11 body {
12     padding-top: 50px;
13 }
14
15 form {
16     padding: 40px 15px;
17      600px;
18     margin: 0 auto;
19 }
20
21 .group {
22     margin: 10px;
23     padding-bottom: 10px;
24     max- 600px;
25 }
26
27 input {
28      400px;
29 }
30
31 .submit {
32     text-align: right;
33 }
34 </style>
35 </head>
36 <body>
37     <jsp:include page="nav.jsp"/>
38     <div class="container">
39         <form action="save.jsp" method="post">
40             <div class="group">
41                 <label for="name" class="title">姓名:</label> <input type="text"
42                     id="name" name="name" />
43             </div>
44             <div class="group">
45                 <label for="password" class="title">密码:</label> <input
46                     type="password" id="password" name="password" />
47             </div>
48             <div class="group">
49                 <label for="description" class="description">说明:</label> <input
50                     id="description" name="description" />
51             </div>
52             <div class="submit">
53                 <button type="submit" value="提交" id="submit">保存</button>
54             </div>
55         </form>
56     </div>
57 </body>
58 </html>
第五步,创建save.jsp,用于接收add.jsp表单上的数据,并通过JDBC技术保存到数据库
 1 <%@ page language="java" contentType="text/html; charset=UTF-8"
 2     pageEncoding="UTF-8" import="java.sql.*"%>
 3 <%
 4     String name = request.getParameter("name");//获取add.jsp表单中的数据,并放在变量里
 5     String password = request.getParameter("password");
 6     String description = request.getParameter("description");
 7     //在使用变量存储数据库访问信息,如URL,数据库用户名,密码等
 8     String url = "jdbc:mysql://149.129.112.161:3306/shop?useUnicode=true&characterEncoding=utf-8";
 9     String user = "shop";
10     String pass = "999999";
11
12     try {//将SQL连接器从磁盘加载到内存
13         Class.forName("com.mysql.jdbc.Driver");
14     } catch (ClassNotFoundException e1) {
15         e1.printStackTrace();
16     }
17     //获取连接对象,并通过连接对象建立预处理语句对象PreparedStatement。
18     try (Connection connection = DriverManager.getConnection(url, user, pass)) {
19
20         String sql = "INSERT INTO student (name, password, description) VALUES (?,?,?);";
21         PreparedStatement statement = connection.prepareStatement(sql, Statement.RETURN_GENERATED_KEYS);
22         statement.setString(1, name);
23         statement.setString(2, password);
24         statement.setString(3, description);
25         int value = statement.executeUpdate();
26         statement.close();
27
28     } catch (SQLException e) {
29         e.printStackTrace();
30     }
31     // 将数据插入到数据库并妆发到查询所有记录上
32     request.getRequestDispatcher("list.jsp").forward(request, response);
33 %>
第六步,实现查询功能
查询功能和查询后的展示功能一起写在list.jsp页面。
 1 <%@ page language="java" contentType="text/html; charset=UTF-8"
 2     pageEncoding="UTF-8" import="java.sql.*,java.util.*,demo.*"%>
 3 <!DOCTYPE html>
 4 <html>
 5 <head>
 6 <meta http-equiv="Content-Type" content="text/html; charset=UTF-8">
 7 <title>学生列表</title>
 8 <link rel="stylesheet"
 9     href="https://maxcdn.bootstrapcdn.com/bootstrap/3.3.7/css/bootstrap.min.css">
10 <style type="text/css">
11 table {
12     margin-top: 80px;
13 }
14 </style>
15 </head>
16 <body>
17     <jsp:include page="nav.jsp" />
18
19     <%
20         List<Student> list = new ArrayList<>();
21
22         String url = "jdbc:mysql://149.129.112.161:3306/shop?useUnicode=true&characterEncoding=utf-8";
23         String user = "shop";
24         String pass = "999999";
25
26         try {
27             Class.forName("com.mysql.jdbc.Driver");
28         } catch (ClassNotFoundException e1) {
29             e1.printStackTrace();
30         }
31         //获取连接
32         try (Connection connection = DriverManager.getConnection(url, user, pass)) {
33
34             Statement statement = connection.createStatement();
35             String sql = "SELECT * FROM student;";//通过连接建立一个语句对象
36             ResultSet rs = statement.executeQuery(sql);//查询数据
37
38             while (rs.next()) {
39                 // 将数据库的记录转换成JOJO实例
40                 Student student = new Student();
41                 student.setId(rs.getInt("id"));
42                 student.setName(rs.getString("name"));
43                 student.setPassword(rs.getString("password"));
44                 student.setDescription(rs.getString("description"));
45                 list.add(student);
46             }
47             rs.close();
48             statement.close();
49
50         } catch (SQLException e) {//捕获异常
51             e.printStackTrace();//将异常打印出来
52         }
53     %>
54
55     <div class="container">
56
57         <%
58             if (list != null && list.size() > 0) {
59         %>
60
61         <table class="table">
62             <tr>
63                 <th>ID</th>
64                 <th>姓名</th>
65                 <th>密码</th>
66                 <th>说明</th>
67                 <th>操作</th>
68             </tr>
69
70             <%
71                 for (Student s : list) {
72             %>
73             <tr>
74                 <td><%=s.getId()%></td>
75                 <td><%=s.getName()%></td>
76                 <td><%=s.getPassword()%></td>
77                 <td><%=s.getDescription()%></td>
78                 <td><a href="edit.jsp?id=<%=s.getId()%>">修改</a> | <a
79                     href="delete.jsp?id=<%=s.getId()%>">删除</a></td>
80             </tr>
81             <%
82                 }
83                 }
84             %>
85         </table>
86     </div>
87 </body>
88 </html>
第七步,实现编辑功能
创建一个edit.jsp类实现编辑功能,编辑功能分两部分,一部分将数据查询出来,放到表单里。另一部分是将表单的数据更新到数据库。
  1 <%@ page language="java" contentType="text/html; charset=UTF-8"
  2     pageEncoding="UTF-8"
  3     import="java.sql.*,java.util.*,demo.Student"%>
  4 <!DOCTYPE html>
  5 <html>
  6 <head>
  7 <meta http-equiv="Content-Type" content="text/html; charset=UTF-8">
  8 <title>修改学生</title>
  9 <link rel="stylesheet"
 10     href="https://maxcdn.bootstrapcdn.com/bootstrap/3.3.7/css/bootstrap.min.css">
 11 <style type="text/css">
 12 body {
 13     padding-top: 50px;
 14 }
 15
 16 form {
 17     padding: 40px 15px;
 18      600px;
 19     margin: 0 auto;
 20 }
 21
 22 .group {
 23     margin: 10px;
 24     padding-bottom: 10px;
 25     max- 600px;
 26 }
 27
 28 input {
 29      400px;
 30 }
 31
 32 .submit {
 33     text-align: right;
 34 }
 35 </style>
 36 </head>
 37 <body>
 38     <%
 39         Student student = new Student();
 40
 41         String id = request.getParameter("id");
 42
 43         if (id != null && id != "") {
 44             //在使用变量存储数据库访问信息,如URL,数据库用户名,密码等
 45             String url = "jdbc:mysql://149.129.112.161:3306/shop?useUnicode=true&characterEncoding=utf-8";
 46             String user = "shop";
 47             String pass = "999999";
 48
 49             try {//将SQL连接器从磁盘加载到内存
 50                 Class.forName("com.mysql.jdbc.Driver");
 51             } catch (ClassNotFoundException e1) {
 52                 e1.printStackTrace();
 53             }
 54           //获取连接
 55             try (Connection connection = DriverManager.getConnection(url, user, pass)) {
 56                 String sql = "SELECT * FROM student where id = ?;";
 57                 PreparedStatement statement = connection.prepareStatement(sql);//产生一个预处理语句
 58                 statement.setInt(1, Integer.parseInt(id));//设置一个参数
 59                 ResultSet rs = statement.executeQuery();//查询所有
 60
 61                 while (rs.next()) {
 62                     // 将数据库的记录转换成JOJO实例
 63                     student.setId(rs.getInt("id"));
 64                     student.setName(rs.getString("name"));
 65                     student.setPassword(rs.getString("password"));
 66                     student.setDescription(rs.getString("description"));
 67                 }
 68                 rs.close();
 69                 statement.close();
 70
 71             } catch (SQLException e) {
 72                 e.printStackTrace();
 73             }
 74
 75         }
 76     %>
 77
 78     <jsp:include page="nav.jsp" />
 79     <div class="container">
 80     <%
 81         if (student!=null){
 82     %>
 83         <form action="update.jsp" method="post">
 84             <input type="hidden" name="id"  value="<%=student.getId() %>">
 85             <div class="group">
 86                 <label for="name" class="title">姓名:</label> <input type="text"
 87                     id="name" name="name"  value="<%=student.getName() %>"/>
 88             </div>
 89             <div class="group">
 90                 <label for="password" class="title">密码:</label> <input
 91                     type="password" id="password" name="password"  value="<%=student.getPassword()%>"/>
 92             </div>
 93             <div class="group">
 94                 <label for="description" class="description">说明:</label> <input
 95                     id="description" name="description"   value="<%=student.getDescription()%>"/>
 96             </div>
 97             <div class="submit">
 98                 <button type="submit" value="提交" id="submit">保存</button>
 99             </div>
100         </form>
101
102         <%} %>
103     </div>
104 </body>
105 </html>
第八步,删除功能
创建一个delete.jsp类实现删除功能,删除功能很简单,几乎都是JDBC程序代码,执行Delete SQL脚本
 1 <%@ page language="java" contentType="text/html; charset=UTF-8"
 2     pageEncoding="UTF-8" import="java.sql.*"%>
 3 <%
 4     String id = request.getParameter("id");
 5
 6       String url = "jdbc:mysql://149.129.112.161:3306/shop?useUnicode=true&characterEncoding=utf-8";
 7       String user = "shop";
 8       String pass = "999999";
 9
10     try {
11         Class.forName("com.mysql.jdbc.Driver");
12     } catch (ClassNotFoundException e1) {
13         e1.printStackTrace();
14     }
15
16     try (Connection connection = DriverManager.getConnection(url, user, pass)) {
17
18         String sql = "delete from student where id = ?";
19         PreparedStatement statement = connection.prepareStatement(sql, Statement.RETURN_GENERATED_KEYS);
20         statement.setInt(1,Integer.parseInt(id));
21         int value = statement.executeUpdate();
22         statement.close();
23
24     } catch (SQLException e) {
25         e.printStackTrace();
26     }
27
28     request.getRequestDispatcher("list.jsp").forward(request, response);
29 %>
这样一个增删改查的工程就做好了