直接上代码
引入js css
<link href="~/assets/css/fileinput.css" media="all" rel="stylesheet" type="text/css" />
<script src="~/assets/js/fileinput.js" type="text/javascript"></script>
<script src="~/assets/js/locales/zh.js"></script>
前台
 <div class="modal-body">
                    <div class="row">
                        <div class="col-xs-6">
                            @Html.TextBoxFor(m => m.FileUploads, new { id = "model_file", type = "file", multiple = "multiple", @class = "file-loading" })
                        </div>
                        <div class="col-xs-6">
                            @Html.TextBoxFor(m => m.FileUploads, new { id = "model_files", type = "file", multiple = "multiple", @class = "file-loading" })
                        </div>
                    </div>
  </div>
实体类 FileUploads
 public class FileUpload
    {
        public FileUpload()
        {
            this.FileUploads = new List<HttpPostedFileBase>();
        }

        public List<HttpPostedFileBase> FileUploads { get; set; }
    }
引用实体类
@using MiniSite.Web.Areas.Pos.Models
@model FileUpload
插件初始化 以及属性
        var control = $("#model_file");
        var uploadrul = "@Url.Action("PictureRequest")"; //后台方法地址
        var upObj = {
            language: 'zh', //设置语言
            uploadUrl: "@Url.Action("PictureRequest")",//后台方法路径
            uploadExtraData: function () {//向后台传递参数
                var data = {
                    description: $("#Description").val(),
                    startDateIdx: $("#startDateIdx").val(),
                    endDateIdx: $("#endDateIdx").val()
                };
                return data;
            },
            uploadExtraData: { "savepath": "/assets/img/" },//上传至服务器的参数,非常重要也就是说上传文件保存的地址
            allowedFileExtensions: ['jpeg','jpg', 'png', 'gif'],//接收的文件后缀 可以更改别的后缀 这里只是图片格式
            showUpload: true, //显示批量上传按钮
            showCaption: false,//是否显示标题
            browseClass: "btn btn-primary", //按钮样式
            dropZoneEnabled: true,//是否显示拖拽区域
            maxFileSize: 4096,//单位为kb,如果为0表示不限制文件大小
            minFileCount: 0,
            maxFileCount: 1,//限制一张图片
            msgSizeTooLarge: " "{name}" 大小为({size} KB) 最大文件大小为 {maxSize} KB.请重新上传!",//文件的实际大小有些许偏差
            enctype: 'multipart/form-data',
            validateInitialCount: true,
            previewFileIcon: "<i class='glyphicon glyphicon-king'></i>",
            msgFilesTooMany: "选择上传的文件数量({n}) 超过允许的最大数值{m}!",
            allowedPreviewTypes: ['image']//能够预览的文件类型,如果不限制。文件预览时可能很慢

        };
        $('#modalShow').html("请选择图片");
        control.fileinput(upObj);
        //导入文件上传成功之后的事件
        $("#model_file").on("fileuploaded", function (event, data, previewId, index) {

        });
        //导入文件上传失败之后的事件
        $('#model_file').on('fileuploaderror', function (event, data, msg) {
            var msg = data.response;
        });
后台方法
        /// <summary>
        /// 保存图片
        /// </summary>
        /// <returns></returns>
        public ActionResult PictureRequest(FileUpload model)
        {
            string json = "{"msg":"上传成功!"}";
            try
            {
                foreach (var file in model.FileUploads)
                {
                    if (file != null && file.ContentLength > 0)
                    {
                        var path = Server.MapPath(this.Request["savepath"] + "\" + file.FileName);
                        file.SaveAs(path);

                }
            }
            catch (Exception ex)
            {
                //失败时返回的参数必须加 error键
                json = "{"error":"" + ex.Message + ""}";
            }
            return Json(json);
        }
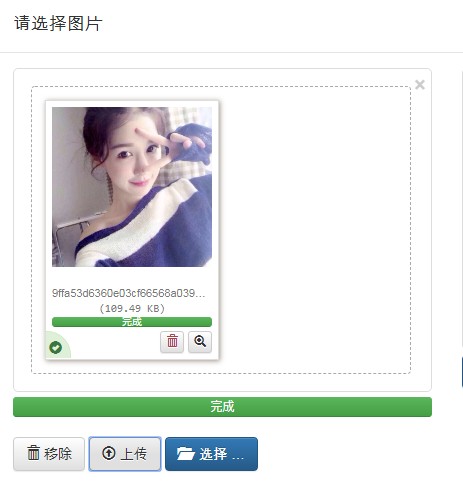
最后上一张效果图

上传后的文件夹内容

至此大工告成
还有一种不是通过实体类这种方法
直接通过IO流实现但是一直没成功 图片一直是破损的
附后台代码 谁知道问题出在哪就艾特我 哈哈哈哈
        public ActionResult PictureRequest()
        {
            string json = "{"msg":"上传成功!"}";
            try
            {
                try
                {
                    this.Response.ContentType = "image/jpeg";
                    Stream sr = this.Request.InputStream;
                    var file = this.Request.Files["model_file"];//获取前台内容
                    //Stream sr = context.Request.InputStream;
                    byte[] bt = new byte[sr.Length];
                    //HttpPostedFile file = context.Request.Files["model_file"];
                    string savepath = this.Request["savepath"];//获取文件保存的路径
                    string fileName = file.FileName;
                    sr.Read(bt, 0, bt.Length);
                    savepath = this.Server.MapPath(savepath) + "\" + fileName;//保存路径
                    FileStream fs = new FileStream(savepath, FileMode.Create);
                    fs.Write(bt, 0, bt.Length);
                    fs.Close();
                    sr.Close();
            }
            catch (Exception ex)
            {
                //失败时返回的参数必须加 error键
                json = "{"error":"" + ex.Message + ""}";
            }
            this.Response.Write(json);
            this.Response.End();
            return Json(json);
        }