可以参考:YouCompleteMe#full-installation-guide
可以直接下载:
http://pan.baidu.com/s/1dDIq2Al 密码: si5q
确保vim支持python
1. 去vim官网下载7.4以上的gvim版本。
2. 去官网下载python2.7。
3. 把python的路径添加到环境变量里,主要是 xxxPython27libs 这个路径添加进去。
4. 检验方法,在vim里输入下面指令,如果返回1说明没问题,否则就是环境路径没有设置正确。
:echo has('python') || has('python3')
不是1就不用往下看了。
安装git 及 Vundle
1. 去git官网下载并安装git。
2. 使用git下载vundle。(对于windows, 在我的电脑上, ~代表C:UsersAdministrator)
git clone https://github.com/VundleVim/Vundle.vim.git ~/.vim/bundle/Vundle.vim
3. 修改vim的vimrc文件,windows下是_vimrc文件,在最顶上添加:
set nocompatible              " be iMproved, required
filetype off                  " required
set rtp+=~/.vim/bundle/Vundle.vim
call vundle#begin()
Plugin 'VundleVim/Vundle.vim'
call vundle#end()            " required
filetype plugin indent on    " required
4. 进入vim,输入下面命令,自此,vundle安装完成。
:PluginInstall
安装YCM插件
1. 使用git下载插件:
git clone https://github.com/Valloric/YouCompleteMe.git ~/.vim/bundle/YouCompleteMe
2. 然后进行下面操作:
cd ~/.vim/bundle/YouCompleteMe
git submodule update --init --recursive
3. 修改vim的_vimrc文件,在Plugin 'VundleVim/Vundle.vim'后添加:Plugin 'Valloric/YouCompleteMe',最后的内容像这样:
set nocompatible              " be iMproved, required
filetype off                  " required
set rtp+=~/.vim/bundle/Vundle.vim
call vundle#begin()
Plugin 'VundleVim/Vundle.vim'
Plugin 'Valloric/YouCompleteMe'
call vundle#end()            " required
filetype plugin indent on    " required
4. 进入vim,输入下面命令,自此,YMC安装完成。
:PluginInstall
这时,打开一个文件,会提示错误,这是因为还没有做完。
编译 ycm_core 库
1. 下载安装Cmake。
2. 安装Visual Studio,免费社区版即可。
3. 新建一个文件夹 ycm_build
cd ~
mkdir ycm_build
cd ycm_build
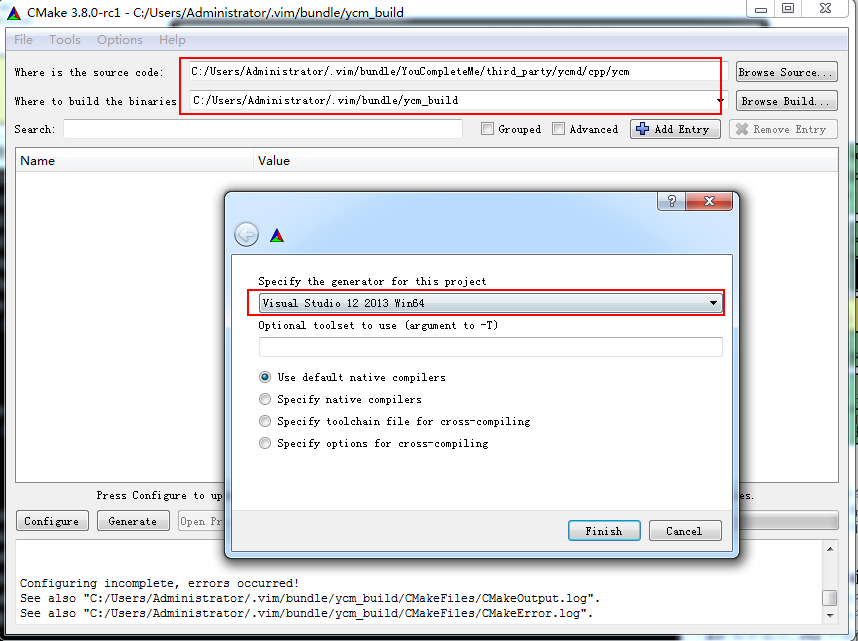
4. 开始编译, 下面的12根据你的安装版本,32位的把win64删掉
cmake -G "Visual Studio 12 Win64" . ~/.vim/bundle/YouCompleteMe/third_party/ycmd/cpp
如果编译不成功,那么就使用cmake的ui一个个的试