1、修改pip源
临时使用:
可以在使用pip的时候在后面加上-i参数,指定pip源
eg: pip install scrapy -i https://pypi.tuna.tsinghua.edu.cn/simple
常用的源有:
新版ubuntu要求使用https源,要注意。
# 清华源
index-url = https://pypi.tuna.tsinghua.edu.cn/simple
trusted-host = pypi.tuna.tsinghua.edu.cn

# 阿里云源
index-url = http://mirrors.aliyun.com/pypi/simple/
trusted-host = mirrors.aliyun.com

## 以下设置trusted-host也类似
# 中国科技大学
https://pypi.mirrors.ustc.edu.cn/simple/
# 华中理工大学:
http://pypi.hustunique.com/
# 山东理工大学:
http://pypi.sdutlinux.org/
# 豆瓣:
http://pypi.douban.com/simple/
永久修改:
linux:
修改 ~/.pip/pip.conf (没有就创建一个), 内容如下(以清华源为例):
[global]
index-url =  https://pypi.tuna.tsinghua.edu.cn/simple
[install]
trusted-host= pypi.tuna.tsinghua.edu.cn
windows:
(1)在windows文件管理器中,输入 %APPDATA%
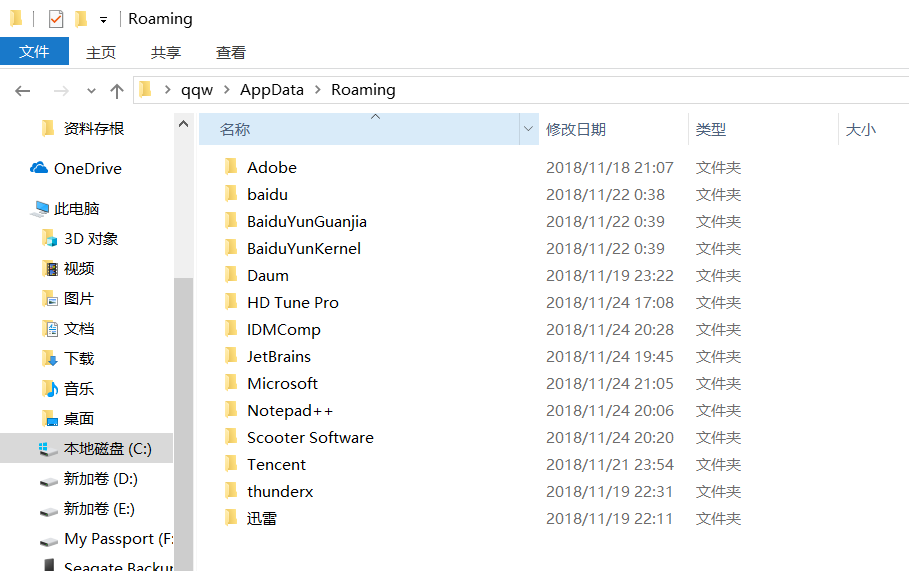
(2)在该目录下新建pip文件夹,然后到pip文件夹里面去新建个pip.ini文件
(3)在新建的pip.ini文件中输入以下内容(以阿里云源为例):
阿里云的源:
[global]
index-url = http://mirrors.aliyun.com/pypi/simple/
trusted-host = mirrors.aliyun.com
离线下载网站:https://pypi.python.org/pypi(centos,windows),https://www.lfd.uci.edu/~gohlke/pythonlibs(windows)
six:pip install six
离线版:six-1.11.0-py2.py3-none-any.whl(centos版),six-1.11.0-py2.py3-none-any.whl(windows版),后面类似
pytz:pip install pytz
离线版:pytz-2017.3-py2.py3-none-any.whl,pytz-2017.3-py2.py3-none-any.whl
pillow:pip install pillow(自动安装olefile, pillow)
离线版:Pillow-4.3.0-cp27-cp27mu-manylinux1_x86_64.whl,Pillow-4.3.0-cp27-cp27m-win_amd64.whl
numpy:pip install numpy
离线版:numpy-1.13.3-cp27-cp27mu-manylinux1_x86_64.whl,numpy-1.13.3-cp27-none-win_amd64.whl
decorator:pip install decorator
离线版:decorator-4.1.2-py2.py3-none-any.whl,decorator-4.1.2-py2.py3-none-any.whl
pyparsing:pip install pyparsing
离线版:pyparsing-2.2.0-py2.py3-none-any.whl,pyparsing-2.2.0-py2.py3-none-any.whl
scikit-learn:pip install scikit-learn
离线版:scikit_learn-0.19.1-cp27-cp27mu-manylinux1_x86_64.whl,scikit_learn-0.19.1-cp27-cp27m-win_amd64.whl
backports.functools-lru-cache:pip install backports.functools-lru-cache
离线版:backports.functools_lru_cache-1.4-py2.py3-none-any.whl,backports.functools_lru_cache-1.4-py2.py3-none-any.whl
cycler:pip install cycler(自动安装six,cycler)
离线版:cycler-0.10.0-py2.py3-none-any.whl,cycler-0.10.0-py2.py3-none-any.whl
python-dateutil:pip install python_dateutil(自动安装six,python_dateutil)
离线版:python_dateutil-2.6.1-py2.py3-none-any.whl,python_dateutil-2.6.1-py2.py3-none-any.whl
scipy:pip install scipy(自动安装numpy, scipy)
离线版:scipy-1.0.0-cp27-cp27mu-manylinux1_x86_64.whl,scipy-1.0.0-cp27-none-win_amd64.whl
PyWavelets:pip install PyWavelets(自动安装numpy,PyWavelets)
离线版:PyWavelets-0.5.2-cp27-cp27mu-manylinux1_x86_64.whl,PyWavelets-0.5.2-cp27-none-win_amd64.whl
pandas:pip install pandas(自动安装six, python-dateutil, numpy, pytz, pandas)
离线版:pandas-0.21.0-cp27-cp27mu-manylinux1_x86_64.whl,pandas-0.21.0-cp27-cp27m-win_amd64.whl
matplotlib:pip install matplotlib(自动安装pyparsing, backports.functools-lru-cache, six, python-dateutil, subprocess32, pytz, cycler, numpy, matplotlib)
离线版:matplotlib-2.1.0-cp27-cp27mu-manylinux1_x86_64.whl,matplotlib-2.1.0-cp27-cp27m-win_amd64.whl
skimage:pip install scikit-image(自动安装numpy, PyWavelets, scipy, decorator, networkx, six, pyparsing, backports.functools-lru-cache, python-dateutil, subprocess32, pytz, cycler, matplotlib, olefile, pillow, scikit-image)
离线版:scikit_image-0.13.1-cp27-cp27mu-manylinux1_x86_64.whl,scikit-image-0.13.1.tar.gz
可能遇见的问题
1、(安装skimage时)skimageexternal ifffile ifffile.c(75) : fatal error C1083: Cannot open include file: 'stdint.h': No such file or directory
原因: stdint.h是c99标准的头文件,vc不支持,所以出现错误“No such file or directory”。
解决方法:
①去我的资源中下载msinttypes-r26.zip,地址为:http://download.csdn.net/detail/atfuies/9887776解压后得到3个文件:inttypes.h,stdint.h,changelog.txt
②找到VC的include目录,一般默认的VC for Python 的include位置为:
C:UsersAdministratorAppDataLocalProgramsCommonMicrosoftVisual C++ for Python9.0VCinclude
有的用户名不是Administrator,将Administrator替换为你自己的用户名。
③将inttypes.h和stdint.h两个文件放到VC for Python 的include文件中。
2、(pip install scikit-image时)error: Microsoft Visual C++ 9.0 is required. Get it from http://aka.ms/vcpython27
原因:python通过pip或者源码来安装某些模块时,这些模块包含有c/c++源码,安装过程会调用本地的编译器编译这些代码。
由于Python默认调用VS2008编译器编译相关C代码,因此出现这种错误的原因可能有如下几个方面:
(1)没有安装VS2008
(2)安装了32位VS2008,使用64位python
解决方法:vs2008已经过时,直接指定更高版本的vs。先确保已安装vs(如vs2013,vs2015等)。
指定方法:打开 “python安装目录/Lib/distutils/msvc9compiler.py”文件,找到find_vcvarsall函数,在该函数开头添加version =VS版本号(最好用pycharm编辑,文本编辑器容易出现空格,tab等造成的格式对齐问题),例如使用VS2013,则version = 12.0。