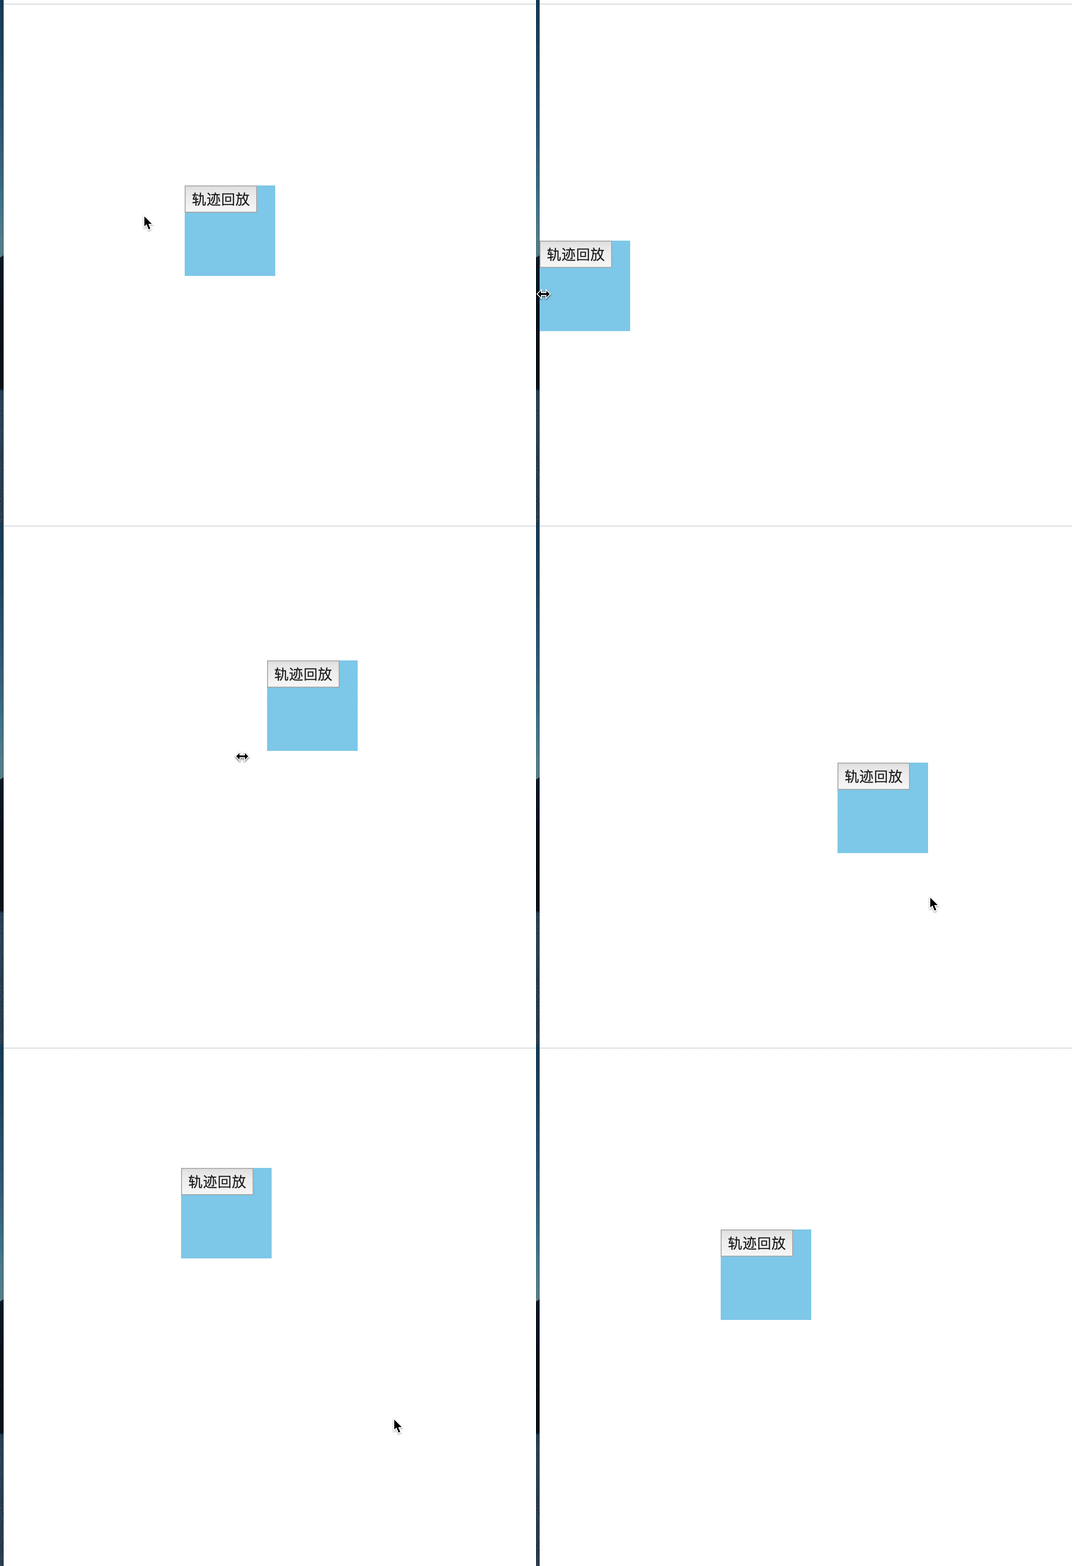
本文通过拖拽案例,实现“跟随鼠标、边界限定、轨迹回放”三大效果;
完整代码中有详尽注释,故不再进行细致讲解;
对于案例中需要注意的重点或易错点问题,会总结在最后。
效果图(仅演示左、上边界限定)

完整代码
<!DOCTYPE html>
<html lang="en">
<head>
    <meta charset="UTF-8">
    <meta name="viewport" content="width=device-width, initial-scale=1.0">
    <title>盒子拖拽</title>
    <style>
        body{
            margin: 0;
            padding: 0;
        }
        #box{
             100px;
            height: 100px;
            background: skyblue;
            position: absolute;
            /* 盒子在页面中的初始位置,可以随意设置 */
            left: 200px;
            top: 200px;
        }
        #btn{
            display: inline-block;
             80px;
            height: 30px;
            font-size: 16px;
            cursor: pointer;
            outline: none;
        }
    </style>
</head>
<body>
    <div id="box"><button id="btn">轨迹回放</button></div>
    <script>
        var box_ele = document.getElementById("box");
        // 声明位置数组,用于记录盒子每次移动后的位置
        var position_arr = [];
        // 获取页面初始宽高,用于限定盒子移动边界
        var screen_width = document.body.offsetWidth;
        var screen_height = window.innerHeight; // 注意页面高度不能通过 document.body.offsetTop 获取

        // 功能1:拖拽
        // 设置变量记录鼠标的状态,鼠标按下时为true
        var flag = false;
        // 鼠标按下准备拖拽,记录鼠标按下时的位置
        var mouse_x, mouse_y;
        box_ele.addEventListener("mousedown", function(evt){
            flag = true;
            var e = evt || event;
            mouse_x = e.offsetX; // 要以元素做参照物,用offset,不能用client
            mouse_y = e.offsetY;
            // 将盒子初始位置(盒子元素偏移量)记录在位置数组中
            position_arr.push({
                x : box_ele.offsetLeft,
                y : box_ele.offsetTop
            })
        })
        // 鼠标移动拖拽开始
        // 事件绑定在document上,避免因鼠标移动速度太快超出盒子边界时盒子跟不上
        document.addEventListener("mousemove", function(evt){
            if(flag){
                var e = evt || event;
                // 声明盒子的位置
                var box_left = e.clientX - mouse_x;
                var box_top = e.clientY - mouse_y;
                // 通过页面初始宽高和盒子宽高计算获得盒子移动的最大值
                var move_width_max = screen_width - box_ele.offsetWidth;
                var move_height_max = screen_height - box_ele.offsetHeight;
                // 分别限定盒子移动的左右上下边界
                box_left = box_left <= 0 ? 0 : box_left;
                box_left = box_left >= move_width_max ? move_width_max : box_left;
                box_top = box_top <= 0 ? 0 : box_top;
                box_top = box_top >= move_height_max ? move_height_max : box_top;
                // 将数据赋值给盒子从而在页面中渲染
                box_ele.style.left = box_left + "px";
                box_ele.style.top = box_top + "px";
                // 若x或y方向移动距离大于5px,则将移动后的盒子位置记录到位置数组中(避免数组中保存数据过多,消耗性能)
                if(box_left >= position_arr[position_arr.length - 1].x + 5 || box_top >= position_arr[position_arr.length - 1].y + 5){
                    position_arr.push({
                        x : box_left,
                        y : box_top
                    })
                }

            }
        })

        // 鼠标抬起拖拽停止
        box_ele.addEventListener("mouseup", function(){
            flag = false;
        })

        // 功能2:回放
        var btn_ele = document.getElementById("btn");
        var timer;
        btn_ele.addEventListener("click", function(){
            // 原思路:通过for循环遍历位置数组中的每一个位置
            // 由于for循环执行太快,故使用定时器
            timer = setInterval(function(){
                // 每次取出位置数组中的最后一个元素位置
                var last_position = position_arr.pop();
                box_ele.style.left = last_position.x + "px";
                box_ele.style.top = last_position.y + "px";
                // 当移动到最后一个位置(即位置数组中数据为空)时,关闭定时器
                if(position_arr.length === 0){
                    clearInterval(timer);
                }
            }, 50)
        })
    </script>
</body>
</html>
注意点
1、鼠标拖拽过程中的盒子位置需要通过 鼠标位置 - 初始时鼠标相对于元素位置 获取,即
box_left = e.clientX - mouse_x
box_top = e.clientY - mouse_y;,
否则盒子会出现在鼠标的右下方。
2、初始的页面高度不能通过 document.body.offsetTop 获取,需要用 window.innerHeight;
3、限制鼠标移动边界时,宽高方向的最大值需要通过 初始页面宽高 - 盒子宽高 获取,即
move_width_max = screen_width - box_ele.offsetWidth;
move_height_max = screen_height - box_ele.offsetHeight;
4、轨迹回放时,目标是位置数组中从后往前依次取出元素,最好的办法就是使用 pop()。
5、注意定时器的关闭条件。position_arr.length === 0