一、OAuth 2.0
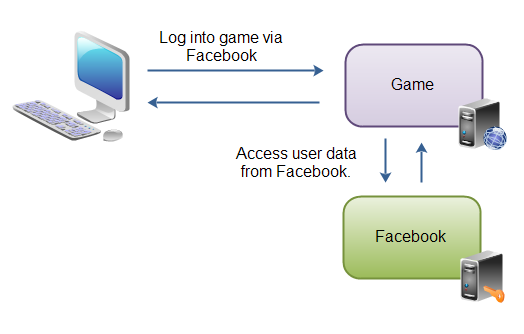
用户访问web游戏应用,该游戏应用要求用户通过Facebook登录。用户登录到了Facebook,再重定向会游戏应用, 游戏应用就可以访问用户在Facebook的数据了,并且该应用可以代表用户向Facebook调用函数(如发送状态更新)。
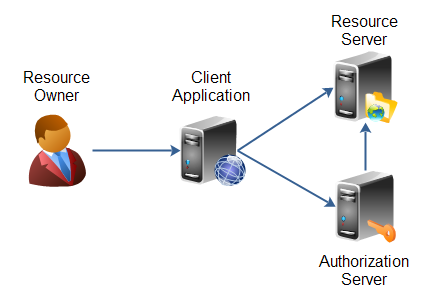
下图说明了OAuth2.0整个授权过程:
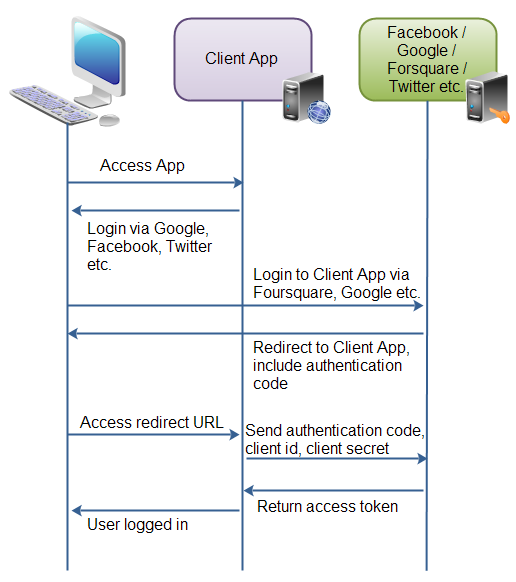
- 用户访问客户端web应用。应用中的按钮”通过Facebook登录”(或者其他的系统,如Google或Twitter)。
- 当用户点击了按钮后,会被重定向到授权的应用(如Facebook)。用户登录并确认授权应用中的数据给客户端应用。
- 授权应用将用户重定向到客户端应用提供的URI,提供这种重定向的URI通常是通过注册客户端应用程序与授权应用程序完成。在注册中,客户端应用的拥有者组注册该重定向URI,在注册过程中认证应用也会给客户端应用客户端标识和密码。在URI后追加一个认证码。该认证码代表了授权。
- 用户在客户端应用访问网页被定位到重定向的URI。在背后客户端应用连接授权应用,并且发送在重定向请求参数中接收到的客户端标识,客户端密码和认证码。授权应用将返回一个访问口令。
- 一旦客户端有了访问口令,该口令便可以被发送到Facebook、Google、Twitter等来访问登录用户的资源。
OAuth 2.0为用户和应用定义了如下角色,这些角色在下图中表示为:
- 资源拥有者
- 资源服务器
- 客户端应用
- 授权服务器
更详细的介绍可参考:https://www.w3cschool.cn/oauth2/5yej1ja2.html。
二、OWIN实现OAuth 2.0 之客户端模式
1、原理
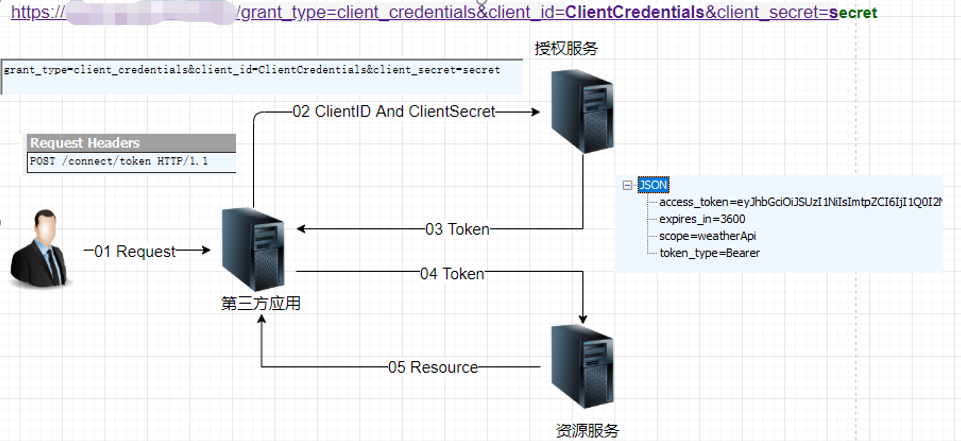
客户端使用自己的名义,而不是用户的名义,向“服务提供商” 进行认证。如下图展示了整个流程:
可以得出一个大概的结论
- 用户(User)通过客户端(Client)访问受限资源(Resource)
- 因为资源受限,所以需要授权;而这个授权是Client与Authentication之间完成的,可以说跟User没有什么关系
- 根据2得出,Resource与User没有关联关系,即User不是这个Resource的Owner(所有者)
2、过程
- Client网站向认证服务网站发出请求。
https://xx.com:8081/grant_type=client_credentials&client_id=ClientCredentials&client_secret=secret
上面 URL 中,grant_type参数等于client_credentials表示采用凭证式,client_id和client_secret用来让认证服务确认Client的身份。
- 认证服务网站验证通过以后,直接返回令牌。这种方式给出的令牌,是针对第三方应用的,而不是针对用户的,即有可能多个用户共享同一个令牌。
- Client网站拿到令牌以后,就可以向资源服务网站(资源服务网站和认证服务网站可以是一个)的 API 请求数据。此时,每个发到 API 的请求,都必须带有令牌。具体做法是在请求的头信息,加上一个
Authorization字段,令牌就放在这个字段里面。
curl -H "Authorization: Bearer ACCESS_TOKEN"
"https://xx:8008/api/Values"
上面命令中,ACCESS_TOKEN就是拿到的令牌。
3、适应场景
- 不太适合用作登录认证!因为登录认证后需要得到用户的一些基本信息,如昵称,头像之类,这些信息是属于User的;
- 适用于一些对于权限要求不强的资源认证,比如:仅用于区分用户是否登录,排除匿名用户获取资源
4、示例(.net framework)
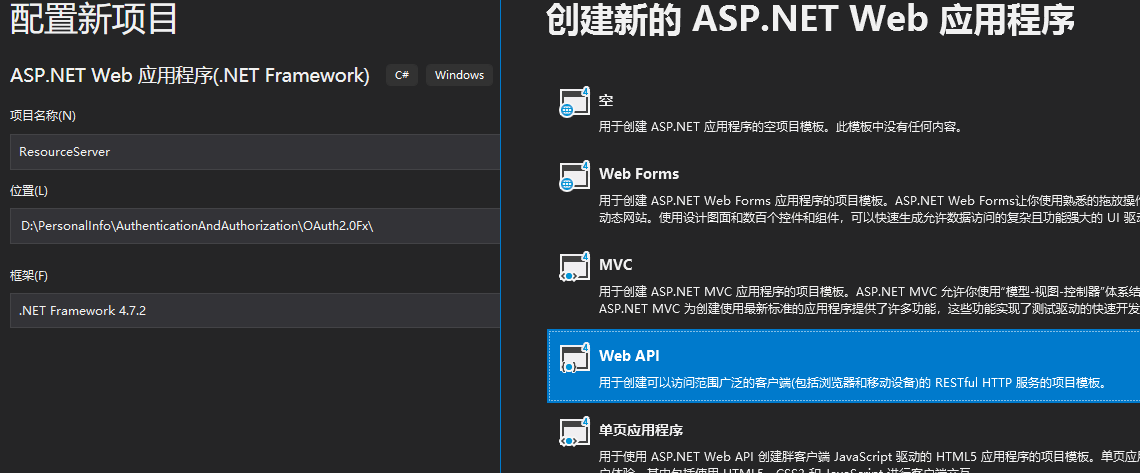
(1)新建API资源项目:ResourceService

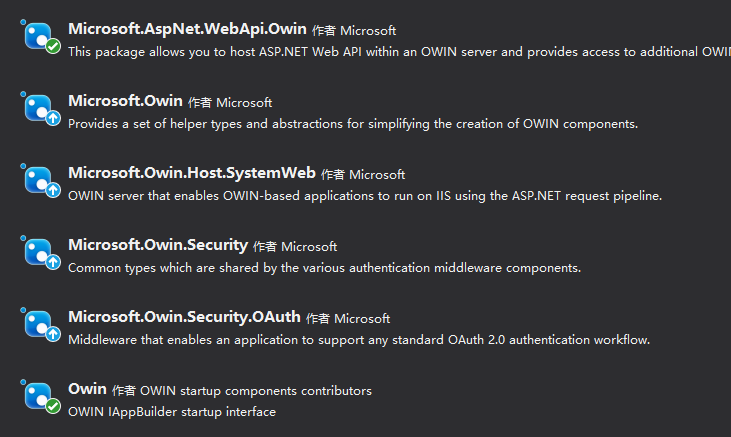
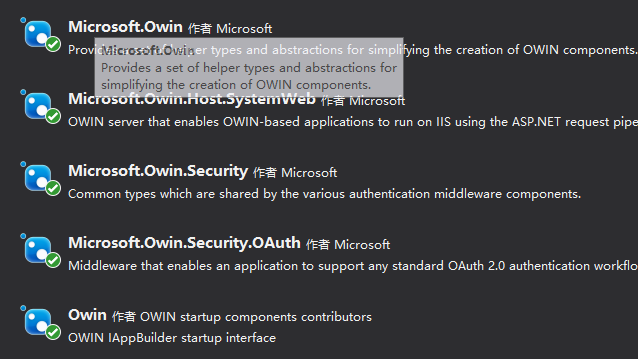
 从nuget中引入下面组件:注意以下六个组件都要安装。
新增Startup.cs
using Microsoft.Owin;
using Owin;

[assembly: OwinStartup(typeof(ResourceService.Startup))]
namespace ResourceService
{
    public partial class Startup
    {
        public void Configuration(IAppBuilder app)
        {
            ConfigureAuth(app);
        }
    }
}
新增Startup.Auth.cs
using Owin;

namespace ResourceService
{
    public partial class Startup
    {
        public void ConfigureAuth(IAppBuilder app)
        {
            // 这句是资源服务器认证token的关键,认证逻辑在里边封装好了,我们看不到
            app.UseOAuthBearerAuthentication(new Microsoft.Owin.Security.OAuth.OAuthBearerAuthenticationOptions());
        }
    }
}
新增ValuesController.cs
using System.Web.Http;

namespace ResourceService.Controllers
{
    [Authorize]
    public class ValuesController : ApiController
    {
        public string Get()
        {
            return "qiuxainhu";
        }
    }
}
web.config配置文件中添加machineKey

<machineKey>这个节允许你设置用于加密数据和创建数字签名的服务器特定的密钥,ASP.NET会自动使用它。比如在分布式集群项目中,对页面的请求由一台计算机处理,而页面回发又由另一台计算机处理,第二个服务器就不能解 密来自第一台服务器的视图状态和表单Cookie。这个问题之所以会发生,是因为两台服务器使用了不同的密钥。可以通过配置相同的 <machineKey>解决。具体可以看machineKey的介绍https://docs.microsoft.com/en-us/previous-versions/msp-n-p/ff649308(v=pandp.10)?redirectedfrom=MSDN
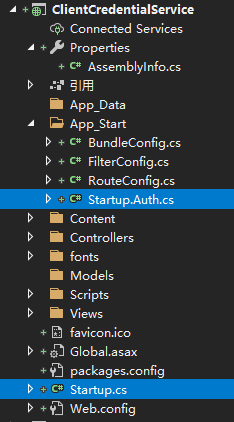
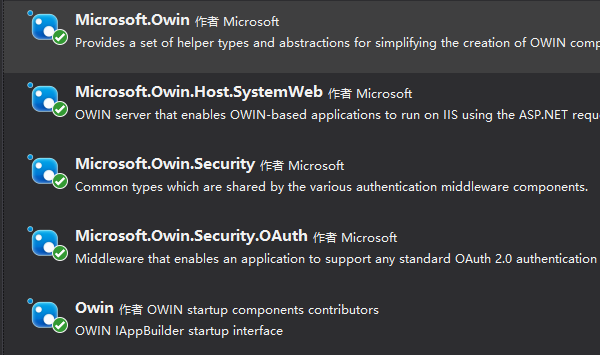
(2)新建认证服务项目:ClientCredentialService

引入以下组件:注意以下五个组件都要引用
新增Startup.cs
using Microsoft.Owin;
using Owin;

[assembly: OwinStartup(typeof(ClientCredentialService.Startup))]
namespace ClientCredentialService
{
    public partial class Startup
    {
        public void Configuration(IAppBuilder app)
        {
            ConfigureAuth(app);
        }
    }
}
新增Startup.Auth.cs
using Microsoft.Owin;
using Microsoft.Owin.Security.OAuth;
using Owin;
using System;
using System.Linq;
using System.Security.Claims;
using System.Security.Principal;
using System.Threading.Tasks;

namespace ClientCredentialService
{
    public partial class Startup
    {
        public void ConfigureAuth(IAppBuilder app)
        {
            //创建OAuth授权服务器
            app.UseOAuthAuthorizationServer(new OAuthAuthorizationServerOptions
            {
                TokenEndpointPath = new PathString("/Token"),//access_token 授权服务请求地址,即http://localhost:端口号/token;
                ApplicationCanDisplayErrors = true,
                AccessTokenExpireTimeSpan = TimeSpan.FromDays(10),//access_token 过期时间
#if DEBUG
                AllowInsecureHttp = true,
#endif
                // Authorization server provider which controls the lifecycle of Authorization Server
                Provider = new OAuthAuthorizationServerProvider
                {
                    OnValidateClientAuthentication = ValidateClientAuthentication,
                    OnGrantClientCredentials = GrantClientCredetails
                }
            });
        }
        /// <summary>
        /// ValidateClientAuthentication方法用来对third party application 认证,
        /// 获取客户端的 client_id 与 client_secret 进行验证
        /// context.Validated(); 表示允许此third party application请求。
        /// </summary>
        /// <param name="context"></param>
        /// <returns></returns>
        private Task ValidateClientAuthentication(OAuthValidateClientAuthenticationContext context)
        {
            string clientId = null;
            string clientSecret = null;
            if (context.TryGetBasicCredentials(out clientId, out clientSecret) ||
                context.TryGetFormCredentials(out clientId, out clientSecret))
            {
                if (clientId == "123456" && clientSecret == "abcdef")
                {
                    context.Validated();
                }
            }
            return Task.FromResult(0);
        }
        /// <summary>
        /// 该方法是对客户端模式进行授权的时候使用的
        /// 对客户端进行授权,授了权就能发 access token 。
        /// 只有这两个方法(ValidateClientAuthentication和GrantClientCredetails)同时认证通过才会颁发token。
        private Task GrantClientCredetails(OAuthGrantClientCredentialsContext context)
        {
            GenericIdentity genericIdentity = new GenericIdentity(context.ClientId, OAuthDefaults.AuthenticationType);
            ClaimsIdentity claimsIdentity = new ClaimsIdentity(genericIdentity, context.Scope.Select(x => new Claim("urn:oauth:scope", x)));
            context.Validated(claimsIdentity);
            return Task.FromResult(0);
        }
    }
}
web.config配置文件中添加machineKey
自此,认证服务项目算是建好了,因为对于客户端模式,认证服务器只需要返回token
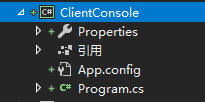
(3)新增Client项目
新增一个控制台项目,用于测试,如下:
新建一个帮助类ConfigSetting,用于读取配置文件:
using System;
using System.Configuration;

namespace ConfigHelper
{
    public class ConfigSetting
    {
        public static readonly string TOKENPATH = GetAppSettingValue("TOKENPATH");
        public static readonly string OAUTH_SERVER_URL=GetAppSettingValue("OAUTH_SERVER_URL");
        public static readonly string OAUTH_TOKEN_PATH = GetAppSettingValue("OAUTH_TOKEN_PATH");
        public static readonly string CLIENTID = GetAppSettingValue("CLIENTID");
        public static readonly string SECRET = GetAppSettingValue("SECRET");
        public static readonly string RESOURCE_SERVER_URL = GetAppSettingValue("RESOURCE_SERVER_URL");
        public static readonly string RESOURCE_ME_PATH = GetAppSettingValue("RESOURCE_ME_PATH");
        private static string GetAppSettingValue(string key)
        {
            string value = null;
            foreach (string item in ConfigurationManager.AppSettings)
            {
                if (item.Equals(key, StringComparison.CurrentCultureIgnoreCase))
                {
                    value = ConfigurationManager.AppSettings[item];
                    break;
                }
            }
            return value;
        }
    }
}
编辑app.config配置文件:
  <appSettings>
        <add key="OAUTH_SERVER_URL" value="http://localhost:8061/" />
        <add key="OAUTH_TOKEN_PATH" value="/Token" />
        <add key="RESOURCE_SERVER_URL" value="http://localhost:8062/" />
        <add key="RESOURCE_ME_PATH" value="/api/Values" />
        <add key="CLIENTID" value="123456" />
        <add key="SECRET" value="abcdef" />
    </appSettings>
修改program.cs,这里使用方式一HttpClient 来做请求:
using Newtonsoft.Json.Linq;
using System;
using System.Collections.Generic;
using System.Net.Http;
using System.Net.Http.Headers;
using System.Text;

namespace ClientConsole
{
    class Program
    {
        private static string OAUTH_SERVER_URL = ConfigSetting.OAUTH_SERVER_URL;

        private static string OAUTH_TOKEN_PATH = ConfigSetting.OAUTH_TOKEN_PATH;

        private static string RESOURCE_SERVER_URL = ConfigSetting.RESOURCE_SERVER_URL;

        private static string RESOURCE_ME_PATH = ConfigSetting.RESOURCE_ME_PATH;

        private static readonly string ClientID = ConfigSetting.CLIENTID;

        private static readonly string Secret = ConfigSetting.SECRET;

        private static string _AccessToken;
        static void Main(string[] args)
        {
            HttpClient _httpClient = new HttpClient();
            Dictionary<string, string> parameters = new Dictionary<string, string>();
            parameters.Add("grant_type", "client_credentials");
            _httpClient.DefaultRequestHeaders.Authorization = new AuthenticationHeaderValue(
               "Basic",
               Convert.ToBase64String(Encoding.ASCII.GetBytes(ClientID + ":" + Secret))
               );
            var response = _httpClient.PostAsync(new Uri(new Uri(OAUTH_SERVER_URL), OAUTH_TOKEN_PATH), new FormUrlEncodedContent(parameters)).Result;
            var responseValue = response.Content.ReadAsStringAsync().Result;
            if (response.StatusCode == System.Net.HttpStatusCode.OK)
            {
                _AccessToken = JObject.Parse(responseValue)["access_token"].Value<string>();
            }
            _httpClient.DefaultRequestHeaders.Authorization = new AuthenticationHeaderValue("Bearer", _AccessToken);
            Console.WriteLine(_httpClient.GetAsync(new Uri(new Uri(RESOURCE_SERVER_URL), RESOURCE_ME_PATH)).Result.Content.ReadAsStringAsync().Result);
            Console.ReadKey();
            Console.ReadKey();
        }
    }
}
看下运行效果:

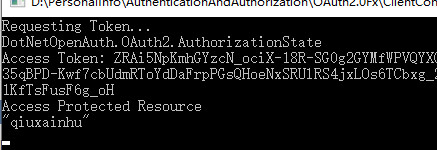
修改program.cs,使用方式二DotNetOpenAuth.OAuth2来请求
using DotNetOpenAuth.OAuth2;
using Newtonsoft.Json.Linq;
using System;
using System.Collections.Generic;
using System.Linq;
using System.Net.Http;
using System.Net.Http.Headers;
using System.Text;
using System.Threading.Tasks;

namespace ClientConsole
{
    class Program
    {
        private static string OAUTH_SERVER_URL = ConfigSetting.OAUTH_SERVER_URL;

        private static string OAUTH_TOKEN_PATH = ConfigSetting.OAUTH_TOKEN_PATH;

        private static string RESOURCE_SERVER_URL = ConfigSetting.RESOURCE_SERVER_URL;

        private static string RESOURCE_ME_PATH = ConfigSetting.RESOURCE_ME_PATH;

        private static readonly string ClientID = ConfigSetting.CLIENTID;

        private static readonly string Secret = ConfigSetting.SECRET;

        private static WebServerClient _WebServerClient;

        private static string _AccessToken;
        static void Main(string[] args)
        {

            InitializeWebServerClient();

            Console.WriteLine("Requesting Token...");
            RequestToken();

            Console.WriteLine("Access Token: {0}", _AccessToken);

            Console.WriteLine("Access Protected Resource");
            AccessProtectedResource();
            Console.ReadKey();
        }

        private static void InitializeWebServerClient()
        {
            Uri authorizationServerUri = new Uri(OAUTH_SERVER_URL);
            AuthorizationServerDescription authorizationServer = new AuthorizationServerDescription
            {
                TokenEndpoint = new Uri(authorizationServerUri, OAUTH_TOKEN_PATH)
            };
            _WebServerClient = new WebServerClient(authorizationServer, ClientID, Secret);
        }
        private static void RequestToken()
        {
            IAuthorizationState state = _WebServerClient.GetClientAccessToken();
            Console.WriteLine(state);
            _AccessToken = state.AccessToken;
        }

        private static void AccessProtectedResource()
        {
            Uri resourceServerUri = new Uri(RESOURCE_SERVER_URL);
            HttpClient client = new HttpClient(_WebServerClient.CreateAuthorizingHandler(_AccessToken));
            string body = client.GetStringAsync(new Uri(resourceServerUri, RESOURCE_ME_PATH)).Result;
            Console.WriteLine(body);
        }
    }
}
使用DotNetOpenAuth.OAuth2需要加下配置文件:
<?xml version="1.0" encoding="utf-8" ?>
<configuration>
    <configSections>
        <sectionGroup name="dotNetOpenAuth" type="DotNetOpenAuth.Configuration.DotNetOpenAuthSection, DotNetOpenAuth.Core">
            <section name="messaging" type="DotNetOpenAuth.Configuration.MessagingElement, DotNetOpenAuth.Core" requirePermission="false" allowLocation="true" />
            <section name="reporting" type="DotNetOpenAuth.Configuration.ReportingElement, DotNetOpenAuth.Core" requirePermission="false" allowLocation="true" />
        </sectionGroup>
    </configSections>

    <dotNetOpenAuth>
        <messaging relaxSslRequirements="true"/>
    </dotNetOpenAuth>

    <appSettings>
        <add key="OAUTH_SERVER_URL" value="http://localhost:8061/" />
        <add key="OAUTH_TOKEN_PATH" value="/Token" />
        <add key="RESOURCE_SERVER_URL" value="http://localhost:8062/" />
        <add key="RESOURCE_ME_PATH" value="/api/Values" />
        <add key="CLIENTID" value="123456" />
        <add key="SECRET" value="abcdef" />
    </appSettings>
    <startup>
        <supportedRuntime version="v4.0" sku=".NETFramework,Version=v4.7.2" />
    </startup>
</configuration>
看下运行效果:
三、OWIN实现OAuth 2.0 之密码模式
1、原理
用户向客户端提供用户名和密码,客户端使用这些信息向认证服务进行认证,密码模式的流程图:

2、过程
如果你高度信任某个应用,RFC 6749 也允许用户把用户名和密码,直接告诉该应用。该应用就使用你的密码,申请令牌,这种方式称为"密码式"(password)。
- A 网站要求用户提供 B 网站的用户名和密码。拿到以后,A 就直接向 B 请求令牌。
https://xx.com/token?grant_type=password&username=USERNAME&password=PASSWORD&client_id=CLIENT_ID
上面 URL 中,grant_type参数是授权方式,这里的password表示"密码式",username和password是 B 的用户名和密码。
- B 网站验证身份通过后,直接给出令牌。注意,这时不需要跳转,而是把令牌放在 JSON 数据里面,作为 HTTP 回应,A 因此拿到令牌。这种方式需要用户给出自己的用户名/密码,显然风险很大,因此只适用于其他授权方式都无法采用的情况,而且必须是用户高度信任的应用。
3、示例
(1)认证服务
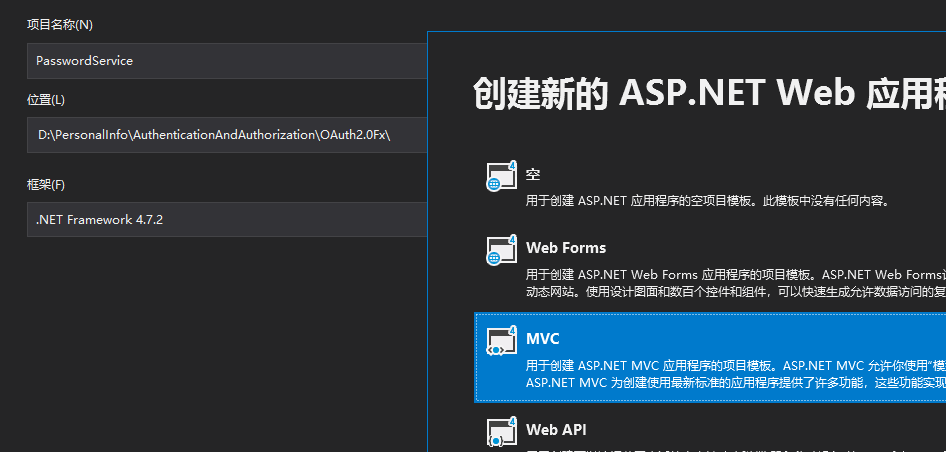
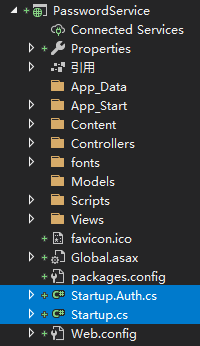
引入下面组件:
新建Startup.cs文件
using Microsoft.Owin;
using Owin;

[assembly: OwinStartup(typeof(PasswordService.Startup))]
namespace PasswordService
{
    public partial class Startup
    {
        public void Configuration(IAppBuilder app)
        {
            ConfigureAuth(app);
        }
    }
}
新建Startup.Auth.cs文件
using Microsoft.Owin;
using Microsoft.Owin.Security;
using Microsoft.Owin.Security.OAuth;
using Owin;
using System;
using System.Security.Claims;
using System.Threading.Tasks;

namespace PasswordService
{
    public partial class Startup
    {
        public void ConfigureAuth(IAppBuilder app)
        {
            //创建OAuth授权服务器
            app.UseOAuthAuthorizationServer(new OAuthAuthorizationServerOptions
            {
                TokenEndpointPath = new PathString("/Token"),//获取 access_token 授权服务请求地址,即http://localhost:端口号/token;
                ApplicationCanDisplayErrors = true,
                AccessTokenExpireTimeSpan = TimeSpan.FromDays(10),//access_token 过期时间
#if DEBUG
                AllowInsecureHttp = true,
#endif
                // Authorization server provider which controls the lifecycle of Authorization Server
                Provider = new OAuthAuthorizationServerProvider
                {
                    OnValidateClientAuthentication = ValidateClientAuthentication,
                    //这个方法就是后台处理密码模式认证关键的地方
                    OnGrantResourceOwnerCredentials = GrantResourceOwnerCredentials
                }
            });
        }
        /// <summary>
        /// ValidateClientAuthentication方法用来对third party application 认证,
        /// 获取客户端的 client_id 与 client_secret 进行验证
        /// context.Validated(); 表示允许此third party application请求。
        /// </summary>
        /// <param name="context"></param>
        /// <returns></returns>
        private Task ValidateClientAuthentication(OAuthValidateClientAuthenticationContext context)
        {
            string clientId = null;
            string clientSecret = null;
            if (context.TryGetBasicCredentials(out clientId, out clientSecret) ||
                context.TryGetFormCredentials(out clientId, out clientSecret))
            {
                if (clientId == "123456" && clientSecret == "abcdef")
                {
                    context.Validated();
                }
            }
            return Task.FromResult(0);
        }
        /// <summary>
        /// 这个方法就是后台处理密码模式认证关键的地方
        /// 认证服务判断查询数据库判断该用户的用户名和密码是否正确。如果正确就会授权,产生token。
        /// </summary>
        /// <param name="context"></param>
        /// <returns></returns>
        private async Task GrantResourceOwnerCredentials(OAuthGrantResourceOwnerCredentialsContext context)
        {
            if (context.UserName != "qiuxianhu" || context.Password != "123456")
            {
                context.SetError("invalid_grant", "The user name or password is incorrect.");
                context.Rejected();
                return;
            }
            else
            {
                ClaimsIdentity claimsIdentity = new ClaimsIdentity(context.Options.AuthenticationType);
                claimsIdentity.AddClaim(new Claim(ClaimTypes.Name, context.UserName));
                var ticket = new AuthenticationTicket(claimsIdentity, new AuthenticationProperties());
                context.Validated(ticket);
            }
            await Task.CompletedTask;
        }
    }
}
web.config配置文件中添加machineKey
(2)资源服务
我们沿用客户端凭证模式中的资源服务。
(3)Client
我们沿用客户端凭证模式中的客户端,这里简单修改下代码:
using Newtonsoft.Json.Linq;
using System;
using System.Collections.Generic;
using System.Net.Http;
using System.Net.Http.Headers;
using System.Text;

namespace Client
{
    class Program
    {
        static void  Main(string[] args)
        {
            string server_url = "http://localhost:8063/";//认证服务地址
            string resource_url = "http://localhost:8062/";//资源服务地址
            string clientid = "123456";
            string secret = "abcdef";
            HttpClient _httpClient = new HttpClient();
            Dictionary<string, string> parameters = new Dictionary<string, string>();
            parameters.Add("grant_type", "password");
            parameters.Add("UserName", "qiuxianhu");
            parameters.Add("Password", "123456");
            _httpClient.DefaultRequestHeaders.Authorization = new AuthenticationHeaderValue(
               "Basic",
               Convert.ToBase64String(Encoding.ASCII.GetBytes(clientid + ":" + secret))
               );
            var response = _httpClient.PostAsync(new Uri(new Uri(server_url), "/Token"), new FormUrlEncodedContent(parameters)).Result;
            var responseValue = response.Content.ReadAsStringAsync().Result;
            if (response.StatusCode == System.Net.HttpStatusCode.OK)
            {
                string token = JObject.Parse(responseValue)["access_token"].Value<string>();
                Console.WriteLine(token);
                _httpClient.DefaultRequestHeaders.Authorization = new AuthenticationHeaderValue("Bearer", token);
                Console.WriteLine(_httpClient.GetAsync(new Uri(new Uri(resource_url), "/api/values")).Result.Content.ReadAsStringAsync().Result);
            }
            Console.ReadKey();
        }
    }
}
效果如下:

四、OWIN实现OAuth 2.0 之授权码模式
1、原理
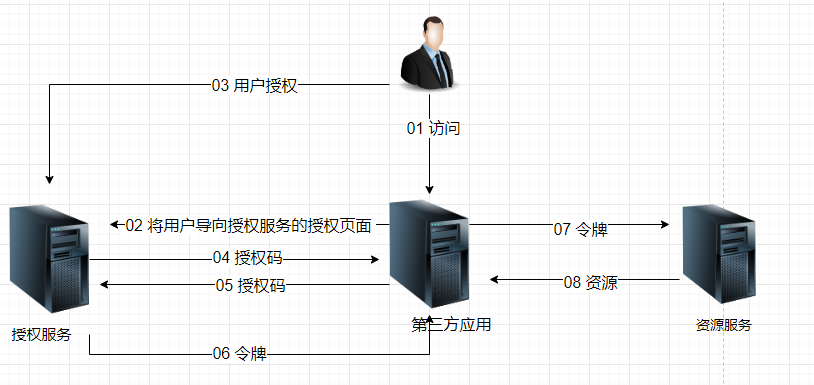
通过客户端的后台服务器,与“服务提供商”的认证服务器进行认证。
- 用户访问客户端,后者将前者导向认证服务器。
- 用户选择是否给予客户端授权。
- 假设用户给予授权,认证服务器首先生成一个授权码,并返回给用户,认证服务器将用户导向客户端事先指定的"重定向URI"(redirection URI),同时附上一个授权码。
- 客户端收到授权码,附上早先的"重定向URI",向认证服务器申请令牌。这一步是在客户端的后台的服务器上完成的,对用户不可见。
- 认证服务器核对了授权码和重定向URI,确认无误后,向客户端发送访问令牌(access token)和更新令牌(refresh token)。
- Client拿着access token去访问Resource资源
2、示例
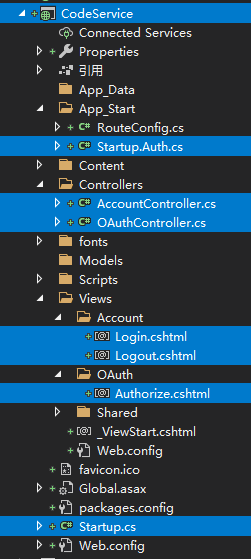
(1)认证服务
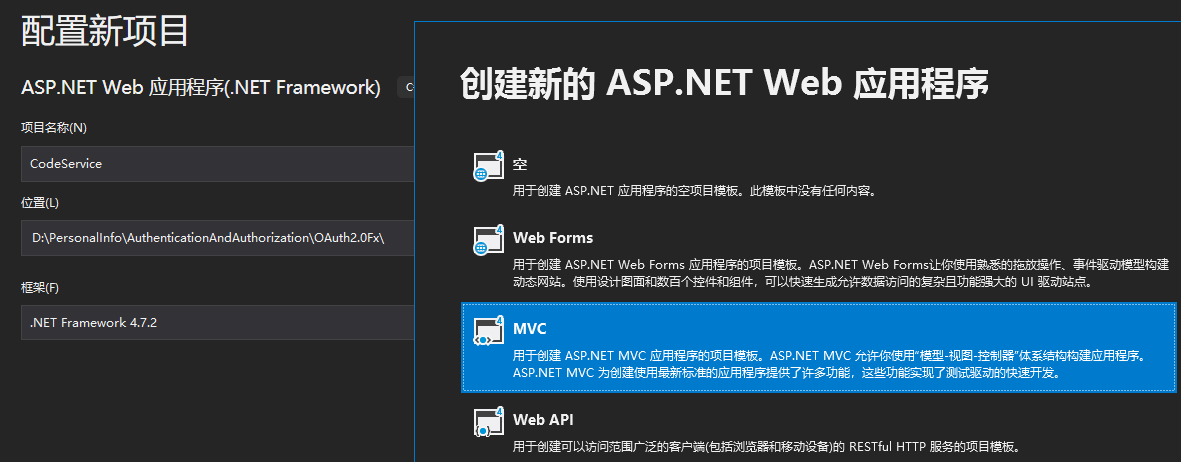
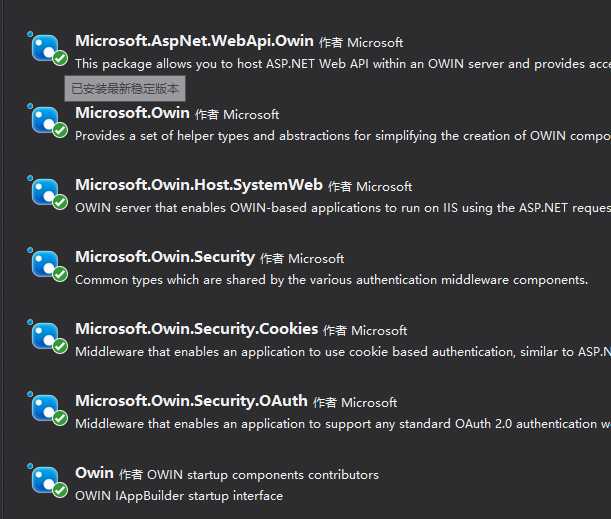
引入以下组件:


新建Startup.cs
using Microsoft.Owin;
using Owin;
[assembly: OwinStartup(typeof(CodeService.Startup))]
namespace CodeService
{
    public partial class Startup
    {
        public void Configuration(IAppBuilder app)
        {
            ConfigureAuth(app);
        }
    }
}
新增Startup.Auth.cs
using Microsoft.AspNet.Identity;
using Microsoft.Owin;
using Microsoft.Owin.Security;
using Microsoft.Owin.Security.Cookies;
using Microsoft.Owin.Security.Infrastructure;
using Microsoft.Owin.Security.OAuth;
using Owin;
using System;
using System.Collections.Concurrent;
using System.Threading.Tasks;

namespace CodeService
{
    public partial class Startup
    {
        public void ConfigureAuth(IAppBuilder app)
        {
            // 使应用程序可以使用 Cookie 来存储已登录用户的信息
            // 并使用 Cookie 来临时存储有关使用第三方登录提供程序登录的用户的信息
            // 配置登录 Cookie
            app.UseCookieAuthentication(new CookieAuthenticationOptions
            {
                AuthenticationType = DefaultAuthenticationTypes.ApplicationCookie,
                AuthenticationMode = AuthenticationMode.Passive,
                LoginPath = new PathString("/Account/Login"),
                LogoutPath = new PathString("/Account/LoginOut"),
            });

            // Setup Authorization Server
            app.UseOAuthAuthorizationServer(new OAuthAuthorizationServerOptions
            {
                AuthorizeEndpointPath = new PathString("/OAuth/Authorize"),// AuthorizeEndpointPath是授权终结点,这个需要自己去写实现逻辑
                TokenEndpointPath = new PathString("/OAuth/Token"),//TokenEndpointPath是生成Token的终结点,这个不需要我们写额外的逻辑了,因为Token的生成涉及到很多方面,例如序列化反序列加密解密等逻辑,所以框架默认已经帮我们做好了。
                AccessTokenExpireTimeSpan = TimeSpan.FromMinutes(30),
                ApplicationCanDisplayErrors = true,
#if DEBUG
                AllowInsecureHttp = true,//重要!!AllowInsecureHttp设置整个通信环境是否启用ssl,不仅是OAuth服务端,也包含Client端(当设置为false时,若登记的Client端重定向url未采用https,则不重定向)。
#endif
                // Provider里面是用来验证客户端跳转地址和客户端验证,正确的做法应该是先判断客户端发送过来的ClientID是否合法,如果合法则验证通过。
                Provider = new OAuthAuthorizationServerProvider
                {
                    OnValidateClientRedirectUri = ValidateClientRedirectUri,
                    OnValidateClientAuthentication = ValidateClientAuthentication
                },

                // Authorization code provider which creates and receives authorization code
                AuthorizationCodeProvider = new AuthenticationTokenProvider
                {
                    OnCreate = CreateAuthenticationCode,
                    OnReceive = ReceiveAuthenticationCode,
                },

                // Refresh token provider which creates and receives referesh token
                RefreshTokenProvider = new AuthenticationTokenProvider
                {
                    OnCreate = CreateRefreshToken,
                    OnReceive = ReceiveRefreshToken,
                }
            });
        }
        /// <summary>
        /// 客户端发送到授权终结点的请求是会被OWIN截取跳转到注册的 OnValidateClientRedirectUri委托,
        /// 客户端发送授权请求代码:
        /// var userAuthorization = _webServerClient.PrepareRequestUserAuthorization();
        /// userAuthorization.Send(HttpContext);
        /// Response.End();
        /// </summary>
        /// <param name="context"></param>
        /// <returns></returns>
        private Task ValidateClientRedirectUri(OAuthValidateClientRedirectUriContext context)
        {
            context.Validated();
            return Task.FromResult(0);
        }
        /// <summary>
        /// TryGetBasicCredentials:是指Client可以按照Basic身份验证的规则提交ClientId和ClientSecret
        /// TryGetFormCredentials:是指Client可以把ClientId和ClientSecret放在Post请求的form表单中提交
        /// </summary>
        /// <param name="context"></param>
        /// <returns></returns>
        private Task ValidateClientAuthentication(OAuthValidateClientAuthenticationContext context)
        {
            string clientId;
            string clientSecret;

            if (context.TryGetBasicCredentials(out clientId, out clientSecret) ||
                context.TryGetFormCredentials(out clientId, out clientSecret))
            {
                if (clientId == "123456" && clientSecret == "abcdef")
                {
                    context.Validated();
                }
            }
            return Task.FromResult(0);
        }

        private readonly ConcurrentDictionary<string, string> _authenticationCodes =
            new ConcurrentDictionary<string, string>(StringComparer.Ordinal);

        private void CreateAuthenticationCode(AuthenticationTokenCreateContext context)
        {
            context.SetToken(Guid.NewGuid().ToString("n") + Guid.NewGuid().ToString("n"));
            _authenticationCodes[context.Token] = context.SerializeTicket();
        }

        private void ReceiveAuthenticationCode(AuthenticationTokenReceiveContext context)
        {
            string value;
            if (_authenticationCodes.TryRemove(context.Token, out value))
            {
                context.DeserializeTicket(value);
            }
        }

        private void CreateRefreshToken(AuthenticationTokenCreateContext context)
        {
            context.SetToken(context.SerializeTicket());
        }

        private void ReceiveRefreshToken(AuthenticationTokenReceiveContext context)
        {
            context.DeserializeTicket(context.Token);
        }
    }
}
添加OAuthController.cs代码如下:
using DotNetOpenAuth.Messaging;
using DotNetOpenAuth.OAuth2;
using System;
using System.Net.Http;
using System.Web.Mvc;

namespace ClientMvc.Controllers
{
    public class HomeController : Controller
    {
        static string accessToken = null;
        static string refreshToken = null;
        public ActionResult Index()
        {
            Uri authorizationServerUri = new Uri("http://localhost:8064/");//认证服务
            AuthorizationServerDescription authorizationServerDescription = new AuthorizationServerDescription
            {
                AuthorizationEndpoint = new Uri(authorizationServerUri, "OAuth/Authorize"),
                TokenEndpoint = new Uri(authorizationServerUri, "OAuth/Token")
            };
            WebServerClient webServerClient = new WebServerClient(authorizationServerDescription, "123456", "abcdef");
            if (string.IsNullOrEmpty(accessToken))
            {
                IAuthorizationState authorizationState = webServerClient.ProcessUserAuthorization(Request);
                if (authorizationState != null)
                {
                    accessToken = authorizationState.AccessToken;
                    refreshToken = authorizationState.RefreshToken;
                }
            }
            // 授权申请
            if (!string.IsNullOrEmpty(Request.Form.Get("btnRequestAuthorize")))
            {
                //这里 new[] { "scopes1", "scopes2" }为需要申请的scopes,或者说是Resource Server的接口标识,或者说是接口权限。然后Send(HttpContext)即重定向。
                OutgoingWebResponse grantRequest = webServerClient.PrepareRequestUserAuthorization(new[] { "scopes1", "scopes2" });
                grantRequest.Send(HttpContext);
                Response.End();
            }


            // 申请资源
            if (!string.IsNullOrEmpty(Request.Form.Get("btnRequestResource")))
            {
                var resourceServerUri = new Uri("http://localhost:8062/");//资源服务
                var resourceRequest = new HttpClient(webServerClient.CreateAuthorizingHandler(accessToken));
                ViewBag.ResourceResponse = resourceRequest.GetStringAsync(new Uri(resourceServerUri, "api/Values")).Result;
            }

            return View();
        }
    }
}
添加Authorize.cshtml,代码如下:
<!DOCTYPE html>
<html xmlns="http://www.w3.org/1999/xhtml">
<head>
    <title>Authorize</title>
</head>
<body>
    <h1>认证页面</h1>
    <form method="POST">
        <p>登录用户:@ViewBag.IdentityName</p>
        <p>第三方应用需要你给他开放以下权限</p>
        <ul>
            @foreach (var scope in ViewBag.Scopes)
            {
                <li>@scope</li>
            }
        </ul>
        <p>
            <input type="submit" name="btnGrant" value="确认授权" />
            <input type="submit" name="btnOtherLogin" value="以不同用户登录" />
        </p>
    </form>
</body>
</html>
添加AccountController.cs,代码如下:
using Microsoft.AspNet.Identity;
using Microsoft.Owin.Security;
using System.Security.Claims;
using System.Web;
using System.Web.Mvc;

namespace CodeService.Controllers
{
    public class AccountController : Controller
    {
        public ActionResult Login()
        {
            if (Request.HttpMethod == "POST")
            {
                IAuthenticationManager authentication = HttpContext.GetOwinContext().Authentication;
                // 默认用户登录成功,生产环境需要单独整合第三方登录信息
                var username = Request.Form["username"];
                var password = Request.Form["password"];
                if (username == "qiuxianhu" && password == "123456")
                {
                    authentication.SignIn(
                        new AuthenticationProperties { IsPersistent = true },
                        new ClaimsIdentity(new[] { new Claim(ClaimsIdentity.DefaultNameClaimType, username) }, DefaultAuthenticationTypes.ApplicationCookie)
                    );
                    var ticket = authentication.AuthenticateAsync(DefaultAuthenticationTypes.ApplicationCookie).Result;
                }
            }
            return this.View();
        }

        public ActionResult Logout()
        {
            IAuthenticationManager authenticationManager = HttpContext.GetOwinContext().Authentication;
            authenticationManager.SignOut(DefaultAuthenticationTypes.ApplicationCookie);
            return View();
        }
    }
}
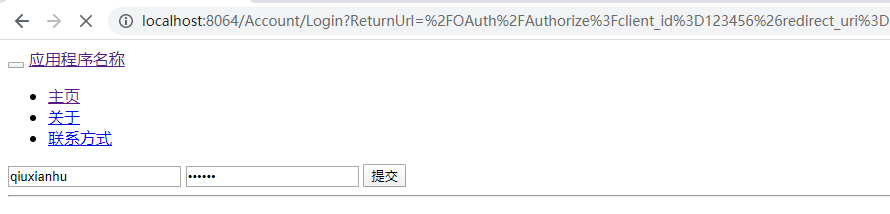
添加Login.cshtml,代码如下:
@{
    ViewBag.Title = "Login";
}

<form method="post">
    <input name="username" type="text" />
    <input name="password" type="password" />
    <input type="submit" value="提交" />
</form>
添加Logout.cshtml,代码如下:
@{
    ViewBag.Title = "Logout";
}

<h2>Logout</h2>
web.config配置文件中添加machineKey
(2)资源服务
我们沿用上边的资源服务器
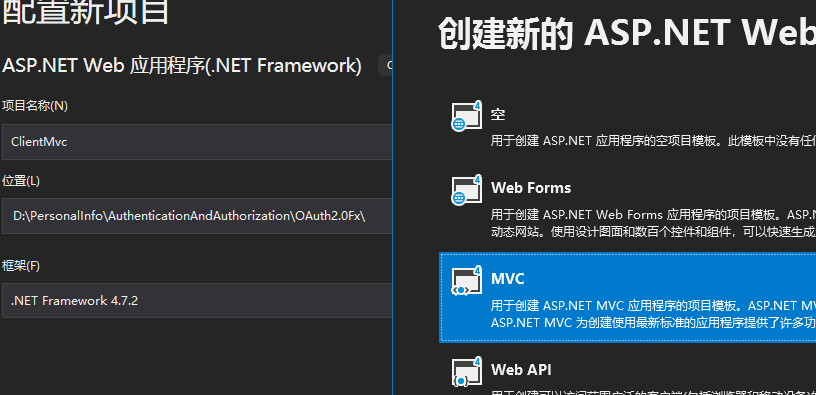
(3)客户端
新建一个mvc项目:
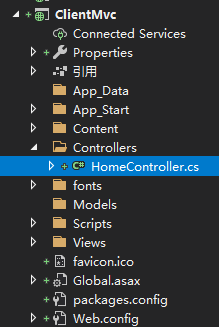
添加HomeController,代码如下:
using DotNetOpenAuth.Messaging;
using DotNetOpenAuth.OAuth2;
using System;
using System.Net.Http;
using System.Web.Mvc;

namespace ClientMvc.Controllers
{
    public class HomeController : Controller
    {
        static string accessToken = null;
        static string refreshToken = null;
        public ActionResult Index()
        {
            Uri authorizationServerUri = new Uri("http://localhost:8064/");//认证服务
            AuthorizationServerDescription authorizationServerDescription = new AuthorizationServerDescription
            {
                AuthorizationEndpoint = new Uri(authorizationServerUri, "OAuth/Authorize"),
                TokenEndpoint = new Uri(authorizationServerUri, "OAuth/Token")
            };
            WebServerClient webServerClient = new WebServerClient(authorizationServerDescription, "123456", "abcdef");
            if (string.IsNullOrEmpty(accessToken))
            {
                IAuthorizationState authorizationState = webServerClient.ProcessUserAuthorization(Request);
                if (authorizationState != null)
                {
                    accessToken = authorizationState.AccessToken;
                    refreshToken = authorizationState.RefreshToken;
                }
            }
            // 授权申请
            if (!string.IsNullOrEmpty(Request.Form.Get("btnRequestAuthorize")))
            {
                //这里 new[] { "scopes1", "scopes2" }为需要申请的scopes,或者说是Resource Server的接口标识,或者说是接口权限。然后Send(HttpContext)即重定向。
                OutgoingWebResponse grantRequest = webServerClient.PrepareRequestUserAuthorization(new[] { "scopes1", "scopes2" });
                grantRequest.Send(HttpContext);
                Response.End();
            }


            // 申请资源
            if (!string.IsNullOrEmpty(Request.Form.Get("btnRequestResource")))
            {
                var resourceServerUri = new Uri("http://localhost:8062/");//资源服务
                var resourceRequest = new HttpClient(webServerClient.CreateAuthorizingHandler(accessToken));
                ViewBag.ResourceResponse = resourceRequest.GetStringAsync(new Uri(resourceServerUri, "api/Values")).Result;
            }

            return View();
        }
    }
}
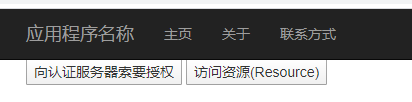
Index.cshtml代码如下:
<!DOCTYPE html>

<html xmlns="http://www.w3.org/1999/xhtml">
<head>
    <title>Authorization Code Grant Client</title>
</head>
<body>
    <form id="form1" method="POST">
        <div>
            <input id="Authorize" name="btnRequestAuthorize" value="向认证服务器索要授权" type="submit" />
            <input id="Resource" name="btnRequestResource" value="访问资源(Resource)" type="submit" />
        </div>
    </form>
</body>
</html>
运行ClientMvc进行测试,发生如下错误:
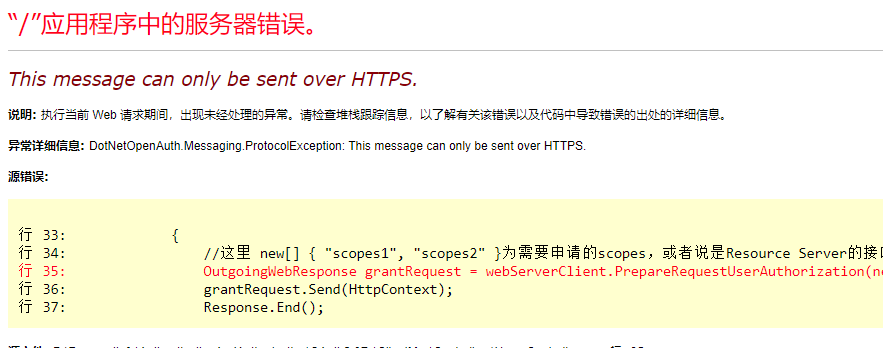
解决方法:配置文件中加入如下节点:
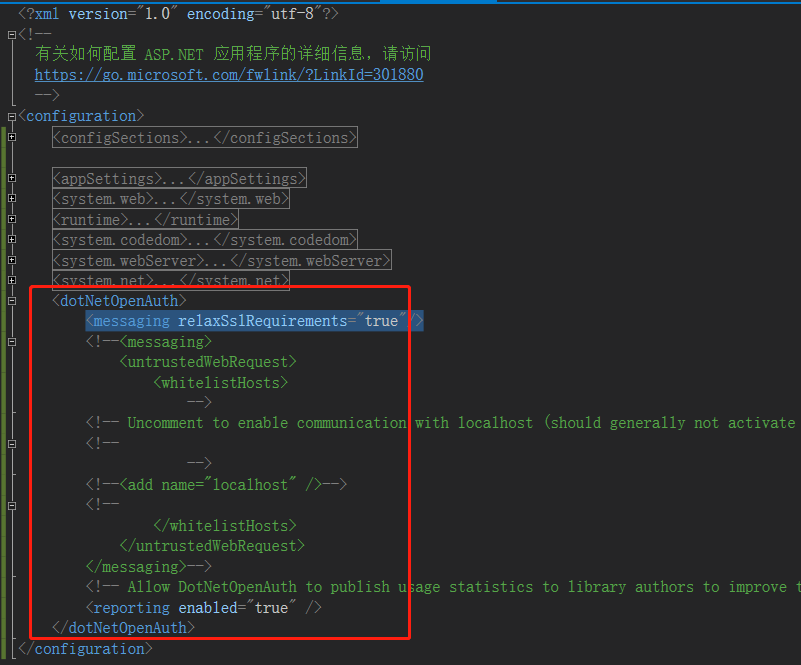
运行效果如下: