三层架构是 web 程序的纵向结构,是 web 程序的身体,而MVC 模式只存在于三层架构的展现层,是 web 程序展示时相互沟通的一种好的方式。
Spring MVC 使我们可以简单地,开发灵活且松耦合的Web项目。
在Servlet 2.5及以下,servlet类需要在web.xml文件中,配置<servlet>元素,才能访问这个Servlet。
但在Spring MVC + Servlet 3.0下,通过实现WebApplicationInitializer 接口,便可实现等同web.xml的配置,做到无web.xml。然后可以在WebApplicationInitializer实现类中,通过Spring MVC的 DispatcherServlet配置Servlet。
下面用Maven构建一个,基于注解和Java配置的,无web.xml配置的Spring MVC工程:
1、构建Maven项目,pom.xml文件如下:
<project xmlns="http://maven.apache.org/POM/4.0.0" xmlns:xsi="http://www.w3.org/2001/XMLSchema-instance"
    xsi:schemaLocation="http://maven.apache.org/POM/4.0.0 http://maven.apache.org/xsd/maven-4.0.0.xsd">
    <modelVersion>4.0.0</modelVersion>
    <groupId>com.qfedu</groupId>
    <artifactId>MySpringMVC</artifactId>
    <version>1.0</version>
    <packaging>war</packaging>

    <properties>
        <!-- Generic properties -->
        <java.version>1.8</java.version>
        <project.build.sourceEncoding>UTF-8</project.build.sourceEncoding>
        <project.reporting.outputEncoding>UTF-8</project.reporting.outputEncoding>

        <!-- build plugins -->
        <compiler.version>3.6.1</compiler.version>
        <war.version>3.1.0</war.version>

        <!-- Web -->
        <jsp.version>2.2</jsp.version>
        <jstl.version>1.2</jstl.version>
        <servlet.version>3.1.0</servlet.version>

        <!-- Spring -->
        <spring-framework.version>4.3.9.RELEASE</spring-framework.version>

        <!-- Logging -->
        <logback.version>1.2.3</logback.version>
        <slf4j.version>1.7.25</slf4j.version>
    </properties>

    <build>
        <plugins>
            <plugin>
                <groupId>org.apache.maven.plugins</groupId>
                <artifactId>maven-compiler-plugin</artifactId>
                <version>${compiler.version}</version>
                <configuration>
                    <source>${java.version}</source>
                    <target>${java.version}</target>
                </configuration>
            </plugin>
            <plugin>
                <groupId>org.apache.maven.plugins</groupId>
                <artifactId>maven-war-plugin</artifactId>
                <version>${war.version}</version>
                <configuration>
                    <failOnMissingWebXml>false</failOnMissingWebXml>
                </configuration>
            </plugin>
        </plugins>
    </build>

    <dependencies>
        <dependency>
            <groupId>javax</groupId>
            <artifactId>javaee-web-api</artifactId>
            <version>7.0</version>
            <scope>provided</scope>
        </dependency>

        <!-- Spring MVC -->
        <dependency>
            <groupId>org.springframework</groupId>
            <artifactId>spring-webmvc</artifactId>
            <version>${spring-framework.version}</version>
        </dependency>

        <!-- Other web dependency -->
        <dependency>
            <groupId>javax.servlet</groupId>
            <artifactId>jstl</artifactId>
            <version>${jstl.version}</version>
        </dependency>
        <dependency>
            <groupId>javax.servlet</groupId>
            <artifactId>javax.servlet-api</artifactId>
            <version>${servlet.version}</version>
            <scope>provided</scope>
        </dependency>
        <dependency>
            <groupId>javax.servlet.jsp</groupId>
            <artifactId>jsp-api</artifactId>
            <version>${jsp.version}</version>
            <scope>provided</scope>
        </dependency>

        <!-- Spring and Transactions -->
        <dependency>
            <groupId>org.springframework</groupId>
            <artifactId>spring-tx</artifactId>
            <version>${spring-framework.version}</version>
        </dependency>

        <!-- 使用 SLF4J 和 LogBack 作为日志 -->
        <dependency>
            <groupId>org.slf4j</groupId>
            <artifactId>slf4j-api</artifactId>
            <version>${slf4j.version}</version>
        </dependency>
        <dependency>
            <groupId>log4j</groupId>
            <artifactId>log4j</artifactId>
            <version>1.2.17</version>
        </dependency>
        <dependency>
            <groupId>org.slf4j</groupId>
            <artifactId>jcl-over-slf4j</artifactId>
            <version>${slf4j.version}</version>
        </dependency>
        <dependency>
            <groupId>ch.qos.logback</groupId>
            <artifactId>logback-classic</artifactId>
            <version>${logback.version}</version>
            <scope>test</scope>
        </dependency>
        <dependency>
            <groupId>ch.qos.logback</groupId>
            <artifactId>logback-core</artifactId>
            <version>${logback.version}</version>
        </dependency>
        <dependency>
            <groupId>ch.qos.logback</groupId>
            <artifactId>logback-access</artifactId>
            <version>${logback.version}</version>
        </dependency>
    </dependencies>
</project>
2、在Maven的src / main / resources 目录下,新建logback.xml文件,用来配置日志:
<?xml version="1.0" encoding="UTF-8"?>
<configuration sacn="true" scanPeriod="1 seconds">
    <contextListener class="ch.qos.logback.classic.jul.LevelChangePropagator">
        <resetJUL>true</resetJUL>
    </contextListener>

    <jmxConfiguration />
    <appender name="console" class="ch.qos.logback.core.ConsoleAppender">
        <encoder>
            <pattern>logbak: %d{HH:mm:ss.SSS} %logger{36} - %msg%n</pattern>
        </encoder>
    </appender>
    <!-- 将org.springframework.web包下的类的日志级别, 设置为DEBUG, 可以看到Web开发中的, 更详细的错误信息 -->
    <logger name="org.springframework.web" level="DEBUG" />
    <root level="info">
        <appender-ref ref="console" />
    </root>
</configuration>
3、依然在 src / main / resources 下,建立 views 目录,然后在 views 目录下,新建 index.jsp 页面(内容随意) —— 页面没有放在Maven标准的 src /main / webapp / WEB-INF 下,这里的目的是,让大家熟悉 Spring Boot 的页面放置习惯,即放在 src / main / resources 目录下。(在Eclipse,用模板创建 jsp 页面时,不知道为什么,文件自动被移到了 webapp 目录下,因此如果是这样,需要再移回来)。
4、Spring MVC 的配置类:
package com.qfedu.MySpringMVC.config;

import org.springframework.context.annotation.Bean;
import org.springframework.context.annotation.ComponentScan;
import org.springframework.context.annotation.Configuration;
import org.springframework.web.servlet.config.annotation.EnableWebMvc;
import org.springframework.web.servlet.view.InternalResourceViewResolver;
import org.springframework.web.servlet.view.JstlView;

@Configuration
@EnableWebMvc
@ComponentScan("com.qfedu.MySpringMVC")
public class MyMvcConfig {
    @Bean
    public InternalResourceViewResolver viewResolver() {
        InternalResourceViewResolver viewResolver = new InternalResourceViewResolver();
        viewResolver.setPrefix("/WEB-INF/classes/views/");
        viewResolver.setSuffix(".jsp");
        viewResolver.setViewClass(JstlView.class);
        return viewResolver;
    }
}
ViewResolver 用于映射开发时的路径,与视图的真实位置。因此,对于开发路径 src / main / resource / views,ViewResolver 需要将路径前缀配置为 / WEB-INF / classes / views / ,因为运行时页面会自动编译到该目录下。如图:

5、Web —— Servlet配置:
package com.qfedu.MySpringMVC.config;

import javax.servlet.ServletContext;
import javax.servlet.ServletException;
import javax.servlet.ServletRegistration.Dynamic;

import org.springframework.web.WebApplicationInitializer;
import org.springframework.web.context.support.AnnotationConfigWebApplicationContext;
import org.springframework.web.servlet.DispatcherServlet;

//实现了WebApplicationInitializer接口, 将会被启动容器的类SpringServletContainerInitializer获取到并完成配置, 就和web.xml一样
public class WebInitializer implements WebApplicationInitializer {

    @Override
    public void onStartup(ServletContext servletContext) throws ServletException {
        //新建WebApplicationContext,并注册配置类(注册配置类中返回的ViewResolver bean),关联当前的ServletContext
        AnnotationConfigWebApplicationContext context = new AnnotationConfigWebApplicationContext();
        context.register(MyMvcConfig.class);
        context.setServletContext(servletContext);

        //DispatcherServlet:前端控制器
        //用WebApplicationContext新建Spring MVC的 DispatcherServlet,然后注册并返回Servlet注册对象
        Dynamic servlet = servletContext.addServlet("dispatcher", new DispatcherServlet(context));
        //设置DispatcherServlet的Mapping和LoadOnStartUp次序
        servlet.addMapping("/");
        servlet.setLoadOnStartup(1);
    }

}
6、一个基本的控制器:
package com.qfedu.MySpringMVC.controller;

import org.springframework.stereotype.Controller;
import org.springframework.web.bind.annotation.RequestMapping;

@Controller
public class HomeContoller {
    @RequestMapping("/index")
    public String index() {
        return "index";
    }
}
最后部署到服务器上,即可访问 http://localhost:8080/MySpringMVC/index。
以上步骤即可完成一个比较 基本的Spring MVC 项目。
Spring MVC 的常用注解:
1、@Controller:将类声明为 Bean,并作为 Spring MVC 的 Controller,Dispatcher Servlet 会根据配置类自动扫描 Controller,并将 Web 请求映射到注解了@RequestMapping 的类、方法上。值得注意的是,在声明普通 Bean 时,使用@Component、@Service、@Repository、@Controller 都是一样的(这一点可以查看 Spring 的源码);但是在声明 Spring MVC 的 Controller 时,只能使用 @Controller。
2、@RequestMapping:可注解在类和方法上,用来将 Web 请求(访问路径和参数)和处理类,以及方法进行映射。注解在方法上的路径会继承类上的路径;可选择 Servlet 的 request 和 response 作为方法的参数;通过 produces 参数,对 request 和 response 的 contentType(包括字符集 charset)进行配置。
3、@ResponseBody:支持将返回值放在 response 内,而不是返回一个页面(即通过 response 返回一些数据,这一点对基于 Ajax 的程序很友好)。可注解在返回值之前,或方法之上。
4、@RequestBody:允许请求的参数在 request 内,通过 POST 方式请求。注解在参数前,则参数为请求体内对应的数据。
5、@PathVariable:用来接收路径参数,如 / news / 001 的号数 001 可作为参数,而不是请求参数 /new ? id = 001。
6、@RestController:是一个组合注解,组合了@Controller 和@ResponseBody,即这是一个只用于数据交互的 Controller(所有的方法都返回数据到 response,而不是页面)。
测试用例:
添加 Jackson Dataformat XML 的依赖,以便对象和 json 或 xml 之间的转换(目前可能由于阿里云镜像的原因,添加了这个依赖的比较新的版本之后,程序就卵了,如果这样,就换个旧点的版本):
<dependency>
    <groupId>com.fasterxml.jackson.dataformat</groupId>
    <artifactId>jackson-dataformat-xml</artifactId>
    <version>${jackson.version}</version>
</dependency>
或者只使用 Jackson 对 json 的支持(即上面的依赖包含下面的依赖):
<dependency>
    <groupId>com.fasterxml.jackson.core</groupId>
    <artifactId>jackson-databind</artifactId>
    <version>${jackson.version}</version>
</dependency>
实体类 Entity —— POJO:
package com.qfedu.MySpringMVC.domain;

public class DemoEntity {
    private Long id;
    private String name;

    public DemoEntity() {
        //必须有一个空构造函数,作为 default,不然 Spring MVC 无法自动将对象转换成 json 格式
    }

    public DemoEntity(Long id, String name) {
        this.id = id;
        this.name = name;
    }

    // 省略getter and setter
}
普通控制器 Controller:
package com.qfedu.MySpringMVC.controller;

import org.springframework.stereotype.Controller;
import org.springframework.web.bind.annotation.RequestMapping;

@Controller
@RequestMapping("/foo")
public class FooController {
    // 具体的方法,下面分别介绍
}
上面的控制器的方法:
演示@RequestMapping 和@ResponseBody:
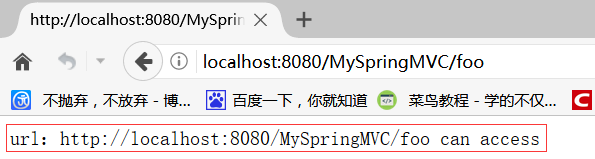
@RequestMapping(produces = "text/plain;charset=UTF-8")
public @ResponseBody String index(HttpServletRequest request) {
    return "url:" + request.getRequestURL() + " can access";
}
@RequestMapping 未标注路径,则继承类路径 /foo,而返回值有@ResponseBody,方法根据 produces 的设置直接返回 contentType="text/plain; charset=UTF-8" 的数据。直接访问 http://localhost:8080/MySpringMVC/foo,将浏览一个 plain 的 html 页面,如下:
演示指定方法路径的@RequestMapping,以及获取 request 参数(访问结果如:http://localhost:8080/MySpringMVC/foo/requestParam?id=1):
@RequestMapping(value = "/requestParam", produces = "text/plain;charset=UTF-8")
public @ResponseBody String DemoRequestParam(Long id) {
    return "id:" + id;
}
Spring 很爽的地方是,会自动拆装,而且要什么给什么(包括实体类和Spring内置的类,这个功能使得处理表单提交变得更简单):
结果如:http://localhost:8080/MySpringMVC/foo/obj?id=1&name=wangyunfei。
@RequestMapping(value = "/obj", produces = "text/plain;charsetF-8")
public @ResponseBody String DemoRequestObj(DemoEntity obj) {
    return "id:" + obj.getId() + ",name:" + obj.getName();
}
也可以将不同的路径,映射到相同的方法(即 value 为 String 的数组,结果如:http://localhost:8080/MySpringMVC/foo/name2,也可以访问 name1):
@RequestMapping(value = {"name1", "name2"}, produces = "text/plain;charset=UTF-8")
public @ResponseBody String DemoMutilplePath(HttpServletRequest request) {
    return "url:" + request.getRequestURL() + " can access";
}
演示@PathVariable(注意与上面的地址的区别,结果如:http://localhost:8080/MySpringMVC/foo/pathvar/paramValue):
@RequestMapping(value = "/pathvar/{param}", produces = "text/plain;charset=UTF-8")
public @ResponseBody String demoPathVar(@PathVariable String param) {
    return "param:" + param;
}
组合了@ResponseBody(不用为每个返回数据的方法注解) 的控制器 RestController:
package com.qfedu.MySpringMVC.controller;

import org.springframework.web.bind.annotation.RequestMapping;
import org.springframework.web.bind.annotation.RestController;

@RestController
@RequestMapping("/rest")
public class DemoRestController {
    // 具体的方法,下面分别介绍
}
上面控制器的方法:
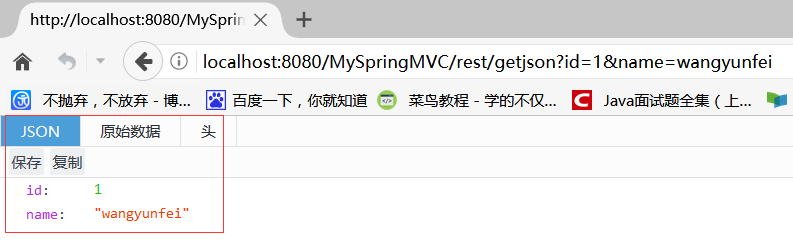
演示返回 json 数据:
@RequestMapping(value = "/getjson", produces = "application/json;charset=UTF-8")        //MediaType.APPLICATION_JSON_UTF8_VALUE
public DemoEntity getJson(DemoEntity obj) {
    return obj;
}
contentType 为 json。访问如:http://localhost:8080/MySpringMVC/rest/getjson?id=1&name=wangyunfei:
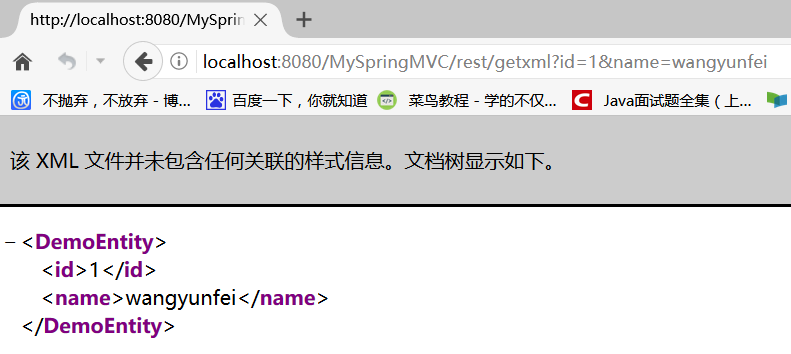
演示返回 xml 数据:
@RequestMapping(value = "getxml", produces = "application/xml;charset=UTF-8")
public DemoEntity getXml(DemoEntity obj) {
    return new DemoEntity(obj.getId(), obj.getName());
}
访问如:http://localhost:8080/MySpringMVC/rest/getxml?id=1&name=wangyunfei,结果:
Spring MVC 基本配置:
将之前的 Spring MVC 配置类升 一下级,继承 WebMvcConfigurerAdapter 类(或者实现 WebMvcConfigurer 接口:Adapter 类是这个接口的实现类),通过重写这个类的一些方法,可以定制一些基本的配置(依然要@EnableWebMvc,开启对 Spring MVC 的支持,否则以下的配置将无效)。
静态资源映射:
若程序的静态文件(如图片等)需要直接访问,或者 html 页面需要访问,可以为配置类重写 addResourceHandlers 方法来实现。
演示用例:
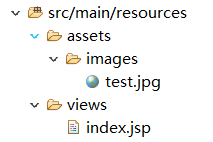
添加静态资源:
在 src / main / resource 下建立 assets 目录,该目录下存放所有的静态资源。再如下图新建一个资源:
配置类:
package com.qfedu.MySpringMVC.config;

import org.springframework.context.annotation.Bean;
import org.springframework.context.annotation.ComponentScan;
import org.springframework.context.annotation.Configuration;
import org.springframework.web.servlet.config.annotation.EnableWebMvc;
import org.springframework.web.servlet.config.annotation.ResourceHandlerRegistry;
import org.springframework.web.servlet.config.annotation.WebMvcConfigurerAdapter;
import org.springframework.web.servlet.view.InternalResourceViewResolver;
import org.springframework.web.servlet.view.JstlView;

@Configuration
@EnableWebMvc
@ComponentScan("com.qfedu.MySpringMVC")
public class MyMvcConfig extends WebMvcConfigurerAdapter {

    @Override
    public void addResourceHandlers(ResourceHandlerRegistry registry) {
        // 映射:addResourceHandler方法的参数是对外的访问路径(URI),addResourceLocations方法的参数是文件存放的位置
        // URI如果是 '/assets/**',则可以访问映射的assets目录下的多级资源
        // 如果是 '/assets/*',则只能访问assets目录,如果有多级目录,也不能访问
        registry.addResourceHandler("/assets/**").addResourceLocations("classpath:/assets/");
    }

    // 其他配置省略(下同)
}
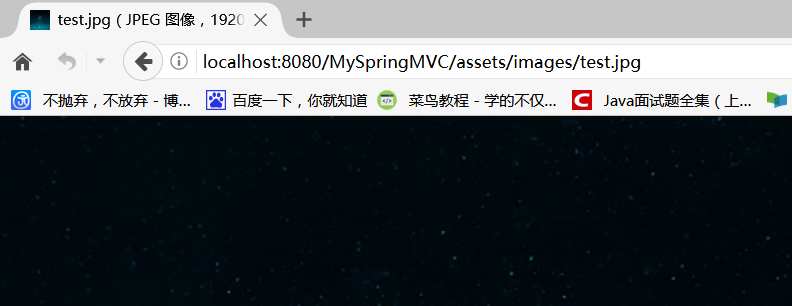
访问如 http://localhost:8080/MySpringMVC/assets/images/test.jpg:
拦截器设置:
拦截器(Interceptor)会对每一个请求处理的前后,进行相关的业务处理,有点类似于 Servlet 的 Filter。
演示用例:
自定义 Interceptor 由一个实现了 HandlerInterceptor 接口,或者继承了 HandlerInterceptorAdapter 类的、普通的 Bean 实现:
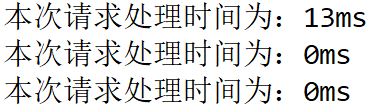
package com.qfedu.MySpringMVC.interceptor;

import javax.servlet.http.HttpServletRequest;
import javax.servlet.http.HttpServletResponse;

import org.springframework.web.servlet.ModelAndView;
import org.springframework.web.servlet.handler.HandlerInterceptorAdapter;

public class DemoInterceptor extends HandlerInterceptorAdapter {

    @Override
    public boolean preHandle(HttpServletRequest request, HttpServletResponse response, Object handler)
            throws Exception {
        long startTime = System.currentTimeMillis();
        request.setAttribute("startTime", startTime);
        return true;
    }

    @Override
    public void postHandle(HttpServletRequest request, HttpServletResponse response, Object handler,
            ModelAndView modelAndView) throws Exception {
        long startTime = (long) request.getAttribute("startTime");
        request.removeAttribute("startTime");
        long endTime = System.currentTimeMillis();
        System.out.println("本次请求处理时间为:" + new Long(endTime - startTime) + "ms");
        request.setAttribute("handleTime", endTime - startTime);
    }

}
为配置类重写 addInterceptors 方法,在方法中注册自定义的拦截器:
package com.qfedu.MySpringMVC.config;

import org.springframework.context.annotation.Bean;
import org.springframework.context.annotation.ComponentScan;
import org.springframework.context.annotation.Configuration;
import org.springframework.web.servlet.config.annotation.EnableWebMvc;
import org.springframework.web.servlet.config.annotation.InterceptorRegistry;
import org.springframework.web.servlet.config.annotation.ResourceHandlerRegistry;
import org.springframework.web.servlet.config.annotation.WebMvcConfigurerAdapter;
import org.springframework.web.servlet.view.InternalResourceViewResolver;
import org.springframework.web.servlet.view.JstlView;

import com.qfedu.MySpringMVC.interceptor.DemoInterceptor;

@Configuration
@EnableWebMvc
@ComponentScan("com.qfedu.MySpringMVC")
public class MyMvcConfig extends WebMvcConfigurerAdapter {

    @Bean
    public DemoInterceptor demoInterceptor() {
        return new DemoInterceptor();
    }

    @Override
    public void addInterceptors(InterceptorRegistry registry) {
        registry.addInterceptor(demoInterceptor());
    }

}
访问任意路径,如 http://localhost:8080/MySpringMVC/index,查看控制台:
@ControllerAdvice:
通过@ControllerAdvice,可以将对控制器的全局配置放在同一个位置,注解了@ControllerAdvice 的类的方法可使用注解@ExcpetionHandler、@InitBinder、@ModelAttribute,这些配置对所有的控制器内注解了@RequestMapping 的方法有效,即全局控制控制器。
1、@ExceptionHandler:用于全局处理控制器里发生的异常。
2、@ModelAttribute:绑定键值对到 Model 里。
3、@InitBinder:用来设置 WebDataBinder —— WebDataBinder 用于选择性的,自动绑定前台请求的参数到 Model 中。
演示用例:
定制 ControllerAdvice:
package com.qfedu.MySpringMVC.advice;

import org.springframework.ui.Model;
import org.springframework.web.bind.WebDataBinder;
import org.springframework.web.bind.annotation.ControllerAdvice;
import org.springframework.web.bind.annotation.ExceptionHandler;
import org.springframework.web.bind.annotation.InitBinder;
import org.springframework.web.bind.annotation.ModelAttribute;
import org.springframework.web.context.request.WebRequest;
import org.springframework.web.servlet.ModelAndView;

// 控制器建言,属于Spring的Bean,下面的建言都是全局的
// Advice for all controllers
@ControllerAdvice
public class HandlerAdvice {

    // 其value属性指定捕获的异常类型
    // 下面的异常处理,会将异常信息以键值对的形式保存到Model中,并跳转到对应的View
    @ExceptionHandler(Exception.class)
    public ModelAndView exception(Exception exception, WebRequest request) {
        ModelAndView modelAndView = new ModelAndView("error");
        modelAndView.addObject("errorMessage", exception.getMessage());
        return modelAndView;
    }

    @ModelAttribute
    public void addAttribute(Model model) {
        // 由于是在@ControllerAdvice的类中,因此@RequestMapping都能获得下面添加的键值对
        // 在@RequestMapping的方法中,注解@ModelAttribute("key")在参数上,即可注入
        model.addAttribute("msg", "额外信息");
    }

    @InitBinder
    public void initBinder(WebDataBinder webDataBinder) {
        webDataBinder.setDisallowedFields("id");    // 过滤掉request的id属性,然后WebDataBinder自动将request绑定到Model中
    }

}
演示控制器(直接抛异常):
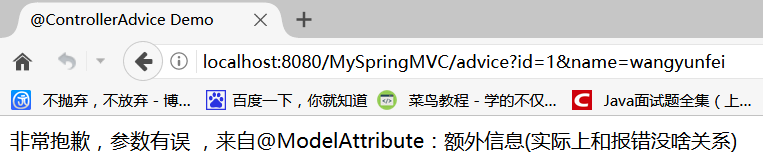
package com.qfedu.MySpringMVC.controller;

import org.springframework.stereotype.Controller;
import org.springframework.web.bind.annotation.ModelAttribute;
import org.springframework.web.bind.annotation.RequestMapping;

import com.qfedu.MySpringMVC.domain.DemoEntity;

@Controller
public class AdviceController {

    @RequestMapping("/advice")
    public String getSomething(@ModelAttribute("msg") String msg, DemoEntity obj) {
        throw new IllegalArgumentException("非常抱歉,参数有误 ,来自@ModelAttribute:" + msg + "(实际上和报错没啥关系)");
    }

}
在 src / main / resource / views 目录下,新建 error.jsp:
<%@ page contentType="text/html; charset=utf-8" pageEncoding="utf-8"%>
<%@ taglib uri="http://java.sun.com/jsp/jstl/core" prefix="c" %>

<!DOCTYPE html>
<html>
<head>
<meta http-equiv="Content-Type" content="text/html; charset=utf-8">
<title>@ControllerAdvice Demo</title>
</head>
<body>
    ${ errorMessage }
</body>
</html>
访问 http://localhost:8080/MySpringMVC/advice?id=1&name=wangyunfei:
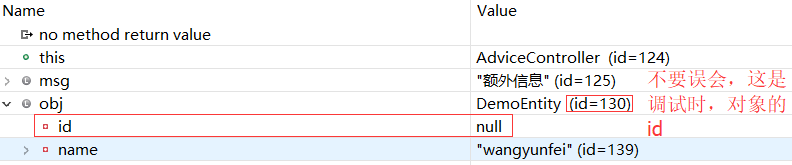
在对应的@RequestMapping 的方法中,打断点调试启动再访问(可以看到 request 给的 obj 对象,已经过滤掉了 id 属性):
其他配置:
1、快捷的 ViewController:
前面使用@RequestMapping 配置页面跳转的时候,存在着无任何业务处理,只是简单的页面跳转,如:
@Controller
public class HomeController {

    @RequestMapping("/index")
    public String index() {
        return "index";        // viewName
    }

}
通常在实际开发中,会涉及到大量这样的情况,如果都这样写则会很麻烦。简化配置:可以在配置类中重写 WebMvcConfigurerAdapter 的 addViewControllers 方法,直接统一注册 viewController:
@Override
public void addViewControllers(ViewControllerRegistry registry) {
    registry.addViewController("/index").setViewName("index");
}
这样一来,代码将会更简洁,更加容易管理,而且程序因此效率更高:

2、路径匹配参数配置:
在 Spring MVC 中,默认情况下,如果路径末尾的参数带 "." 的话,如使用之前的@RequestMapping:localhost:8080/MySpringMVC/foo/pathvar/xx.yy,那么 "." 以及后缀都会被忽略掉:
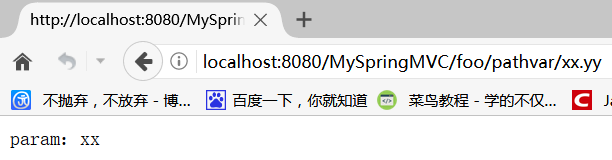
重写之前配置类的 configurePathMatch 方法:
@Override
public void configurePathMatch(PathMatchConfigurer configurer) {
    // 当匹配到后缀时,是否使用后缀。如果是enabled,例如匹配为 /users.* ,则会映射为 /users
    configurer.setUseSuffixPatternMatch(true);    // 默认为true:enabled
}
现在后缀将不会被忽略:

在开发中,更多基本配置请查看 WebMvcConfigurerAdapter 或 WebMvcConfigurer 的 API 文档,或者直接查看其源码。
Spring MVC 高级配置:
文件上传配置:
演示用例:
添加文件上传依赖(为了简化文件操作,添加 Commons IO 的依赖):
<dependency>
    <groupId>commons-fileupload</groupId>
    <artifactId>commons-fileupload</artifactId>
    <version>1.3.1</version>
</dependency>
<dependency>
    <groupId>org.apache.commons</groupId>
    <artifactId>commons-io</artifactId>
    <version>1.3.2</version>
</dependency>
在 src / main / resources / views 目录下,新建 upload.jsp(其中表单必须有 enctype 属性,method 必须为 post):
<%@ page contentType="text/html; charset=utf-8" pageEncoding="utf-8"%>

<!DOCTYPE html>
<html>
<head>
<meta http-equiv="Content-Type" content="text/html; charset=utf-8">
<title>upload page</title>
</head>
<body>
    <div class="upload">
        <form action="upload" enctype="multipart/form-data" method="post">
            <input type="file" name="file" />
            <br />
            <input type="submit" value="上传" />
        </form>
    </div>
</body>
</html>
注册对应的 ViewController:
@Override
public void addViewControllers(ViewControllerRegistry registry) {
    // 其他省略
    registry.addViewController("/toUpload").setViewName("upload");
}
添加文件上传解析器 MutilpartResolver 的 Bean:
@Bean
public MultipartResolver multipartResolver() {
    // 这是Spring的Resolver,不是Apache的
    CommonsMultipartResolver multipartResolver = new CommonsMultipartResolver();
    multipartResolver.setMaxUploadSize(1000000);
    multipartResolver.setDefaultEncoding("UTF-8");    //解决文件名中文乱码问题
    return multipartResolver;
}
文件上传业务,控制器:
package com.qfedu.MySpringMVC.controller;

import java.io.File;
import java.io.IOException;

import org.apache.commons.io.FileUtils;
import org.springframework.web.bind.annotation.RequestMapping;
import org.springframework.web.bind.annotation.RequestMethod;
import org.springframework.web.bind.annotation.RestController;
import org.springframework.web.multipart.MultipartFile;

@RestController
public class UploadController {

    @RequestMapping(value = "/upload", method = RequestMethod.POST)
    public String upload(MultipartFile file) {
        try {
            // 本来应该上传到文件服务器上,为了演示更直接简单,直接将上传文件写到本机上
            FileUtils.writeByteArrayToFile(new File("E:/upload/" + file.getOriginalFilename()), file.getBytes());  //快速写文件到磁盘。好用而且效率高
            return "ok";
        } catch (IOException e) {
            e.printStackTrace();
            return "wrong";
        }
    }

}
部署并启动服务器,访问 http://localhost:8080/MySpringMVC/toUpload,进行文件上传,如下:
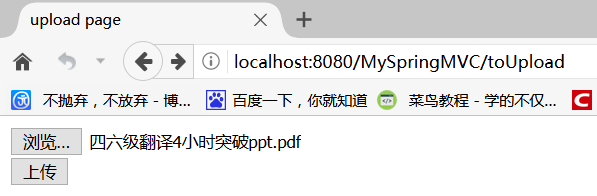
点击上传,如果返回 ok,则上传成功,查看本地文件,如:

自定义 HttpMessageConverter:
HttpMessageConverter 是用来处理 request 和 response 内的数据的。Spring 内置了大量 HttpMessageConverter,例如 MappingJackson2HttpMessageConverter、StringHttpMessageConverter 等,也可以根据自己的业务需求,自定义 HttpMessageConverter(需要在配置类中注册为 Bean,并通过重写 WebMvcConfigurerAdapter 的方法注册到 MVC 环境中)。
Spring 的 HttpMessageConverter 都是直接或间接继承抽象类 AbstractHttpMessageConverter<T>:
package com.qfedu.MySpringMVC.messageconvert;

import java.io.IOException;
import java.nio.charset.Charset;

import org.springframework.http.HttpInputMessage;
import org.springframework.http.HttpOutputMessage;
import org.springframework.http.MediaType;
import org.springframework.http.converter.AbstractHttpMessageConverter;
import org.springframework.http.converter.HttpMessageNotReadableException;
import org.springframework.http.converter.HttpMessageNotWritableException;
import org.springframework.util.StreamUtils;

import com.qfedu.MySpringMVC.domain.DemoEntity;

public class MyMessageConverter extends AbstractHttpMessageConverter<DemoEntity> {

    public MyMessageConverter() {
        // 新建一个自定义的媒体类型 contentType="application/x-qfedu";
        super(new MediaType("application", "x-qfedu", Charset.forName("UTF-8")));
    }

    @Override
    protected boolean supports(Class<?> clazz) {
        // 返回值表明,当前MessageConverter只支持处理DemoEntity类
        return DemoEntity.class.isAssignableFrom(clazz);
    }

    @Override
    protected DemoEntity readInternal(Class<? extends DemoEntity> clazz, HttpInputMessage inputMessage)
            throws IOException, HttpMessageNotReadableException {
        // 处理媒体类型为x-qfedu的@RequestMapping的请求数据,@RequestBody拿到的是处理后的数据
        String temp = StreamUtils.copyToString(inputMessage.getBody(), Charset.forName("UTF-8"));
        String[] tempArr = temp.split("-");
        return new DemoEntity(new Long(tempArr[0]), tempArr[1]);
    }

    @Override
    protected void writeInternal(DemoEntity obj, HttpOutputMessage outputMessage)
            throws IOException, HttpMessageNotWritableException {
        // 处理@RequestMapping的方法的返回值,@ResponseBody返回的也是处理后的数据
        String out = "hello:" + obj.getId() + "-" + obj.getName();
        outputMessage.getBody().write(out.getBytes());
    }

}
注册为 Bean,然后在注册为 HttpMessageConverter。在 Spring MVC 中,注册 HttpMessageConverter 有两个方法:
- configurerMessageConverters:会覆盖掉 Spring MVC 默认注册的多个内置 HttpMessageConverter。
- extendMessageConverters:仅添加一个自定义的 HttpMessageConverter,不会有覆盖。
@Bean
public MyMessageConverter myConverter() {
    return new MyMessageConverter();
}
@Override
public void extendMessageConverters(List<HttpMessageConverter<?>> converters) {
    converters.add(myConverter());
}
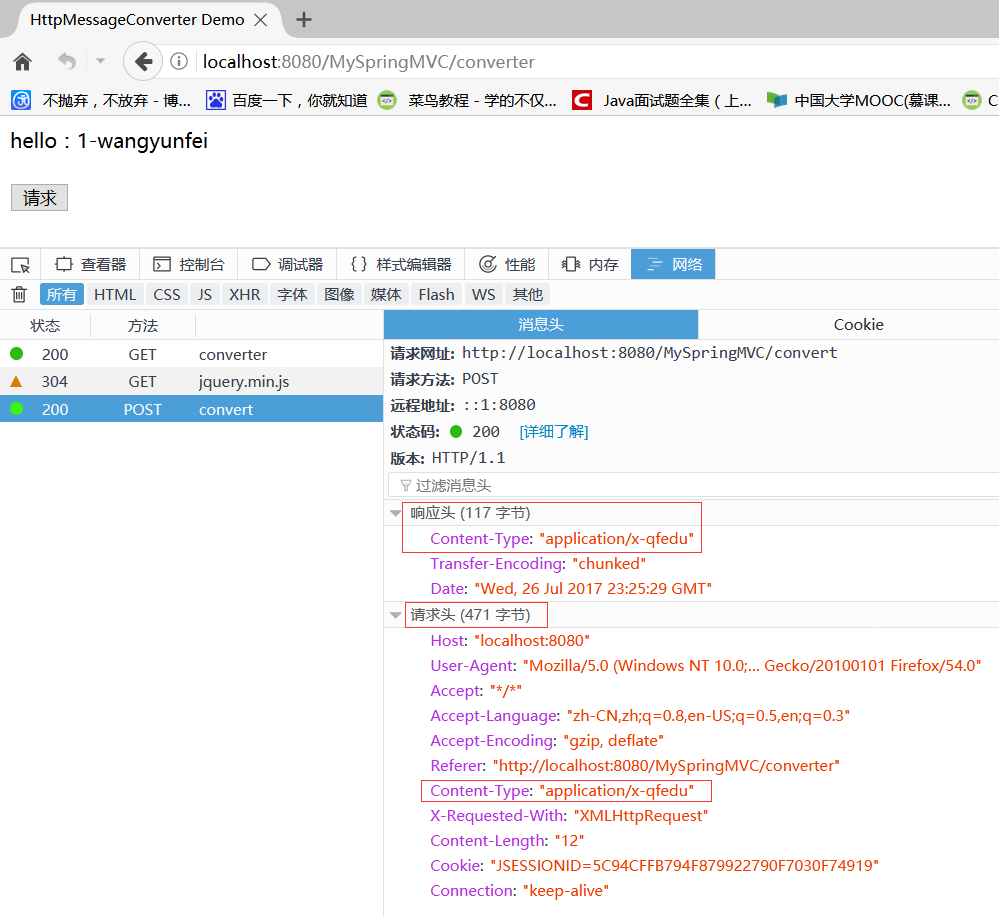
添加请求页面 converter.jsp:
<%@ page contentType="text/html; charset=utf-8" pageEncoding="utf-8"%>

<!DOCTYPE html>
<html>
<head>
<meta http-equiv="Content-Type" content="text/html; charset=utf-8">
<title>HttpMessageConverter Demo</title>
<script src="https://cdn.bootcss.com/jquery/3.2.1/jquery.min.js"></script>
<script>
    function request() {
        $.ajax({
            url : "convert",
            data : "1-wangyunfei",
            type : "POST",
            contentType : "application/x-qfedu",
            success : function(data) {
                $("#resp").html(data);
            }
        });
    }
</script>
</head>

<body>
    <div id="resp"></div>
    <br />
    <input type="button" onclick="request();" value="请求" />
</body>
</html>
相应的 ViewController:
@Override
public void addViewControllers(ViewControllerRegistry registry) {
    registry.addViewController("/converter").setViewName("converter");
}
要请求的 Controller:
package com.qfedu.MySpringMVC.controller;

import org.springframework.web.bind.annotation.RequestBody;
import org.springframework.web.bind.annotation.RequestMapping;
import org.springframework.web.bind.annotation.RestController;

import com.qfedu.MySpringMVC.domain.DemoEntity;

@RestController
public class ConverterController {

    @RequestMapping(value = "/convert", produces = "application/x-qfedu")
    public DemoEntity convert(@RequestBody DemoEntity obj) {
        return obj;
    }

}
访问 http://localhost:8080/MySpringMVC/converter,请求后的结果:
服务器端推送技术:
在日常开发中,很多类型的网站需要服务器端推送技术,最容易理解和实现的解决方案是:客户端使用 Ajax 向服务器轮询消息,但是由于客户端不知道服务端什么时候有数据,因此不知道什么时候该请求消息,轮询的频率不好控制,因此服务器的压力会很大。
为了,服务器端主动推送信息,客户端则随时监听推送事件,准备接受消息。下面将演示基于 SSE(Server Send Event 服务端发送事件)的推送。该方法需要新式浏览器的支持,是半双工通信。除此之外,还有一种全双工的新技术 —— WebSocket。
演示 SSE:
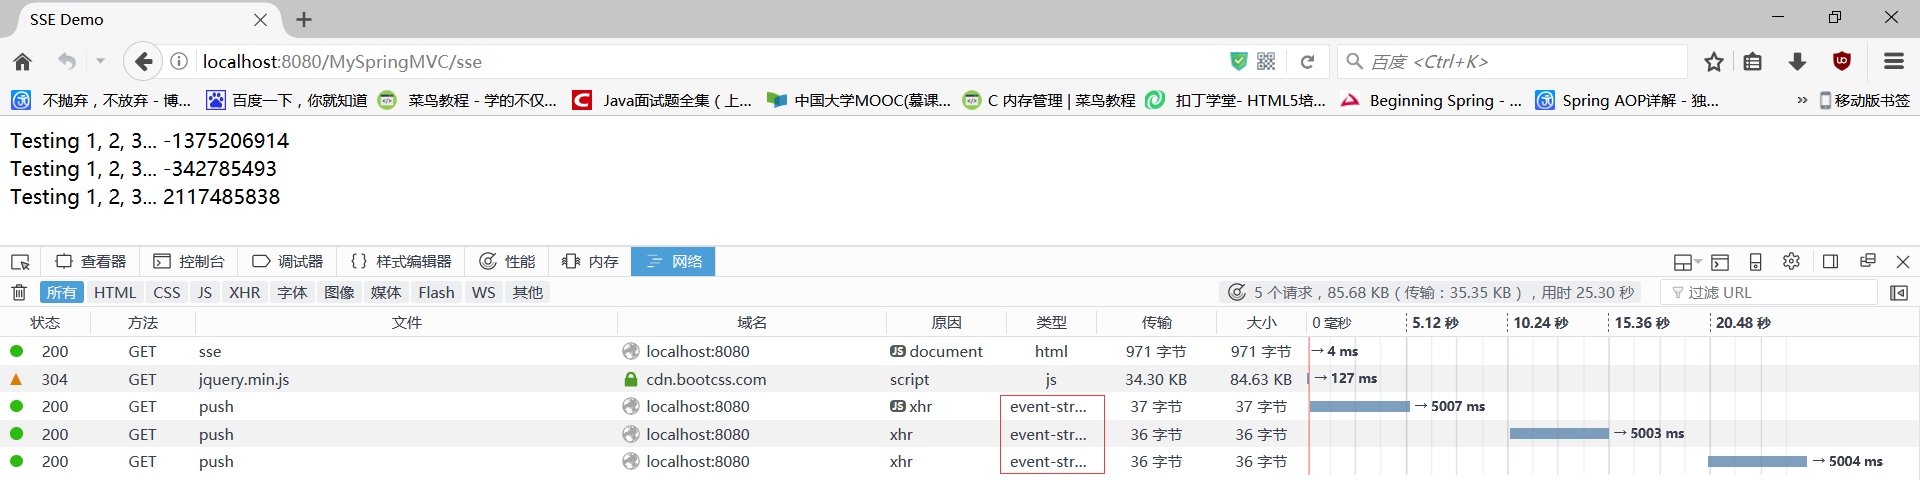
控制器(SSE 服务端,输出的媒体类型为 text/event-stream 是对服务端的支持):
package com.qfedu.MySpringMVC.controller;

import java.util.Random;

import org.springframework.web.bind.annotation.RequestMapping;
import org.springframework.web.bind.annotation.RestController;

@RestController
public class SseController {

    @RequestMapping(value = "/push", produces = "text/event-stream")
    public String push() {
        Random r = new Random();
        try {
            Thread.sleep(5000);
        } catch (InterruptedException e) {
            e.printStackTrace();
        }
        // 消息传输格式:data:消息体

。前缀:data:。后缀:

。
        return "data:Testing 1, 2, 3... " + r.nextInt() + "

";
    }

}
新建 sse.jsp —— SSE 客户端(使用浏览器内置的 EventSource 对象,建立对服务端的监听,并绑定一系列监听处理事件):
<%@ page contentType="text/html; charset=utf-8" pageEncoding="utf-8"%>

<!DOCTYPE html>
<html>
<head>
<meta http-equiv="Content-Type" content="text/html; charset=utf-8">
<title>SSE Demo</title>
<script src="https://cdn.bootcss.com/jquery/3.2.1/jquery.min.js"></script>
<script>
    $(function() {
        // 只有新式的浏览器才有 EventSource 对象:SSE客户端
        if (!!window.EventSource) {
            var source = new EventSource("push");
            var s = "";
            source.addEventListener('message', function(e) {
                s = s + e.data + "<br />";
                $("#msgFromPush").html(s);
            });

            source.addEventListener('open', function(e) {
                console.log("连接打开.");
            }, false);

            source.addEventListener('error', function(e) {
                if (e.readyState == EventSource.CLOSED) {
                    console.log("连接关闭");
                } else {
                    console.log(e.readyState);
                }
            }, false);
        } else {
            console.log("你的浏览器不支持SSE");
        }
    });
</script>
</head>
<body>
    <div id="msgFromPush"></div>
</body>
</html>
配置 see.jsp 的访问映射:
@Override
public void addViewControllers(ViewControllerRegistry registry) {
  registry.addViewController("/sse").setViewName("sse");
}
然后运行,访问 http://localhost:8080/MySpringMVC/sse:
Spring MVC 的测试:
MVC 相关的测试主要针对控制器。测试 Web 项目通常不需要发布、部署、启动,为此需要一些 Servlet 相关的模拟对象(Mock 对象),比如:MockMvc、MockHttpServletRequest、MockHttpServletResponse、MockHttpSession 等。
测试是非常有用的,让测试用例通过测试,才能保证软件的质量和可控性。在现实开发中,会事先确定项目需求(即先要知道产品是什么样子的,然后按照需求去开发),因此有一个概念叫测试驱动开发(Test Driven Development,TDD):设计人员先按照需求,写一个预期结果的测试用例(此时还没有实现代码,测试肯定是无法通过的),为了让测试用例通过,不断编码和重构,最终通过,一个项目模型也驱动而生。
演示用例(使用 Spring TestContext Framework 对普通控制器和 RestController 的页面跳转进行单元测试):
添加 Spring Test 依赖(基于JUnit):
<!-- Spring Test -->
<dependency>
    <groupId>junit</groupId>
    <artifactId>junit</artifactId>
    <version>4.12</version>
    <scope>test</scope>
</dependency>
<dependency>
    <groupId>org.springframework</groupId>
    <artifactId>spring-test</artifactId>
    <version>${spring-framework.version}</version>
    <scope>test</scope>
</dependency>
单例 Bean:
package com.qfedu.MySpringMVC.service;

import org.springframework.stereotype.Service;

@Service
public class DemoService {

    public String sayHello() {
        return "hello";
    }

}
测试用例(没有编译错误,但此时测试无法通过):
package com.qfedu.MySpringMVC;

import static org.springframework.test.web.servlet.request.MockMvcRequestBuilders.get;
import static org.springframework.test.web.servlet.result.MockMvcResultMatchers.content;
import static org.springframework.test.web.servlet.result.MockMvcResultMatchers.forwardedUrl;
import static org.springframework.test.web.servlet.result.MockMvcResultMatchers.model;
import static org.springframework.test.web.servlet.result.MockMvcResultMatchers.status;
import static org.springframework.test.web.servlet.result.MockMvcResultMatchers.view;

import org.junit.Before;
import org.junit.Test;
import org.junit.runner.RunWith;
import org.springframework.beans.factory.annotation.Autowired;
import org.springframework.mock.web.MockHttpServletRequest;
import org.springframework.mock.web.MockHttpSession;
import org.springframework.test.context.ContextConfiguration;
import org.springframework.test.context.junit4.SpringJUnit4ClassRunner;
import org.springframework.test.context.web.WebAppConfiguration;
import org.springframework.test.web.servlet.MockMvc;
import org.springframework.test.web.servlet.setup.MockMvcBuilders;
import org.springframework.web.context.WebApplicationContext;

import com.qfedu.MySpringMVC.config.MyMvcConfig;
import com.qfedu.MySpringMVC.service.DemoService;

@RunWith(SpringJUnit4ClassRunner.class)
@ContextConfiguration(classes = MyMvcConfig.class)
// 为WebApplicationContext容器指定 web 程序资源的根目录:不能包含Spring资源前缀,如classpath:、file:(即解释为文件系统资源);不能以slash(斜线/)结尾
// 默认为文件系统 src / main / webapp 。注:在发布为WAR的标准Maven工程中,这是作为web程序根的标准目录
@WebAppConfiguration("src/main/resources")
public class TestControllerIntergrationTests {
    private MockMvc mockMvc;

    @Autowired
    private DemoService demoService;

    // 获得容器(已经被@RunWith、@ContextConfiguration配置好了)
    // WebApplicationContext容器需要额外配置 @WebAppConfiguration
    @Autowired
    private WebApplicationContext context;

    // 此处仅作演示,并未使用
    @Autowired
    MockHttpSession session;
    @Autowired
    MockHttpServletRequest request;

    @Before
    public void setup() {
        mockMvc = MockMvcBuilders.webAppContextSetup(context).build();
    }

    @Test
    public void testNormalController() throws Exception {
        // forwardedUrl:页面转向的真正路径;status-OK:200
        mockMvc.perform(get("/testNormal"))
                .andExpect(status().isOk())
                .andExpect(view().name("page"))
                .andExpect(forwardedUrl("/WEB-INF/classes/views/page.jsp"))
                .andExpect(model().attribute("msg", demoService.sayHello()));
    }

    @Test
    public void testRestController() throws Exception {
        mockMvc.perform(get("/testRest"))
                .andExpect(status().isOk())
                .andExpect(content().contentType("text/plain;charset=UTF-8"))
                .andExpect(content().string(demoService.sayHello()));
    }
}
运行:
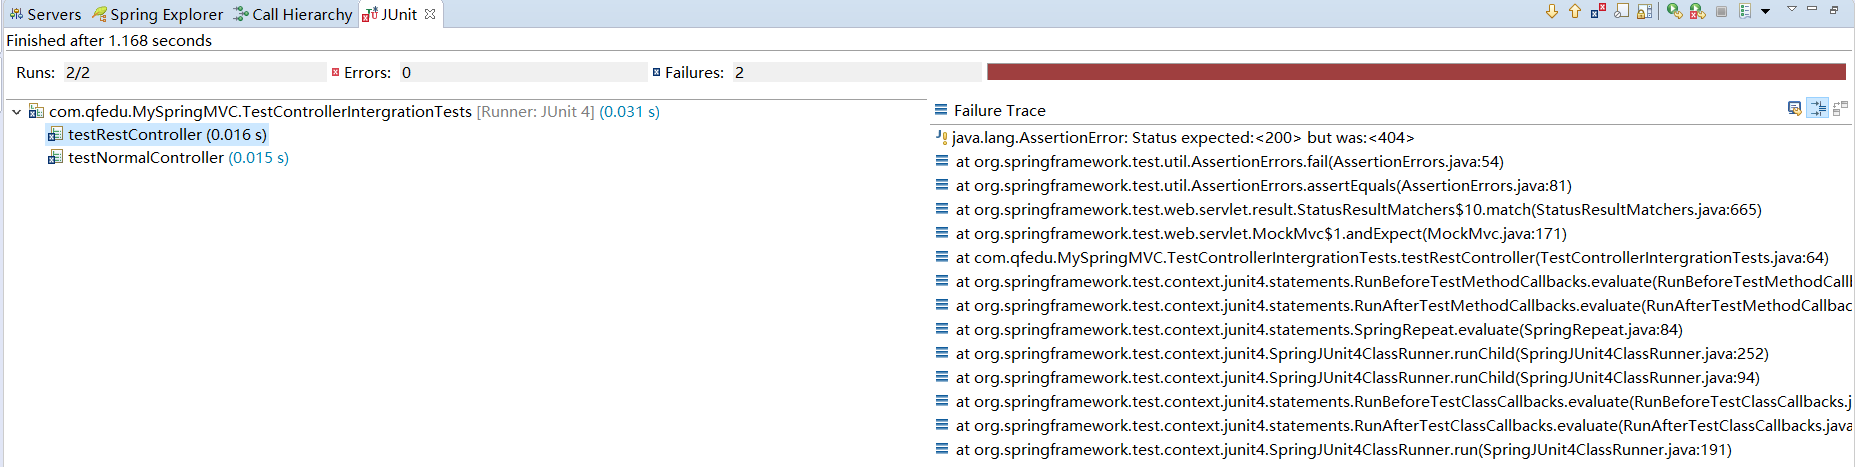
因此,增加两个测试控制器:
普通控制器:
package com.qfedu.MySpringMVC.controller;

import org.springframework.beans.factory.annotation.Autowired;
import org.springframework.stereotype.Controller;
import org.springframework.ui.Model;
import org.springframework.web.bind.annotation.RequestMapping;

import com.qfedu.MySpringMVC.service.DemoService;

@Controller
public class NormalController {
    @Autowired
    DemoService demoService;

    @RequestMapping("/testNormal")
    public String testPage(Model model) {
        model.addAttribute("msg", demoService.sayHello());
        return "page";
    }

}
对应视图 page.jsp 内容随意。
RestController:
package com.qfedu.MySpringMVC.controller;

import org.springframework.beans.factory.annotation.Autowired;
import org.springframework.web.bind.annotation.RequestMapping;
import org.springframework.web.bind.annotation.RestController;

import com.qfedu.MySpringMVC.service.DemoService;

@RestController
public class MyRestController {
    @Autowired
    DemoService demoService;

    @RequestMapping(value = "/testRest", produces = "text/plain;charset=UTF-8")
    public String testRest() {
        return demoService.sayHello();
    }
}
再次测试控制器能否成功页面跳转,以及相应请求信息是否正确:
