博文正文开头格式:(2分)
|
项目 |
内容 |
|
《面向对象程序设计(java)》 |
https://www.cnblogs.com/nwnu-daizh/ |
|
这个作业的要求在哪里 |
https://www.cnblogs.com/nwnu-daizh/p/11888568.html |
|
作业学习目标 |
(1) 掌握事件处理的基本原理,理解其用途; (2) 掌握AWT事件模型的工作机制; (3) 掌握事件处理的基本编程模型; (4) 了解GUI界面组件观感设置方法; (5) 掌握WindowAdapter类、AbstractAction类的用法; (6) 掌握GUI程序中鼠标事件处理技术。 |
随笔博文正文内容包括:
第一部分:总结第十一章理论知识(35分)
第11章 事件处理
一、 事件处理基础
(a)事件源(event source):能够产生事件的对象都可 以成为事件源,如文本框、按钮等。一个事件源是一个 能够注册监听器并向监听器发送事件对象的对象。
(b) 事件监听器(event listener):事件监听器对象接 收事件源发送的通告(事件对象),并对发生的事件作 出响应。一个监听器对象就是一个实现了专门监听器接 口的类实例,该类必须实现接口中的方法,这些方法当 事件发生时,被自动执行。
(c) 事件对象(event object):Java将事件的相关信息 封装在一个事件对象中,所有的事件对象都最终派生于 java.util.EventObject类。不同的事件源可以产生不 同类别的事件。
(d)监听器对象:是一个实现了特定监听器接口的类实例。
(e)GUI设计:GUI设计中,程序员需要对组件的某种事件进行响应和处理时,必须完成两个步骤:
1) 定义实现某事件监听器接口的事件监听器类,并具体化接口中声明的事件处理抽象方法。
2) 为组件注册实现了规定接口的事件监听器对象;
(f)注册监听器方法:eventSourceObject.addEventListener(eventListenerObject)
(g)监听器接口的实现:监听器类必须实现与事件源相对应的接口,即必须提供接口中方法的实现。
(h)适配器类:当程序用户试图关闭一个框架窗口时,Jframe对象就是WindowEvent的事件源。
适配器类动态地满足了Java中实现监视器类的技术要求。
通过扩展适配器类来实现窗口事件需要的动作。
处理按钮点击事件:对于GUI的应用程序来说,事件处理是必不可少的,因此我们需要熟练地掌握事件处理模型。对于事件我们需要了解两个名词:事件源对象与监听器对象。从字面上我们就可以理解个大概,下面我们系统说明一下:监听器对象是一个实现了特定监听器接口(listener interface)的类的实例,事件源是一个能够注册监听器对象并发送事件对象的对象,事件发生时,事件源将事件对象传递给所有注册的监听器,监听器对象将利用事件对象中的信息决定如何对事件做出相应
二、简洁的指定监听器
监听器对象就是一个实现了特定监听器接口的类的实例,那么监听器接口就是我们所关心的问题了。在监听器接口的最顶层接口是java.util.EventListener,这个接口是所有事件侦听器接口必须扩展的标记接口。感到诧异的是这个接口完全是空的,里面没有任何的抽象方法的定义,查看源代码里面空空如也啊!
事件监听器类(监听器对象所属的类)必须实现事件监听器接口或继承事件监听器适配器类。
事件监听器接口定义了处理事件必须实现的方法。
事件监听器适配器类是对事件监听器接口的简单实现。目的是为了减少编程的工作量。
事件监听器的接口命名方式为:XXListener,而且,在java中,这些接口已经被定义好了。用来被实现,它定义了事件处理器(即事件处理的方法原型,这个方法需要被重新实现)。
例如:ActionListener接口、MouseListener接口、WindowListener接口、KeyListener接口、ItemListener接口、MouseMotionListener接口、FocusListener接口、ComponentListener接口等
三、改变观感
Swing程序默认使用Metal观感,采用两种方式改变观感。
第一种:在Java安装的子目录jre/lib下的文件swing.properties中,将属性swing.defaultlaf设置为所希望的观感类名。
swing.defaultlaf=com.sun.java.swing.plaf.motif.MotifLookAndFeel
第二种:调用静态的UIManager. setLookAndFeel方法,动态地改变观感,提供所想要的观感类名,再调用静态方法SwingUtilities.updateComponentTreeUI来刷新全部的组件集。
四、适配器类
1.当程序用户试图关闭一个框架窗口时,JFrame对象就是WindowEvent的事件源。
捕获窗口事件的监听器:WindowListener listener=...frame.addWindowListener(listener);
窗口监听器必须是实现WindowListener接口的类的一个对象,WindowListener接口中有七个方法,它们的名字是自解释的。
2.鉴于代码简化的要求,对于不止一个方法的AWT监听器接口都有一个实现了它的所有方法,但却不做任何工作的适配器类。例:WindowAdapter类。
适配器类动态地满足了Java中实现监视器类的技术要求。通过扩展适配器类来实现窗口事件需要的动作。
3.扩展WindowAdapter类,继承六个空方法,并覆盖WindowClosing()方法:
class Terminator extends WindowAdapter{
public void windowClosing(WindowEvente){
System.exit(0);}}
4.可将一个Terminator对象注册为事件监听器:WindowListener listener=new Terminator();frame.addWindowListener(listener);
只要框架产生一个窗口事件,该事件就会传递给监听器对象。
创建扩展于WindowAdapter的监听器类是很好的改进,但还可以进一步将上面语句也可简化为:frame.addWindowListener(new Terminator());
五、动作
(a) 激活一个命令可以有多种方式,如用户可以通过 菜单、击键或工具栏上的按钮选择特定的功能。
(b) 在AWT事件模型中,无论是通过哪种方式下达命 令(如:点击按钮、菜单选项、按下键盘),其 操作动作都是一样的。
(c)动作接口及其类:Swing包提供了非常实用的机制来封装命令,并将它们连接到多个事件源,这就是Action接口。
(d)Action是一个接口,而不是一个类,实现这个接口的类必须要实现它的7个方法。
(e)AbstractAction 类 实 现 了 Action 接 口 中 除actionPerformed方法之外的所有方法,这个类存储了所有名/值对,并管理着属性变更监听器。
六、 鼠标事件
(a)鼠标事件 – MouseEvent
(b)鼠标监听器接口 – MouseListener – MouseMotionListener
(c) 鼠标监听器适配器 – MouseAdapter – MouseMotionAdapter
(d)用户点击鼠标按钮时,会调用三个监听器方法:
1.鼠标第一次被按下时调用mousePressed方法;
2.鼠标被释放时调用mouseReleased方法;
3.两个动作完成之后,调用mouseClicked方法。
(e)鼠标在组件上移动时,会调用mouseMoved方法。
(f)鼠标事件返回值:鼠标事件的类型是MouseEvent,当发生鼠标事件时:MouseEvent类自动创建一个事件对象,以及事件发生位置的x和y坐标,作为事件返回值。
(g)监听鼠标点击事件,实现MouseListener接口.
七、AWT事件继承层次
(a) 所有的事件都是由java.util包中的EventObject 类扩展而来。
(b) AWTEevent 是所有AWT 事件类的父类, 也是 EventObject的直接子类。
(c) 有些Swing组件生成其他类型的事件对象,一般直 接 扩 展 于 EventObject, 而不是AWTEvent,位于 javax.swing.event.*。
(d) 事件对象封装了事件源与监听器彼此通信的事件 信息。在必要的时候,可以对传递给监听器对象的 事件对象进行分析。
第二部分:实验部分
实验1:测试程序1(5分)
程序代码如下:
package button;

import java.awt.*;
import java.awt.event.*;
import javax.swing.*;

/**
 * A frame with a button panel
 */
public class ButtonFrame extends JFrame
{
   private JPanel buttonPanel;
   private static final int DEFAULT_WIDTH = 300;
   private static final int DEFAULT_HEIGHT = 200;

   public ButtonFrame()
   {
       //调整组件的大小,宽度和高度
      setSize(DEFAULT_WIDTH, DEFAULT_HEIGHT);

      // 创建了三个按钮对象
      JButton yellowButton = new JButton("Yellow");
      JButton blueButton = new JButton("Blue");
      JButton redButton = new JButton("Red");

      buttonPanel = new JPanel();

      // 向面板添加按钮
      buttonPanel.add(yellowButton);
      buttonPanel.add(blueButton);
      buttonPanel.add(redButton);

      //将面板添加到框架
      add(buttonPanel);

      // 创建按钮对象
      ColorAction yellowAction = new ColorAction(Color.YELLOW);
      ColorAction blueAction = new ColorAction(Color.BLUE);
      ColorAction redAction = new ColorAction(Color.RED);

      // 将动作与按钮相关联
      yellowButton.addActionListener(yellowAction);
      blueButton.addActionListener(blueAction);
      redButton.addActionListener(redAction);
   }

   /**
    * An action listener that sets the panel's background color.
    */
   private class ColorAction implements ActionListener
   //ColorAction类后面实现了一个监听器接口类ActionListener
   {
      private Color backgroundColor;
 //Color 类用于封装默认 sRGB 颜色空间中的颜色,或者用于封装由 ColorSpace 标识的任意颜色空间中的颜色

      public ColorAction(Color c)
      {
         backgroundColor = c;
      }

      public void actionPerformed(ActionEvent event)
      {
         buttonPanel.setBackground(backgroundColor);
      }
   }
}
package button;

import java.awt.*;
import javax.swing.*;

/**
 * @version 1.34 2015-06-12
 * @author Cay Horstmann
 */
public class ButtonTest
{
   public static void main(String[] args)
   {
       //lambda表达式
      EventQueue.invokeLater(() -> {
         JFrame frame = new ButtonFrame();
         frame.setTitle("ButtonTest");
         //setTitle表示将此窗体的标题设置为制定的字符串
         frame.setDefaultCloseOperation(JFrame.EXIT_ON_CLOSE);
         //根据参数的值显示或隐藏窗口
         frame.setVisible(true);
      });
   }
}
用lambda表达式简化:
package button;

import java.awt.*;
import java.awt.event.*;
import javax.swing.*;

/**
 * A frame with a button panel
 */
public class ButtonFrame extends JFrame {
    private JPanel buttonPanel;
    private static final int DEFAULT_WIDTH = 300*2;
    private static final int DEFAULT_HEIGHT = 200*2;

    public ButtonFrame() {
        setSize(DEFAULT_WIDTH, DEFAULT_HEIGHT);
        //用new运算符调用构造器
        buttonPanel = new JPanel();
    //创建按钮生成了三个按钮对象
        makeButton("黄色", Color.yellow);
        makeButton("蓝色", Color.blue);
        makeButton("红色", Color.red);
        add(buttonPanel);
    }
    protected void makeButton(String name,Color backgound) {
        // 创建按钮
        JButton button = new JButton(name);
        // 向面板添加按钮
        buttonPanel.add(button);
        // 创建按钮操作

        button.addActionListener(new ActionListener() {

            public void actionPerformed(ActionEvent e) {
                // TODO 自动生成的方法存根
                buttonPanel.setBackground(backgound);
            }
        });
        //通过lambad表达式实现
        button.addActionListener((e)->{
            buttonPanel.setBackground(backgound);
        });
    }
}
运行结果如下:
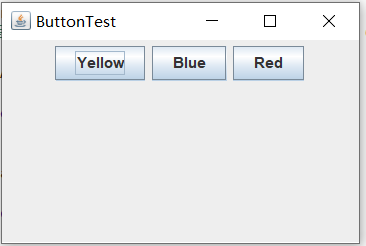
JButton组件的基本API:
Swing中的按钮是Jbutton,它是javax.swing.AbstracButton类的子类,swing中的按钮可以显示图像,并且可以将按钮设置为窗口的默认图标,而且还可以将多个图像指定给一个按钮。
在JButton中有如下几个比较常用的构造方法。
- JButton(Icon icon): 按钮上显示图标。
- JButton(String text): 按钮上显示字符。
- JButton(String text,Icon icon): 按钮上既显示图标又先施字符。
实验1:测试程序2(5分)
程序代码如下:
package plaf;

import javax.swing.JButton;
import javax.swing.JFrame;
import javax.swing.JPanel;
import javax.swing.SwingUtilities;
import javax.swing.UIManager;

/**带有按钮面板的框架,用于改变外观
 * A frame with a button panel for changing look-and-feel
 */
public class PlafFrame extends JFrame
{
   private JPanel buttonPanel;

   public PlafFrame()
   {
      buttonPanel = new JPanel();
//获得一个用于描述已安装的观感的对象数组
      UIManager.LookAndFeelInfo[] infos = UIManager.getInstalledLookAndFeels();
      for (UIManager.LookAndFeelInfo info : infos)
          //返回观感的显示名称
         makeButton(info.getName(), info.getClassName());
      //返回观感实现类的名称

      add(buttonPanel);
      pack();
      //调整此窗口的大小,以适合其子组件的首选大小和布局。
   }

   /**
    * Makes a button to change the pluggable look-and-feel.
    * @param name the button name
    * @param className the name of the look-and-feel class
    */
   private void makeButton(String name, String className)
   {
      // 向面板添加按钮
      JButton button = new JButton(name);
      buttonPanel.add(button);

      // 设定按钮动作

      button.addActionListener(event -> {
         // 按钮动作:切换到新的外观
         try
         {
            UIManager.setLookAndFeel(className);
            //className - 指定实现外观的类名称的字符串
            // Swing方法的集合
            SwingUtilities.updateComponentTreeUI(this);
            //简单的外观更改:将树结构中的每个节点转到 updateUI() -- 也就是说,通过当前外观初始化其 UI 属性。
            pack();
         }
         catch (Exception e)//抛出异常
         //Exception 类及其子类是 Throwable 的一种形式,它指出了合理的应用程序想要捕获的条件。
         {
            e.printStackTrace();
            //Exception 类及其子类是 Throwable 的一种形式,它指出了合理的应用程序想要捕获的条件。
         }
      });
   }
}
package plaf;

import java.awt.*;
import javax.swing.*;

/**
 * @version 1.32 2015-06-12
 * @author Cay Horstmann
 */
public class PlafTest
{
   public static void main(String[] args)
   {
       //lambda表达式
      EventQueue.invokeLater(() -> {
         JFrame frame = new PlafFrame();
         frame.setTitle("PlafTest");
         frame.setDefaultCloseOperation(JFrame.EXIT_ON_CLOSE);
         //退出应用程序默认窗口关闭操作
         frame.setVisible(true);
      });
   }
}
运行结果如下:


GUI程序中观感的设置方法:
相关API :static voidsetLookAndFeel(LookAndFeel newLookAndFeel)
static voidupdateComponentTreeUI(Component c)实验1:测试程序3(5分)
程序代码如下:
package action;

import java.awt.*;
import java.awt.event.*;
import javax.swing.*;

/**
 * A frame with a panel that demonstrates color change actions.
 */
public class ActionFrame extends JFrame
{//JPanel是一般轻量级容器
   private JPanel buttonPanel;
   private static final int DEFAULT_WIDTH = 300;
   private static final int DEFAULT_HEIGHT = 200;

   public ActionFrame()
   {
      setSize(DEFAULT_WIDTH, DEFAULT_HEIGHT);

      buttonPanel = new JPanel();

      //定义动作
      Action yellowAction = new ColorAction("Yellow", new ImageIcon("yellow-ball.gif"),
            Color.YELLOW);
      Action blueAction = new ColorAction("Blue", new ImageIcon("blue-ball.gif"), Color.BLUE);
      Action redAction = new ColorAction("Red", new ImageIcon("red-ball.gif"), Color.RED);

      // 添加这些操作的按钮
      buttonPanel.add(new JButton(yellowAction));
      buttonPanel.add(new JButton(blueAction));
      buttonPanel.add(new JButton(redAction));

      // 将面板添加到框
      add(buttonPanel);

      // 将y b和r键与名称相关联
      InputMap imap = buttonPanel.getInputMap(JComponent.WHEN_ANCESTOR_OF_FOCUSED_COMPONENT);
      imap.put(KeyStroke.getKeyStroke("ctrl Y"), "panel.yellow");
      imap.put(KeyStroke.getKeyStroke("ctrl B"), "panel.blue");
      imap.put(KeyStroke.getKeyStroke("ctrl R"), "panel.red");

      // 将名称与操作相关联
      ActionMap amap = buttonPanel.getActionMap();
      //ActionMap 提供从 Object(称为键 或 Action 名)到 Action 的映射
      amap.put("panel.yellow", yellowAction);
      //put:添加一个 key 到 action 的绑定
      amap.put("panel.blue", blueAction);
      amap.put("panel.red", redAction);
   }

   public class ColorAction extends AbstractAction
   //ColorAction类接口实现了AbstractAction接口的继承
   {
      /**
       * Constructs a color action.
       * @param name the name to show on the button
       * @param icon the icon to display on the button
       * @param c the background color
       */
      public ColorAction(String name, Icon icon, Color c)
      {
         putValue(Action.NAME, name);
         //NAME用来存储动作的 String 名称的键,用于菜单或按钮。
         putValue(Action.SMALL_ICON, icon);
         //用来存储小型 Icon(比如 ImageIcon)的键
         putValue(Action.SHORT_DESCRIPTION, "Set panel color to " + name.toLowerCase());
         putValue("color", c);
      }
    //指示发生了组件定义的动作的语义事件
      public void actionPerformed(ActionEvent event)
      //发生操作时调用
      {
         Color c = (Color) getValue("color");
         buttonPanel.setBackground(c);//调用setBackground方法并设置背景颜色
      }
   }
}
package action;

import java.awt.*;
import javax.swing.*;

/**
 * @version 1.34 2015-06-12
 * @author Cay Horstmann
 */
public class ActionTest
{
   public static void main(String[] args)
   {
      EventQueue.invokeLater(() -> //lambda表达式
      {
         JFrame frame = new ActionFrame();
         frame.setTitle("ActionTest");//标题
         frame.setDefaultCloseOperation(JFrame.EXIT_ON_CLOSE);
         frame.setVisible(true);//可见
      });
   }
}
程序运行时只需同时按Ctrl+Y或R或B键,窗口就会自动显示某种颜色,运行结果如下:
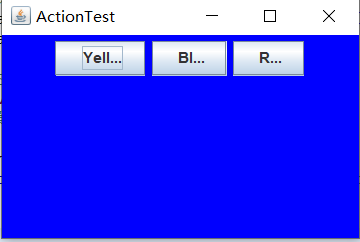
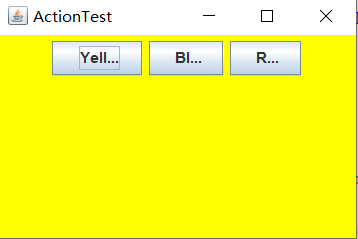
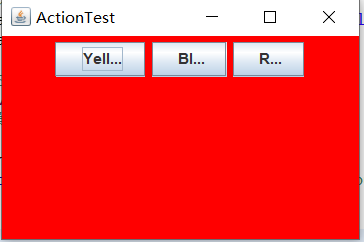
GUI程序中按钮、键盘动作映射到动作对象的方法:
实现按下CTRL+Y、CTRL+B或CTRL+R来改变面板颜色
Swing包的Action接口封装了命令,将它们连接到多个事件源。
实验1:测试程序4(5分)
程序代码如下:
package mouse;

import java.awt.*;
import java.awt.event.*;
import java.awt.geom.*;
import java.util.*;
import javax.swing.*;

/**
 * A component with mouse operations for adding and removing squares.
 */
public class MouseComponent extends JComponent
{
   private static final int DEFAULT_WIDTH = 300;
   private static final int DEFAULT_HEIGHT = 200;

   private static final int SIDELENGTH = 10;
   private ArrayList<Rectangle2D> squares;
   private Rectangle2D current;
   // 包含鼠标光标的正方形
   public MouseComponent()
   {
      squares = new ArrayList<>();
      current = null;

      addMouseListener(new MouseHandler());
      addMouseMotionListener(new MouseMotionHandler());
   }

   public Dimension getPreferredSize() { return new Dimension(DEFAULT_WIDTH, DEFAULT_HEIGHT); }

   public void paintComponent(Graphics g)
   {
      Graphics2D g2 = (Graphics2D) g;

      // 画所有正方形
      for (Rectangle2D r : squares)
         g2.draw(r);
   }

   /**
    * Finds the first square containing a point.
    * @param p a point
    * @return the first square that contains p
    */
   public Rectangle2D find(Point2D p)
   {
      for (Rectangle2D r : squares)
      {
         if (r.contains(p)) return r;
      }
      return null;
   }

   /**
    * Adds a square to the collection.
    * @param p the center of the square
    */
   public void add(Point2D p)//Point2D 类定义表示 (x,y) 坐标空间中位置的点。
   {
      double x = p.getX();
      //以 double 精度返回此 Point2D 的 X 坐标
      double y = p.getY();
      //以 double 精度返回此 Point2D 的 Y 坐标。

      current = new Rectangle2D.Double(x - SIDELENGTH / 2, y - SIDELENGTH / 2, SIDELENGTH,
            SIDELENGTH);
      //Rectangle2D 类描述通过位置 (x,y) 和尺寸 (w x h) 定义的矩形。
      squares.add(current);
      repaint();//重绘此组件。
   }

   /**
    * 从集合中移除正方形
    * @param s the square to remove
    */
   public void remove(Rectangle2D s)
   {
      if (s == null) return;
      if (s == current) current = null;
      squares.remove(s);
      repaint();
   }

   private class MouseHandler extends MouseAdapter//接收鼠标事件的抽象适配器类
   {
       //鼠标按键在组件上按下时调用。
      public void mousePressed(MouseEvent event)
      {
         // 如果光标不在正方形内添加一个新的正方形
         current = find(event.getPoint());
         if (current == null) add(event.getPoint());
      }
//鼠标按键在组件上单击(按下并释放)时调用。
      public void mouseClicked(MouseEvent event)
      {
         // 如果双击,删除当前正方形
         current = find(event.getPoint());
         if (current != null && event.getClickCount() >= 2) remove(current);
      }
   }

   private class MouseMotionHandler implements MouseMotionListener
   {
      public void mouseMoved(MouseEvent event)
      {
         // 如果光标在内部,请将其设置为十字准线
         //一个矩形

         if (find(event.getPoint()) == null) setCursor(Cursor.getDefaultCursor());
         else setCursor(Cursor.getPredefinedCursor(Cursor.CROSSHAIR_CURSOR));
      }

      public void mouseDragged(MouseEvent event)
      {
         if (current != null)
         {
            int x = event.getX();
            int y = event.getY();

            // 拖住当前矩形,使其居中于 (x, y)
            current.setFrame(x - SIDELENGTH / 2, y - SIDELENGTH / 2, SIDELENGTH, SIDELENGTH);
            repaint();
         }
      }
   }
}
package mouse;

import javax.swing.*;
//提供一组“轻量级”(全部是 Java 语言)组件,尽量让这些组件在所有平台上的工作方式都相同。

/**
 * 包含用于测试鼠标操作的面板的框架。
 */
public class MouseFrame extends JFrame//继承
{
   public MouseFrame()
   {
      add(new MouseComponent());//将指定组件追加到此容器的尾部
      pack();//调整此窗口的大小,以适合其子组件的首选大小和布局
   }
}
package mouse;

import java.awt.*;
import javax.swing.*;

/**
 * @version 1.34 2015-06-12
 * @author Cay Horstmann
 */
public class MouseTest
{
   public static void main(String[] args)
   {
      EventQueue.invokeLater(() -> {
         JFrame frame = new MouseFrame();
         frame.setTitle("MouseTest");//设件自定义的鼠标按钮组建
         frame.setDefaultCloseOperation(JFrame.EXIT_ON_CLOSE);
         frame.setVisible(true);
      });
   }
}
运行结果如下:

鼠标事件处理技术:
(a)鼠标事件 – MouseEvent
(b)鼠标监听器接口 – MouseListener – MouseMotionListener
(c) 鼠标监听器适配器 – MouseAdapter – MouseMotionAdapter
(d)用户点击鼠标按钮时,会调用三个监听器方法:
1.鼠标第一次被按下时调用mousePressed方法;
2.鼠标被释放时调用mouseReleased方法;
3.两个动作完成之后,调用mouseClicked方法。
(e)鼠标在组件上移动时,会调用mouseMoved方法。
(f)鼠标事件返回值:鼠标事件的类型是MouseEvent,当发生鼠标事件时:MouseEvent类自动创建一个事件对象,以及事件发生位置的x和y坐标,作为事件返回值。
(g)监听鼠标点击事件,实现MouseListener接口.
实验2:结对编程练习包含以下4部分:(20分)
1) 程序设计思路简述;
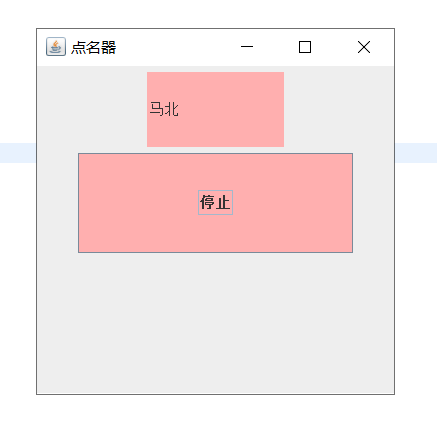
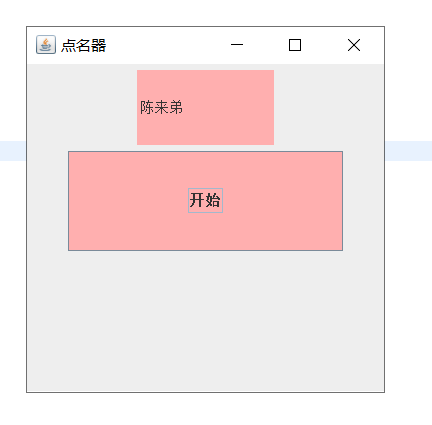
定义数组,用txt文件存储学生姓名,文件读取到数组,用ActionListener接口实现按钮控制,并且监听器要定义一个actionPerformed方法,该方法接收ActionEvent对象参数,按钮产生一个动作事件,动作用getText和setText方法调用,用户点击按钮,当为“开始”时,timer调用 start() 方法,为“停止”时,timer调用stop()方法,还有一些颜色设置。随机抽取一个学生姓名,最后把姓名显示到GUI界面上。
2) 符合编程规范的程序代码;
package dianming;


import java.awt.Color;
import java.awt.Dimension;
import java.awt.FlowLayout;
import java.awt.Label;
import java.awt.event.ActionEvent;
import java.awt.event.ActionListener;
import java.io.BufferedReader;
import java.io.File;
import java.io.FileInputStream;
import java.io.IOException;
import java.io.InputStreamReader;
import java.util.ArrayList;

import javax.swing.JButton;
import javax.swing.JFrame;
import javax.swing.Timer;

public class Rollcall
{
    public static void main(String args[])
    {
        try {
            Dmq dmq = new Dmq();
            dmq.lab.setText("随机点名器");
            dmq.setTitle("点名器");
        } catch (IOException e)
        {
            // TODO Auto-generated catch block
            e.printStackTrace();
        }
    }
}

class Dmq extends JFrame
{
    final Label lab = new Label();
    ArrayList<String> namelist = new ArrayList<String>();

    public Dmq() throws IOException
    {
        File file = new File("src/2019studentlist.txt");
        FileInputStream fis = new FileInputStream(file);
        InputStreamReader isr = new InputStreamReader(fis, "GBK");
        BufferedReader br = new BufferedReader(isr);
        String line = "";
        while ((line = br.readLine()) != null)
        {
            if (line.lastIndexOf("---") < 0)
            {
                namelist.add(line);
            }
        }
        setBounds(550, 300, 200, 100);
        final Timer timer = new Timer(50, new ActionListener()
        {
            public void actionPerformed(ActionEvent e)
            {
                lab.setText(namelist.get((int) (Math.random() * namelist.size())));
            }
        });

        JButton jbutton = new JButton("开始");
        jbutton.setPreferredSize(new Dimension(220,80));
        lab.setPreferredSize(new Dimension(110,60));
        jbutton.addActionListener(new ActionListener()
        {
            public void actionPerformed(ActionEvent e)
            {
                JButton jbutton = (JButton) e.getSource();
                if (jbutton.getText().equals("开始"))
                {
                    jbutton.setText("停止");
                    timer.start();


                } else if (jbutton.getText().equals("停止"))
                {
                    jbutton.setText("开始");
                    timer.stop();

                }

            }
        });
        jbutton.setBounds(30,30,300,100);
        jbutton.setBackground(Color.pink);
        lab.setBackground(Color.pink);
        this.setLayout(new FlowLayout());
        this.add(lab);
        this.add(jbutton);
        this.setSize(300,300);
        this.setVisible(true);
        this.setDefaultCloseOperation(EXIT_ON_CLOSE);
        br.close();
    }

}
3) 程序运行功能界面截图;

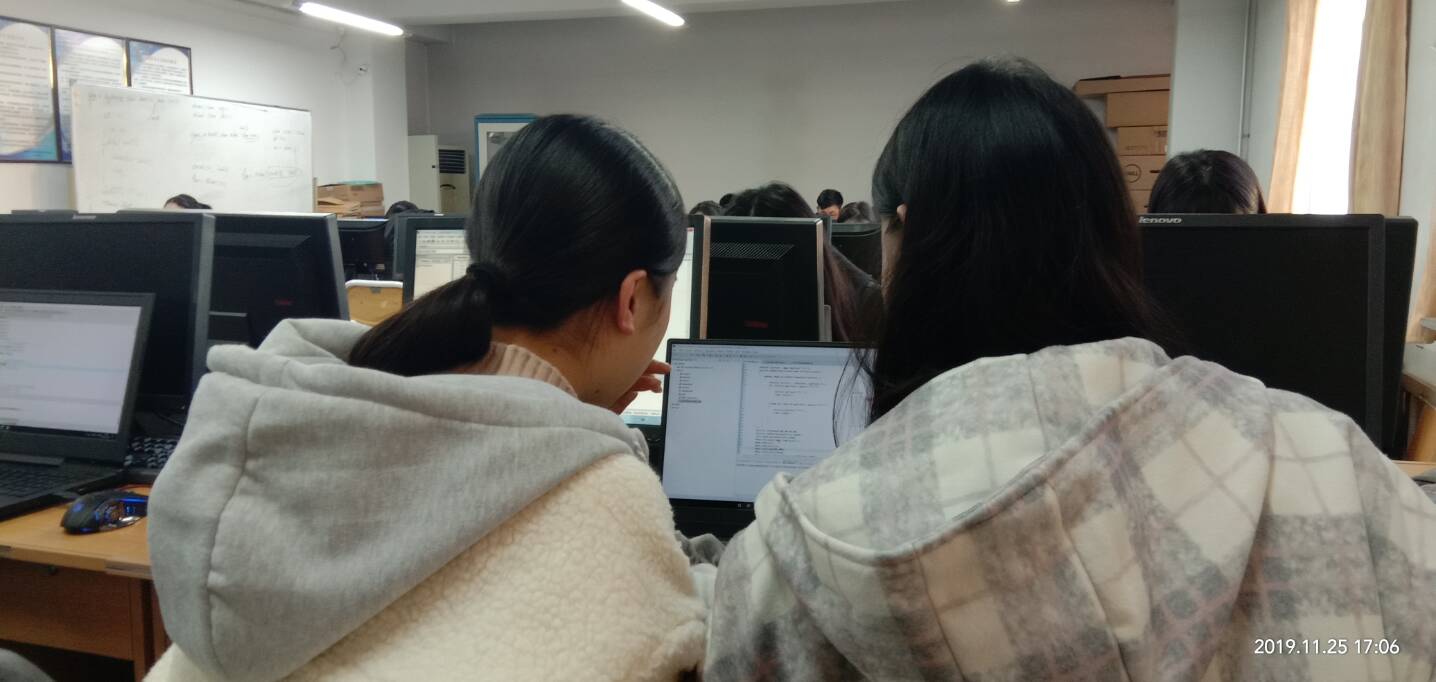
4) 结对过程描述,提供两人在讨论、细化和编程时的结对照片(非摆拍)。
实验总结:(20分)
通过本周的学习,我掌握了事件处理的基本原理,理解了用途;并了解学习了以下几点。AWT事件模型的工作机制;事件处理的基本编程模型;了解了GUI界面组件观感设置方法;WindowAdapter类、AbstractAction类的用法;GUI程序中鼠标事件处理技术。通过和合作伙伴结对编程,合作完成点名器的实验,对事件处理机制有了更深的体会。但是这个实验还是借助了外力才得以完成,有一些地方还是不懂,课后再加深了解一下。