关于Vue
https://cn.vuejs.org/
Idea的JavaScript版本设置在ECMAScript6以上
尤雨溪开发
一套用于构建用户界面的渐进式框架
核心库只关心视图层
Soc关注点分离原则
便于整合第三方库
网络通信:axios(前端通信框架ajax)
页面跳转:vue-router
状态管理:vuex
vue-UI:ICE,ElementUI……
特点
vm:数据双向绑定(相当于后端的controller)
虚拟dom:利用内存
计算属性:vue特色
综合了:mvvm(angular)+dom(react)
数据驱动,组件化
dom监听,数据绑定
第一个Vue程序
Idea安装vue插件
https://www.cnblogs.com/rain2020/p/12709370.html
vue-first
https://github.com/ChenCurry/vue-first.git
(判断,循环,事件,双向绑定,组件,Axios通信,计算属性,插槽slot,自定义事件内容分发)
常用属性
v-on绑定事件,简写 @
v-model数据双向绑定
v-bind给组件绑定参数,简写 :
组件内部绑定事件
this.$emit("事件名",参数);
第一个Vue-cli程序
安装nodejs
http://nodejs.cn/download/
(vue是基于nodejs)
node -v
npm -v
安装npm淘宝镜像加速器
npm install cnpm -g
该目录下会多出一些文件
C:UsersasusAppDataRoaming pm ode_modules
安装vue-cli
cnpm install vue-cli -g
vue list
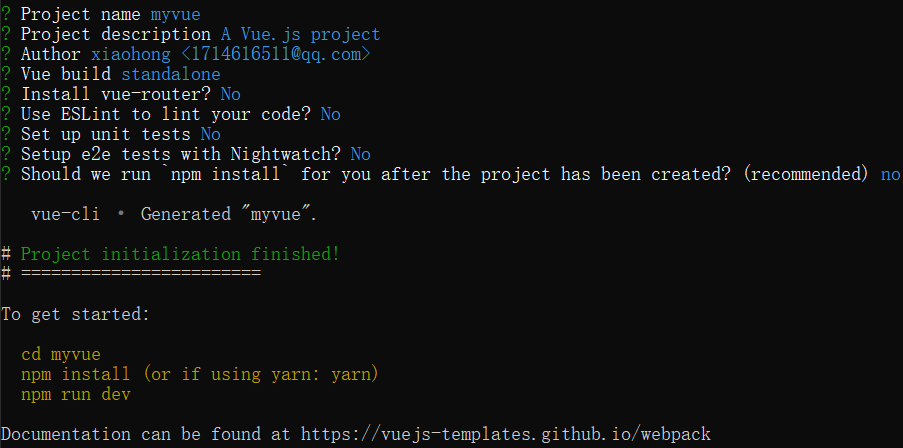
创建vue程序
cd D:cangku
vue init webpack myvue
# 后话:在idea中新建module-->js-->vue
安装依赖环境
cd myvue
npm install
npm audit fix

启动项目
npm run dev
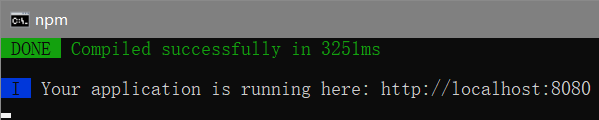
访问
http://localhost:8080/
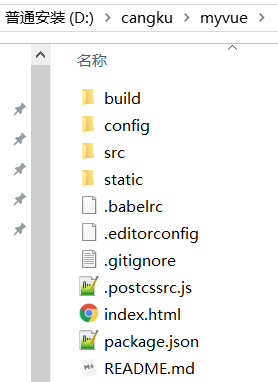
用Idea打开myvue

开启管理员权限

(后话:这样修改了不能破解了,完了该课学习换回去)
Webpack
Webpack是一个前端资源加载/打包工具。
安装(打包工具和客户端)
npm install webpack -g
npm install webpack-cli -g
测试安装成功
webpack -v
webpack-cli -v
新建文件夹webpack-study并用Idea打开
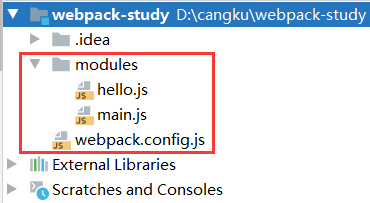
hello.js
//暴露一个方法
exports.sayHi = function () {
    document.write("<h1>测试webpack</h1>")
};
exports.sayHi2 = function () {
    document.write("<h1>测试webpack</h1>")
};
exports.sayHi3 = function () {
    document.write("<h1>测试webpack</h1>")
};
main.js
var hello = require("./hello");
hello.sayHi();
webpack.config.js
module.exports = {
    entry: './modules/main.js',
    output: {
        filename: "./js/bundle.js"
    }
};
打包

index.html测试
<!DOCTYPE html>
<html lang="en">
<head>
    <meta charset="UTF-8">
    <title>Title</title>
</head>
<body>
<script src="dist/js/bundle.js"></script>
</body>
</html>
Vue Router
(myvue工程中)
为当前项目安装
npm install vue-router --save-dev
npm audit fix
便可在main.js中导入并显示声明使用
import Vue from 'vue'
import App from './App'
import VueRouter from 'vue-router'
import router from './router'//自动扫描路由配置

Vue.config.productionTip = false

//显示声明使用vuerouter
Vue.use(VueRouter);

new Vue({
  el: '#app',
  //配置路由
  router,
  components: { App },
  template: '<App/>'
})
使用路由(相当于路由的配置文件)
import Vue from 'vue';
import VueRouter from "vue-router";
import Content from "../components/Content";
import Main from "../components/Main";

//安装路由
Vue.use(VueRouter);

//配置导出路由
export default new VueRouter({
  routes: [
    {
      //路由路径
      path: '/content',
      name: 'content',
      //跳转的组件
      component: Content
    },
    {
      //路由路径
      path: '/main',
      name: 'main',
      //跳转的组件
      component: Main
    }
  ]
})
App.vue
<template>
  <div id="app">
    <h1>xio xi</h1>
    <router-link to="/main">首页</router-link>
    <router-link to="/content">内容页</router-link>
    <router-view></router-view>
  </div>
</template>

<script>

export default {
  name: 'App',
}
</script>

<style>
#app {
  font-family: 'Avenir', Helvetica, Arial, sans-serif;
  -webkit-font-smoothing: antialiased;
  -moz-osx-font-smoothing: grayscale;
  text-align: center;
  color: #2c3e50;
  margin-top: 60px;
}
</style>
部分代码略,见源码
https://github.com/ChenCurry/myvue.git
启动
npm run dev
Vue+ElementUI
创建项目hello-vue
命令提示符(管理员):
cd D:cangku
# 创建项目hello-vue
vue init webpack hello-vue
# 安装vue-router
cd hello-vue
npm install vue-router --save-dev
# 安装element-ui
npm i element-ui -S
# 安装依赖
npm install
npm audit fix
# 安装SASS加速器
cnpm install sass-loader node-sass --save-dev
# 启动测试
npm run dev
用Idea打开项目
assets:用于存放资源文件
components:用于存放 Vue 功能组件
views:用于存放 Vue 视图组件
router:用于存放 vue-router 配置
报错修改版本(先直接试试下面的步骤)
"sass-loader": "^10.0.1",改为"sass-loader": "^7.3.1",
重新安装/启动
cnpm install
cnpm run dev
访问
http://localhost:8080/login
源码
https://github.com/ChenCurry/hello-vue.git
推荐
https://docsify.js.org/#/
嵌套路由
http://localhost:8080/main
组件+子路由+router-link+显示到router-view
404及路由钩子
https://github.com/ChenCurry/hello-vue.git
cnpm install axios -s