1.项目技术选型
小程序的第三方开发框架,例如
- 腾讯的wepy :语法类似vue
- 美团mpvue:语法类似vue
- 京东taro:语法类似react
- 滴滴chameleon:语法类似vue
- uniapp:语法类似vue
- 原生框架:MINA
考虑到原生的版本迭代较快,我们先用原生框架
2.黑马优购小程序搭建步骤
- 新建小程序项目
- 搭建目录结构
(1)styles 存放公告样式
(2)components 存放组件
(3)lib 存放第三方库
(4)utils 自己的帮助库
(5)request 自己的接口帮助库
至此配置如下:
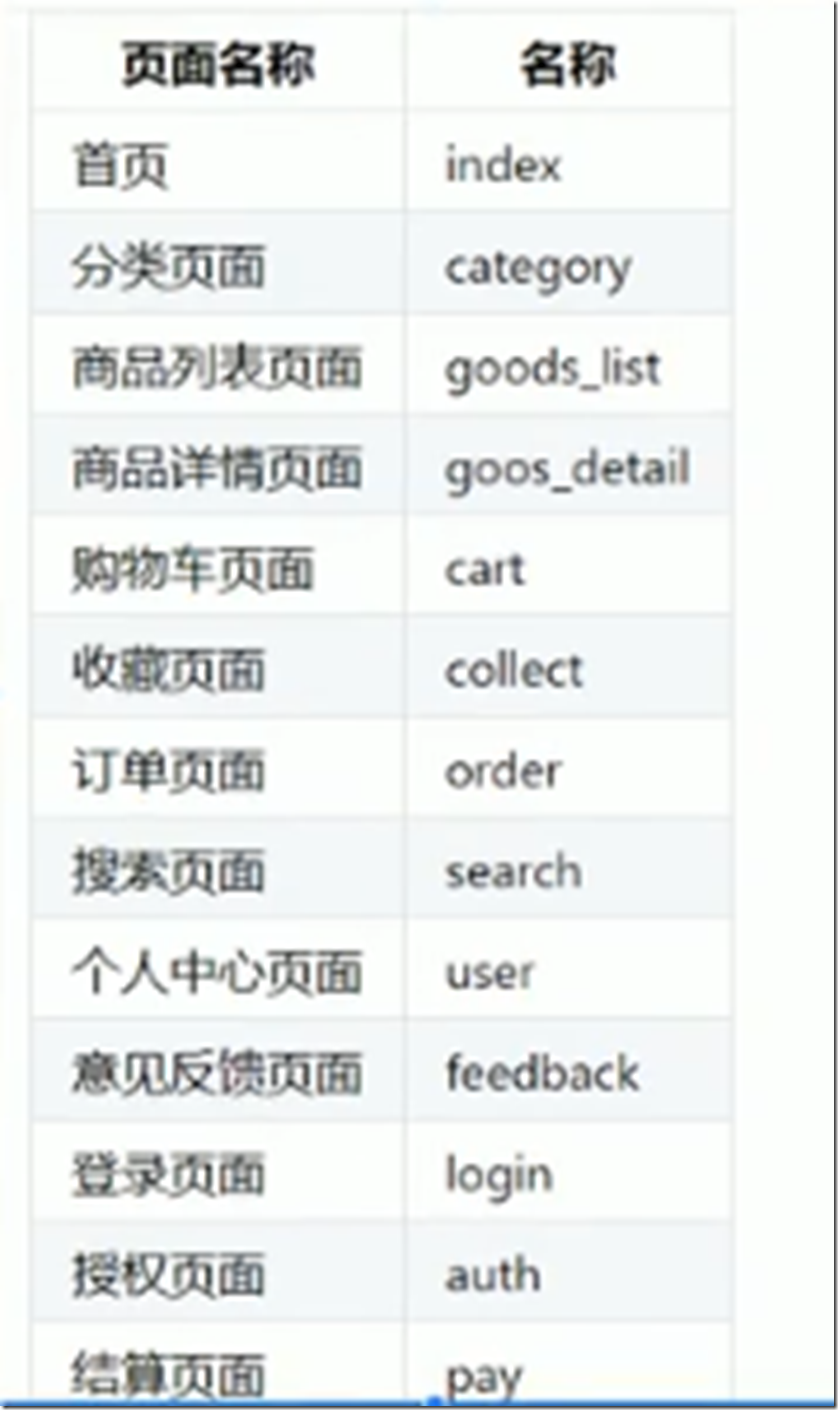
- 搭建项目的页面

- 引入字体图标
引入阿里图标库 ,在styles中创建iconfont.wxss文件,放入下面链接内容
//at.alicdn.com/t/font_2180986_xu7t62w171i.css
引入后,在app.wxss中引入,这样这个css就可以全局使用
/**app.wxss**/
@import "./styles/iconfont.wxss";
- 搭建项目tabbar结构
2.1 搭建项目的tabbar结构
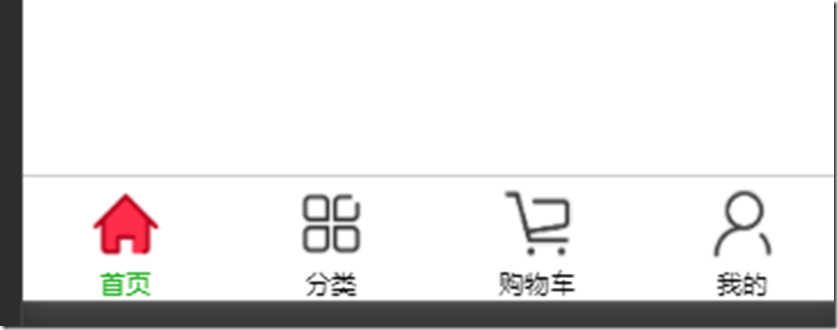
项目tabbar结构就是优购下面的首页、分类、购物车、我的这些图标在app.json文件中,和windows同层级
"tabBar": {
"list": [{
"pagePath": "pages/index/index",
"text": "首页",
"iconPath": "icons/home.png",
"selectedIconPath": "icons/home-o.png"
},
{
"pagePath": "pages/category/index",
"text": "分类",
"iconPath": "icons/category.png",
"selectedIconPath": "icons/category-o.png"
},
{
"pagePath": "pages/cart/index",
"text": "购物车",
"iconPath": "icons/cart.png",
"selectedIconPath": "icons/cart-o.png"
},
{
"pagePath": "pages/user/index",
"text": "我的",
"iconPath": "icons/my.png",
"selectedIconPath": "icons/my-o.png"
}
]
},
定义导航条颜色为红色,app.json中进行
"window":{
"backgroundTextStyle":"light",
"navigationBarBackgroundColor": "#eb4450",
"navigationBarTitleText": "黑马优购",
"navigationBarTextStyle":"black"
},
下面实现以下功能
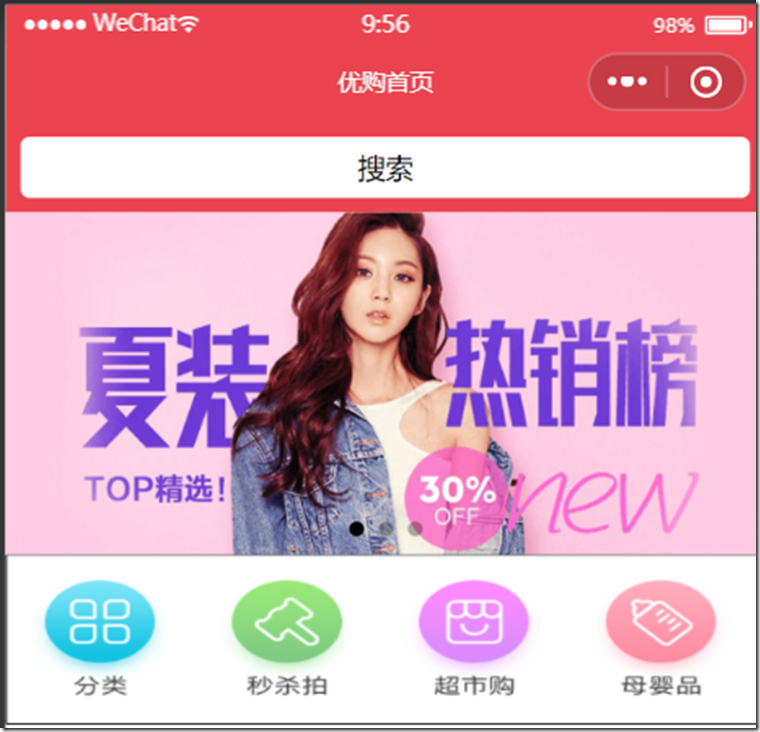
第一个自定义组件,类似于搜索框,很多页面都用,所以我们将它自定义组件,而且点击它会自动变换,实际上是一个导航链接。
自定义组件文件夹中
<!--components/SearchInput/SearchInput.wxml-->
<view class="SearchInput">
<view class="back">
<!-- open-type="navigate"表示跳转的是非tabbar页面 -->
<navigator url="/pages/search/index" open-type="navigate">搜索</navigator>
</view>
</view>
/* components/SearchInput/SearchInput.wxss */
.back{
background-color: white;
100%;
height: 100%;
display: flex;
align-items: center;
justify-content: center;
border-radius: 10rpx;
}
.SearchInput{
height:90rpx;
padding: 15rpx;
background-color:var(--themeColor);
/* border: 1rpx solid black; */
display: flex;
justify-content: center;
align-items: center;
}
index文件夹中:
<!--index.wxml-->
<view class="pyg_index">
<!-- 搜索框 开始 -->
<SearchInput>开始</SearchInput>
<!-- 搜索框 结束 -->
</view>
{
"usingComponents": {
"SearchInput":"../../components/SearchInput/SearchInput"
},
"navigationBarTitleText": "优购首页"
}
2.2.获取轮播图数据
获取轮播图数据分为:
- 1获取轮播图的接口数据
- 2是接口数据与轮播图标签结合
<!--index.wxml-->
<view class="pyg_index">
<!-- 搜索框 开始 -->
<SearchInput>开始</SearchInput>
<!-- 搜索框 结束 -->
<!-- 轮播图开始 -->
<view class="index_swiper">
<!-- 1.swiper标签默认宽度高度是100%*150px
2.image标签页存在默认宽度和高度 320px*240px
3.我们需要设计下轮播图的宽高 原图是 750*340
我们需要设置图片的高度自适应,而宽度等于100%
我们需要设置swiper标签高度和图片的高度一样
图片标签z自带mode属性,渲染模式
widthfix:让图片的标签宽高与内容(也就是真正图片)宽高等比例发生变化
-->
<swiper autoplay="true" indicator-dots circular>
<swiper-item wx:for="{{swiperList}}" wx:key="goods_id">
<navigation-bar>
<image src="{{item.image_src}}"mode="widthfix"></image>
</navigation-bar>
</swiper-item>
</swiper>
</view>
<!-- 轮播图结束 -->
</view>
//index.js
// 0 引入用来发送请求的方法
import {request} from "../../request/index.js";
//获取应用实例
Page({
/**
* 页面的初始数据
*/
data: {
// 轮播图数组
swiperList:[]
},
/**
* 生命周期函数--监听页面加载
*/
onLoad: function (options) {
// // 1.发送数据获取请求
// wx.request({
// url: 'https://api-hmugo-web.itheima.net/api/public/v1/home/swiperdata',
// success: (result) => {
// this.setData({
// swiperList:result.data.message
// })
// },
// })
request({url:"https://api-hmugo-web.itheima.net/api/public/v1/home/swiperdata"})
.then(result=>{
this.setData({
swiperList:result.data.message
})
})
},
2.3.获取导航模块数据
获取轮播图数据分为:
- 1获取导航的接口数据
- 2是接口数据与导航图标签结合(也就是渲染)
//index.js
// 0 引入用来发送请求的方法
import {request} from "../../request/index.js";
//获取应用实例
Page({
/**
* 页面的初始数据
*/
data: {
// 轮播图数组
swiperList:[],
//导航数组
cateList:[]
},
/**
* 生命周期函数--监听页面加载
*/
onLoad: function (options) {
// // 1.发送数据获取请求
// wx.request({
// url: 'https://api-hmugo-web.itheima.net/api/public/v1/home/swiperdata',
// success: (result) => {
// this.setData({
// swiperList:result.data.message
// })
// },
// })
// request({url:"https://api-hmugo-web.itheima.net/api/public/v1/home/swiperdata"})
// .then(result=>{
// this.setData({
// swiperList:result.data.message
// })
// })
this.getSwiperList();
this.getCateList();
},
// 获取轮播图数据
getSwiperList(){
request({url:"https://api-hmugo-web.itheima.net/api/public/v1/home/swiperdata"})
.then(result=>{
this.setData({
swiperList:result.data.message
})
})
},
//获取导航数据
getCateList(){
request({url:"https://api-hmugo-web.itheima.net/api/public/v1/home/catitems"})
.then(result=>{
this.setData({
cateList:result.data.message
})
})
},
<!-- 导航开始 -->
<view class="index_cate">
<navigator wx:for="{{cateList}}"
wx:key="name">
<image mode="widthFix" src="{{item.image_src}}"></image>
</navigator>
</view>
<!-- 导航结束 -->
.index_cate{
display: flex;
border: solid 1rpx black;
}
.index_cate navigator image{
185rpx;
padding: 20rpx;
}
/**index.wxss**/
.index_swiper{
swiper{
750rpx;
height: 340rpx;
image{
100%;
// 高height不用管 因为image的mode设置为widthFix
}
}
}
.index_cate{
display: flex;
navigator{
padding: 20rpx;
flex:1;/*让所有弹性盒模型对象的子元素都有相同的长度,忽略它们内部的内容*/
image{
100%;
}
}
}
.index_floor{
.floor_group{
.floor_title{
padding: 10rpx;
image{
border:1rpx solid black;
100%;
}
}
.floor_list{
overflow: hidden;
navigator{
float: left;
33.33%;
/*后四个超链接*/
&:nth-last-child(-n+4){
/*原图的宽高232*386 232/386=33.33vw/height height: 33.33vw*386/232;*/
height: 33.33vw*386/232/2;
/*左边框白底*/
border-left: 10rpx solid white;
}
&:nth-child(2),&:nth-child(3){
border-bottom: 10rpx solid white;
}
image{
100%;
height: 100%;
}
}
}
}
}
<!--index.wxml-->
<view class="pyg_index">
<!-- 搜索框 开始 -->
<SearchInput>开始</SearchInput>
<!-- 搜索框 结束 -->
<!-- 轮播图开始 -->
<!-- 1.swiper标签默认宽度高度是100%*150px
2.image标签页存在默认宽度和高度 320px*240px
3.我们需要设计下轮播图的宽高 原图是 750*340
我们需要设置图片的高度自适应widthFix,而宽度等于100%
我们需要设置swiper标签高度和图片的高度一样
图片标签z自带mode属性,渲染模式
widthfix:让图片的标签宽高与内容(也就是真正图片)宽高等比例发生变化
-->
<view class="index_swiper">
<swiper autoplay="true" indicator-dots circular>
<swiper-item wx:for="{{swiperList}}" wx:key="goods_id">
<navigation-bar>
<image src="{{item.image_src}}"mode="widthFix"></image>
</navigation-bar>
</swiper-item>
</swiper>
</view>
<!-- 轮播图结束 -->
<!-- 导航开始 -->
<view class="index_cate">
<navigator wx:for="{{cateList}}" wx:key="name">
<image mode="widthFix" src="{{item.image_src}}"></image>
</navigator>
</view>
<!-- 导航结束 -->
<!-- 楼层开始 -->
<view class="index_floor">
<view class="floor_group" wx:for="{{floorList}}" wx:for-item="item1" wx:for-index="index1" wx:key="floor_title" >
<!-- 标题 -->
<view class="floor_titile">
<image mode="widthFix"src="{{item1.floor_title.image_src}}"></image>
</view>
<!-- 内容 -->
<view class="floor_list">
<navigator wx:for="{{item1.product_list}}" wx:for-item="item2" wx:for-index="index2" wx:key="name">
<image mode="{{index2===0?'widthFix':'scaleToFill'}}" src="{{item2.image_src}}"></image>
</navigator>
</view>
</view>
</view>
<!-- 楼层结束 -->
</view>


