------ubuntu server 12----------


1、安装bind9
sudo apt-get -y install bind9 bind9utils
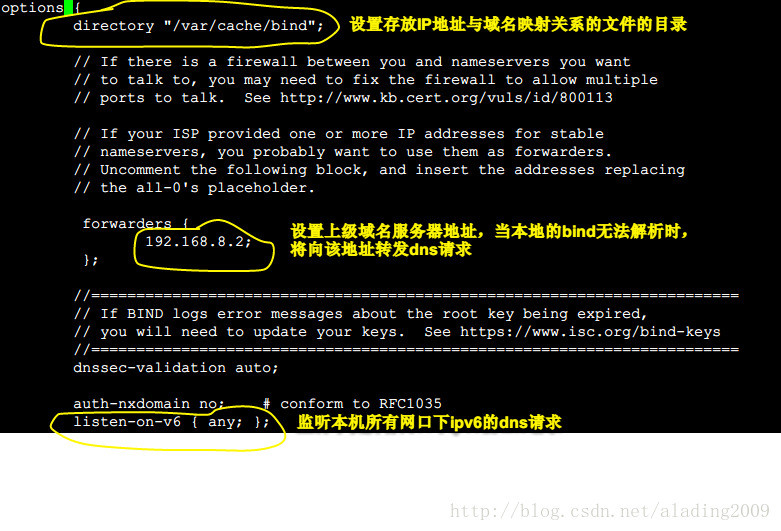
2、配置 /etc/bind/name.conf.options
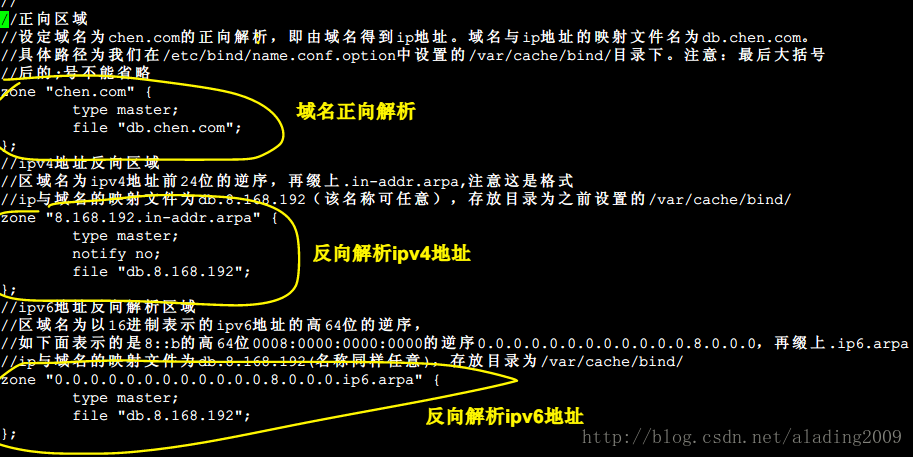
3、配置 /etc/bind/name.conf.local,设置解析的域和映射文件位置
4、在指定目录/var/cache/bind/下创建映射文件,直接把/etc/bind/db.local复制过来进行修改
cp /etc/bind/db.local /var/cache/bind/db.chen.com
cp /etc/bind/db.local /var/cache/bind/db.8.168.192
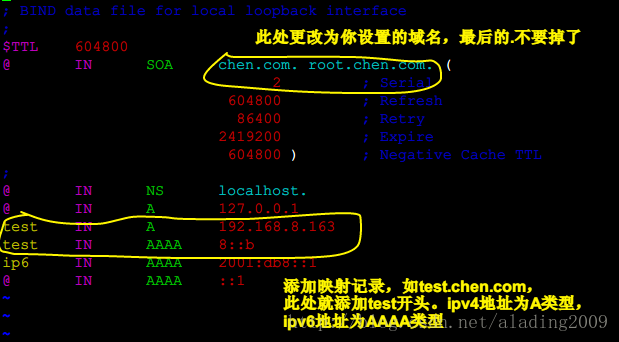
5、配置正向映射文件 db.chen.com
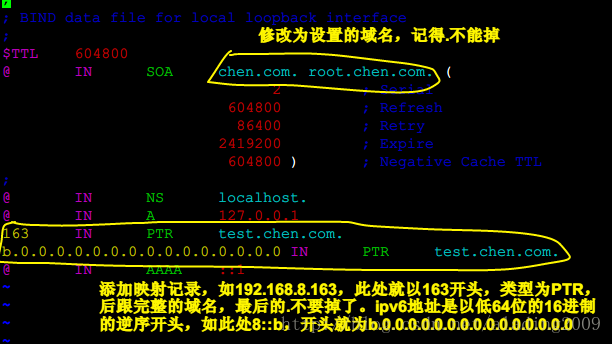
6、配置反向映射文件 db.8.168.192
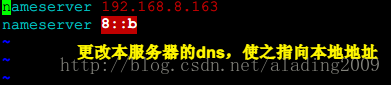
7、修改 /etc/resolv.conf,指定dns服务器
8、重启bind,使配置生效
9、正向解析测试
10、反向解析测试
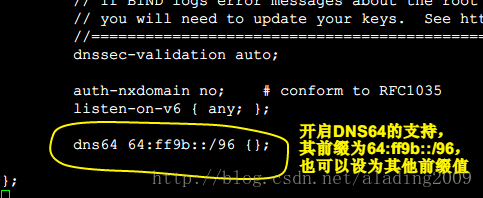
11、添加DNS64支持,修改/etc/bind/named.conf.options
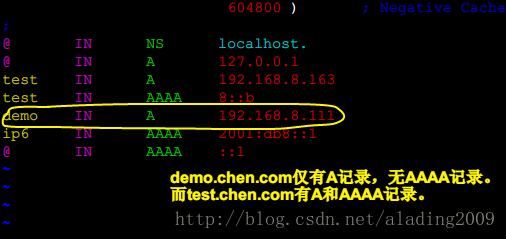
12、在 /var/cache/bind/db.chen.com中添加一条正向解析的A记录
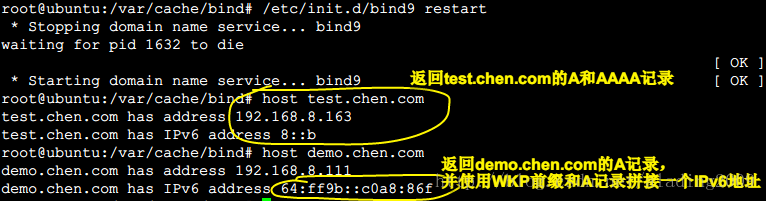
13、重启bind服务,并测试DNS64功能
14、参考链接
http://www.centoscn.com/CentosServer/dns/2014/0316/2576.html
http://www.doc88.com/p-6751655480165.html
http://jingyan.baidu.com/article/414eccf60226f16b431f0ad3.html
http://blogread.cn/it/article/6799
-------CentOS上有些不同-----------
1、安装
sudo yum -y install bind bind-utils
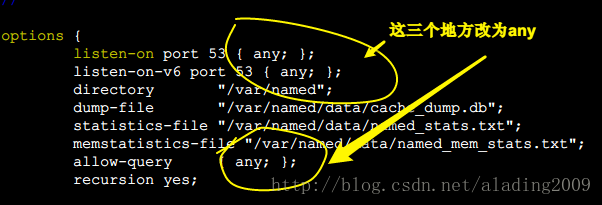
2、配置/etc/named.conf
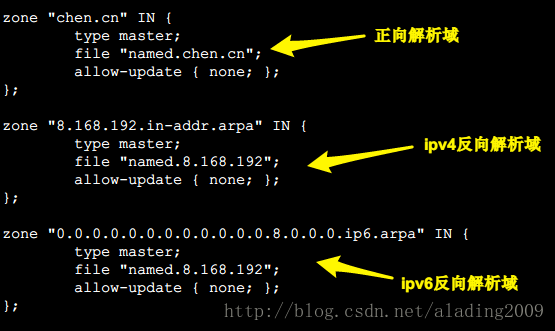
3、配置/etc/named.rfc1912.zones,添加域名与ip的映射文件
3、创建正向和反向解析文件
cp /var/named/named.loopback /var/named/named.chen.cn
cp /var/named/named.loopback /var/named/named.8.168.192
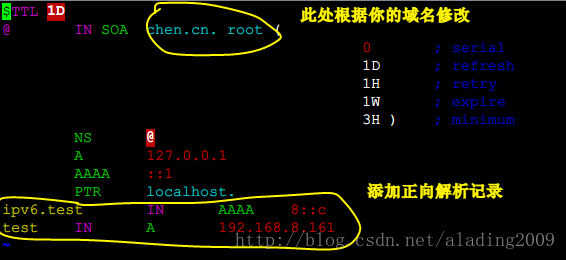
4、配置正向解析文件named.chen.cn
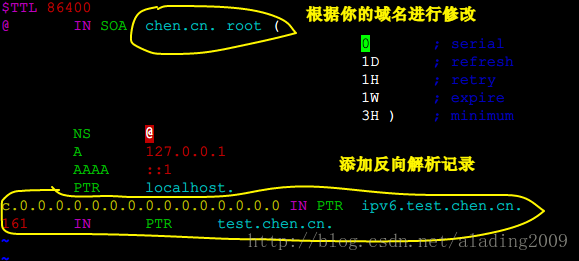
5、配置反向解析文件named.8.168.192
6、重启bind服务
service named restart
7、修改dns服务器设置,指向本机地址
vim /etc/resolv.conf
8、关闭iptables和ip6tables防火墙
service iptables stop
service ip6tables stop