我们从SpringBoot的run方法入手,主体逻辑步骤为:
1.prepareEnvironment
2.createApplicationContext
3.prepareContext
4.refreshContext
5.afterRefresh
prepareEnvironment
org.springframework.boot.SpringApplication#run(java.lang.String...) =》org.springframework.boot.SpringApplication#prepareEnvironment =》org.springframework.boot.SpringApplicationRunListeners#environmentPrepared =》org.springframework.boot.context.event.EventPublishingRunListener#environmentPrepared
在这里通过org.springframework.context.event.SimpleApplicationEventMulticaster广播ApplicationEnvironmentPreparedEvent事件。
那么,事件的监听者有哪些?通过代码走读发现,事件的监听者在EventPublishingRunListener构造方法中通过SpringApplication.getListeners()获取。那么,SpringApplication的监听者又是哪来的?
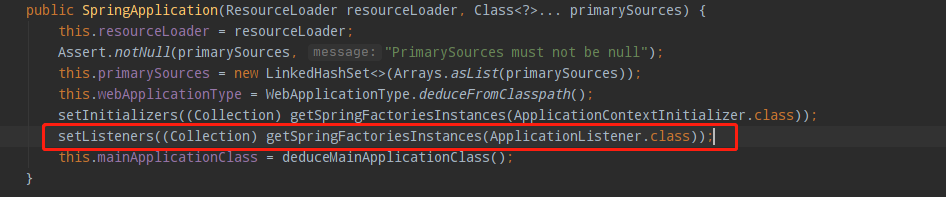
同样,走读代码如下,通过springfactories机制加载org.springframework.context.ApplicationListener实现:
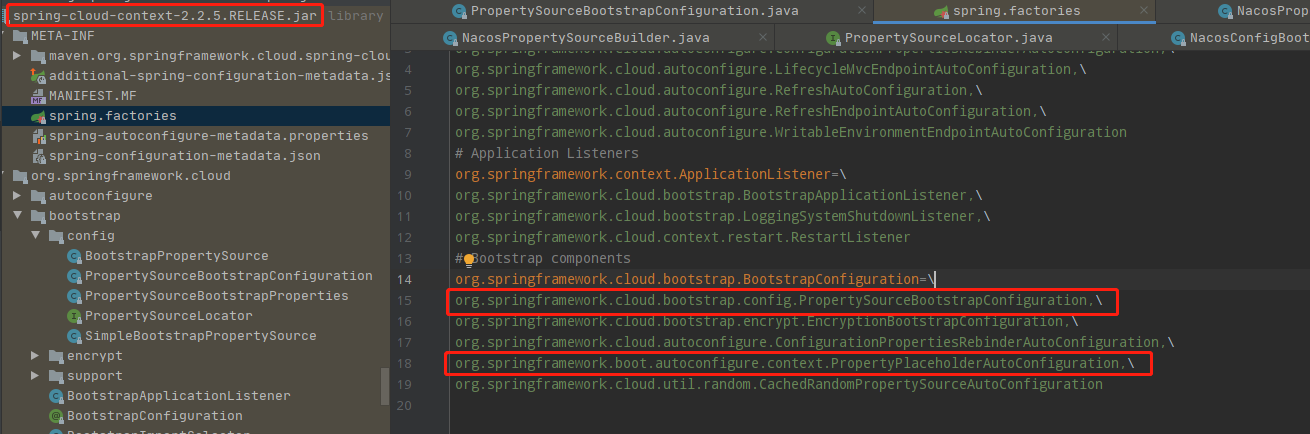
这其中就有一个Spring Cloud扩展的实现:

这个listener监听的正是上文提到的环境准备事件ApplicationEnvironmentPreparedEvent:

org.springframework.cloud.bootstrap.BootstrapApplicationListener#onApplicationEvent主要通过构建临时ApplicationContext,利用Spring自带的IOC能力,查找以SpringFactories方式扩展org.springframework.cloud.bootstrap.BootstrapConfiguration注解的class,BootstrapApplicationListener主要目的是查找ApplicationContextInitializer并加入到SpringApplication的initializers列表中,用于监听后续正式Context事件。
代码调用路径:org.springframework.cloud.bootstrap.BootstrapApplicationListener#onApplicationEvent =》 org.springframework.cloud.bootstrap.BootstrapApplicationListener#bootstrapServiceContext
这里通过SpringApplicationBuilder构建临时Context,build的source为org.springframework.cloud.bootstrap.BootstrapImportSelectorConfiguration


这里通过org.springframework.cloud.bootstrap.BootstrapImportSelector加载返回字符串对应的class实例到IOC容器。至于@Import注解的分析见另外一篇博文。
@Override
    public String[] selectImports(AnnotationMetadata annotationMetadata) {
        ClassLoader classLoader = Thread.currentThread().getContextClassLoader();
        // Use names and ensure unique to protect against duplicates
        // 获取通过SpringFactories方式以org.springframework.cloud.bootstrap.BootstrapConfiguration为key扩展的所有class类名
        List<String> names = new ArrayList<>(SpringFactoriesLoader
                .loadFactoryNames(BootstrapConfiguration.class, classLoader));
        // 这里有个扩展点,可以通过spring.cloud.bootstrap.sources加载Bootstrap相关bean
        names.addAll(Arrays.asList(StringUtils.commaDelimitedListToStringArray(
                this.environment.getProperty("spring.cloud.bootstrap.sources", ""))));

        List<OrderedAnnotatedElement> elements = new ArrayList<>();
        for (String name : names) {
            try {
                elements.add(
                        new OrderedAnnotatedElement(this.metadataReaderFactory, name));
            }
            catch (IOException e) {
                continue;
            }
        }
        AnnotationAwareOrderComparator.sort(elements);

        String[] classNames = elements.stream().map(e -> e.name).toArray(String[]::new);

        return classNames;
    }
这里有个跟本篇主题相关的Spring Cloud扩展BootstrapConfiguration的两个实现:
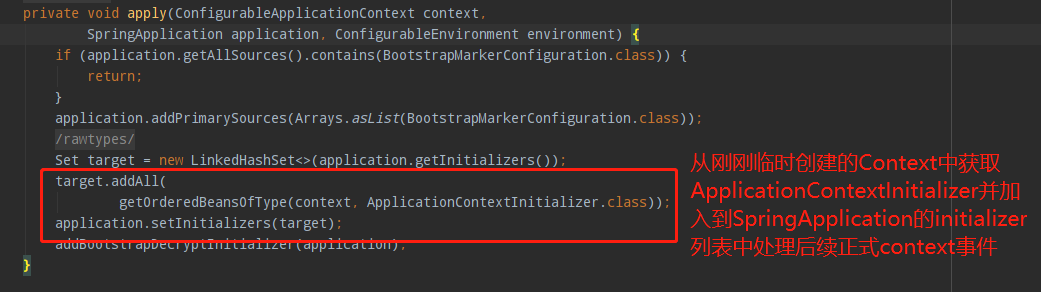
构建完context后回到onApplicationEvent方法,调用org.springframework.cloud.bootstrap.BootstrapApplicationListener#apply。
回到org.springframework.boot.SpringApplication#run(java.lang.String...)方法,
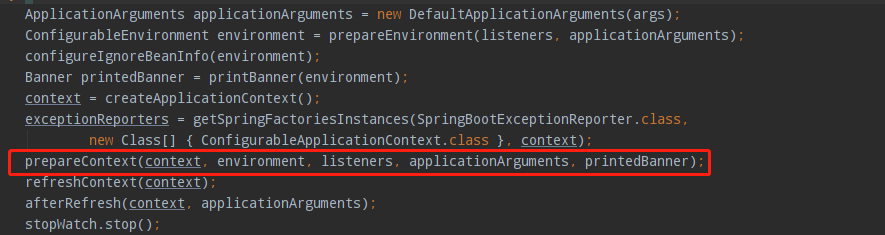
prepareContext
了解spring源码的人应该知道,bean的创建等都是在Context的refresh中。这里再refresh之前做些环境数据的准备工作。
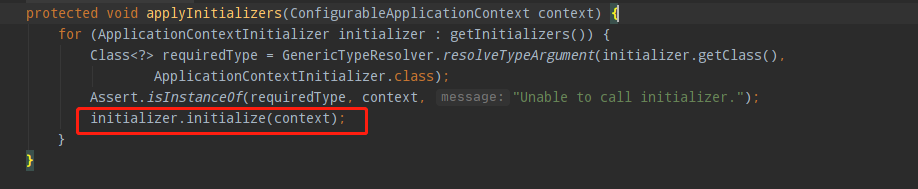
org.springframework.boot.SpringApplication#prepareContext =》org.springframework.boot.SpringApplication#applyInitializers
循环调用所有initializer的initialize方法:
看下上文提到的Spring Cloud扩展org.springframework.cloud.bootstrap.config.PropertySourceBootstrapConfiguration#initialize,重点代码片段如下,通过propertySourceLocators获取PropertySource:

问题来了,propertySourceLocators是哪里来的?还记得PropertySourceBootstrapConfiguration是怎么构建的吗?没错,就是以org.springframework.cloud.bootstrap.BootstrapImportSelectorConfiguration为source,创建临时Context加载生成的bean,这里会加载所有以org.springframework.cloud.bootstrap.BootstrapConfiguration为key的bean,我们的主角登场了,Spring Cloud Alibaba Nacos Config扩展了Spring Cloud的这个点:
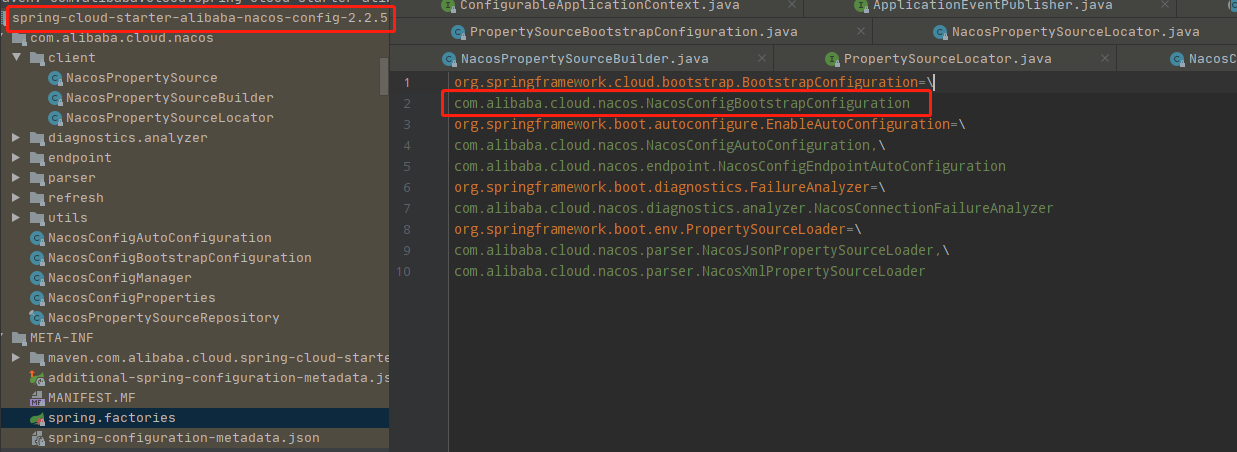
com.alibaba.cloud.nacos.NacosConfigBootstrapConfiguration自动创建了NacosPropertySourceLocator:

最终会调用com.alibaba.cloud.nacos.client.NacosPropertySourceLocator#locate:
@Override
    public PropertySource<?> locate(Environment env) {
        nacosConfigProperties.setEnvironment(env);
        ConfigService configService = nacosConfigManager.getConfigService();

        if (null == configService) {
            log.warn("no instance of config service found, can't load config from nacos");
            return null;
        }
        long timeout = nacosConfigProperties.getTimeout();
        nacosPropertySourceBuilder = new NacosPropertySourceBuilder(configService,
                timeout);
        String name = nacosConfigProperties.getName();
        // 优先使用配置的spring.cloud.nacos.config.prefix
        String dataIdPrefix = nacosConfigProperties.getPrefix();
        // 如果没有配置prefix,尝试使用spring.cloud.nacos.config.name
        if (StringUtils.isEmpty(dataIdPrefix)) {
            dataIdPrefix = name;
        }
        // 还是没有的话,使用spring.application.name
        if (StringUtils.isEmpty(dataIdPrefix)) {
            dataIdPrefix = env.getProperty("spring.application.name");
        }

        CompositePropertySource composite = new CompositePropertySource(
                NACOS_PROPERTY_SOURCE_NAME);
        // 加载共享配置
        loadSharedConfiguration(composite);
        // 加载扩展配置
        loadExtConfiguration(composite);
        // 加载应用配置
        loadApplicationConfiguration(composite, dataIdPrefix, nacosConfigProperties, env);
        return composite;
    }
com.alibaba.cloud.nacos.client.NacosPropertySourceLocator#loadApplicationConfiguration =》 com.alibaba.cloud.nacos.client.NacosPropertySourceLocator#loadNacosDataIfPresent =》com.alibaba.cloud.nacos.client.NacosPropertySourceLocator#loadNacosPropertySource =》com.alibaba.cloud.nacos.client.NacosPropertySourceBuilder#build =》com.alibaba.cloud.nacos.client.NacosPropertySourceBuilder#loadNacosData =》com.alibaba.nacos.client.config.NacosConfigService#getConfig
最终通过nacos client的configService从服务端获取数据并封装成PropertySource返回。