上一篇文章记录了我利用cocoapods创建基于SVN的私有库的全部过程,今天我再记录一下基于git创建的过程。
整体先说明一下创建一个私有的podspec包括如下那么几个步骤:
- 创建并设置一个私有的
Spec Repo。 - 创建
Pod的所需要的项目工程文件,并且有可访问的项目版本控制地址。 - 创建
Pod所对应的podspec文件。 - 本地测试配置好的
podspec文件是否可用。 - 向私有的
Spec Repo中提交podspec。 - 在个人项目中的
Podfile中增加刚刚制作的好的Pod并使用。 - 更新维护
podspec。
在这一系列的步骤中需要创建两个Git仓库,分别是第一步和第二步(第二步不一定非要是Git仓库,只要是可以获取到相关代码文件就可以,也可以是SVN的,也可以说zip包,区别就是在podspec中的source项填写的内容不同),并且第一步只是在初次创建私有podspec时才需要,之后在创建其他的只需要从第二步开始就可以。
创建私有Spec Repo
什么是Spec Repo?他是所有的Pods的一个索引,就是一个容器,所有公开的Pods都在这个里面,他实际是一个Git仓库,remote端在GitHub上,当我们使用Cocoapods后它会被clone到本地的~/.cocoapods/repos目录下,可以进入到这个目录看到master文件夹就是这个官方的Spec Repo了。这个master目录的结构是这个样子的

因此我们需要创建一个类似于master的私有Spec Repo 。同理这个私有创建一个 Spec Repo我们也要有一个远程端。那么我们需要Git仓库,这个仓库你可以创建私有的也可以创建公开的。如果是私有的话,项目中其他同事,你要给他这个Git仓库的权限。
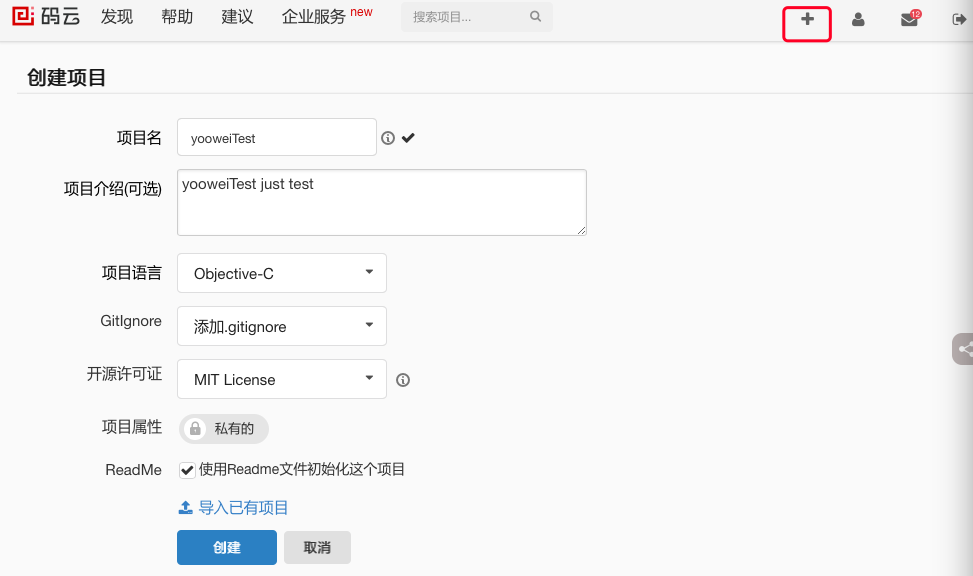
https://git.oschina.net(选择右上角的+号,创建项目)
创建完成之后在Terminal中执行如下命令
命令格式# pod repo add [Private Repo Name] [GitHub HTTPS clone URL]
$ pod repo add yooweiTest https://git.oschina.net/yoowei/yooweiTest
详情
$ defaults write com.apple.finder AppleShowAllFiles -boolean true ; killall Finder
$ pod repo add yoowei https://git.oschina.net/yoowei/yooweiTest
Cloning spec repo `yooweiTest` from `https://git.oschina.net/yoowei/yooweiTest`
Username for 'https://git.oschina.net': yoowei
Password for 'https://yoowei@git.oschina.net':
输入账号码云的账号密码后,进入到~/.cocoapods/repos目录下就可以看到yoowei这个目录了。至此第一步创建私有Spec Repo完成。
PS:如果有其他合作人员共同使用这个私有Spec Repo的话在他有对应Git仓库的权限的前提下执行相同的命令添加这个Spec Repo即可。
检查是否安装成功:
$ cd ~/.cocoapods/repos/yooweiTest
$ pod repo lint .
注意第二个命令后面的 "."不能省。
创建Pod项目工程文件
这个第二步没有什么好介绍的,如果是有现有的组件项目,并且在Git的版本管理下,那么这一步就算完成了,可以直接进行下一步了。如果没有的话,可以使用Cocoapods提供的一个工具将第二步与第三步结合起来做。
现在来说一下这个工具,相关的文档介绍是Using Pod Lib Create 就拿我创建的yooweiTestLibrary为例子具体讲一下这里是如何操作的,先cd到要创建项目的目录然后执行
$ cd /Users/galahad/Desktop/yooweiTesting
$ pod lib create yooweiTestLibrary
Cloning `https://github.com/CocoaPods/pod-template.git` into `yooweiTestLibrary`.
Configuring yooweiTestLibrary template.
! Before you can create a new library we need to setup your git credentials.
What is your name?
> yoowei
! Setting your name in git to yoowei
git config user.name "yoowei"
What is your email?
> yoowei@126.com
! Setting your email in git to yoowei@126.com
git config user.email "yoowei@126.com"
------------------------------
To get you started we need to ask a few questions, this should only take a minute.
2017-01-16 11:19:40.625 defaults[86074:448157]
The domain/default pair of (org.cocoapods.pod-template, HasRunbefore) does not exist
If this is your first time we recommend running through with the guide:
- http://guides.cocoapods.org/making/using-pod-lib-create.html
( hold cmd and double click links to open in a browser. )
Press return to continue.
What language do you want to use?? [ Swift / ObjC ]
> Objc
Would you like to include a demo application with your library? [ Yes / No ]
> Yes
Which testing frameworks will you use? [ Specta / Kiwi / None ]
> Specta
Would you like to do view based testing? [ Yes / No ]
> Yes
What is your class prefix?
> WY
Running pod install on your new library.
Analyzing dependencies
Fetching podspec for `yooweiTestLibrary` from `../`
Downloading dependencies
Installing Expecta (1.0.5)
Installing Expecta+Snapshots (3.0.0)
Installing FBSnapshotTestCase (2.1.4)
Installing Specta (1.0.5)
Installing yooweiTestLibrary (0.1.0)
Generating Pods project
Integrating client project
[!] Please close any current Xcode sessions and use `yooweiTestLibrary.xcworkspace` for this project from now on.
Sending stats
Pod installation complete! There are 5 dependencies from the Podfile and 5 total pods installed.
Ace! you're ready to go!
We will start you off by opening your project in Xcode
open 'yooweiTestLibrary/Example/yooweiTestLibrary.xcworkspace'
To learn more about the template see `https://github.com/CocoaPods/pod-template.git`.
To learn more about creating a new pod, see `http://guides.cocoapods.org/making/making-a-cocoapod`.
项目生成的目录结构及相关介绍如下:
MacBook:yooweiTesting yoowei$ tree -L 3
.
└── yooweiTestLibrary
├── Example
│ ├── Podfile
│ ├── Podfile.lock
│ ├── Pods
│ ├── Tests
│ ├── yooweiTestLibrary
│ ├── yooweiTestLibrary.xcodeproj
│ └── yooweiTestLibrary.xcworkspace
├── LICENSE
├── README.md
├── _Pods.xcodeproj -> Example/Pods/Pods.xcodeproj
├── yooweiTestLibrary
│ ├── Assets //资源文件
│ └── Classes //类文件
└── yooweiTestLibrary.podspec
11 directories, 5 files
接下来就是向yooweiTestLibrary组件文件夹中添加库文件和资源,并配置podspec文件,我测试的时候把一个UIAlertView分类放入yooweiTestLibrary/Classes中,然后进入Example文件夹执行pod update命令,再打开项目工程可以看到,刚刚添加的组件已经在Pods子工程下Development Pods/yooweiTestLibrary中了。之所以是Development Pods/PodTestLibrary中,这是因为我们是在本地测试,而没有把podspec文件添加到Spec Repo中的缘故。
注:这里需要注意的是每当你向yooweiTestLibrary中添加了新的文件或者以后更新了podspec的版本都需要重新执行一遍pod update命令。
通过Cocoapods创建出来的目录本身就在本地的Git管理下,我们需要做的就是给它添加远端仓库,同样去GitHub或其他的Git服务提供商那里创建一个私有的仓库,拿到SSH地址(这一步需要配置 SSH)
使用SSH方式加密连接过程如下(码云的相关方式):
$ ssh-keygen
Generating public/private rsa key pair.
Enter file in which to save the key (/Users/galahad/.ssh/id_rsa): //直接回车,千万不要输入
/Users/galahad/.ssh/id_rsa already exists.
Overwrite (y/n)? y
Enter passphrase (empty for no passphrase): //输入密码,待会会用到
Enter same passphrase again:
Your identification has been saved in /Users/galahad/.ssh/id_rsa.
Your public key has been saved in /Users/galahad/.ssh/id_rsa.pub.
The key fingerprint is:
省略......
The key's randomart image is:
省略......
$ cat ~/.ssh/id_rsa.pub // 查看
省略......拿到以后在开源中国码云上面添加公钥
$ ssh -T git@git.oschina.net //连接(添加成功以后,这里进项连接)
Enter passphrase for key '/Users/galahad/.ssh/id_rsa': //输入刚才的那个密码
Welcome to Git@OSC, yoowei!
一切OK
然后cd到yooweiTestLibrary项目目录
将本地仓库关联到git远程仓库的详细步骤
$ cd /Users/galahad/Desktop/yooweiTesting/yooweiTestLibrary
$ git add .
$ git commit -s -m "Initial Commit of Library"
$ git remote add origin git@git.oschina.net:yoowei/yooweiTestLibrary.git
$ git push -u origin master //报错
Enter passphrase for key '/Users/galahad/.ssh/id_rsa': //输入密码
To git.oschina.net:yoowei/yooweiTestLibrary.git
! [rejected] master -> master (fetch first)
error: failed to push some refs to 'git@git.oschina.net:yoowei/yooweiTestLibrary.git'
hint: Updates were rejected because the remote contains work that you do
hint: not have locally. This is usually caused by another repository pushing
hint: to the same ref. You may want to first integrate the remote changes
hint: (e.g., 'git pull ...') before pushing again.
hint: See the 'Note about fast-forwards' in 'git push --help' for details.
$ git fetch
Enter passphrase for key '/Users/galahad/.ssh/id_rsa':
From git.oschina.net:yoowei/yooweiTestLibrary
* [new branch] master -> origin/master
$ git branch
* master
$ git push --force origin master //直接强推,成功
Enter passphrase for key '/Users/galahad/.ssh/id_rsa':
Counting objects: 324, done.
Delta compression using up to 4 threads.
Compressing objects: 100% (313/313), done.
Writing objects: 100% (324/324), 186.04 KiB | 0 bytes/s, done.
Total 324 (delta 74), reused 0 (delta 0)
remote: Resolving deltas: 100% (74/74), done.
To git.oschina.net:yoowei/yooweiTestLibrary.git
+ 66361fb...e9cc24c master -> master (forced update)
本地仓库添加东西以后,测试
$ git status
$ git add .
$ git commit -m" 初始化"
$ git push
fatal: The current branch master has no upstream branch.
To push the current branch and set the remote as upstream, use
git push --set-upstream origin master
$ git push --set-upstream origin master
Enter passphrase for key '/Users/galahad/.ssh/id_rsa':
Counting objects: 7, done.
Delta compression using up to 4 threads.
Compressing objects: 100% (7/7), done.
Writing objects: 100% (7/7), 17.74 KiB | 0 bytes/s, done.
Total 7 (delta 1), reused 0 (delta 0)
To git.oschina.net:yoowei/yooweiTestLibrary.git
f2bf993..f2d3210 master -> master
Branch master set up to track remote branch master from origin.
本地仓库添加图片后(再次测试就OK了)
$ git status
$ git add .
$ git commit -m"添加图片"
$ git push
Enter passphrase for key '/Users/galahad/.ssh/id_rsa':
Counting objects: 5, done.
Delta compression using up to 4 threads.
Compressing objects: 100% (5/5), done.
Writing objects: 100% (5/5), 6.71 KiB | 0 bytes/s, done.
Total 5 (delta 1), reused 0 (delta 0)
To git.oschina.net:yoowei/yooweiTestLibrary.git
f2d3210..a54adeb master -> master
因为podspec文件中获取Git版本控制的项目还需要tag号,
所以我们要打上一个tag,
$ git tag -m "first release" 0.1.0
推送tags到远程仓库
$ git push --tags
$ git tag
0.1.0
接下来就开始编辑podspec文件了,它是一个Ruby的文件.
也可参考:http://www.cnblogs.com/richard-youth/p/6272932.html
编辑完podspec文件后,需要验证一下这个文件是否可用
$ pod spec lint yooweiTestLibrary.podspec --verbose以前测试的时候遇到过的错误:
1、-> yooweiTestLibrary (0.1.0)
- WARN | summary: The summary is not meaningful.
- WARN | url: There was a problem validating the URL https://github.com/<GITHUB_USERNAME>/yooweiTestLibrary.
- ERROR | [iOS] unknown: Encountered an unknown error ([!] /usr/bin/git clone https://github.com/<GITHUB_USERNAME>/yooweiTestLibrary.git /var/folders/rg/gmjp61bx0x95t4tjx2hh_3sr0000gn/T/d20170119-91250-1w5v7us --template= --single-branch --depth 1 --branch 0.1.0
Cloning into '/var/folders/rg/gmjp61bx0x95t4tjx2hh_3sr0000gn/T/d20170119-91250-1w5v7us'...
fatal: unable to access 'https://github.com/<GITHUB_USERNAME>/yooweiTestLibrary.git/': The requested URL returned error: 400
红色的需要修改。
2、
-> yooweiTestLibrary (0.1.0)
- ERROR | [iOS] file patterns: The `resource_bundles` pattern for `yooweiTestLibrary` did not match any file.
原因是:
s.resource_bundles = {
'yooweiTestLibrary' => ['yooweiTestLibrary/Assets/*.png']
}
找不到任何文件,所以报错,解决方式要么弄几张图片,要么先删掉。
当你看到
yooweiTestLibrary.podspec passed validation.
时,说明验证通过了,不过这只是这个podspec文件是合格的,不一定说明这个yooweiTestLibrary是可以用的,我们需要在本地做一下验证,这就是第四步的内容了,第四步在具体说明。
创建podspec文件
如果从第二步过来,如果已经有了现成的项目,那么就给这个项目创建一个podspec文件。编辑完成之后使用验证命令验证一下。
具体操作参考:http://www.cnblogs.com/richard-youth/p/4704413.html
本地测试podspec文件
我们可以创建一个新的项目,在这个项目的Podfile文件中直接指定刚才创建编辑好的podspec文件,看是否可用。 在Podfile中我们可以这样编辑,有两种方式
其中yooweiTestLibrary.podspec的路径为/Users/galahad/Desktop/yooweiTesting/yooweiTestLibrary/yooweiTestLibrary.podspec
# 指定路径的方式,注意到yooweiTestLibrary.podspec上一层文件夹就可以了
#pod 'yooweiTestLibrary', :path => '~/Desktop/yooweiTesting/yooweiTestLibrary'
# 指定podspec文件(要具体到yooweiTestLibrary.podspec)
pod 'yooweiTestLibrary', :podspec => '~/Desktop/yooweiTesting/yooweiTestLibrary/yooweiTestLibrary.podspec'
然后执行pod install命令安装依赖,打开项目工程,可以看到库文件都被加载到Pods子项目中了。
中间测试过程中遇到部分错误,通过修改.Podspec文件就可以解决。
在项目中编写代码,测试库文件无误后就可以开始下一步了,提交podspec到Spec Repo中。
向Spec Repo提交podspec
向Spec Repo提交podspec需要完成两点一个是podspec必须通过验证无误,再一个就是删掉无用的注释(规范,但不必须)。 向我们的私有Spec Repo提交podspec只需要一个命令
pod repo push [本地Spec Repo名称][podspec文件路径]
$ pod repo push yooweiTest ~/Desktop/yooweiTesting/yooweiTestLibrary/yooweiTestLibrary.podspec
完成之后这个组件库就添加到我们的私有Spec Repo中了,可以进入到~/.cocoapods/repos/yooweiTest目录下查看
可能会出现的问题是:
Validating spec
Cloning spec repo `-1` from ``
[!] Unable to add a source with url `` named `-1`.
You can try adding it manually in `~/.cocoapods/repos` or via `pod repo add`.
网上资料说,是装了多个Xcode导致路径变了,
解决:
$ sudo xcode-select -switch /Applications/Xcode.app/Contents/Developer
注意这个路径可以通过终端拉文件得到:/Applications/Xcode.app/Contents/Developer
$ pod update --no-repo-update
$ pod install --verbose --no-repo-update
真是蛋疼,所有的方法用尽了还是(以后有机会再重新试试?)
[!] Unable to add a source with url `` named `-1`.
You can try adding it manually in `~/.cocoapods/repos` or via `pod repo add`.
那我就真手动了,前往~/.cocoapods/repos文件夹找到yoowei文件夹
其组成方式是
specName —— 版本version —— specName.podspec
$ cd /Users/galahad/.cocoapods/repos/yooweiTest
$ tree -L 3
.
├── LICENSE
├── README.md
└── yooweiTestLibrary
└── 0.1.0
└── yooweiTestLibrary.podspec
2 directories, 3 files
然后
$ pod search yooweiTestLibrary
[!] Unable to find a pod with name, author, summary, or description matching `yooweiTestLibrary`
$ rm ~/Library/Caches/CocoaPods/search_index.json
$ pod search yooweiTestLibrary
Creating search index for spec repo 'master'.. Done!
Creating search index for spec repo 'net:443'.. Done!
Creating search index for spec repo 'yoowei'.. Done!
-> yooweiTestLibrary (0.1.0)
测试yooweiTest
pod 'yooweiTestLibrary', '~> 0.1.0'
- Homepage: https://git.oschina.net
- Source: https://git.oschina.net/yoowei/yooweiLibrary.git
- Versions: 0.1.0 [yoowei repo]
这里说的是添加到私有的Repo,如果要添加到Cocoapods的官方库了,可以使用trunk工具。
可以参考:http://www.cnblogs.com/richard-youth/p/4704413.html
使用制作好的yooweiTestLibrary
我们在正式项目中使用这个私有的yooweiTestLibrary,在项目的Podfile里增加以下一行代码
pod 'yooweiTestLibrary', '~> 0.1.0'
$ pod install
之后发现不正常现象
Analyzing dependencies
[!] Unable to find a specification for `yooweiTestLibrary (~> 0.1.0)`
原因:
如果你不指定来源的话,pod install只会在master下搜索有没有,而我们的yooweiTestLibrary.podspec文件在yoowei下面,当然找不到了!
解决方式
在podfile文件最上方添加
source 'https://git.oschina.net/yoowei/yooweiTest' #我们自己的私有spec仓库的地址
source 'https://github.com/CocoaPods/Specs.git' #官方仓库的地址
默认情况下,如果你不添加source的话,系统会默认使用 https://github.com/CocoaPods/Specs.git 官方源,但是当你添加了source后,系统就不再自动搜索官方源,所以这两句都必须添加!!!!!
怎么查看本地有几个repo
$ pod repo
master
- Type: git (master)
- URL: https://github.com/CocoaPods/Specs.git
- Path: /Users/galahad/.cocoapods/repos/master
net:443
fatal: Not a git repository (or any of the parent directories): .git
- Type: local
- URL:
- Path: /Users/galahad/.cocoapods/repos/net:443
yooweiTest
- Type: git (master)
- URL: https://git.oschina.net/yoowei/yooweiTest
- Path: /Users/galahad/.cocoapods/repos/yooweiTest
3 repos
怎么删除repos
pod repo remove masterpod setup更新维护podspec
最后再来说一下制作好的podspec文件后续的更新维护工作,比如如何添加新的版本,如何删除。
我已经制作好了yooweiTestLibrary的0.1.0版本,现在我对他进行升级工作,这次我添加了更多的模块到yooweiTestLibrary之中,包括工具类,底层Model及UIKit扩展等,这里又尝试了一下subspec功能,给yooweiTestLibrary创建了多个子分支。
具体做法是先将源文件添加到yooweiTestLibrary/Classes中,然后按照不同的模块对文件目录进行整理,因为我有四个模块,所以在/yooweiTestLibrary/Classes下有创建了四个子目录,完成之后继续编辑之前的yooweiTestLibrary.podspec,这次增加了subspec特性
Pod::Spec.new do |s|
s.name = 'yooweiTestLibrary'
s.version = '0.1.0'
s.summary = '测试yooweiTest'
s.description = <<-DESC
TODO: Add long description of the pod here.
DESC
s.homepage = 'https://git.oschina.net/yoowei'
s.license = { :type => 'MIT', :file => 'LICENSE' }
s.author = { 'yoowei' => 'wyhist2012@126.com' }
s.platform = :ios, "8.0"
s.source = { :git => 'https://git.oschina.net/yoowei/yooweiTestLibrary.git', :tag => s.version }
s.requires_arc = true
# s.source_files = 'yooweiTestLibrary/Classes/**/*'
# s.resource_bundles = {
# 'yooweiTestLibrary' => ['yooweiTestLibrary/Assets/*.png']
# }
# s.public_header_files = 'yooweiTestLibrary/Classes/**/*.h'
s.subspec 'NetWorkEngine' do |networkEngine|
networkEngine.source_files = 'yooweiTestLibrary/Classes/NetworkEngine/**/*'
networkEngine.public_header_files = 'yooweiTestLibrary/Classes/NetworkEngine/**/*.h'
networkEngine.dependency 'AFNetworking', '~> 2.3'
end
s.subspec 'DataModel' do |dataModel|
dataModel.source_files = 'yooweiTestLibrary/Classes/DataModel/**/*'
dataModel.public_header_files = 'yooweiTestLibrary/Classes/DataModel/**/*.h'
end
s.subspec 'CommonTools' do |commonTools|
commonTools.source_files = 'yooweiTestLibrary/Classes/CommonTools/**/*'
commonTools.public_header_files = 'yooweiTestLibrary/Classes/CommonTools/**/*.h'
commonTools.dependency 'OpenUDID', '~> 1.0.0'
end
s.subspec 'UIKitAddition' do |ui|
ui.source_files = 'yooweiTestLibrary/Classes/UIKitAddition/**/*'
ui.public_header_files = 'yooweiTestLibrary/Classes/UIKitAddition/**/*.h'
ui.resource = "yooweiTestLibrary/Assets/MLSUIKitResource.bundle"
ui.dependency 'yooweiTestLibrary/CommonTools' #注意这个yooweiTestLibrary这个是本框架的名字,这里需要优化?
end
s.frameworks = 'UIKit'
#s.dependency 'AFNetworking', '~> 2.3'
#s.dependency 'OpenUDID', '~> 1.0.0'
end
因为我们创建了subspec所以项目整体的依赖dependency,源文件source_files,头文件public_header_files,资源文件resource等都移动到了各自的subspec中,每个subspec之间也可以有相互的依赖关系,比如UIKitAddition就依赖于CommonTools。
编辑完成之后,在测试项目yooweiTestLibrary里pod update一下(只要改东西就要pod update),几个子项目都被加进项目工程了,写代码验证无误之后,就可以将这个工程push到远端仓库,并打上新的tag->1.0.0。
$ git tag -m "reNew" 0.2.0
推送tags到远程仓库
$ git push --tags
$ git tag
0.1.0
0.2.0
这个时候可以再次编辑podsepc文件(可以改版本号了比如0.3.0,改完后再提交,然后再tag0.3.0,最后再验证)
最后再次使用pod spec lint验证编辑好的podsepc文件,没有自身的WARNING或者ERROR之后,就可以再次提交到Spec Repo中了,命令跟之前是一样的
pod repo push [本地Spec Repo名称][podspec文件路径]
$ pod repo push yooweiTest ~/Desktop/yooweiTesting/yooweiTestLibrary/yooweiTestLibrary.podspec
之后再次到~/.cocoapods/repos/yooweiTest目录下查看
├── LICENSE ├──yooweiTestLibrary│ ├── 0.1.0 │
│ └──yooweiTestLibrary.podspec
│ └── 0.2.0 ││└──yooweiTestLibrary.podspec
── README.md 3 directories, 4 files已经有两个版本了,可以使用pod search查找结果.同时,我们也要将这些push到远程仓库里面(管理podspec的远程仓库)。
完成这些之后,在实际项目中我们就可以选择使用整个组件库或者是组件库的某一个部分了,对应的Podfile中添加的内容为
source 'https://github.com/CocoaPods/Specs.git' # 官方库
source 'https://git.oschina.net/yoowei/yooweiTest' # 私有库
platform :ios, '7.0'

pod 'yooweiTestLibrary/NetWorkEngine', '1.0.0' #使用某一个部分

pod 'yooweiTestLibrary/UIKitAddition', '1.0.0'

pod 'yooweiTestLibrary', '1.0.0' #使用整个库最后介绍一下如何删除一个私有Spec Repo,只需要执行一条命令即可
$ pod repo remove yooweiTest这样这个Spec Repo就在本地删除了,我们还可以通过
$ pod repo add yoowei git@git.oschina.net:yoowei/yooweiTestLibrary.git再把它给加回来。
如果我们要删除私有Spec Repo下的某一个podspec怎么操作呢,此时无需借助Cocoapods,只需要cd到~/.cocoapods/repos/yoowei目录下,删掉库目录
然后在将Git的变动push到远端仓库即可
参考文章:
http://blog.wtlucky.com/blog/2015/02/26/create-private-podspec/