zoukankan      html  css  js  c++  java
  • 将React Native 集成进现有OC项目中(过程记录) 、jsCodeLocation 生成方式总结

    将RN集成到现有OC项目应该是最常见的,特别是已经有OC项目的,不太可能会去专门搞个纯RN的项目。又因为RN不同版本,引用的依赖可能不尽相同,所以特别说明下,本文参考的文档是React Native (0.57)相关文档。

    一、准备工作

    本文演示项目基于如下版本:

    "react": "16.5.0",
    "react-native": "0.57.1"

    1、RN搭建开发环境

    如果你已经创建过RN项目,并且运行成功了,那么你的环境配置应该是没有问题的,但是如果你是第一次进行学习,那么就要搭建开发环境了,具体的可以参考: React Native (0.57)开发环境搭建(过程记录)

    2、安装CocoaPods

    没有安装过CocoaPods的,可以参考:CocoaPods :为iOS程序提供依赖管理的工具(yoowei)

    二、集成ReactNative

    1、新建一个OC项目

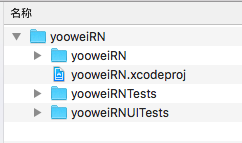
    任意地方,创建一个文件夹“OC项目集成RN”,创建一个yooweiRN的OC项目,用为已有OC项目。如下:
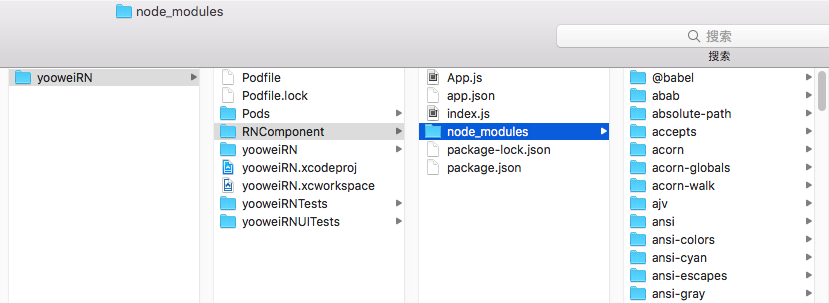
    2、终端命令 cd 到该项目跟目录。创建文件夹RNComponent (文件夹名字可以自定义,主要用来存放RN相关的文件)和配置文件package.json
    $ cd /Users/galahad/Desktop/ziliao/OC项目集成RN/RNComponent 
    $ touch package.json
     
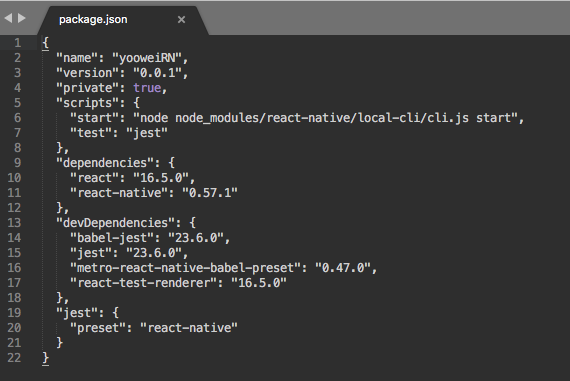
    package.josn 中的内容如下,其中name位App的名字,dependencies为react和react-native的版本,在创建这些信息时,建议利用react-native init AwesomeProject新建新项目时会自动创建package.json,直接把文件复制过来,更改name为自己的原生项目名,确保信息为最新的,且不容易出错。


    3、安装React Native依赖包
    进入到RNComponent文件夹下运行命令行,npm install。
    $ cd /Users/galahad/Desktop/ziliao/OC项目集成RN/yooweiRN/RNComponent 
    $ npm install
    执行结束后项目中会多出一个node_modules文件夹
     
    使用镜像文件,执行很快
    added 1033 packages from 527 contributors in 37.502s
     
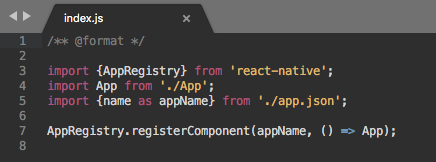
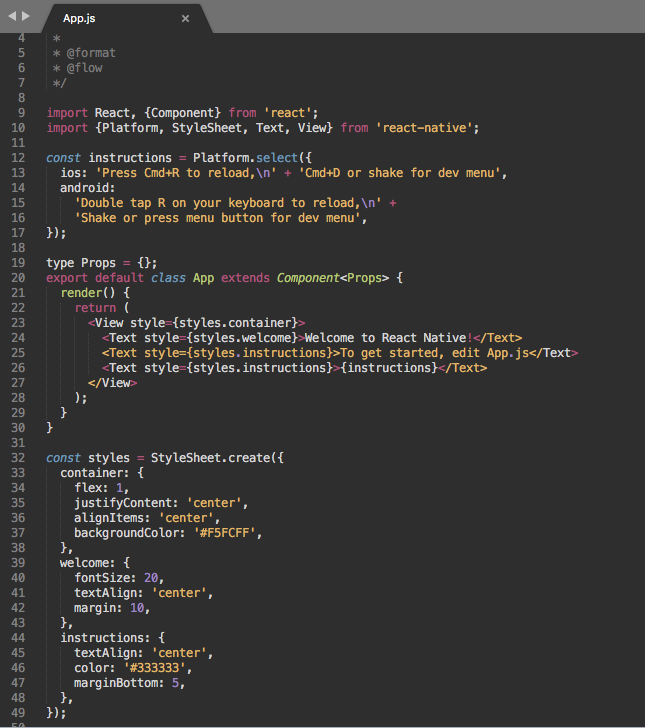
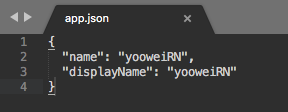
    4、创建入口文件index.js、参考官方生成的RN项目里面的文件
    $ cd /Users/galahad/Desktop/ziliao/OC项目集成RN/yooweiRN/RNComponent
    $ touch index.js
    $ touch App.js
    $ touch app.json


    5. Cocoapods集成React Native

    终端命令cd 到项目跟目录
    $ cd /Users/galahad/Desktop/ziliao/OC项目集成RN/yooweiRN 
     
    创建Podfile文件:
    $ touch Podfile
    $ open -e podfile
    $ cd /Users/galahad/Desktop/ziliao/OC项目集成RN/yooweiRN 
    $ pod install
    (1)在安装的过程中遇到好多以前没有遇到的问题,下面一一记录下来,以供参考:
    [!] CocoaPods could not find compatible versions for pod "React/BatchedBridge":
      In Podfile:
        React/BatchedBridge (from `./RNComponent/node_modules/react-native`)
    None of your spec sources contain a spec satisfying the dependency: `React/BatchedBridge (from `./RNComponent/node_modules/react-native`)`.
    You have either:
     * out-of-date source repos which you can update with `pod repo update` or with `pod install --repo-update`.
     * mistyped the name or version.
     * not added the source repo that hosts the Podspec to your Podfile.
    Note: as of CocoaPods 1.0, `pod repo update` does not happen on `pod install` by default.
    然后我按照要求进行升级,升级的过程中又遇到了另外一个问题。(先透漏下,最终的原因不是因为没有升级,后面会讲到)
     
    $ pod repo update
     遇到了一个问题
     /usr/bin/git -C /Users/galahad/.cocoapods/repos/WYNetWorking fetch origin --progress
      remote: Repository not found.
      fatal: repository 'https://github.com/yoowei/WYNetWorking.git/' not found
    [!] CocoaPods was not able to update the `WYNetWorking` repo. If this is an unexpected issue and persists you can inspect it running `pod repo update --verbose`
     
    这个是我原来自己建的库,已经废弃了,github上面的库已经删除,所以此次报这个错误。进入这个/Users/galahad/.cocoapods/repos/WYNetWorking目录下,将其删掉即可。
     
    之后,还是报上面那个错误
     
    [!] CocoaPods could not find compatible versions for pod "React/BatchedBridge":
     
    那么我就认为这个根本就不是什么cocoapods 升不升级的问题,而是依赖存不存在的问题,所以在podfile 里面直接将BatchedBridge 删掉,然后pod install 能够成功。但是整个项目却报一堆错误
     
    Undefined symbols for architecture x86_64:
      "_OBJC_CLASS_$_RCTDevMenuItem", referenced from:
          objc-class-ref in RCTPerfMonitor.o
      "facebook::react::parseTypeFromHeader(facebook::react::BundleHeader const&)", referenced from:
          +[RCTJavaScriptLoader attemptSynchronousLoadOfBundleAtURL:runtimeBCVersion:sourceLength:error:] in RCTJavaScriptLoader.o
     
      。。。(省略)
     
      "_OBJC_CLASS_$_RCTInspectorDevServerHelper", referenced from:
          objc-class-ref in RCTBridge.o
          objc-class-ref in RCTDevSettings.o
    ld: symbol(s) not found for architecture x86_64
    clang: error: linker command failed with exit code 1 (use -v to see invocation)
     
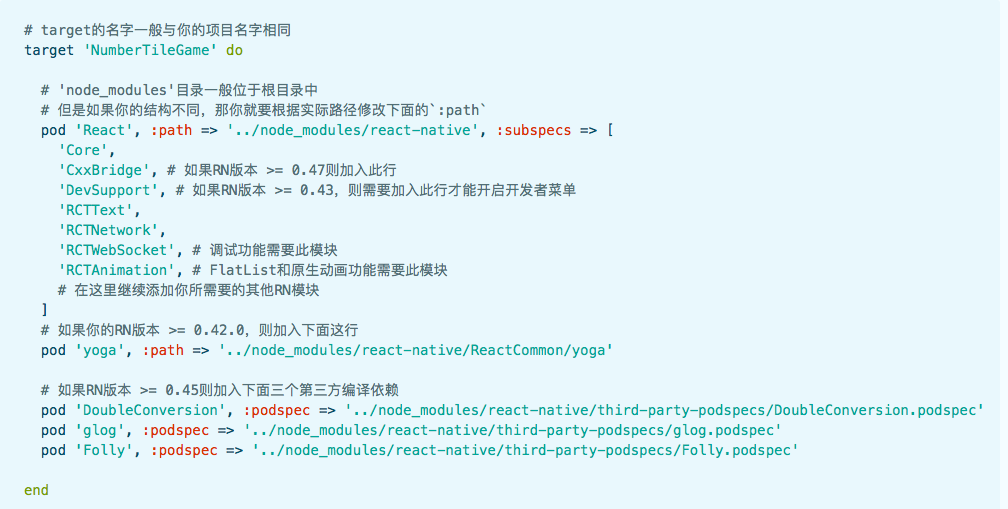
    转变思路,应该是引用的三方依赖库文件不对,这个时候,参考 https://reactnative.cn/docs/integration-with-existing-apps/
     
     
    参考之后(注意可能不同版本不一样),编辑podfile 文件,如下:

    source 'https://github.com/CocoaPods/Specs.git'
    platform :ios, '9.0'
    use_frameworks!

    target 'yooweiRN' do
    # 'node_modules'目录一般位于根目录中 。但是如果你的结构不同,那你就要根据实际路径修改下面的`:path`
    pod 'React', :path => './RNComponent/node_modules/react-native', :subspecs => [
    'Core',
    'ART',
    'RCTActionSheet',
    'RCTGeolocation',
    'RCTImage',
    'RCTNetwork',
    'RCTPushNotification',
    'RCTSettings',
    'RCTText',
    'RCTVibration',
    'RCTWebSocket',
    'RCTLinkingIOS',
    'RCTAnimation',
    'CxxBridge',
    'DevSupport',

    ]
    pod 'yoga', :path => './RNComponent/node_modules/react-native/ReactCommon/yoga'

    pod 'DoubleConversion', :podspec => './RNComponent/node_modules/react-native/third-party-podspecs/DoubleConversion.podspec'

    pod 'glog', :podspec => './RNComponent/node_modules/react-native/third-party-podspecs/glog.podspec'
    pod 'Folly', :podspec => './RNComponent/node_modules/react-native/third-party-podspecs/Folly.podspec'


    target 'yooweiRNTests' do
    inherit! :search_paths
    # Pods for testing
    end

    target 'yooweiRNUITests' do
    inherit! :search_paths
    # Pods for testing
    end
    end

    然后pod install 又特么出问题了
    $ pod install
    Analyzing dependencies
    Fetching podspec for `DoubleConversion` from `./RNComponent/node_modules/react-native/third-party-podspecs/DoubleConversion.podspec`
    Fetching podspec for `Folly` from `./RNComponent/node_modules/react-native/third-party-podspecs/Folly.podspec`
    Fetching podspec for `React` from `./RNComponent/node_modules/react-native`
    Fetching podspec for `glog` from `./RNComponent/node_modules/react-native/third-party-podspecs/glog.podspec`
    Fetching podspec for `yoga` from `./RNComponent/node_modules/react-native/ReactCommon/yoga`
    Downloading dependencies
    Installing DoubleConversion (1.1.6)
    Installing Folly (2016.10.31.00)
    Using React (0.57.1)
    Installing boost-for-react-native (1.63.0)
    Installing glog (0.3.5)
    [!] /bin/bash -c 
    set -e
    #!/bin/bash
    set -e
     
    PLATFORM_NAME="${PLATFORM_NAME:-iphoneos}"
    CURRENT_ARCH="${CURRENT_ARCH}"
     
    ......(省略)
     
    xcrun: error: SDK "iphoneos" cannot be located
    xcrun: error: SDK "iphoneos" cannot be located
    xcrun: error: SDK "iphoneos" cannot be located
    xcrun: error: unable to lookup item 'Path' in SDK 'iphoneos'
    /Users/galahad/Library/Caches/CocoaPods/Pods/External/glog/2263bd123499e5b93b5efe24871be317-e8acf/missing: Unknown `--is-lightweight' option
    Try `/Users/galahad/Library/Caches/CocoaPods/Pods/External/glog/2263bd123499e5b93b5efe24871be317-e8acf/missing --help' for more information
    configure: WARNING: 'missing' script is too old or missing
    configure: error: in `/Users/galahad/Library/Caches/CocoaPods/Pods/External/glog/2263bd123499e5b93b5efe24871be317-e8acf':
    configure: error: C compiler cannot create executables
    See `config.log' for more details
     
    然后执行下面命令:
    $ sudo xcode-select --switch /Applications/Xcode.app/Contents/Developer/
    输入mac密码
    Password:
    重新安装
    $ pod install
    安装没有问题,工程运行OK .
     

    三、项目处理

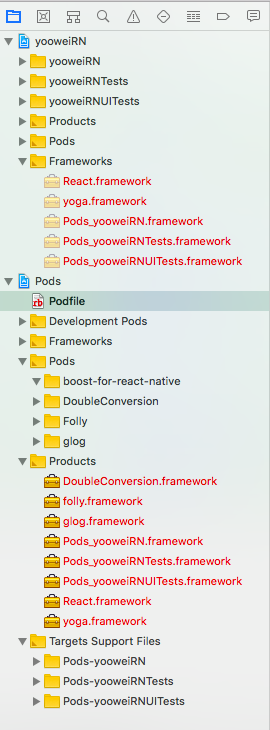
    项目目录:整个工程中新建一个文件夹 RNComponent ,用来装RN相关资料,显得整洁,便于管理。
     
    工程目录结构:
     
    注意工程目录结构中并没有将 RNComponent 拖进去,因为cocopods 已经引用过了相关的东西。
     
    1、配置App Transport Security

    在iOS 9以上的系统中,除非明确指明,否则应用无法通过http协议连接到localhost主机。 建议在Info.plist进行如下设置,否则会报Could not connect to development server错误。

     

    2、添加RCTRootView
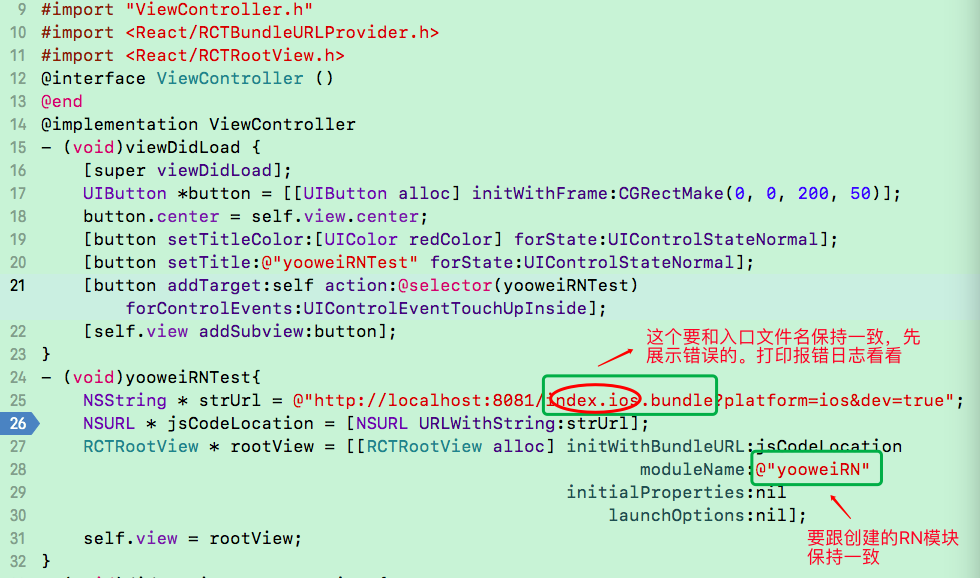
    这里只是在ViewController中进行了测试,具体放在什么地方,怎么放置大家根据项目需求而定。
     

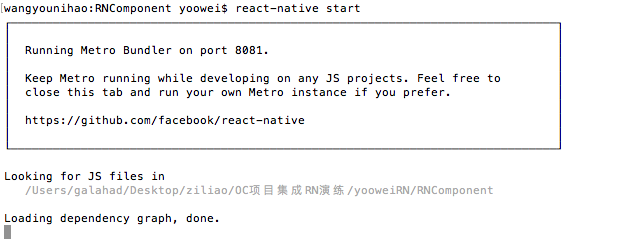
    3、开启RN本地服务(cd 到RNComponent目录)

    $ cd /Users/galahad/Desktop/ziliao/OC项目集成RN演练/yooweiRN/RNComponent 

    $ react-native start
    不出意外的是下面这个场景

    原因:打印日志看看

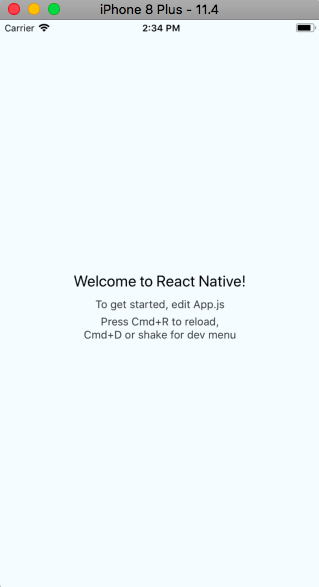
    由于RN不同版本,入口文件名不同,根据实际入口文件名,修改之后。

    模拟器展示如下:
    4G真机上面运行失败 :(正常现象)

    Failed to load bundle(http://localhost:8081/index.bundle?platform=ios&dev=true) with error:(Could not connect to development server.

    wifi真机上面运行失败:

    Ensure the following:

    - Node server is running and available on the same network - run 'npm start' from react-native root

    - Node server URL is correctly set in AppDelegate

    - WiFi is enabled and connected to the same network as the Node Server

    URL: http://localhost:8081/index.bundle?platform=ios&dev=true Could not connect to the server.)

    打开偏好设置-网络-查看当前ip地址,将项目中的localhost改为当前ip(注意,手机的wifi应当和电脑连接的是同一个网络才可以) 

    至此,将RN集成进OC项目中,并简单的运行起来,告一段落。下面待续......

    jsCodeLocation生成方式总结:

    NSURL *jsCodeLocation;

     /**

       * OPTION 1:  development

       * Load from development server. Start the server from the repository root:

       * $ npm start

       * To run on device, change `localhost` to the IP address of your computer, and make sure your computer and iOS device are on the same Wi-Fi network.

       */

      jsCodeLocation = [NSURL URLWithString:@"http://localhost:8081/index.bundle?platform=ios&dev=true"];

    /**

       * OPTION 2:Release

       * Load from pre-bundled file on disk. The static bundle is automatically generated by the "Bundle React Native code and images" build step when  running the project on an actual device or running the project on the simulator in the "Release" build configuration.

       */

       jsCodeLocation = [[NSBundle mainBundle] URLForResource:@"main" withExtension:@"jsbundle"];


    另外实际项目中,还有如下写法:

    #ifdef DEBUG

        jsCodeLocation = [[RCTBundleURLProvider sharedSettings] jsBundleURLForBundleRoot:@"index.ios" fallbackResource:nil];

    #else

        jsCodeLocation = [[NSBundle mainBundle] URLForResource:@"bundle/index.ios" withExtension:@"jsbundle"];

    #endif

    如果项目中使用了CodePush的话,还有如下写法

    #ifdef DEBUG

      jsCodeLocation = [[RCTBundleURLProvider sharedSettings] jsBundleURLForBundleRoot:@"index" fallbackResource:nil];

    #else

      jsCodeLocation = [CodePush bundleURL];

    #endif

    说明:

    上面的两个例子,JS代码包URL的获取是通过RCTBundleProvider这个类实现的。JS代码包的URL有两种可能结果,一种是Packager Server URL,一种是本地JS代码包的文件路径。通过jsCodeLocation = [[RCTBundleURLProvider sharedSettings] jsBundleURLForBundleRoot:@"index" fallbackResource:nil];去获取JS代码包URL时,会首先检查是否有正在运行的Packager Server,如果有则返回相应Packager Server中JS代码包的绝对路径;如果没有正在运行的Packager Server,则会返回一个本地JS代码包的文件路径,不传递fallbackResource参数时,默认返回 本地main.jsbundle的文件路径。


  • 相关阅读:
    腾讯// 反转字符串
    腾讯//Multiply Strings 字符串相乘
    腾讯//盛最多水的容器
    腾讯//删除排序数组中的重复项
    腾讯//删除排序数组中的重复项
    C语言中的预处理命令
    Python十大应用领域与就业方向
    Python的主要应用领域及应用场景
    Git命令_git status
    Git命令_git add快速添加文件到暂存区
  • 原文地址:https://www.cnblogs.com/richard-youth/p/9724870.html
Copyright © 2011-2022 走看看