转载请注明出处:点我
这是一系列的文章,会从基础开始一步步的介绍Python中的Generator以及coroutine(协程)(主要是介绍coroutine),并且详细的讲述了Python中coroutine的各种高级用法,最后会用coroutine实现一个简单的多任务的操作系统。
其实也是看完这篇文章的学习笔记吧!O(∩_∩)O
生成器(Generator)
什么是生成器?在Python中,生成器(Generator)是一个带有yield关键字的函数
 1 def gene():
 2     a = 1
 3     print "开始执行gene(),a = ",a
 4     a += 1
 5     yield "rio_2607"
 6     print "回到gene(),再辞开始执行,a = ",a
 7     a += 2
 8     yield "uestc"
 9     print "又回到了gene(),a = ",a
10     yield "emc"
gene()就是一个生成器,因为函数的定义中有yield关键字。那么生成器跟普通的函数有什么区别呢?
当调用gene()函数的时候,不会立即执行gene()函数中的代码,而是返回一个生成器对象(generator object):
 1 >>> def gene():
 2     a = 1
 3     print "开始执行gene(),a = ",a
 4     a += 1
 5     yield "rio_2607"
 6     print "回到gene(),再辞开始执行,a = ",a
 7     a += 2
 8     yield "uestc"
 9     print "又回到了gene(),a = ",a
10     yield "emc"
11
12
13 >>> g = gene()
14 >>> type(g)
15 <type 'generator'>
可以看到,g是一个generator类型的对象。那么什么时候会执行函数的代码呢?答:当调用生成器对象的next()函数时就会开始执行函数定义中的代码。
但是跟普通函数一旦开始执行就会一直执行直到结束不同,生成器函数会一直往下执行,但是一旦碰到yield关键字,就会返回yield关键字后面的数据,把函数当前的所有状态封存起来,然后暂停函数的执行,在生成器对象的next()函数再一次被调用的时候,会接着上一次暂停的地方继续往下执行,直到碰到了下一个yield关键字或者函数的代码执行完毕
>>> g = gene()
>>> type(g)
<type 'generator'>
>>> g.next()
开始执行gene(),a =  1
'rio_2607'
>>> g.next()
回到gene(),再辞开始执行,a =  2
'uestc'
>>> g.next()
又回到了gene(),a =  4
'emc'
可以看到,第一次调用g.next()函数时,函数内部的代码才开始执行,当执行到yield "rio_2607"这一句代码时,会返回"rio_2607",然后函数暂停执行。然后当再次调用next函数的时候,gene()函数会接着往下面执行,可以看到,这时打印出来的a=2,保持了函数上一次离开时候的数据,当碰到yield "uestc"这一句时,函数会再次停止执行,封存此时函数内的数据。当再一次调用next()函数的时候,gene()会接着上次的状态,在上次暂停的地方继续往下执行,可以看到,此时打印输出了a=4,碰到yield之后再次暂停执行。
当生成器执行完毕后,再一次调用next()时,函数会抛出StopIteration异常
>>> g.next()
又回到了gene(),a =  4
'emc'
>>> g.next()

Traceback (most recent call last):
  File "<pyshell#13>", line 1, in <module>
    g.next()
StopIteration
生成器表达式(Generator Expresisions)
生成器表达式(Generator Expresisions)类似于列表推导式(list comprehension)
ge = (x * 2 for x in a)
其中(x * 2 for x in a)就是生成器表达式,这个表达式会返回一个生成器对象:
>>> ge = (x * 2 for x in a)
>>> ge
<generator object <genexpr> at 0x01EA0A30>
在for循环中,for循环会自动调用生成器对象的next()函数并处理StopIteration异常:
>>> ge
<generator object <genexpr> at 0x01EA0A30>
>>> for i in ge:
    print i


2
4
6
8
说了那么多,那么生成器除了实现迭代器(Iteration)之外,还有有什么作用呢?
我们有这么一个web server上面的log文件,数据大概是这样的
77.81.4.30 - - [24/Feb/2008:02:17:53 -0600] "GET /favicon.ico HTTP/1.1" 404 133
24.1.247.118 - - [24/Feb/2008:02:20:25 -0600] "GET /dynamic/ HTTP/1.1" 200 5105
24.1.247.118 - - [24/Feb/2008:02:20:26 -0600] "GET /favicon.ico HTTP/1.1" 404 133
24.1.247.118 - - [24/Feb/2008:02:20:26 -0600] "GET /favicon.ico HTTP/1.1" 404 133
122.117.168.219 - - [24/Feb/2008:02:22:06 -0600] "GET /ply/ HTTP/1.1" 304 -
122.117.168.219 - - [24/Feb/2008:02:22:06 -0600] "GET /ply/bookplug.gif HTTP/1.1" 304 -
122.117.168.219 - - [24/Feb/2008:02:22:08 -0600] "GET /ply/example.html HTTP/1.1" 304 -
89.182.136.236 - - [24/Feb/2008:02:23:04 -0600] "GET /ply/ HTTP/1.1" 200 8018
89.182.136.236 - - [24/Feb/2008:02:23:05 -0600] "GET /ply/bookplug.gif HTTP/1.1" 200 23903
89.182.136.236 - - [24/Feb/2008:02:23:05 -0600] "GET /favicon.ico HTTP/1.1" 404 133
66.249.65.37 - - [24/Feb/2008:02:23:29 -0600] "GET /papers/SIAM97/SIAM97.pdf HTTP/1.1" 200 188949
117.198.144.124 - - [24/Feb/2008:02:23:50 -0600] "GET /ply/ply.html HTTP/1.1" 200 97238
117.198.144.124 - - [24/Feb/2008:02:23:53 -0600] "GET /favicon.ico HTTP/1.1" 404 133
每一行的最后一列要么表示一个字节数据,要么为-,表示字节数据未知
现在我们要统计文件中记录的所有的字节数据大小
python中常规的写法是这样的,在一个for循环中,每次处理一行数据:
 1 def non_generator_func():
 2     '''
 3     分析web server的log文件来判断所有传输的字节数
 4     Non-Generator的写法:用一个for循环
 5     :return:
 6     '''
 7     wwwlog = open("access-log")
 8     total = 0
 9
10     for line in wwwlog:
11         # 获取字节数的字符串表示
12         bytestr = line.rsplit(None, 1)[1]
13         if bytestr != "-":
14             total += int(bytestr)
15
16     print "Total", total
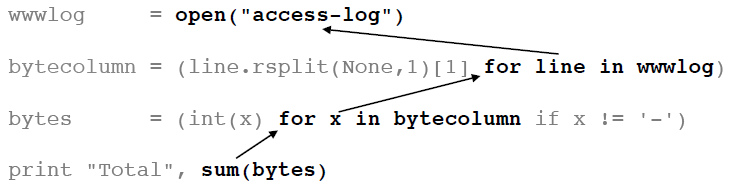
现在来看看使用Generator的风格编写的代码:
1 def generator_func():
2     wwwlog = open("access-log")
3     # 采用生成器表达式(Generator expression),返回一个Generator对象
4     bytecolumn = (line.rsplit(None, 1)[1] for line in wwwlog)
5     bytes = (int(x) for x in bytecolumn if x != "-")
6
7     # 最后一步才进行计算
8     print "Total", sum(bytes)
可以看出,使用Generator,可以编写更少的代码,还会有跟普通的Python编程完全不一样的编程风格。
上面的generator_func()函数的工作方式类似于管道(pipeline):
access-log ---> wwwlog ---> bytecollumn --->bytes --->sum() --->total
现在来看另外一个Generator Fucntion的典型用法:在这里,我们模拟实现Unix中的"tail -f"命令。照例先看代码:
 1 # tail -f:可以实时的得到新追加到文件中的信息,常用来跟踪日志文件
 2 def unix_tail_f(thefile):
 3     '''
 4     Python版本的 Unix 'tail -f'
 5     '''
 6     import time
 7     # 跳到文件末尾
 8     thefile.seek(0,2)
 9     while True:
10         line = thefile.readline()
11         if not line:
12             time.sleep(0.1)
13             continue
14         yield line
通过下面的方式来使用unix_tail_f()函数:
1 logfile = open("access-log")
2 for line in follow(logfile):
3   print line,
可以看出,通常使用Generator Fucntion的模式应该为:

现在,我们已经实现了tail -f的效果,接下来我们要更进一步,实现tail -f | grep 的过滤效果。先编写一个Generator Function,名字叫做grep,代码如下:
1 def grep(pattern,lines):
2     for line in lines:
3         if pattern in line:
4             # 如果line中有pattern,则返回这个line并挂起,暂停执行
5             yield line
下面的代码能够达到unix中的tail -f | grep pattern的效果:
 1 def tail_f_grep(file,pattern):
 2     '''
 3     模拟tail -f | grep pattern
 4     '''
 5     logfile = open(file)
 6     loglines = unix_tail_f(logfile)
 7     pylines = grep(pattern,loglines)
 8
 9     # 在for循环中处理结果
10     for line in pylines:
11         print line,
当调用tail_f_grep("access-log","python")可以达到tail -f | grep python的效果。
关于Python中的生成器,Python函数式编程指南(四):生成器这篇博客讲的挺好的,大家可以看下这篇博客。