一、安装Nginx
1、安装依赖扩展
# yum -y install wget openssl* gcc gcc-c++ autoconf libjpeg libjpeg-devel libpng libpng-devel freetype freetype-devel libxml2 libxml2-devel zlib zlib-devel glibc glibc-devel glib2 glib2-devel bzip2 bzip2-devel ncurses ncurses-devel curl curl-devel e2fsprogs e2fsprogs-devel krb5 krb5-devel libidn libidn-devel openssl openssl-devel openldap openldap-devel nss_ldap openldap-clients openldap-servers make gd gd2 gd-devel gd2-devel libxslt libxslt-devel libaio libaio-devel
2、下载Nginx源码包
# wget http://nginx.org/download/nginx-1.13.5.tar.gz
3、创建用户名和用户组
# groupadd www
# useradd -r -g www www
4、解压并安装
# tar -zxvf nginx-1.13.5.tar.gz
# cd nginx-1.13.5
# ./configure --user=www --group=www --prefix=/usr/local/nginx
# make && make install
5、启动nginx服务
# /usr/local/nginx/sbin/nginx &
6、关闭防火墙或者开放80端口
关闭防火墙
# systemctl stop firewalld.service
开启80端口
# firewall-cmd --zone=public --add-port=80/tcp --permanent
# firewall-cmd --reload
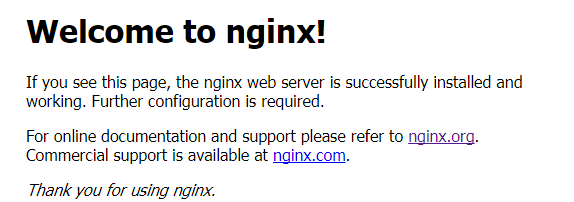
7、访问页面 http://ip

二、安装MySQL-5.7.19
1、下载安装包
# wget https://dev.mysql.com/get/Downloads/MySQL-5.7/mysql-5.7.19-linux-glibc2.12-x86_64.tar.gz
2、创建mysql用户和用户组
# groupadd mysql
# useradd -r -r mysql mysql
3、解压安装包并创建data目录
# tar -zxf mysql-5.7.19-linux-glibc2.12-x86_64.tar.gz
# mv mysql-5.7.19-linux-glibc2.12-x86_64 /usr/local/mysql
# cd /usr/local/mysql
# mkdir data logs
# echo "" > logs/error.log
4、初始化MySQL
# ./bin/mysqld --initialize --user=mysql --basedir=/usr/local/mysql --datadir=/usr/local/mysql/data --port=3306
初始化之后会生成一个随机的root账号的密码,如下(如果初始化的时候有指定log-error的路径,则在log-error中查看密码)

或者使用 --initialize-insecure 不生成随机密码
5、授权
# cd /usr/local
# chown -R mysql:mysql mysql
6、启动MySQL服务
# /usr/local/mysql/bin/mysqld_safe --user=mysql &
7、数据库配置
# vim /etc/my.cnf

[client]
port=3306
socket=/tmp/mysql.sock
default-character-set=utf8

[mysql]
no-auto-rehash
default-character-set=utf8

[mysqld]
user    = mysql
port    = 3306
basedir = /usr/local/mysql
datadir = /usr/local/mysql/data
socket  = /tmp/mysql.sock
pid-file = mysql3306.pid
log-error=/usr/local/mysql/logs/error.log
skip_name_resolve = 1
open_files_limit    = 65535
back_log = 1024
max_connections = 1500
max_connect_errors = 1000000
table_open_cache = 1024
table_definition_cache = 1024
table_open_cache_instances = 64
thread_stack = 512K
external-locking = FALSE
max_allowed_packet = 32M
sort_buffer_size = 16M
join_buffer_size = 16M
thread_cache_size = 2250
query_cache_size = 0
query_cache_type = 0
interactive_timeout = 600
wait_timeout = 600
tmp_table_size = 96M
max_heap_table_size = 96M

###***slowqueryparameters
long_query_time = 0.1
slow_query_log = 1
slow_query_log_file = /usr/local/mysql/logs/slow.log

###***binlogparameters
log-bin=mysql-bin
binlog_cache_size=4M
max_binlog_cache_size=8M
max_binlog_size=1024M
binlog_format=MIXED
expire_logs_days=7

###***master-slavereplicationparameters
server-id=3306
#slave-skip-errors=all

[mysqldump]
quick
max_allowed_packet=32M
8、拷贝服务文件
# cp /usr/local/mysql/support-files/mysql.server /etc/init.d/mysqld
9、重启MySQL服务
# /etc/init.d/mysqld restart
10、配置环境变量
# vi /etc/profile
#最后一行添加以下两行:
export MYSQL_HOME=/usr/local/mysql
export PATH=$PATH:$MYSQL_HOME/bin

#保存退出
source /etc/profile
11、修改root密码
mysql -uroot -p mysql
SET password=PASSWORD("123456");
12、设置开机自启
chkconfig --add mysqld
chkconfig mysqld on
三、安装PHP
1、安装依赖库——libmcrypt
# wget http://downloads.sourceforge.net/mcrypt/libmcrypt-2.5.8.tar.gz
# tar zxvf libmcrypt-2.5.8.tar.gz
# cd libmcrypt-2.5.8/
# ./configure
# make && make install
# /sbin/ldconfig
# cd libltdl/
# ./configure --enable-ltdl-install
# make && make install
# ln -sf /usr/local/lib/libmcrypt.la /usr/lib/libmcrypt.la
# ln -sf /usr/local/lib/libmcrypt.so /usr/lib/libmcrypt.so
# ln -sf /usr/local/lib/libmcrypt.so.4 /usr/lib/libmcrypt.so.4
# ln -sf /usr/local/lib/libmcrypt.so.4.4.8 /usr/lib/libmcrypt.so.4.4.8
# ldconfig
2、安装依赖库——mhash
# wget http://downloads.sourceforge.net/mhash/mhash-0.9.9.9.tar.gz
# tar zxvf mhash-0.9.9.9.tar.gz
# cd mhash-0.9.9.9/
# ./configure
# make && make install
# ln -sf /usr/local/lib/libmhash.a /usr/lib/libmhash.a
# ln -sf /usr/local/lib/libmhash.la /usr/lib/libmhash.la
# ln -sf /usr/local/lib/libmhash.so /usr/lib/libmhash.so
# ln -sf /usr/local/lib/libmhash.so.2 /usr/lib/libmhash.so.2
# ln -sf /usr/local/lib/libmhash.so.2.0.1 /usr/lib/libmhash.so.2.0.1
# ldconfig
3、安装依赖库——mcrypt
# wget http://downloads.sourceforge.net/mcrypt/mcrypt-2.6.8.tar.gz
# tar zxvf mcrypt-2.6.8.tar.gz
# cd mcrypt-2.6.8/
# ./configure
# make && make install
4、下载PHP安装包
wget -O php-7.1.10.tar.gz http://hk1.php.net/get/php-7.1.10.tar.gz/from/this/mirror
5、解压安装包
# tar -zxf php-7.1.10.tar.gz
# cd php-7.1.10
# ./configure --prefix=/usr/local/php --with-config-file-path=/usr/local/php/etc --enable-fpm --with-fpm-user=www --with-fpm-group=www --with-mysqli --with-pdo-mysql --with-iconv-dir --with-freetype-dir --with-jpeg-dir --with-png-dir --with-zlib --with-libxml-dir=/usr --enable-xml --disable-rpath --enable-bcmath --enable-shmop --enable-sysvsem --enable-inline-optimization --with-curl --enable-mbregex --enable-mbstring --with-mcrypt --enable-ftp --with-gd --enable-gd-native-ttf --with-openssl --with-mhash --enable-pcntl --enable-sockets --with-xmlrpc --enable-zip --enable-soap --without-pear --with-gettext --disable-fileinfo --enable-maintainer-zts --enable-opcache --with-xsl
或者
# ./configure --prefix=/usr/local/php --with-config-file-path=/usr/local/php/etc --enable-fpm --with-fpm-user=www --with-fpm-group=www --with-mysqli --with-pdo-mysql --with-iconv-dir --with-freetype-dir --with-jpeg-dir --with-png-dir --with-zlib --with-libxml-dir=/usr --enable-xml --disable-rpath --enable-bcmath --enable-shmop --enable-sysvsem --enable-inline-optimization --with-curl --enable-mbregex --enable-mbstring --enable-ftp --with-gd --enable-gd-native-ttf --with-openssl --with-mhash --enable-pcntl --enable-sockets --with-xmlrpc --enable-zip --enable-soap --without-pear --with-gettext --disable-fileinfo --enable-maintainer-zts --with-libdir=lib64
# make && make install
6、修改配置文件
# cp php.ini-development /usr/local/php/etc/php.ini
# cp ./sapi/fpm/php-fpm.conf /usr/local/php/etc/php-fpm.conf
# cp /usr/local/php/etc/php-fpm.d/www.conf.default /usr/local/php/etc/php-fpm.d/www.conf
7、php-fpm随系统自启动
# cp ./sapi/fpm/init.d.php-fpm /etc/init.d/php-fpm
8、启动PHP
# /usr/local/php/sbin/php-fpm
9、设置PHP的环境变量
# vim /etc/profile

export PHP_HOME=/usr/local/php
export PATH=$PATH:$PHP_HOME/bin

重启生效
source /etc/profile
10、设置开启自启动
# cd /etc/init.d/
# chmod 744 php-fpm
# chkconfig --add php-fpm
# chkconfig php-fpm on