前言
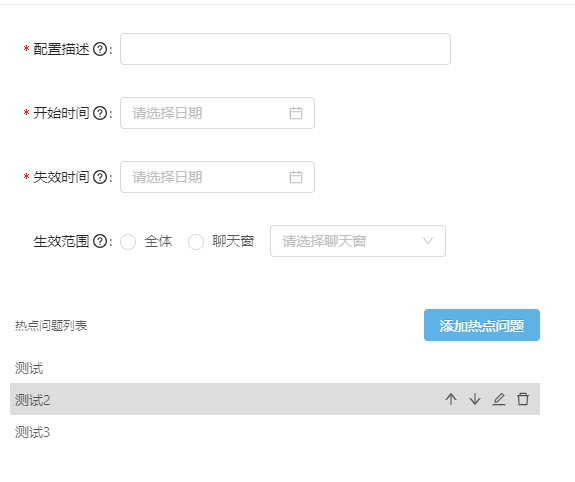
昨天联调一个页面,看着就一个页面,接口倒是不少。
热点问题配置测试联调完成(同步异步接口共11个)
1.配置新增
2.配置编辑
3.配置删除
4.热点问题新增
5.热点问题编辑
6.热点问题删除
7.热点问题上移
8.热点问题下移
9.热点问题保存
10.热点问题校验
11.热点问题列表
下图这一块是最麻烦的,调用的其他部分的组件,为了能复用,联调了很久。
之前封装的组件每一个动作是调接口的异步行为,此时改成同步的,最后保存一起提交。
那么在同步处理的时候,用到了很多数组的增删改,index索引值的变更。
下面,我首先总结一下数组处理的所有方法,再把在此处会用到的方法贴出来。
一.增加元素
1.push():push可接收任意数量的参数,把它们逐个添加至数组末尾,并且可以返回修改后数组的长度。
var sports = ['soccer', 'baseball'];
var total = sports.push('football', 'swimming');

console.log(sports); // ['soccer', 'baseball', 'football', 'swimming']
console.log(total);  // 4
2.unshift() :与push()类似,也可接收任意数量的参数,只不过是将参数逐个添加至数组最前面而已,同样返回新数组长度。
const array1 = [1, 2, 3];
console.log(array1.unshift(4, 5));
// expected output: 5
console.log(array1);
// expected output: Array [4, 5, 1, 2, 3]
3.concat() :该方法与push()方法有点类似,同样是将元素添加至数组末尾,只不过这个数组已经不是原来的那个数组了,而是其副本,所以concat()操作数组后会返回一个新的数组。
特性:
- 不传参数,返回当前数组副本
- 传递非数组参数,这些参数就会被直接添加到结果数组的末尾
- 传递数组参数,将数组每一个元素,添加新的数组中
const array1 = ['a', 'b', 'c'];
const array2 = ['d', 'e', 'f'];

console.log(array1.concat(array2));
// expected output: Array ["a", "b", "c", "d", "e", "f"]
4.splice(): 功能很强大,划重点
前面的三个方法都具有很大局限性,因为不是添加到数组前就是数组后,而splice()它非常灵活,它可以添加元素到数组的任意位置。
它除了可以添加元素之外还具有删除和替换元素的功能。
splice()可以向数组指定位置添加任意数量的元素。
需要传入至少3个参数:splice(a, b, c, d, ......)
-
- 1、a 起始元素的位置
- 2、b 要删除的元素个数,从起始元素开始算
- 3、c后面的是要插入的元素,可以是数组
总结一下,原理就是,在规定的起始位置a,删除b个,如果后面需要塞进去新元素就加到cd...的位置,如果不加就是删除了,splice实质上是通过删除元素来实现插入、删除、替换的
4.1 splice 删除
写法
array.splice(index,n);
参数含义
index:数组中需要删除数据的起始位置;
n:需要删除的元素,数据的个数;
4.2 splice 插入
写法
array.splice(index,0,data1,data2,....);
参数
index:数组中需要插入数据的起始位置;
0:删除的个数为0;
data1,data2:需要插入的元素,用逗号隔开
4.3 splice 替换
写法
array.splice(index,n,data1,data2,......);
参数
index:需要替换的元素的起始位置;
n:需要替换的元素的个数,实质是删除;
data1,data2:需要插入元素,用逗号隔开;
二、删除元素
1.pop() :与push()方法配合使用可以构成后进先出的栈,该方法可从数组末尾删除最后一项并返回该项
const plants = ['broccoli', 'cauliflower', 'cabbage', 'kale', 'tomato'];

console.log(plants.pop());
// expected output: "tomato"

console.log(plants);
// expected output: Array ["broccoli", "cauliflower", "cabbage", "kale"]

plants.pop();

console.log(plants);
// expected output: Array ["broccoli", "cauliflower", "cabbage"]
2.shift(): 与push()方法配合使用可以构成先进先出的队列,该方法可删除数组第一项并返回该项。
const array1 = [1, 2, 3];

const firstElement = array1.shift();

console.log(array1);
// expected output: Array [2, 3]

console.log(firstElement);
// expected output: 1
3.slice(): 该方法同concat()一样是返回一个新数组,不会影响原数组,只不过slice()是用来裁剪数组的,返回裁剪下来的数组。
slice()方法可以接受一或两个参数,
1、一个参数,返回从该参数指定位置开始到当前数组末尾的所有项。
2、两个参数,返回起始和结束位置之间的项,但不包括结束位置的项。
const animals = ['ant', 'bison', 'camel', 'duck', 'elephant'];

console.log(animals.slice(2));
// expected output: Array ["camel", "duck", "elephant"]

console.log(animals.slice(2, 4));
// expected output: Array ["camel", "duck"]

console.log(animals.slice(1, 5));
// expected output: Array ["bison", "camel", "duck", "elephant"]
4、splice(): 它除了可以添加元素之外还具有删除和替换元素的功能。 详细看以上例子
三、查找元素
indexOf() 和 lastIndexOf()
这两个方法都接收两个参数:
1、要查找的项
2、表示查找起点位置的索引。(可选的)
indexOf() 从数组的开头(位置0)开始向后查找。
lastIndexOf() 从数组的末尾开始向前查找。
两个方法,当找不到该元素时,都返回 -1
var arr = [1,2,3,4,5,2];

var index = arr.indexOf(2);

console.log(index);  // 1

index = arr.indexOf(2, 0);
console.log(index);  // 1

index = arr.indexOf(2, 2);
console.log(index);  // 5

index = arr.indexOf(6);
console.log(index);  // -1
其它方法:
1.join():该方法用来将数组转换为字符串,不改变原数组,返回转换后的字符串
const elements = ['Fire', 'Air', 'Water'];

console.log(elements.join());
// expected output: "Fire,Air,Water"

console.log(elements.join(''));
// expected output: "FireAirWater"

console.log(elements.join('-'));
// expected output: "Fire-Air-Water"
2.sort(): 按ascii码排序,改变原数组,返回排序后的数组
const months = ['March', 'Jan', 'Feb', 'Dec'];
months.sort();
console.log(months);
// expected output: Array ["Dec", "Feb", "Jan", "March"]

const array1 = [1, 30, 4, 21, 100000];
array1.sort();
console.log(array1);
// expected output: Array [1, 100000, 21, 30, 4]
3.reverse() :用于颠倒数组中元素的顺序。返回的是颠倒后的数组,会改变原数组。
const array1 = ['one', 'two', 'three'];
console.log('array1:', array1);
// expected output: "array1:" Array ["one", "two", "three"]

const reversed = array1.reverse();
console.log('reversed:', reversed);
// expected output: "reversed:" Array ["three", "two", "one"]

/* Careful: reverse is destructive. It also changes
the original array */
console.log('array1:', array1);
// expected output: "array1:" Array ["three", "two", "one"]
4.filter():返回数组中满足条件的元素组成的新数组,原数组不变(筛选,过滤)
const words = ['spray', 'limit', 'elite', 'exuberant', 'destruction', 'present'];

const result = words.filter(word => word.length > 6);

console.log(result);
// expected output: Array ["exuberant", "destruction", "present"]
5.map() :map() 方法来根据需求格式化原数组,返回格式化后的数组。原数组不变。可以传入三个值,分别是(当前元素,索引index,map的原数组)
var arr = [1,2,3,4,5,2];
var arr2 = arr.map(function(current, index, array){
    console.log("当前元素current="+current + "索引index="+index +"数组array="+array)
    return "$"+current
})
console.log(arr) //[1, 2, 3, 4, 5, 2]
console.log(arr2) //["$1", "$2", "$3", "$4", "$5", "$2"]
6.every() :对数组的每一项都运行给定的函数,若每一项都返回 ture,则返回 true($$)
const isBelowThreshold = (currentValue) => currentValue < 40;

const array1 = [1, 30, 39, 29, 10, 13];

console.log(array1.every(isBelowThreshold));
// expected output: true
7.some():对数组的每一项都运行给定的函数,若存在一项或多项返回 ture,否则返回 false(||)
const array = [1, 2, 3, 4, 5];

// checks whether an element is even
const even = (element) => element % 2 === 0;

console.log(array.some(even));
// expected output: true
8.forEach() :遍历整个数组,不中断,可以传入三个值,分别是(当前元素,索引index,原数组)
const array1 = ['a', 'b', 'c'];

array1.forEach(element => console.log(element));

// expected output: "a"
// expected output: "b"
// expected output: "c"
forEach和map很相似,很多地方用两个其中一种都行
相同点:
- 都是只能遍历数组
- 都有三个返回值(当前元素,索引index,原数组)
- 都是循环遍历数组每一项
区别是:
map,有返回值,可以return出来
forEach,没有返回值。forEach()返回值是undefined,不可以链式调用。
没有办法终止或者跳出forEach()循环,除非抛出异常,所以想执行一个数组是否满足什么条件,返回布尔值,可以用一般的for循环实现,或者用Array.every()或者Array.some();
关于以上区别的笔试题
["1", "2", "3"].map(parseInt);  //结果  [1, NaN, NaN]

如果想得到[1, 2,3]应该这么做
function returnInt(element){
  return parseInt(element,10);
}

["1", "2", "3"].map(returnInt);
这主要是因为 parseInt()默认有两个参数,第二个参数是进制数。当parsrInt没有传入参数的时候,而map()中的回调函数时候,会给它传三个参数,第二个参数就是索引,明显不正确,所以返回NaN了。
另,写map需要注意的点:
写到这里,发现这篇文章好长啊,已经写了一个小时了。不知道为什么博客园不能只用一种代码引入样式,两种弄的眼花缭乱,你们将就看吧。
下面贴一下实现最上面项目功能的store代码(技术栈react+mobx)
// 新增一个空的热点问题
    @action addHotItem = (obj) => {
        const { handledHotTopicContext } = this.currentItem;
        const { list } = handledHotTopicContext
        this.currentItem = {
            ...this.currentItem,
            handledHotTopicContext: { ...handledHotTopicContext, list: [...list, obj], selectedItem: null }
        };
    }

    // 保存一个热点问题(新增或修改)
    @action saveHotItem = (param, index) => {
        const { id } = param;
        const { handledHotTopicContext } = this.currentItem;
        const { list } = handledHotTopicContext
        // 编辑
        if (id !== undefined) {
            list.splice(id, 1, param);
            this.currentItem = {
                ...this.currentItem,
                handledHotTopicContext: { ...handledHotTopicContext, list: [...list], selectedItem: null }
            };
      // 新增
        } else {
            const leg = list.length - 1
            const { name } = param
            const addObj = { id: leg, name: name }
            list.splice(leg, 1, addObj);
            // list.push(addObj)
            this.currentItem = {
                ...this.currentItem,
                handledHotTopicContext: { ...handledHotTopicContext, list: [...list], selectedItem: null }
            };
        }
    }

    // 删除一个热点问题
    @action delHotItem = (param) => {
        const { id } = param;
        const { handledHotTopicContext } = this.currentItem;
        const { list } = handledHotTopicContext
        list.splice(id, 1);
        this.currentItem = {
            ...this.currentItem,
            handledHotTopicContext: { ...handledHotTopicContext, list: [...list], selectedItem: null }
        };
    }

    // 上移下移一个热点问题
    @action moveHotItem = (item, key) => {
        let temp = null;
        const { id } = item;
        let index = 0;
        const { handledHotTopicContext } = this.currentItem;
        const { list } = handledHotTopicContext
        index = list.findIndex(ele => ele.id === item.id);

        if (key === 'up') {
            temp = { ...list[index - 1] };
            list[index - 1] = { ...list[index] };
            list[index] = temp;
            this.currentItem = {
                ...this.currentItem,
                handledHotTopicContext: { ...handledHotTopicContext, list: [...list], selectedItem: null }
            };

        } else {
            temp = { ...list[index + 1] };
            list[index + 1] = { ...list[index] };
            list[index] = temp;
            this.currentItem = {
                ...this.currentItem,
                handledHotTopicContext: { ...handledHotTopicContext, list: [...list], selectedItem: null }
            };
        }
    }