一、注意
1、允许xcode访问钥匙串
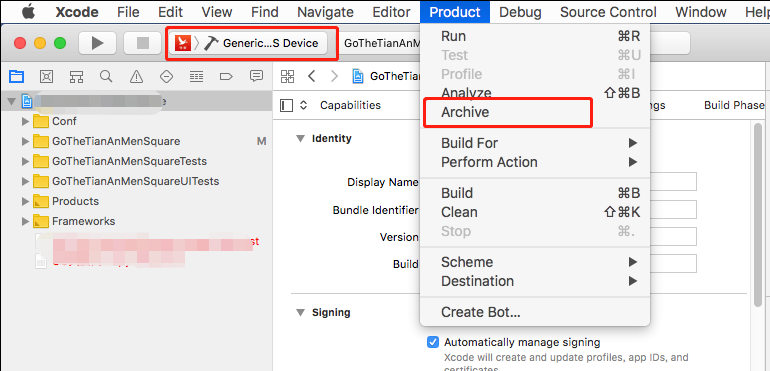
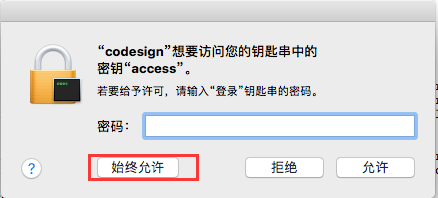
首先使用xcode提供的打包工具打包,看到如下提示后,输入用户密码后点击“始终允许”后再次打包即可。
选择“Generic IOS Device”然后单击Product->Archive
2、解除钥匙锁定
我们直接在mac电脑上使用命令打包导出ipa包一切正常,当使用ssh命令远程连接到mac电脑上打包就报如下错误。

原因是钥匙串被锁定,在打包前先执行如下命令解锁keychain。其中-p是当前用户的密码。
如果使用jenkins自动发布,需要使用jenkins主控机ssh登录mac系统然后执行解锁命令,也就是多一个客户端或多一个用户都要针对此用户解锁。
security unlock-keychain -p 123
二、手动管理证书-打包(转载)
之前咱们讲过 使用命令行打包 下面咱们介绍使用脚本打包,其实脚本和命令行没有太大的本质区别。
以下是脚本文件:
#注意:脚本目录和xxxx.xcodeproj要在同一个目录,如果放到其他目录,请自行修改脚本。
#工程名字(Target名字)
Project_Name="Target名字,系统默认和工程名字一样"
#配置环境,Release或者Debug
Configuration="Release"

#AdHoc版本的Bundle ID
AdHocBundleID="com.xxxxx"
#AppStore版本的Bundle ID
AppStoreBundleID="com.xxxxx"
#enterprise的Bundle ID
EnterpriseBundleID="com.xxxxx"

# ADHOC
#证书名#描述文件
ADHOCCODE_SIGN_IDENTITY="iPhone Distribution: xxxxx"
ADHOCPROVISIONING_PROFILE_NAME="xxxxx-xxxx-xxxxx-xxxxx"

#AppStore证书名#描述文件
APPSTORECODE_SIGN_IDENTITY="iPhone Distribution: xxxx"
APPSTOREROVISIONING_PROFILE_NAME="xxxx-xxxx-xxxx-xxxx-xxxx"

#企业(enterprise)证书名#描述文件
ENTERPRISECODE_SIGN_IDENTITY="iPhone Distribution: xxxx"
ENTERPRISEROVISIONING_PROFILE_NAME="693bc1e0-7f7a-4fba-8a08-977ffb7fb296"

#加载各个版本的plist文件
ADHOCExportOptionsPlist=./ADHOCExportOptionsPlist.plist
AppStoreExportOptionsPlist=./AppStoreExportOptionsPlist.plist
EnterpriseExportOptionsPlist=./EnterpriseExportOptionsPlist.plist

ADHOCExportOptionsPlist=${ADHOCExportOptionsPlist}
AppStoreExportOptionsPlist=${AppStoreExportOptionsPlist}
EnterpriseExportOptionsPlist=${EnterpriseExportOptionsPlist}

echo "~~~~~~~~~~~~选择打包方式(输入序号)~~~~~~~~~~~~~~~"
echo "		1 appstore"
echo "		2 adhoc"
echo "		3 enterprise"

# 读取用户输入并存到变量里
read parameter
sleep 0.5
method="$parameter"

# 判读用户是否有输入
if [ -n "$method" ]
then

#clean下
xcodebuild clean -xcodeproj ./$Project_Name/$Project_Name.xcodeproj -configuration $Configuration -alltargets

    if [ "$method" = "1" ]
    then

#appstore脚本
xcodebuild -project $Project_Name.xcodeproj -scheme $Project_Name -configuration $Configuration -archivePath build/$Project_Name-appstore.xcarchive clean archive build  CODE_SIGN_IDENTITY="${APPSTORECODE_SIGN_IDENTITY}" PROVISIONING_PROFILE="${APPSTOREROVISIONING_PROFILE_NAME}" PRODUCT_BUNDLE_IDENTIFIER="${AppStoreBundleID}"
xcodebuild -exportArchive -archivePath build/$Project_Name-appstore.xcarchive -exportOptionsPlist $AppStoreExportOptionsPlist -exportPath ~/Desktop/$Project_Name-appstore.ipa
    elif [ "$method" = "2" ]
    then
#adhoc脚本
xcodebuild -project $Project_Name.xcodeproj -scheme $Project_Name -configuration $Configuration -archivePath build/$Project_Name-adhoc.xcarchive clean archive build CODE_SIGN_IDENTITY="${ADHOCCODE_SIGN_IDENTITY}" PROVISIONING_PROFILE="${ADHOCPROVISIONING_PROFILE_NAME}" PRODUCT_BUNDLE_IDENTIFIER="${AdHocBundleID}"
xcodebuild -exportArchive -archivePath build/$Project_Name-adhoc.xcarchive -exportOptionsPlist $ADHOCExportOptionsPlist -exportPath ~/Desktop/$Project_Name-adhoc.ipa
    elif [ "$method" = "3" ]
    then
#企业打包脚本
xcodebuild -project $Project_Name.xcodeproj -scheme $Project_Name -configuration $Configuration -archivePath build/$Project_Name-enterprise.xcarchive clean archive build CODE_SIGN_IDENTITY="${ENTERPRISECODE_SIGN_IDENTITY}" PROVISIONING_PROFILE="${ENTERPRISEROVISIONING_PROFILE_NAME}" PRODUCT_BUNDLE_IDENTIFIER="${EnterpriseBundleID}"
xcodebuild -exportArchive -archivePath build/$Project_Name-enterprise.xcarchive -exportOptionsPlist $EnterpriseExportOptionsPlist -exportPath ~/Desktop/$Project_Name-enterprise.ipa
else
    echo "参数无效...."
    exit 1
    fi
fi
其中AppStore证书名、描述文件参考 证书(Certificate)与描述文件(Provisioning Profiles)
1.1、上文中需要的几个plist文件
ADHOCExportOptionsPlist.plist
<?xml version="1.0" encoding="UTF-8"?>
<!DOCTYPE plist PUBLIC "-//Apple//DTD PLIST 1.0//EN" "http://www.apple.com/DTDs/PropertyList-1.0.dtd">
<plist version="1.0">
<dict>
	<key>provisioningProfiles</key>
	<dict>
		<key>你的bundle ID</key>
		<string>描述文件UUID,和脚本中的一样</string>
	</dict>
	<key>method</key>
	<string>ad-hoc</string>
</dict>
</plist>
AppStoreExportOptionsPlist.plist
<?xml version="1.0" encoding="UTF-8"?>
<!DOCTYPE plist PUBLIC "-//Apple//DTD PLIST 1.0//EN" "http://www.apple.com/DTDs/PropertyList-1.0.dtd">
<plist version="1.0">
<dict>
	<key>provisioningProfiles</key>
	<dict>
		<key>你的bundle ID</key>
		<string>描述文件UUID,和脚本中的一样</string>
	</dict>
	<key>method</key>
	<string>app-store</string>
</dict>
</plist>
EnterpriseExportOptionsPlist.plist
<?xml version="1.0" encoding="UTF-8"?>
<!DOCTYPE plist PUBLIC "-//Apple//DTD PLIST 1.0//EN" "http://www.apple.com/DTDs/PropertyList-1.0.dtd">
<plist version="1.0">
<dict>
	<key>provisioningProfiles</key>
	<dict>
		<key>你的bundle ID</key>
		<string>描述文件UUID,和脚本中的一样</string>
	</dict>
	<key>method</key>
	<string>enterprise</string>
</dict>
</plist>
以上代码在这个地址可以下载: github下载地址
三、自动管理证书-打包
自动管理证书打包和手动管理区别不到,只是需要设置自动管理证书和打包还有导出时候不用指定证书常用名和描述文件名。
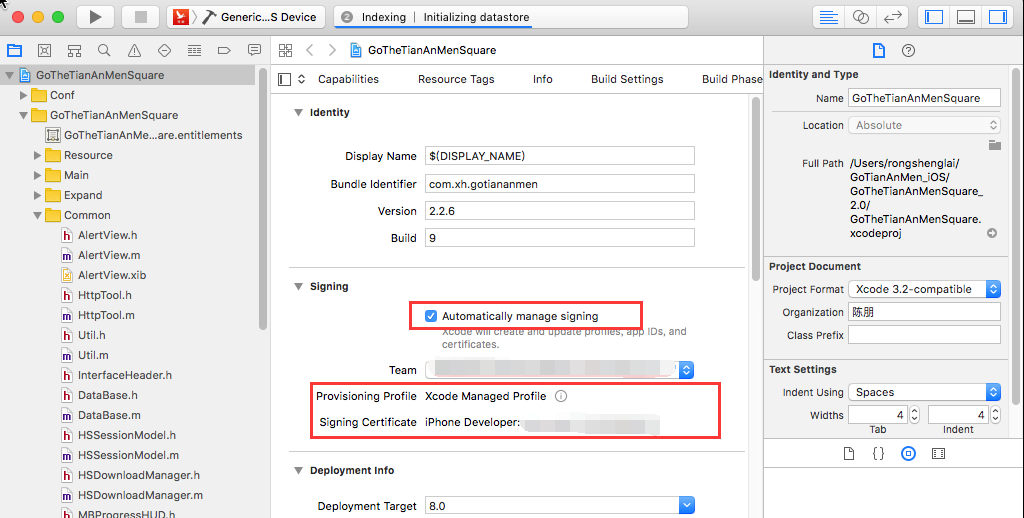
1、设置自动管理证书
勾选“automatically manage signing”选择相应的team即可
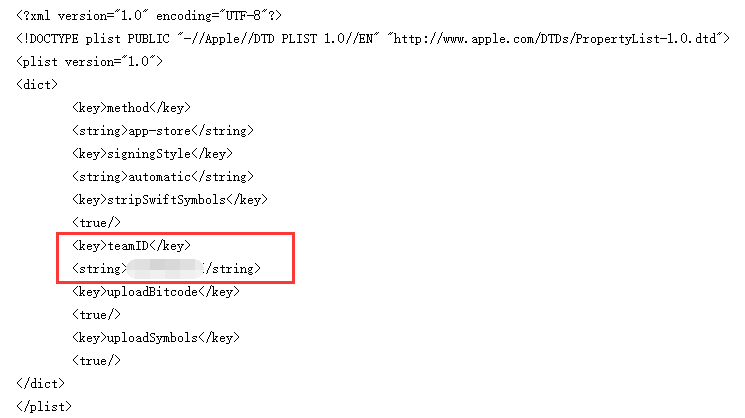
2、得到plist文件
在xcode中打包后,使用命令(命令中的plist文件可以些info.plist)导出一个ipa文件,在导出的目录中找到ExportOptions.plist将其复制到工程中,那个文件就是导出时使用的plist。
AppStoreExportOptions.plist
<?xml version="1.0" encoding="UTF-8"?>
<!DOCTYPE plist PUBLIC "-//Apple//DTD PLIST 1.0//EN" "http://www.apple.com/DTDs/PropertyList-1.0.dtd">
<plist version="1.0">
<dict>
        <key>method</key>
        <string>app-store</string>
        <key>signingStyle</key>
        <string>automatic</string>
        <key>stripSwiftSymbols</key>
        <true/>
        <key>uploadBitcode</key>
        <true/>
        <key>uploadSymbols</key>
        <true/>
</dict>
</plist>
EnterpriseExportOptions.plist
<?xml version="1.0" encoding="UTF-8"?>
<!DOCTYPE plist PUBLIC "-//Apple//DTD PLIST 1.0//EN" "http://www.apple.com/DTDs/PropertyList-1.0.dtd">
<plist version="1.0">
<dict>
	<key>compileBitcode</key>
	<true/>
	<key>method</key>
	<string>enterprise</string>
	<key>signingStyle</key>
	<string>automatic</string>
	<key>stripSwiftSymbols</key>
	<true/>
	<key>thinning</key>
	<string><none></string>
</dict>
</plist>
ADHOCExportOptions.plist
<?xml version="1.0" encoding="UTF-8"?>
<!DOCTYPE plist PUBLIC "-//Apple//DTD PLIST 1.0//EN" "http://www.apple.com/DTDs/PropertyList-1.0.dtd">
<plist version="1.0">
<dict>
        <key>compileBitcode</key>
        <true/>
        <key>method</key>
        <string>ad-hoc</string>
        <key>signingStyle</key>
        <string>automatic</string>
        <key>stripSwiftSymbols</key>
        <true/>
        <key>thinning</key>
        <string><none></string>
</dict>
</plist>
DevelopmentExportOptions.plist
<?xml version="1.0" encoding="UTF-8"?>
<!DOCTYPE plist PUBLIC "-//Apple//DTD PLIST 1.0//EN" "http://www.apple.com/DTDs/PropertyList-1.0.dtd">
<plist version="1.0">
<dict>
        <key>compileBitcode</key>
        <true/>
        <key>method</key>
        <string>development</string>
        <key>signingStyle</key>
        <string>automatic</string>
        <key>stripSwiftSymbols</key>
        <true/>
        <key>thinning</key>
        <string><none></string>
</dict>
</plist>
以上的这四个plist我都将如下两句去掉了,意思是导出app时候自动签名使用那个team。配置这个后你导出的app可以跟打包时候使用不同team,因为我的一样所以就去掉了。
3、生成导出描述文件
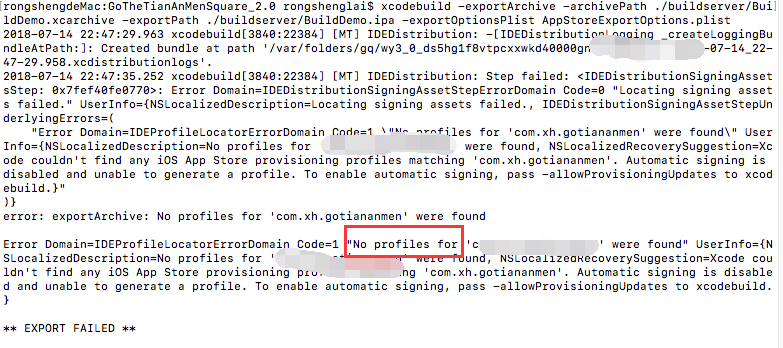
打包成功后下面需要将app导出,执行导出命令后会给出如下错误提示,提示没有导出的描述文件。
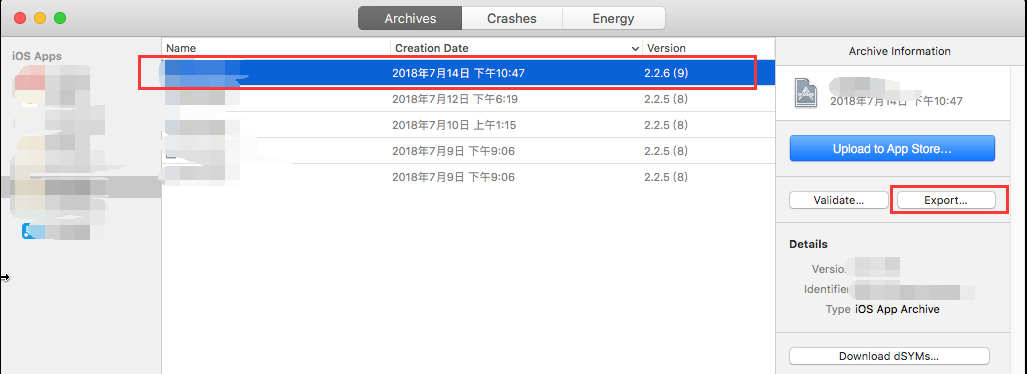
a)双击之前打包好.xcarchive文件,单击“Export”
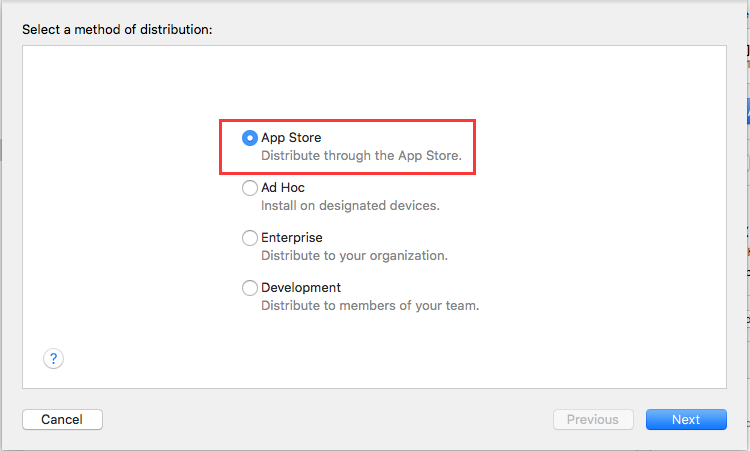
b)选择App Store后单击“Next”
 、
、
c)单击“Next”

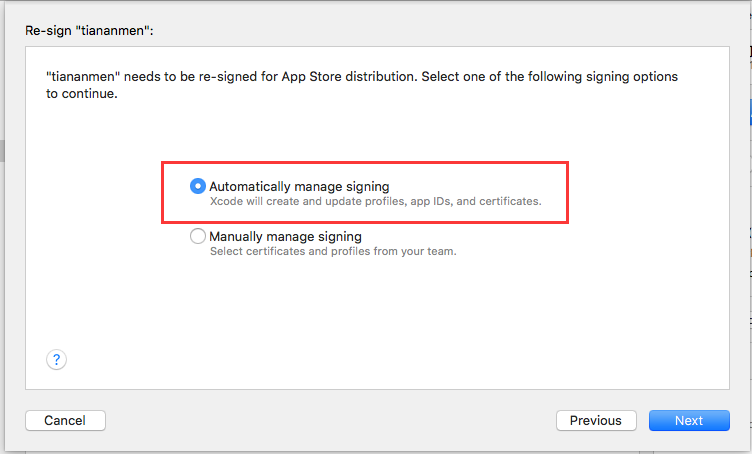
d)选择“Automatically manage signing”单击“next”,之后会自动连接开发者平台生成需要的描述文件
e)成功后再次执行导出命令则成功,同样需要导出AD hoc或企业版都需要按照如上方法执行一遍。
四、到底如何选择呢?
其实两种方式各有优缺点。
手动管理证书需要手动给每一个appid配置一个描述文件,当增加一个设备后还需要重新生成描述文件。有点是打包和导出只要一个描述文件即可,而且不需要在xcode中打包并打出项目(没有找到命令行方式自动配置描述文件)。
自动管理证书不用登录苹果开发者平台配置描述文件,但需要根据每一个appid运行一次打包和导出ipa包后,xcode才会自动生成描述文件并保存到本机。
两种方式都有一个缺点,就是描述文件有效期为一年,时间到了都需要重新来一遍。
参考文档
https://blog.csdn.net/qq_34047841/article/details/54144149