一、注册jira账号
访问如下网址: https://issues.sonatype.org/secure/Signup.jspa
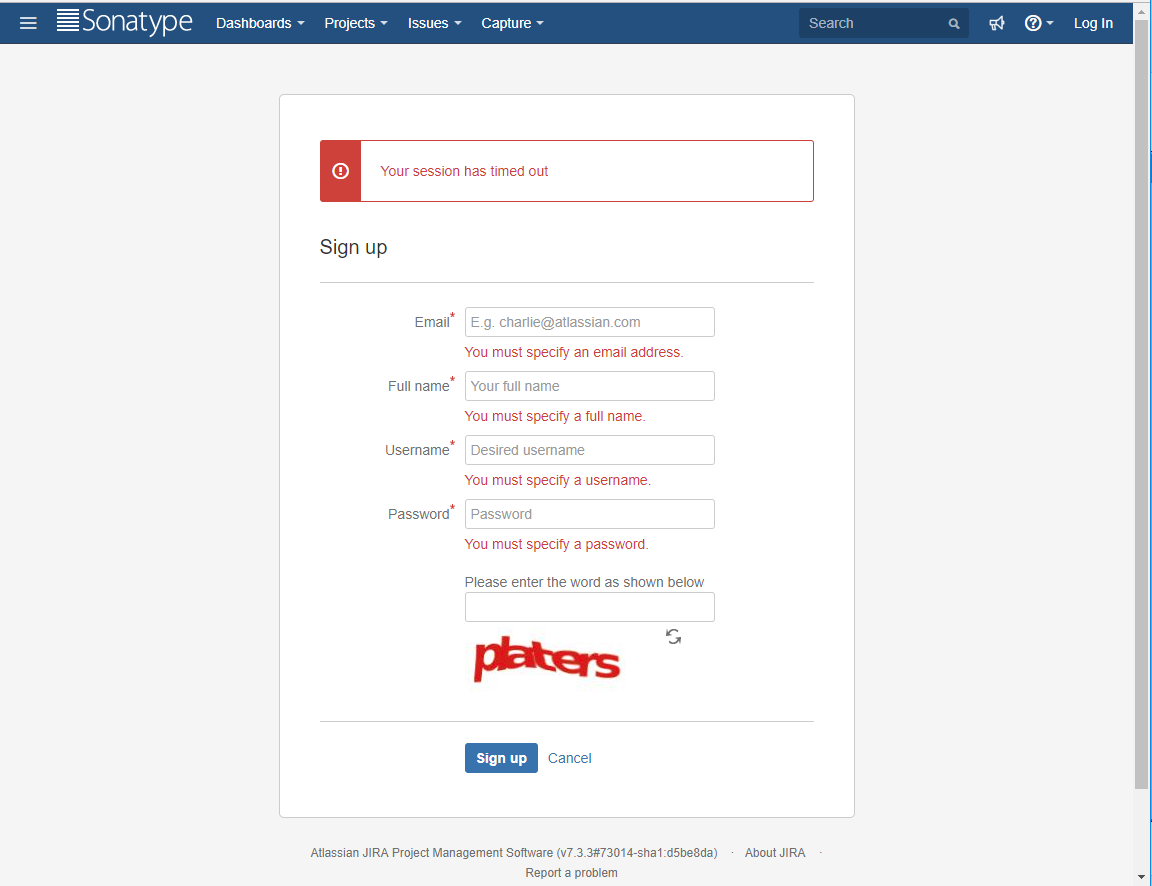
记住邮箱,用户名,密码以备以后使用,一定牢记。
二、创建一个issue
1、创建issue
https://issues.sonatype.org/secure/CreateIssue.jspa?issuetype=21&pid=10134

输入如下内容:
Summary: 项目说明,例如:Personal project
GroupID:就是pom.xml中的groupID,例如:com.gitee.rslai
Project URL:填写你的个人主页即可,例如:https://gitee.com/rslai
SCM url:跟Project URL写成一样即可。
2、等待Issue通过
一般需要 1 ~ 2 天,审批通过后会发邮件通知,在提交的 Issue 下面会看到 Sonatype 工作人员的回复。
他会问你是否是你自己的域名,你就回复是你所在组织的域名就行,例如:Yes,I’m themember of the organization with the domain ‘com.gitee.rslai’

3、等待Issue通过
之后还要继续等待1~2天,成功后会收到邮件回复。
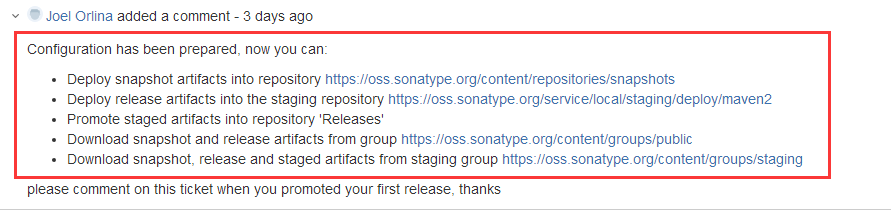
收到如下内容代表审核通过。
三、提供GPG/PGP 的签名文件
1、安装 GnuPG
访问 https://www.gnupg.org/download/ 下载gpg4win并安装。

2、生成 Key Pair 密钥对
在cmd中输入如下命令生成Key Pair 密钥对
gpg --gen-key

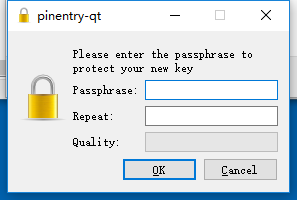
中间还要输入密码

记住上图中的key,之后上传key还需要输入此key。
3、查看 Key Pair 密钥对(如果换机器就需要复制 pubring.kbx、trustdb.gpg文件)
gpg --list-keys

4、发布公钥到GPG key-servers
Sonatype公司会在下面任意一个key-servers上进行搜索公钥,具体的key-servers 为:
http://pgp.mit.edu:11371
http://keyserver.ubuntu.com:11371
http://pool.sks-keyservers.net:11371
所以随便添加到 keyserver.ubuntu.com,命令如下,其中send-keys就是“2、生成 Key Pair 密钥对”中的key
gpg --keyserver hkp://keyserver.ubuntu.com:11371 --send-keys 8230XXXXXXXXD7337
5、查看公钥
gpg -–keyserver hkp://keyserver.ubuntu.com:11371 -–recv-keys 8230XXXXXXXXD7337
四、修改pom.xml文件
1、配置项目坐标 GAV
groupId和你issue申请时填写相同
    <groupId>com.gitee.rslai.commons.http</groupId>
    <artifactId>http</artifactId>
    <version>1.0-SNAPSHOT</version>
2、项目名称、描述和URL
    <name>${project.groupId}:${project.artifactId}</name>
    <description>A application used as an example on how to set up pushing
        its components to the Central Repository.
    </description>
    <url>http://www.example.com/example-application</url>
3、License信息
<licenses>
  <license>
    <name>The Apache License, Version 2.0</name>
    <url>http://www.apache.org/licenses/LICENSE-2.0.txt</url>
  </license>
</licenses>
两个选一个即可
<licenses>
  <license>
    <name>MIT License</name>
    <url>http://www.opensource.org/licenses/mit-license.php</url>
  </license>
</licenses>
4、开发者信息
    <developers>
        <developer>
            <name>rslai</name>
            <email>netlrs@163.com</email>
            <organization>rslai</organization>
            <organizationUrl>https://gitee.com/rslai</organizationUrl>
        </developer>
    </developers>
5、SCM信息
svn服务器如下填写
<scm>
  <connection>scm:svn:http://subversion.example.com/svn/project/trunk/</connection>
  <developerConnection>scm:svn:https://subversion.example.com/svn/project/trunk/</developerConnection>
  <url>http://subversion.example.com/svn/project/trunk/</url>
</scm>
Git服务器GitHub如下填写
<scm>
  <connection>scm:git:git://github.com/simpligility/ossrh-demo.git</connection>
  <developerConnection>scm:git:ssh://github.com:simpligility/ossrh-demo.git</developerConnection>
  <url>http://github.com/simpligility/ossrh-demo/tree/master</url>
</scm>
Git服务器BitBucket如下填写
<scm>
  <connection>scm:git:git://bitbucket.org/simpligility/ossrh-pipeline-demo.git</connection>
  <developerConnection>scm:git:ssh://bitbucket.org:simpligility/ossrh-pipeline-demo.git</developerConnection>
  <url>https://bitbucket.org/simpligility/ossrh-pipeline-demo/src</url>
</scm>
Mercurial服务器BitBucket如下填写
<scm>
  <connection>scm:hg:http://bitbucket.org/juven/hg-demo</connection>
  <developerConnection>scm:hg:https://bitbucket.org/juven/hg-demo</developerConnection>
  <url>http://bitbucket.org/juven/hg-demo</url>
</scm>
Apache Git服务器如下填写
<scm>
  <connection>scm:git:https://git-wip-us.apache.org/repos/asf/maven.git</connection>
  <developerConnection>scm:git:https://git-wip-us.apache.org/repos/asf/maven.git</developerConnection>
  <url>https://github.com/apache/maven/tree/${project.scm.tag}</url>
  <tag>master</tag>
</scm>
码云Git服务器如下填写
    <scm>
        <connection>scm:git:git@gitee.com:rslai/Http.git</connection>
        <developerConnection>scm:git:ssh://gitee.com:rslai/Http.git</developerConnection>
        <url>https://gitee.com/rslai/Http.git</url>
    </scm>
6、配置分发管理服务器
    <distributionManagement>
        <snapshotRepository>
            <id>ossrh</id>
            <url>https://oss.sonatype.org/content/repositories/snapshots</url>
        </snapshotRepository>
        <repository>
            <id>ossrh</id>
            <url>https://oss.sonatype.org/service/local/staging/deploy/maven2</url>
        </repository>
    </distributionManagement>
这就是上面你Issue通过后给你的地址
7、配置Profiles
可以根据不同环境进行打包发布。
    <profiles>
        <profile>
            <id>release</id>
            <build>
                <!--...-->
                <!--javadoc, source and gpg plugin from above-->
                <!--...-->
            </build>
        </profile>
    </profiles>
8、添加如下插件
a)gpg签名插件,maven-gpg-plugin
b)Nexus发布插件,nexus-staging-maven-plugin
c)Sources插件,maven-source-plugin
d)Javadoc插件,maven-javadoc-plugin
如下:
    <build>
        <plugins>
            <!-- gpg sign Plugin -->
            <plugin>
                <groupId>org.apache.maven.plugins</groupId>
                <artifactId>maven-gpg-plugin</artifactId>
                <version>1.6</version>
                <executions>
                    <execution>
                        <id>sign-artifacts</id>
                        <phase>verify</phase>
                        <goals>
                            <goal>sign</goal>
                        </goals>
                    </execution>
                </executions>
            </plugin>
            <!-- Nexus Staging Plugin -->
            <plugin>
                <groupId>org.sonatype.plugins</groupId>
                <artifactId>nexus-staging-maven-plugin</artifactId>
                <version>1.6.8</version>
                <extensions>true</extensions>
                <configuration>
                    <serverId>ossrh</serverId>
                    <nexusUrl>https://oss.sonatype.org/</nexusUrl>
                    <autoReleaseAfterClose>true</autoReleaseAfterClose>
                </configuration>
            </plugin>
             <!-- Sources Plugin -->
            <plugin>
                <groupId>org.apache.maven.plugins</groupId>
                <artifactId>maven-source-plugin</artifactId>
                <version>3.0.1</version>
                <executions>
                    <execution>
                        <id>attach-sources</id>
                        <goals>
                            <goal>jar-no-fork</goal>
                        </goals>
                    </execution>
                </executions>
            </plugin>
             <!-- Javadoc Plugin -->
            <plugin>
                <groupId>org.apache.maven.plugins</groupId>
                <artifactId>maven-javadoc-plugin</artifactId>
                <version>3.0.1</version>
                <executions>
                    <execution>
                        <id>attach-javadocs</id>
                        <goals>
                            <goal>jar</goal>
                        </goals>
                    </execution>
                </executions>
            </plugin>
        </plugins>
    </build>
五、修改mvn的settings.xml文件
打开settings.xml文件,一般在mvn安装目录或你指定的位置,例如:C:apache-maven-3.5.0conf
找到servers段,将server内容copy进去
  <servers>
    <server>
      <id>ossrh</id>
      <username>netlrs</username>
      <password>qQTMC6d3ZRawtY0N%</password>
    </server>
  </servers>
2、默认由于防火墙有时down不下来可以修改如下ali景象地址
  <mirrors>
	 <mirror>
            <id>nexus-aliyun</id>
            <mirrorOf>central</mirrorOf>
            <name>Nexus aliyun</name>
            <url>http://maven.aliyun.com/nexus/content/groups/public/</url>
    </mirror>
  </mirrors>
六、发布到仓库
进入cmd命令行,执行如下命令,发布过程中会要求输入密码输入“2、生成 Key Pair 密钥对”输入的密码即可
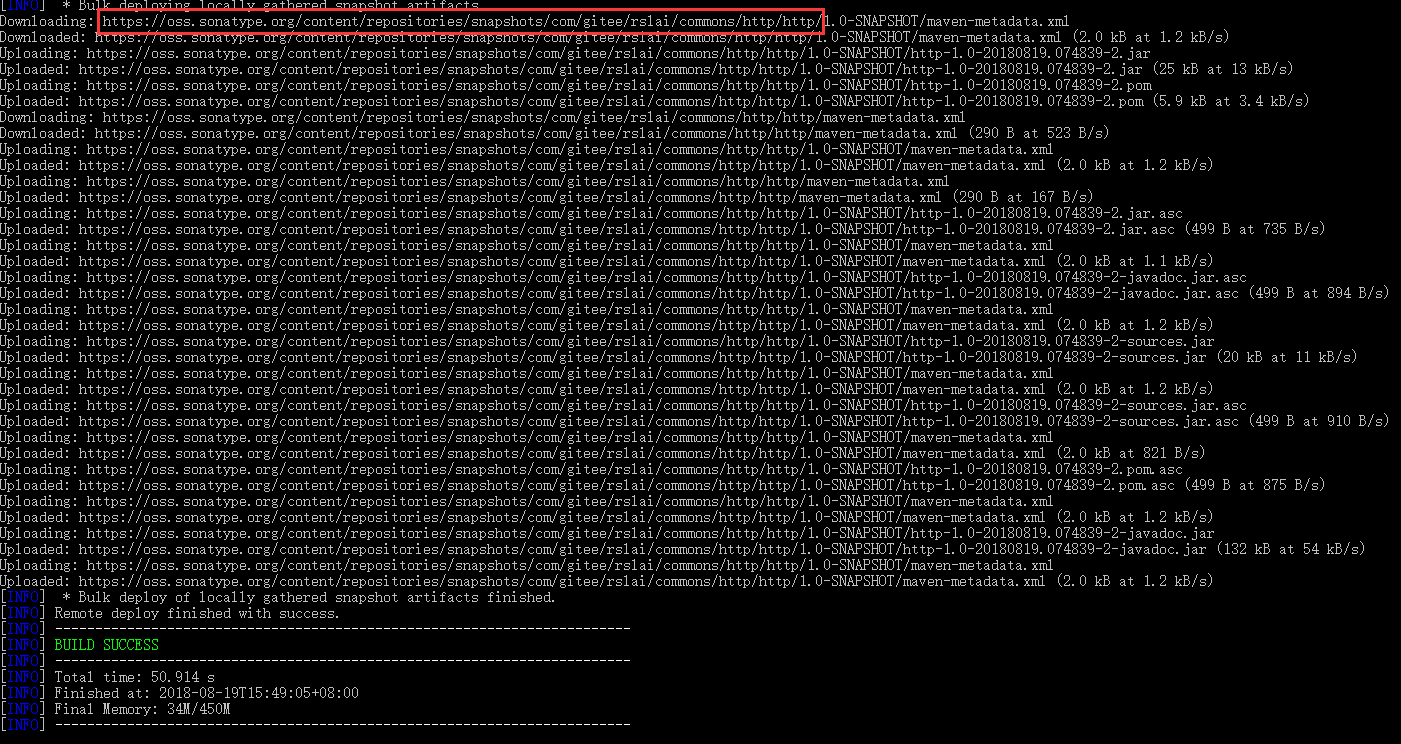
mvn clean deploy
发布成功如下图
https://oss.sonatype.org/content/repositories/snapshots/com/gitee/rslai/commons/http/http/ 这个地址就是发布后服务器地址
七、其它项目中引入此项目
访问 https://oss.sonatype.org 网址,输入之前的groupId “com.gitee.rslai.commons.http” 找到maven配置如下,将其写入其它项目的pom.xml文件,重新导入后即可使用。
<dependency>
  <groupId>com.gitee.rslai.commons.http</groupId>
  <artifactId>http</artifactId>
  <version>1.0-SNAPSHOT</version>
</dependency>
八、其它人引入此项目
由于发布的是 SNAPSHOT 所以只能自己引用,如果需要他人引用需要发布 release 版本
将pom.xml中的-SNAPSHOT去掉
    <groupId>com.gitee.rslai.base.commons</groupId>
    <artifactId>util</artifactId>
    <version>0.1-SNAPSHOT</version>
改为
    <groupId>com.gitee.rslai.base.commons</groupId>
    <artifactId>util</artifactId>
    <version>0.1</version>
重新发布:
mvn clean deploy
最后提示 close、release即表示发布成功。过10来分钟即可通过pom导入,过2小时可在 http://search.maven.org/ 网站查询到
九、导入密钥
步骤如下,先生成新密钥,再导入之前密钥,然后再签名导入密码,最后将新密钥推到GPG key-servers
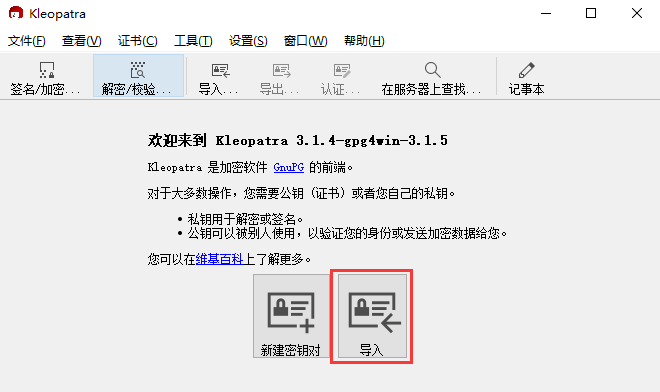
1、安装gpg4win
2、单击“导入”
3、导入后需要创建一个新的key用以验证之前的密钥
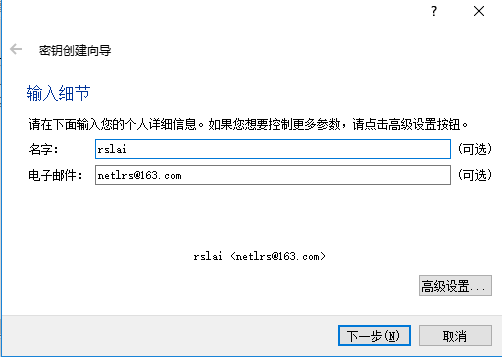
4、创建新密钥需要密码
5、点击之前的密钥证书选择验证,输入密码即验证成功
6、发布新公钥到GPG key-servers
查看现有keys
gpg --list-keys
上面的是之前的公钥,下边的是本次生成的公钥

使用之前的公钥查询
gpg --keyserver hkp://keyserver.ubuntu.com:11371 --recv-keys 1413D2A43XXXXXXXXXXXXXXXXXXXX0F9D7337
会查到已经注册

使用新公钥查询会看到没有注册

重新发布公钥到GPG key-servers,再次查询就会看到已经注册
gpg --keyserver hkp://keyserver.ubuntu.com:11371 --send-keys B62CC3XXXXXXXXXXXXXXXXXXXXXXXXXXXXXXD984E
7、mvn deploy时报如下错误,原因是之前没有将新生成的公钥推送到key-servers,错误信息如下

执行send-keys即可
gpg --keyserver hkp://keyserver.ubuntu.com:11371 --send-keys B62CC3XXXXXXXXXXXXXXXXXXXXXXXXXXXXXXD984E
参考文档:
https://blog.csdn.net/xiajiqiu/article/details/77607492