http://my.oschina.net/joanfen/blog/137601
效果如下图:可触发按钮事件

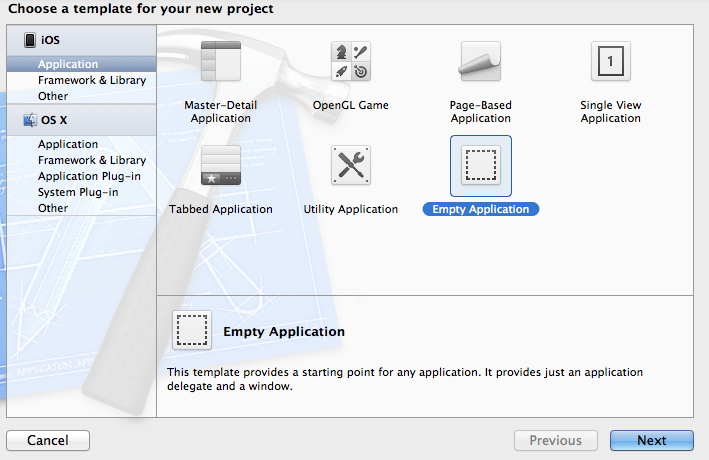
1、创建一个Empty Application
2、新建一个TableViewController,命名为MyTable

2.1在AppDelegate.h中添加@class 和property
|
1
2
3
4
5
6
7
8
9
10
11
12
|
#import <UIKit/UIKit.h>@class MyTable;@interface AppDelegate : UIResponder <UIApplicationDelegate>@property (strong, nonatomic) UIWindow *window;//声明@property (strong, nonatomic) MyTable *MyTableView;@end |
2.2在AppDelegate.m的 didFinishLaunchingWithOptions方法中
|
1
2
3
4
5
6
7
8
9
10
11
12
13
14
15
16
|
- (BOOL)application:(UIApplication *)application didFinishLaunchingWithOptions:(NSDictionary *)launchOptions{ self.window = [[UIWindow alloc] initWithFrame:[[UIScreen mainScreen] bounds]]; self.window.backgroundColor = [UIColor whiteColor]; _MyTableView = [[MyTable alloc] initWithNibName:@"MyTable" bundle:nil]; //创建一个navigationController,也可不创建,直接将window的rootViewController设定为MyTableView,此处创建是为了让程序有NavigationController的属性,方便Push视图 UINavigationController *nv = [[UINavigationController alloc] initWithRootViewController:self.MyTableView]; self.window.rootViewController = nv; [self.window makeKeyAndVisible]; return YES;} |
2.3、在MyTable的viewWillAppear方法中
|
1
2
3
4
5
|
-(void)viewWillAppear:(BOOL)animated{ [super viewWillAppear:animated]; self.title = @"自定义Table";} |
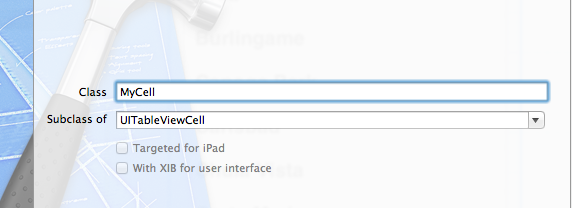
3、新建一个UITableViewCell类,命名为MyCell
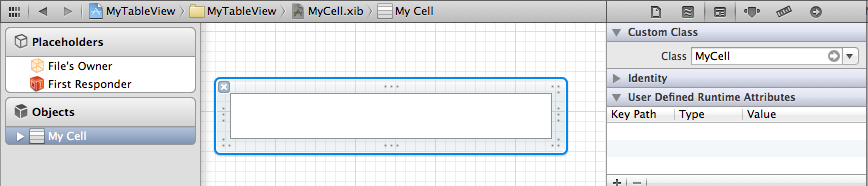
4、新建一个View,命名与上面的相同(也可不同,只是命名相同更加方便)

4.1、将此View中的View删除,拖一个TableViewCell进来,将此tableViewCell的Custom Class改成3中新建的类MyCell
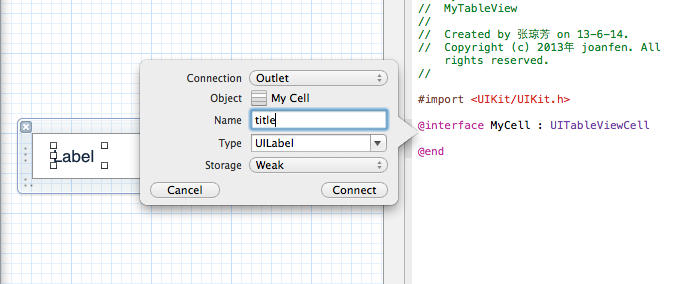
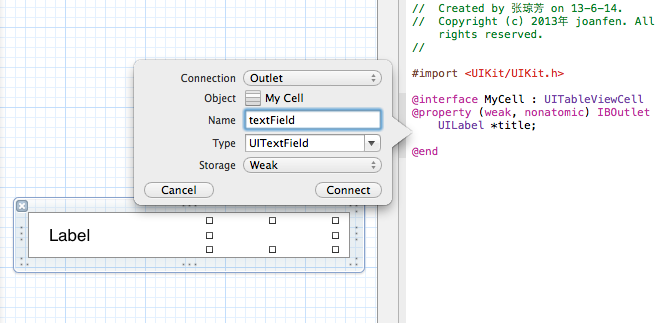
4.2.1、在cell中添加一个Label,创建映射
4.2.2、在Cell中添加一个TextField,创建映射
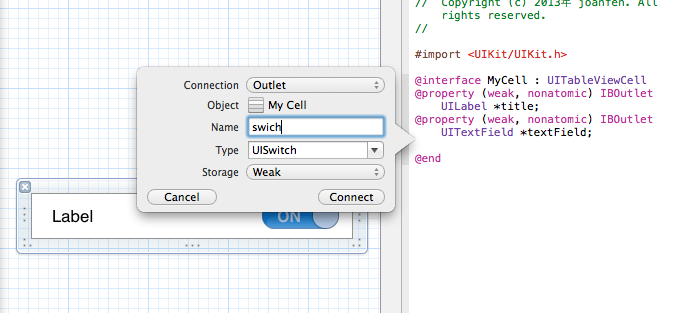
4.3.3、在Cell中添加一个Switch,创建映射
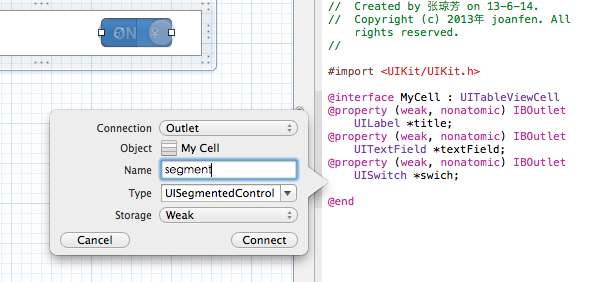
4.3.4、在Cell中添加一个segment,创建映射
5、在MyTable.m中,补充tableViewDataSource方法
|
1
2
3
4
5
6
7
8
9
10
11
12
13
|
- (NSInteger)numberOfSectionsInTableView:(UITableView *)tableView{ // Return the number of sections. return 1;}- (NSInteger)tableView:(UITableView *)tableView numberOfRowsInSection:(NSInteger)section{ // Return the number of rows in the section. return 4;} |
补充CellForRow方法
|
1
2
3
4
5
6
7
8
9
10
11
12
13
14
15
16
17
18
19
20
21
22
23
24
25
26
27
28
29
30
31
32
33
34
35
36
37
38
|
- (UITableViewCell *)tableView:(UITableView *)tableView cellForRowAtIndexPath:(NSIndexPath *)indexPath{ static NSString *CellIdentifier = @"MyCell"; //自定义cell MyCell *cell = (MyCell *)[tableView dequeueReusableCellWithIdentifier:CellIdentifier]; if (cell ==nil) { //加载MyCell.xib文件,此处loadNibNamed后面的参数CellIdentifier必须与MyCell.xib文件名相同,否则会无法加载,报错崩溃 NSArray *nibArray = [[NSBundle mainBundle] loadNibNamed:CellIdentifier owner:self options:nil]; cell = (MyCell *)[nibArray objectAtIndex:0]; } cell.accessoryType = UITableViewCellAccessoryDisclosureIndicator; NSArray *array = [NSArray arrayWithObjects:@"姓名",@"性别",@"学历",@"保险", nil]; cell.title.text = [array objectAtIndex:indexPath.row]; //根据行数来确定每行内容 if (indexPath.row == 0||indexPath.row==2) { cell.textField.hidden = NO; cell.swich.hidden = YES; cell.segment.hidden = YES; } else if(indexPath.row == 1){ cell.textField.hidden = YES; cell.segment.hidden = NO; cell.swich.hidden = YES; } else if(indexPath.row == 3) { cell.textField.hidden = YES; cell.swich.hidden = NO; cell.segment.hidden = YES; } //设置TextField代理 cell.textField.delegate = self; return cell;}
|