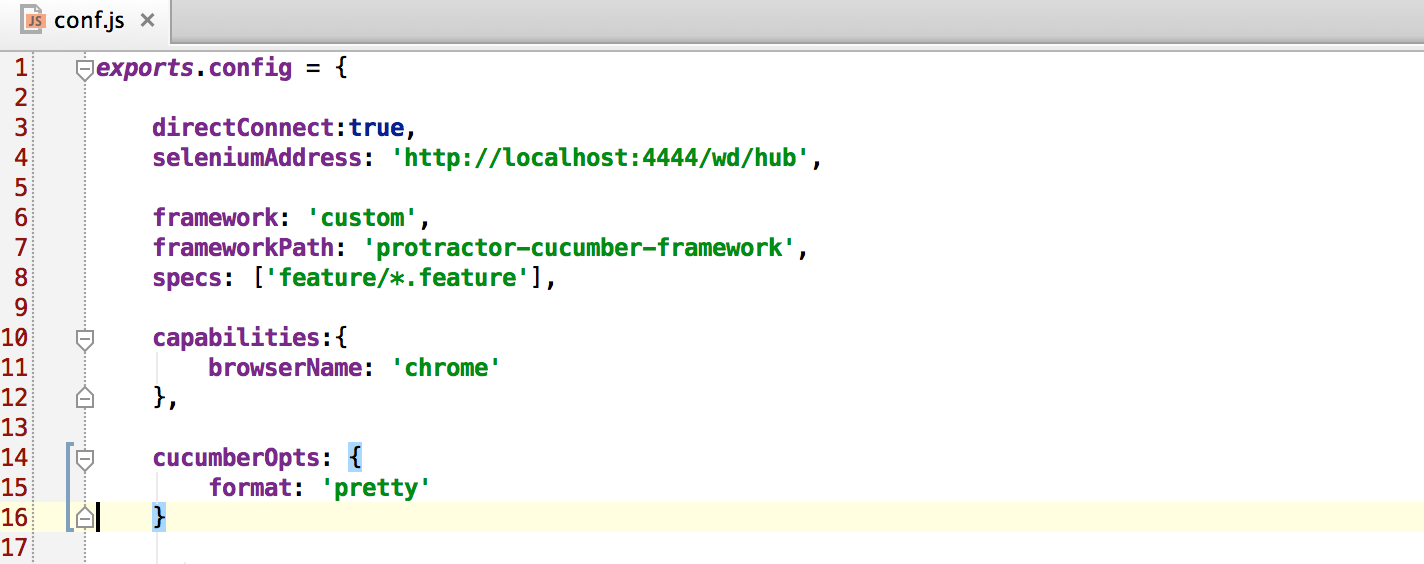
上一篇博文中我们已经在package.json中写入了cucumber依赖库,在执行 npm install 之后,cucumber就已经下载好了。接下来要做的是修改conf.js,请参考下图:

去年我搭这个框架的时候,如果要引入Cucumber,只需要将framework设置为cucumber即可。但是Protractor做了更改,此处需要设置为custom,并且需要增加frameworkPath这一项,这就是我去年搭建的框架跑不起来的原因。
下面我们以在亚马逊上搜索一本书为例子来编写featrue和实现步骤。
新建一个featrue文件,例如amazonTest.feature

1 Feature: Search book
2
3   Scenario: Search a book
4     Given I open Amazon website
5     When I search book "Agile Estimating and Planning"
6     Then I should see the book "Agile Estimating and Planning" in search result
再创建相应的实现步骤amazonTestSteps.js

 1 var testAmazonWrapper = function(){
 2
 3     this.Given(/^I open Amazon website$/, function(next) {
 4         next();
 5     });
 6
 7     this.When(/^I search book "([^"]*)"$/, function(book, next) {
 8         next();
 9     });
10
11     this.Then(/^I should see the book "([^"]*)" in search result$/, function(book,next) {
12         next();
13     });
14 };
15
16 module.exports = testAmazonWrapper;
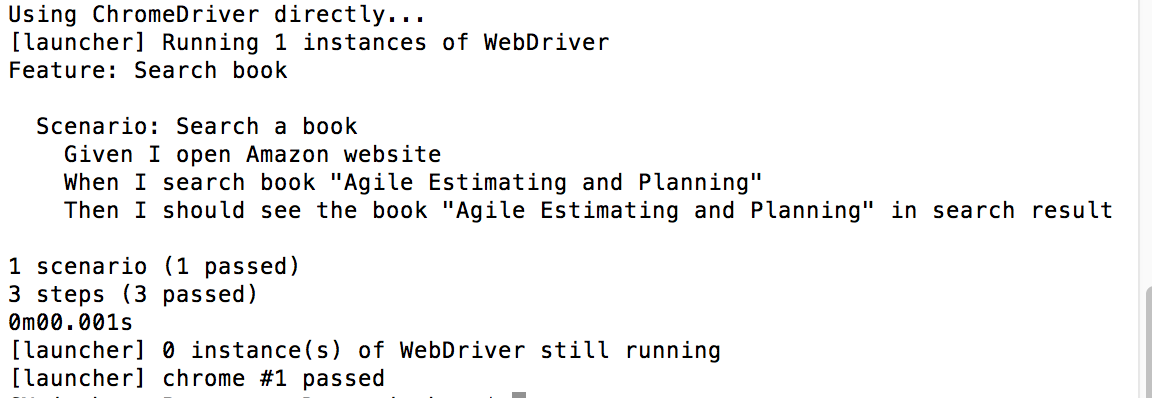
最后执行Protractor conf.js运行一下,运行结果如下:

------写在后面的话------
请允许我再唠叨两句题外话,在引入Cucumber之前,请思考一下是否有必要使用Cucumber。众所周知,Cucumber是为了实现BDD时采用的工具,也就是说,只有我们在做BDD的时候,才需要考虑使用Cucumber。如果是为了让测试看起来高大上,看起来很有技术含量,而去盲目引入Cucumber,反而会增加编写测试的工作量,写出来的Feature也没有起到应有的作用。唠叨完毕。
文中使用的框架和代码已经上传到github,小伙伴们若需要可自取:https://github.com/SallyZY/ProtractDemo
如需转载,请注明出处,这是对他人劳动成果的尊重~
