上一篇我们讲了spring boot 整合JdbcTemplate来进行数据的持久化,
这篇我们来说下怎么通过spring boot 整合JPA来实现数据的持久化。
一、代码实现
- 修改pom,引入依赖
  <!-- 引入jpa 依赖 -->
        <dependency>
            <groupId>org.springframework.boot</groupId>
            <artifactId>spring-boot-starter-data-jpa</artifactId>
        </dependency>
- 修改application.properties,配置相关信息
#修改tomcat默认端口号 server.port=8090 #修改context path server.context-path=/test #配置数据源信息 spring.datasource.driver-class-name=com.mysql.jdbc.Driver spring.datasource.url=jdbc:mysql://localhost:3306/test spring.datasource.username=root spring.datasource.password=root #配置jpa spring.jpa.hibernate.ddl-auto=update spring.jpa.show-sql=true spring.jackson.serialization.indent_output=true - 创建实体类
package com.study.entity;

import javax.persistence.Entity;
import javax.persistence.GeneratedValue;
import javax.persistence.GenerationType;
import javax.persistence.Id;
import javax.persistence.Table;

@Entity
@Table(name="t_user")
public class User {

    @Id @GeneratedValue(strategy=GenerationType.AUTO)
    private Integer id;
    private String userName;
    private String password;

    public Integer getId() {
        return id;
    }

    public void setId(Integer id) {
        this.id = id;
    }

    public String getUserName() {
        return userName;
    }

    public void setUserName(String userName) {
        this.userName = userName;
    }

    public String getPassword() {
        return password;
    }

    public void setPassword(String password) {
        this.password = password;
    }

}
- 创建repository接口并继承CrudRepository
package com.study.repository;

import org.springframework.data.jpa.repository.Query;
import org.springframework.data.repository.CrudRepository;
import org.springframework.data.repository.query.Param;

import com.study.entity.User;

/**
 * 注意:
 * 1.这里这里是interface,不是class
 *
 * 2.CrudRepository里面的泛型,第一个是实体类,第二个是主键的类型
 *
 * 3.由于crudRepository 里面已经有一些接口了,如deleteAll,findOne等, 我们直接调用即可
 *
 * 4.当然,我们也可以根据自己的情况来实现自己的接口,如下面的getUser()方法,jpql语句和hql语句差不多
 *
 * */
public interface UserRepository extends CrudRepository<User, Integer> {

    /**
     * 我们这里只需要写接口,不需要写实现,spring boot会帮忙自动实现
     *
     * */

    @Query("from User where id =:id ")
    public User getUser(@Param("id") Integer id);
}
- 创建service
- 接口
package com.study.service;

import com.study.entity.User;


public interface UserService {
    public User getUser(Integer id);
}
- 实现
package com.study.service.impl;

import org.springframework.beans.factory.annotation.Autowired;
import org.springframework.stereotype.Service;

import com.study.entity.User;
import com.study.repository.UserRepository;
import com.study.service.UserService;

@Service
public class UserServiceImpl implements UserService {

    @Autowired
    UserRepository repository;

    @Override
    public User getUser(Integer id) {
        //有两种方式:
        //1.调用crudRepository的接口
//        return repository.findOne(id);
        //2.调用我们自己写的接口
        return repository.getUser(id);
    }


}
- 接口
- 创建controller
package com.study.controller;

import org.springframework.beans.factory.annotation.Autowired;
import org.springframework.web.bind.annotation.PathVariable;
import org.springframework.web.bind.annotation.RequestMapping;
import org.springframework.web.bind.annotation.RestController;

import com.study.entity.User;
import com.study.service.UserService;

@RestController
public class UserController {
    @Autowired
    UserService service;

    @RequestMapping("/getUser/{id}")
    public User getUser(@PathVariable("id") Integer id){

        return service.getUser(id);
    }
}
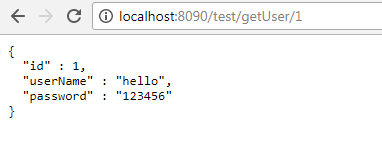
- 测试,页面以json格式显示数据库值

二、知识点引申
关于Repository知识点,可以去看下下面这篇文章
https://segmentfault.com/a/1190000012346333