使用kubeadm安装Kubernetes 1.15.1
kubeadm是Kubernetes官方提供的用于快速安装Kubernetes集群的工具,伴随Kubernetes每个版本的发布都会同步更新,kubeadm会对集群配置方面的一些实践做调整,通过实验kubeadm可以学习到Kubernetes官方在集群配置上一些新的最佳实践。
最近发布的Kubernetes 1.15中,kubeadm对HA集群的配置已经达到beta可用,说明kubeadm距离生产环境中可用的距离越来越近了。
1.准备
1.1 系统配置
在安装之前,需要先做如下准备。两台CentOS 7.6主机如下:
cat /etc/hosts
192.168.99.11 node1
192.168.99.12 node2
安装centos base源和epel源:
CentOS:
1、备份
mv /etc/yum.repos.d/CentOS-Base.repo /etc/yum.repos.d/CentOS-Base.repo.backup
2、下载新的CentOS-Base.repo 到/etc/yum.repos.d/
CentOS 7
wget -O /etc/yum.repos.d/CentOS-Base.repo http://mirrors.aliyun.com/repo/Centos-7.repo
或者
curl -o /etc/yum.repos.d/CentOS-Base.repo http://mirrors.aliyun.com/repo/Centos-7.repo
3、之后运行yum makecache生成缓存
epel:
##epel 配置方法
###1、备份(如有配置其他epel源)
mv /etc/yum.repos.d/epel.repo /etc/yum.repos.d/epel.repo.backup
mv /etc/yum.repos.d/epel-testing.repo /etc/yum.repos.d/epel-testing.repo.backup
2、下载新repo 到/etc/yum.repos.d/
epel(RHEL 7)
wget -O /etc/yum.repos.d/epel.repo http://mirrors.aliyun.com/repo/epel-7.repo
在所有的机器上执行,安装基本命令:
yum install -y net-tools conntrack-tools wget vim ntpdate libseccomp libtool-ltdl lrzsz
如果各个主机启用了防火墙,需要开放Kubernetes各个组件所需要的端口,可以查看Installing kubeadm中的”Check required ports”一节。 这里简单起见在各节点禁用防火墙:
systemctl stop firewalld
systemctl disable firewalld
禁用SELINUX:
setenforce 0
vi /etc/selinux/config
SELINUX=disabled
创建/etc/sysctl.d/k8s.conf文件,添加如下内容:
cat >/etc/sysctl.d/k8s.conf <<EOF
net.bridge.bridge-nf-call-ip6tables = 1
net.bridge.bridge-nf-call-iptables = 1
net.ipv4.ip_forward = 1
EOF
#执行命令使修改生效。
modprobe br_netfilter
sysctl -p /etc/sysctl.d/k8s.conf
关闭swap
swapoff -a
sed -i 's/.*swap.*/#&/' /etc/fstab
1.2 kube-proxy开启ipvs的前置条件
由于ipvs已经加入到了内核的主干,所以为kube-proxy开启ipvs的前提需要加载以下的内核模块:
ip_vs
ip_vs_rr
ip_vs_wrr
ip_vs_sh
nf_conntrack_ipv4
在所有的Kubernetes节点node1和node2上执行以下脚本:
cat > /etc/sysconfig/modules/ipvs.modules <<EOF
#!/bin/bash
modprobe -- ip_vs
modprobe -- ip_vs_rr
modprobe -- ip_vs_wrr
modprobe -- ip_vs_sh
modprobe -- nf_conntrack_ipv4
EOF
chmod 755 /etc/sysconfig/modules/ipvs.modules && bash /etc/sysconfig/modules/ipvs.modules && lsmod | grep -e ip_vs -e nf_conntrack_ipv4
上面脚本创建了的/etc/sysconfig/modules/ipvs.modules文件,保证在节点重启后能自动加载所需模块。 使用lsmod | grep -e ip_vs -e nf_conntrack_ipv4命令查看是否已经正确加载所需的内核模块。
接下来还需要确保各个节点上已经安装了ipset软件包
yum install ipset -y 。默认是安装的,不用安装
[root@k8s-master-15-81 ~]# rpm -qa ipset
ipset-6.38-3.el7_6.x86_64
[root@k8s-master-15-81 ~]#
为了便于查看ipvs的代理规则,最好安装一下管理工具ipvsadm
yum install ipvsadm -y
如果以上前提条件如果不满足,则即使kube-proxy的配置开启了ipvs模式,也会退回到iptables模式
1.3安装Docker
Kubernetes从1.6开始使用CRI(Container Runtime Interface)容器运行时接口。默认的容器运行时仍然是Docker,使用的是kubelet中内置dockershim CRI实现。
#1.安装yum源工具包
yum install -y yum-utils device-mapper-persistent-data lvm2
#2.下载docker-ce官方的yum源配置文件,上面操作了 这里就不操作了
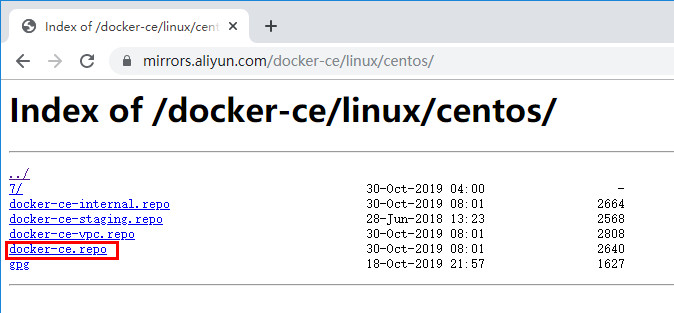
yum-config-manager --add-repo http://mirrors.aliyun.com/docker-ce/linux/centos/docker-ce.repo
备注:不用加https,如下阿里云没用
yum-config-manager --add-repo https://mirrors.aliyun.com/docker-ce/linux/centos/docker-ce.repo

不使用国外源
#yum-config-manager --add-repo https://download.docker.com/linux/centos/docker-ce.repo
#3.禁用docker-c-edge源配edge是不开发版,不稳定,下载stable版
yum-config-manager --disable docker-ce-edge
#4.更新本地YUM源缓存
yum makecache fast
#5.安装Docker-ce最新版本
yum -y install docker-ce
systemctl start docker
systemctl enable docker
#6.配置daemon, 因为kubelet的启动环境变量要与docker的cgroup-driver驱动相同,以下是官方推荐处理方式
#由于国内拉取镜像较慢,配置文件最后追加了阿里云镜像加速配置。
cat >/etc/docker/daemon.json <<EOF
{
  "registry-mirrors":["https://8vd2izvl.mirror.aliyuncs.com"],

  "insecure-registries":["192.168.0.70:5000"]
}
EOF
备注:举例其他源,不需要操作
cat > /etc/docker/daemon.json <<EOF
{
  "exec-opts": ["native.cgroupdriver=systemd"],
  "log-driver": "json-file",
  "log-opts": {
    "max-size": "100m"
  },
  "storage-driver": "overlay2",
  "storage-opts": [
    "overlay2.override_kernel_check=true"
  ],
  "registry-mirrors": ["https://uyah70su.mirror.aliyuncs.com"]
}
EOF

举例2:
使用DaoCloud加速器(可以跳过这一步)
curl -sSL https://get.daocloud.io/daotools/set_mirror.sh | sh -s http://0d236e3f.m.daocloud.io
# docker version >= 1.12
# {"registry-mirrors": ["http://0d236e3f.m.daocloud.io"]}
# Success.
# You need to restart docker to take effect: sudo systemctl restart docker
systemctl restart docker
#7.设置开机自启动
systemctl restart docker && systemctl enable docker && systemctl status docker
下面操作是举例指定docker版本安装,不需要操作。
安装docker的yum源:
yum install -y yum-utils device-mapper-persistent-data lvm2
yum-config-manager
--add-repo
http://mirrors.aliyun.com/docker-ce/linux/centos/docker-ce.repo
备注:
# 添加Docker repository,这里改为国内阿里云yum源,下面国外源不建议用

yum-config-manager
    --add-repo
    https://download.docker.com/linux/centos/docker-ce.repo
查看最新的Docker版本:
yum list docker-ce.x86_64  --showduplicates |sort -r
docker-ce.x86_64            3:18.09.7-3.el7                     docker-ce-stable
docker-ce.x86_64            3:18.09.6-3.el7                     docker-ce-stable
docker-ce.x86_64            3:18.09.5-3.el7                     docker-ce-stable
docker-ce.x86_64            3:18.09.4-3.el7                     docker-ce-stable
docker-ce.x86_64            3:18.09.3-3.el7                     docker-ce-stable
docker-ce.x86_64            3:18.09.2-3.el7                     docker-ce-stable
docker-ce.x86_64            3:18.09.1-3.el7                     docker-ce-stable
docker-ce.x86_64            3:18.09.0-3.el7                     docker-ce-stable
docker-ce.x86_64            18.06.3.ce-3.el7                    docker-ce-stable
docker-ce.x86_64            18.06.2.ce-3.el7                    docker-ce-stable
docker-ce.x86_64            18.06.1.ce-3.el7                    docker-ce-stable
docker-ce.x86_64            18.06.0.ce-3.el7                    docker-ce-stable
docker-ce.x86_64            18.03.1.ce-1.el7.centos             docker-ce-stable
docker-ce.x86_64            18.03.0.ce-1.el7.centos             docker-ce-stable
...
Kubernetes 1.15当前支持的docker版本列表是1.13.1, 17.03, 17.06, 17.09, 18.06, 18.09。 这里在各节点安装docker的18.09.7版本。
yum makecache fast

yum install -y --setopt=obsoletes=0
  docker-ce-18.09.7-3.el7

systemctl start docker
systemctl enable docker
确认一下iptables filter表中FOWARD链的默认策略(pllicy)为ACCEPT。
iptables -nvL
Chain INPUT (policy ACCEPT 263 packets, 19209 bytes)
 pkts bytes target     prot opt in     out     source               destination

Chain FORWARD (policy ACCEPT 0 packets, 0 bytes)
 pkts bytes target     prot opt in     out     source               destination
    0     0 DOCKER-USER  all  --  *      *       0.0.0.0/0            0.0.0.0/0
    0     0 DOCKER-ISOLATION-STAGE-1  all  --  *      *       0.0.0.0/0            0.0.0.0/0
    0     0 ACCEPT     all  --  *      docker0  0.0.0.0/0            0.0.0.0/0            ctstate RELATED,ESTABLISHED
    0     0 DOCKER     all  --  *      docker0  0.0.0.0/0            0.0.0.0/0
    0     0 ACCEPT     all  --  docker0 !docker0  0.0.0.0/0            0.0.0.0/0
    0     0 ACCEPT     all  --  docker0 docker0  0.0.0.0/0            0.0.0.0/0
1.4 修改docker cgroup driver为systemd-不需要操作
根据文档CRI installation中的内容,对于使用systemd作为init system的Linux的发行版,使用systemd作为docker的cgroup driver可以确保服务器节点在资源紧张的情况更加稳定,因此这里修改各个节点上docker的cgroup driver为systemd。
创建或修改/etc/docker/daemon.json:
{
  "exec-opts": ["native.cgroupdriver=systemd"]
}
重启docker:
systemctl restart docker

docker info | grep Cgroup
Cgroup Driver: systemd
2.使用kubeadm部署Kubernetes
2.1 安装kubeadm和kubelet
下面在各节点安装kubeadm和kubelet:
安装的kubelet、kubectl、kubeadm源
阿里云:
如果yum安装过程中报错,那么需要把阿里云地址中的https修改为http,切记
cat <<EOF > /etc/yum.repos.d/kubernetes.repo
[kubernetes]
name=Kubernetes
baseurl=https://mirrors.aliyun.com/kubernetes/yum/repos/kubernetes-el7-x86_64/
enabled=1
gpgcheck=1
repo_gpgcheck=1
gpgkey=https://mirrors.aliyun.com/kubernetes/yum/doc/yum-key.gpg https://mirrors.aliyun.com/kubernetes/yum/doc/rpm-package-key.gpg
EOF
yum clean all && yum makecache -y
yum makecache fast
也可以如下配置
[root@localhost ~]# cat >> /etc/yum.repos.d/kubernetes.repo << EOF
[kubernetes]
name=Kubernetes
baseurl=https://mirrors.aliyun.com/kubernetes/yum/repos/kubernetes-el7-x86_64/
enabled=1
gpgcheck=0
EOF
yum clean all && yum makecache -y
yum makecache fast
谷歌官方:
cat <<EOF > /etc/yum.repos.d/kubernetes.repo
[kubernetes]
name=Kubernetes
baseurl=https://packages.cloud.google.com/yum/repos/kubernetes-el7-x86_64
enabled=1
gpgcheck=1
repo_gpgcheck=1
gpgkey=https://packages.cloud.google.com/yum/doc/yum-key.gpg
        https://packages.cloud.google.com/yum/doc/rpm-package-key.gpg
EOF
测试地址https://packages.cloud.google.com/yum/repos/kubernetes-el7-x86_64是否可用,如果不可用需要Ke学上网。
curl https://packages.cloud.google.com/yum/repos/kubernetes-el7-x86_64
开始安装:
yum install -y kubelet-1.15.1 kubeadm-1.15.1 kubectl-1.15.1
安装完成
Total                                                                                                                               6.8 MB/s |  55 MB  00:00:08
Running transaction check
Running transaction test
Transaction test succeeded
Running transaction
  Installing : socat-1.7.3.2-2.el7.x86_64                                                                                                                       1/6
  Installing : kubernetes-cni-0.7.5-0.x86_64                                                                                                                    2/6
  Installing : kubelet-1.15.1-0.x86_64                                                                                                                          3/6
  Installing : cri-tools-1.13.0-0.x86_64                                                                                                                        4/6
  Installing : kubectl-1.15.1-0.x86_64                                                                                                                          5/6
  Installing : kubeadm-1.15.1-0.x86_64                                                                                                                          6/6
  Verifying  : kubectl-1.15.1-0.x86_64                                                                                                                          1/6
  Verifying  : cri-tools-1.13.0-0.x86_64                                                                                                                        2/6
  Verifying  : kubelet-1.15.1-0.x86_64                                                                                                                          3/6
  Verifying  : kubeadm-1.15.1-0.x86_64                                                                                                                          4/6
  Verifying  : kubernetes-cni-0.7.5-0.x86_64                                                                                                                    5/6
  Verifying  : socat-1.7.3.2-2.el7.x86_64                                                                                                                       6/6

Installed:
  kubeadm.x86_64 0:1.15.1-0                             kubectl.x86_64 0:1.15.1-0                             kubelet.x86_64 0:1.15.1-0

Dependency Installed:
  cri-tools.x86_64 0:1.13.0-0                         kubernetes-cni.x86_64 0:0.7.5-0                         socat.x86_64 0:1.7.3.2-2.el7

Complete!
[root@k8s-node-0-88 ~]#
从安装结果可以看出还安装了cri-tools, kubernetes-cni, socat三个依赖:
- 官方从Kubernetes 1.14开始将cni依赖升级到了0.7.5版本
- socat是kubelet的依赖
- cri-tools是CRI(Container Runtime Interface)容器运行时接口的命令行工具
运行kubelet –help可以看到原来kubelet的绝大多数命令行flag参数都被DEPRECATED了,如
......
--address 0.0.0.0   The IP address for the Kubelet to serve on (set to 0.0.0.0 for all IPv4 interfaces and `::` for all IPv6 interfaces) (default 0.0.0.0) (DEPRECATED: This parameter should be set via the config file specified by the Kubelet's --config flag. See https://kubernetes.io/docs/tasks/administer-cluster/kubelet-config-file/ for more information.)
......
而官方推荐我们使用–config指定配置文件,并在配置文件中指定原来这些flag所配置的内容。具体内容可以查看这里Set Kubelet parameters via a config file。这也是Kubernetes为了支持动态Kubelet配置(Dynamic Kubelet Configuration)才这么做的,参考Reconfigure a Node’s Kubelet in a Live Cluster。
kubelet的配置文件必须是json或yaml格式,具体可查看这里。
Kubernetes 1.8开始要求关闭系统的Swap,如果不关闭,默认配置下kubelet将无法启动。 关闭系统的Swap方法如下:
swapoff -a
修改 /etc/fstab 文件,注释掉 SWAP 的自动挂载,使用free -m确认swap已经关闭。 swappiness参数调整,修改/etc/sysctl.d/k8s.conf添加下面一行:
vim /etc/sysctl.d/k8s.conf
vm.swappiness=0
执行sysctl -p /etc/sysctl.d/k8s.conf使修改生效。
sysctl -p /etc/sysctl.d/k8s.conf
因为这里本次用于测试两台主机上还运行其他服务,关闭swap可能会对其他服务产生影响,所以这里修改kubelet的配置去掉这个限制。 使用kubelet的启动参数–fail-swap-on=false去掉必须关闭Swap的限制,修改/etc/sysconfig/kubelet,加入:
vim /etc/sysconfig/kubelet
KUBELET_EXTRA_ARGS=--fail-swap-on=false
2.2 使用kubeadm init初始化集群
在各节点开机启动kubelet服务:
systemctl enable kubelet.service
使用kubeadm config print init-defaults可以打印集群初始化默认的使用的配置:
apiVersion: kubeadm.k8s.io/v1beta2
bootstrapTokens:
- groups:
  - system:bootstrappers:kubeadm:default-node-token
  token: abcdef.0123456789abcdef
  ttl: 24h0m0s
  usages:
  - signing
  - authentication
kind: InitConfiguration
localAPIEndpoint:
  advertiseAddress: 1.2.3.4
  bindPort: 6443
nodeRegistration:
  criSocket: /var/run/dockershim.sock
  name: node1
  taints:
  - effect: NoSchedule
    key: node-role.kubernetes.io/master
---
apiServer:
  timeoutForControlPlane: 4m0s
apiVersion: kubeadm.k8s.io/v1beta2
certificatesDir: /etc/kubernetes/pki
clusterName: kubernetes
controllerManager: {}
dns:
  type: CoreDNS
etcd:
  local:
    dataDir: /var/lib/etcd
imageRepository: k8s.gcr.io
kind: ClusterConfiguration
kubernetesVersion: v1.14.0
networking:
  dnsDomain: cluster.local
  serviceSubnet: 10.96.0.0/12
scheduler: {}
参考:
https://www.kubernetes.org.cn/5551.html
https://blog.frognew.com/2019/07/kubeadm-install-kubernetes-1.15.html
https://cloud.tencent.com/developer/article/1487550
https://blog.rj-bai.com/post/160.html