web网站接入GitHub第三方登录(踩坑)
博客第三方登录最终决定用GitHub登录,下面是我的踩坑纪录和实现源码,分享出来
**官方文档地址: **https://developer.github.com/apps/building-oauth-apps/authorizing-oauth-apps/
创建应用,获取Client ID,Client Secret,Authorization callback URL

进入后,找到左侧
Developer settings
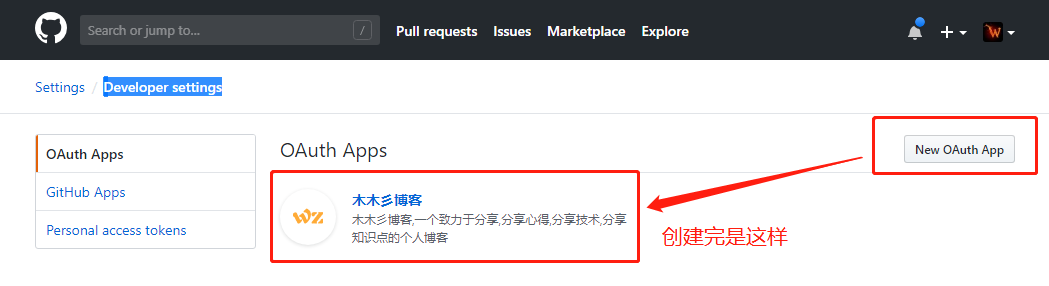
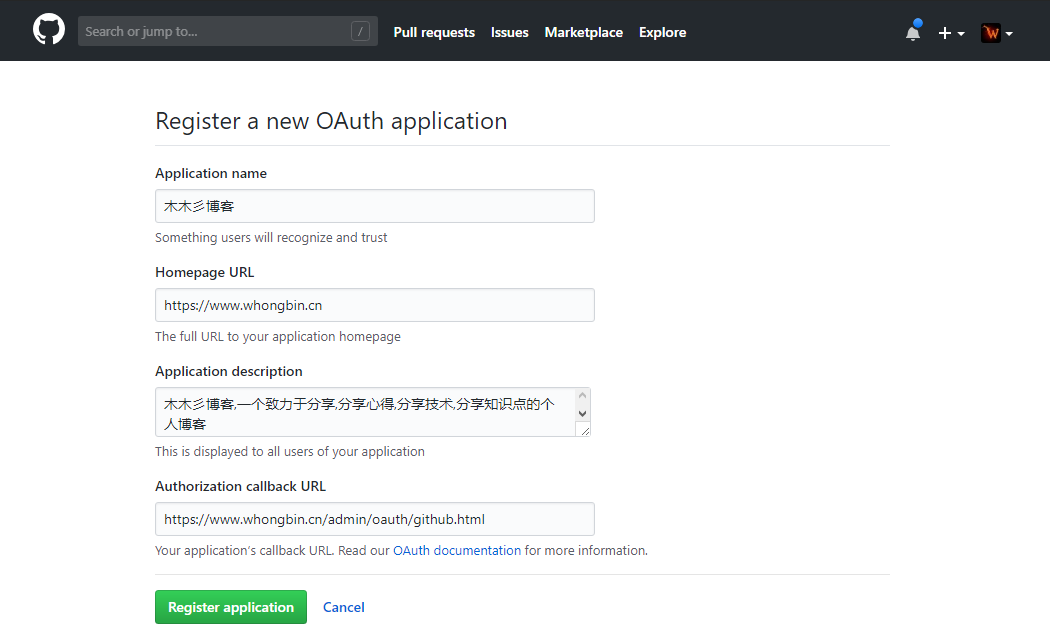
填写你的应用信息,保存即可
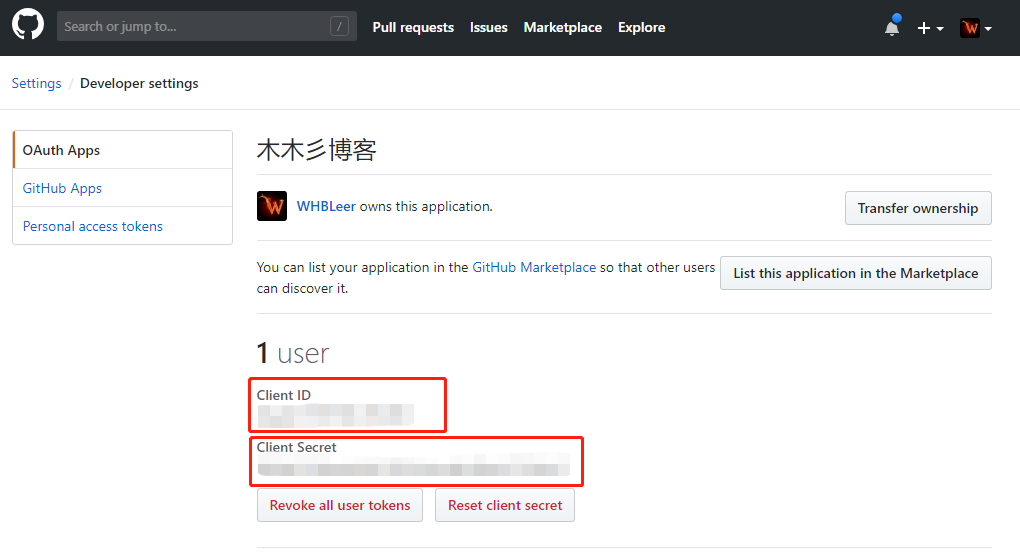
保存后,纪录下面的两个值和你填写的回调地址
更新
有朋友在使用下面代码的时候说报错了,然后我才发现我的文章内容没有写完整 [aru_85] ,惭愧,特在此表示歉意并且更新下本篇文章内容,保证尽量少的出现问题
- 2018-10-18日更新
在使用下面代码的时候,请先执行以下命令(对Windows无爱,仅Linux),
#安装第三方类库
composer require sy-records/oauth-login
安装完成后在控制器中引用
use AuthGithubConnect;
编写代码,获取数据
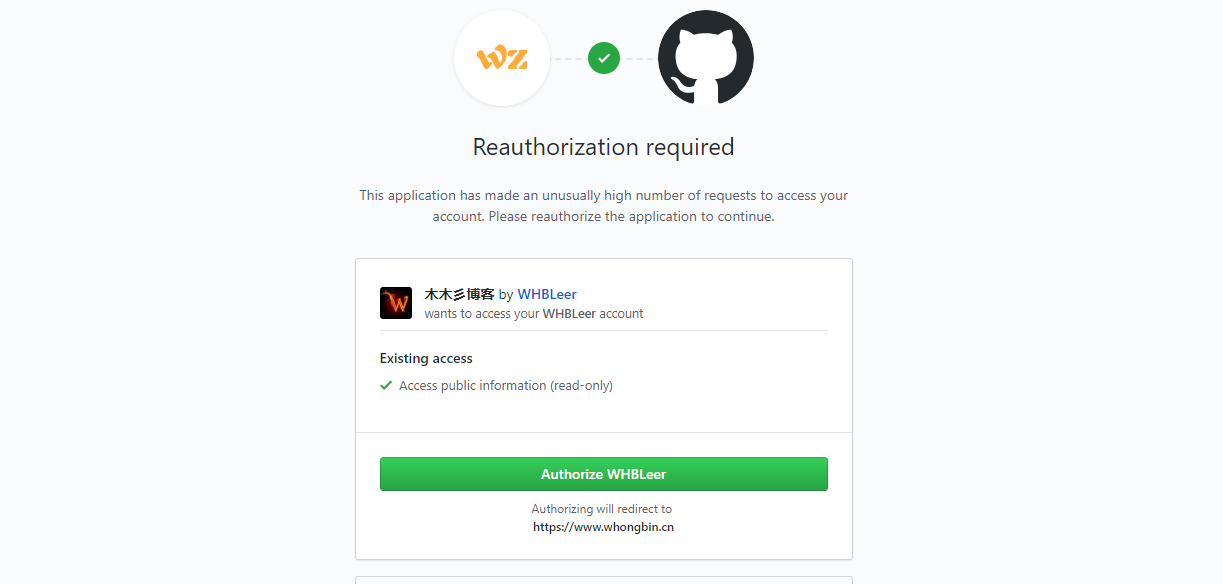
1. 入口重定向
接口:
https://github.com/login/oauth/authorize?client_id=yourclientid&redirect_uri=yourredirect_uri
<a href="https://github.com/login/oauth/authorize?client_id=yourclientid&redirect_uri=yourredirect_uri">github登录</a>
重定向至下面页面
2. 根据code获取access_token
回调页面中处理
获取access_token接口:https://github.com/login/oauth/access_token
// 用户登录
if (isset($_GET['code'])) {
	$access_token_url = 'https://github.com/login/oauth/access_token';
	$params = array(
		'client_id'     => self::GITHUB_CLIENT_ID,
		'client_secret' => self::GITHUB_CLIENT_SECRET,
		'code'          => $_GET['code'],
	);
	$access_token = getHttpResponsePOST($access_token_url, $params);
}
取到的access_token数据格式是string
access_token=e72e16c7e42f292c6912e7710c838347ae178b4a&token_type=bearer
3. 根据access_token获取用户信息
获取用户信息接口:
https://api.github.com/user在这我用的是curl进行http请求
if ($access_token) {
	$info_url = 'https://api.github.com/user?'.$access_token;
	$data = array();
	parse_str($access_token,$data);
	$token = $data['access_token'];
	$url = "https://api.github.com/user?access_token=".$token;
	$headers[] = 'Authorization: token '.$token;
	$headers[] = "User-Agent: 木木彡博客";
	$result = getHttpResponseGET($info_url,[],$headers);
	$info = json_decode($result,true);
	if (isset($info['id'])) {
		// 处理获取到的数据
	}
}
4. 开发过程中的坑
上面步骤中,第一步和第二步都没问题,但是到第三部时,看我代码你会发现,我在curl请求时添加了header,这个
header必须填写,这可能是github的严格的验证机制吧,其中
Authorization填写内容是你获取到的access_token,例:"Authorization: token e72e16c7e42f292c6912e7710c838347ae178b4a";User-Agent填写内容是你的应用名称,如我的应用名称是木木彡博客,例:"User-Agent: 木木彡博客"
5. 处理数据完整代码
// 用户登录
public function github()
{
    if (isset($_GET['code'])) {
        $access_token_url = 'https://github.com/login/oauth/access_token';
        $params = array(
            'client_id'     => self::GITHUB_CLIENT_ID,
            'client_secret' => self::GITHUB_CLIENT_SECRET,
            'code'          => $_GET['code'],
        );
        $access_token = getHttpResponsePOST($access_token_url, $params);
        if ($access_token) {
            $info_url = 'https://api.github.com/user?'.$access_token;
			$data = array();
			parse_str($access_token,$data);
			$token = $data['access_token'];
			$url = "https://api.github.com/user?access_token=".$token;
            $headers[] = 'Authorization: token '.$token;
			$headers[] = "User-Agent: 木木彡博客";
			$result = getHttpResponseGET($info_url, $headers);
            $info = json_decode($result,true);
            if (isset($info['id'])) {
	            $Oauth = new OauthModel();
	            $num = $Oauth->github($info);
	            if ($num==3) {
	                // 登录成功
	                $this->redirect('index/index');
	            }
            }
        }
    }
}

/**
 * 远程获取数据,POST模式
 * @param $url 指定URL完整路径地址
 * @param $param 请求的数据
 * return 远程输出的数据
 */
function getHttpResponsePOST($url = '', $param = array()) {
    if (empty($url) || empty($param)) {
        return false;
    }
    $ch = curl_init();//初始化curl
    curl_setopt($ch, CURLOPT_URL,$url);//抓取指定网页
    curl_setopt($ch, CURLOPT_HEADER, 0);//设置header
    curl_setopt($ch, CURLOPT_RETURNTRANSFER, 1);//要求结果为字符串且输出到屏幕上
    curl_setopt($ch, CURLOPT_POST, 1);//post提交方式
    curl_setopt($ch, CURLOPT_POSTFIELDS, $param);
    $data = curl_exec($ch);//运行curl
    curl_close($ch);

    return $data;
}

/**
 * 远程获取数据,GET模式
 * 注意:
 * @param $url 指定URL完整路径地址
 * @param $header 头部
 * return 远程输出的数据
 */
function getHttpResponseGET($url,$header=null) {
    $curl = curl_init();
    curl_setopt($curl, CURLOPT_URL, $url);
    if(!empty($header)){
        curl_setopt($curl, CURLOPT_HTTPHEADER, $header);
    }
    curl_setopt($curl, CURLOPT_RETURNTRANSFER, 1);
    $output = curl_exec($curl);
    // echo curl_getinfo($curl);
    curl_close($curl);
    unset($curl);
    return $output;
}