-
步骤1
下载jar包及其配置文件 -
步骤2
把下载好的文件上传到服务器上,我这里上传的目录是/home/ambry

-
步骤3
- 启动前要修改的文件列表(在x.x.x.8 服务器上部署为例)
1. HardwareLayout_8.json
2. PartitionLayout_8.json
3. frontend_8.properties
4. server8.properties - 修改配置文件HardwareLayout.json,这个文件声明的是硬盘的
{
    "clusterName": "OneDiskOneReplica",
    "version": 99,
    "datacenters": [
        {
            "dataNodes": [ #dataNodes是可以存放数组的形式,添加多个元素就可以把数据存储到多台服务器,形成ambry集群
                {
                    "disks": [
                        {
                            "capacityInBytes": 429496729600,#硬盘空间大小
                            "hardwareState": "AVAILABLE",#状态
                            "mountPath": "/home/ambry/data"#存储的位置
                        }
                    ],
                    "hardwareState": "AVAILABLE",
                    "hostname": "x.x.x.8",#ip地址
                    "port": 1100 #端口
                }
            ],
            "name": "Datacenter",
            "id" : "1"
        }
    ]
}
- 修改PartitionLayout.json文件,这个是声明逻辑存储的配置,决定了ambry最终能存放多少的大小。
            {"id": 0,
            "partitionClass": "max-replicas-all-datacenters",
            "partitionState": "READ_WRITE", #读写模式
            "replicaCapacityInBytes": 429496729600, #初始化的大小、第一次启动就分配好空间了,如果要修改大小,需要删除原来的文件夹,然后重新启动
            "replicas": [ #备份模式,只填本机的就不会备份,这里是个数组,可以配置多个,多个就会产生备份数据
                {
                    "hostname": "x.x.x.8", #物理机的地址
                    "mountPath": "/home/ambry/data", #数据存储的路径
                    "port": 1100 #后端服务所使用的端口
                }
            ]}
- 修改server.properties
	#填写ip,不用写localhost
	host.name=x.x.x.8
	port=1100

	#cluster map
	clustermap.cluster.name=Ambry_Dev
	clustermap.datacenter.name=Datacenter
	clustermap.host.name=x.x.x.8
- 修改前端的配置frontend.json
# rest server 、不同版本ambry的这个填写不一样
rest.server.blob.storage.service.factory=com.github.ambry.frontend.AmbryBlobStorageServiceFactory
# rest.server.account.service.factory=com.github.ambry.account.HelixAccountServiceFactory
# router
router.hostname=x.x.x.8
router.datacenter.name=Datacenter
router.ttl.update.success.target=1
router.put.success.target=1
router.delete.success.target=1
# router.max.put.chunk.size.bytes=1048576
# cluster map
clustermap.cluster.name=Ambry_Dev
clustermap.datacenter.name=Datacenter
clustermap.host.name=x.x.x.8
# helix property store
# helix.property.store.zk.client.connect.string=localhost:2182
# helix.property.store.root.path=/ambry/Ambry_Dev/helixPropertyStore
#kms
kms.default.container.key=B374A26A71490437AA024E4FADD5B497FDFF1A8EA6FF12F6FB65AF2720B59CCF
- 步骤4
- ambry后端启动 ,这里是启动x.x.x.8 的ambry
nohup java -Dlog4j.configuration=file:./config/log4j.properties -jar ambry.jar --serverPropsFilePath ./config/server1.properties --hardwareLayoutFilePath ./config/HardwareLayout.json --partitionLayoutFilePath ./config/PartitionLayout.json > logs/server.log &
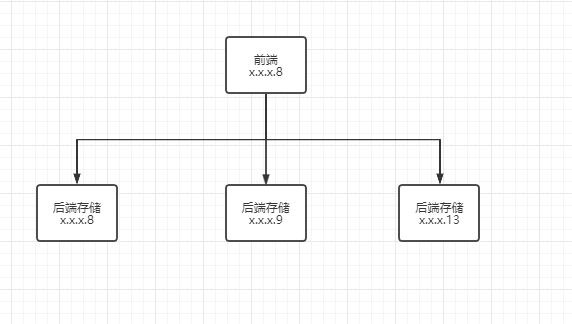
- ambry前端启动 ,这里是启动x.x.x.8 的ambry,前端只需要在一个服务器作为入口,前端连接后端的示意图如下
nohup java -Dlog4j.configuration=file:./config/log4j.properties -cp "*" com.github.ambry.frontend.AmbryFrontendMain --serverPropsFilePath ./config/frontend.properties --hardwareLayoutFilePath ./config/HardwareLayout.json --partitionLayoutFilePath ./config/PartitionLayout.json > logs/frontend.log &

- 步骤5,检验是否启动成功
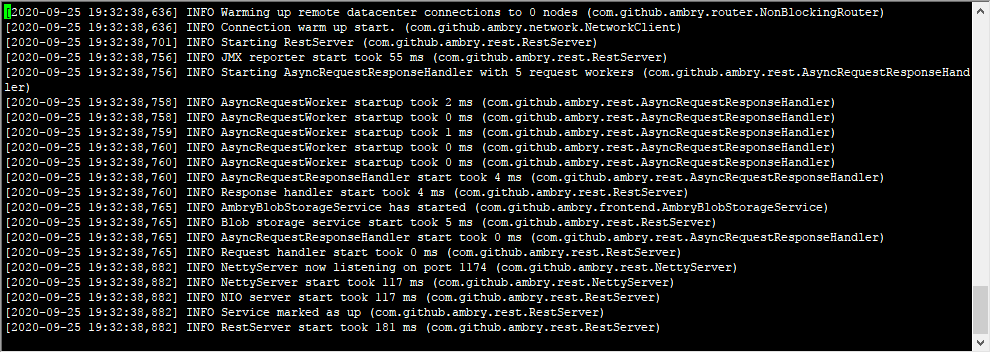
使用 curl 127.0.0.1:1174/healthCheck 返回Good 就是部署成功了

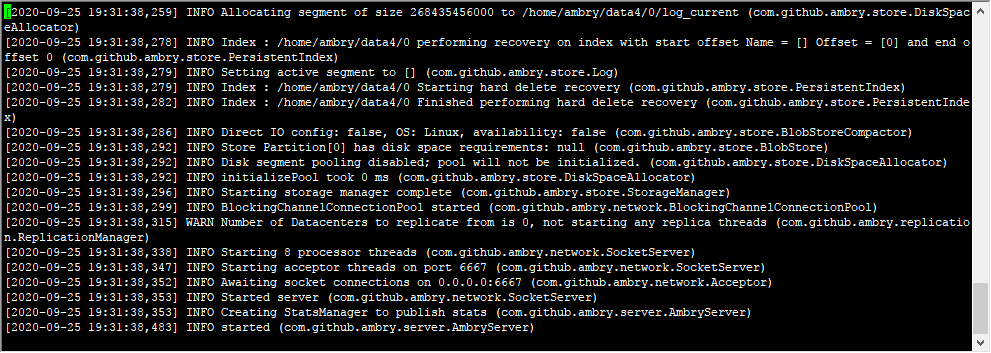
后端启动日志的图中在我们制定的目录下有分配了存储空间,可以进入到目录里面 看,也可以使用命令的方式 du -sh 查询分配的大小

- 重复以上步骤 在机器x.x.x.9 和 x.x.x.13 启动后端的服务器即可完成集群的搭建,在x.x.x.9用的端口是1101,x.x.x.13 用的端口是1102
部署3机器的集群完整的hardwareLayout和patitionLayout文件
- PatitionLayout.json
{
    "clusterName": "OneDiskOneReplica",
    "version": 21,
    "partitions": [
        {
            "id": 0,
            "partitionClass": "max-replicas-all-datacenters",
            "partitionState": "READ_WRITE",
            "replicaCapacityInBytes": 429496729600,
            "replicas": [
                {
                    "hostname": "x.x.x.8",
                    "mountPath": "/home/ambry/data4",
                    "port": 1100
                }
            ]
        },
		{
            "id": 1,
            "partitionClass": "max-replicas-all-datacenters",
            "partitionState": "READ_WRITE",
            "replicaCapacityInBytes": 429496729600,
            "replicas": [
                {
                    "hostname": "x.x.x.9",
                    "mountPath": "/home/ambry/data4",
                    "port": 1101
                }
            ]
        },
		{
            "id": 2,
            "partitionClass": "max-replicas-all-datacenters",
            "partitionState": "READ_WRITE",
            "replicaCapacityInBytes": 429496729600,
            "replicas": [
                {
                    "hostname": "x.x.x.13",
                    "mountPath": "/home/ambry/data4",
                    "port": 1102
                }
            ]
        }
    ]
}
- HardWareLayout.json
{
    "clusterName": "hardwareLayout-mutilDisk",
    "version": 1,
    "datacenters": [
        {
            "dataNodes": [
                {
                    "disks": [
                        {
                            "capacityInBytes": 21474836480,
                            "hardwareState": "AVAILABLE",
                            "mountPath": "/home/ambry/data4"
                        }
                    ],
                    "hardwareState": "AVAILABLE",
                    "hostname": "x.x.x.8",
                    "port": 1100
                },
                {
                    "disks": [
                        {
                            "capacityInBytes": 21474836480,
                            "hardwareState": "AVAILABLE",
                            "mountPath": "/home/ambry/data4"
                        }
                    ],
                    "hardwareState": "AVAILABLE",
                    "hostname": "x.x.x.9",
                    "port": 1101
                }
                ,
                {
                    "disks": [
                        {
                            "capacityInBytes": 21474836480,
                            "hardwareState": "AVAILABLE",
                            "mountPath": "/home/ambry/data4"
                        }
                    ],
                    "hardwareState": "AVAILABLE",
                    "hostname": "x.x.x.13",
                    "port": 1102
                }
            ],
            "name": "Datacenter",
            "id": "1"
        }
    ]
}
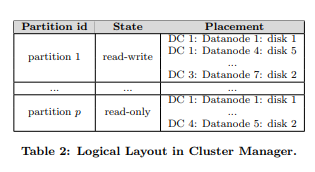
关于PartitionLayout和hardwareLayout布局的图片形式,可以根据自己的需求配置不一样的布局方式。


下载ambry相关文件
链接:https://pan.baidu.com/s/1dJ7wC_N-p7WLsQMQsze8rg
提取码:ylcg