打开SAP C4C Cloud Application Studio,
进入Solution Explorer,右键菜单里选择Add -> New Item:
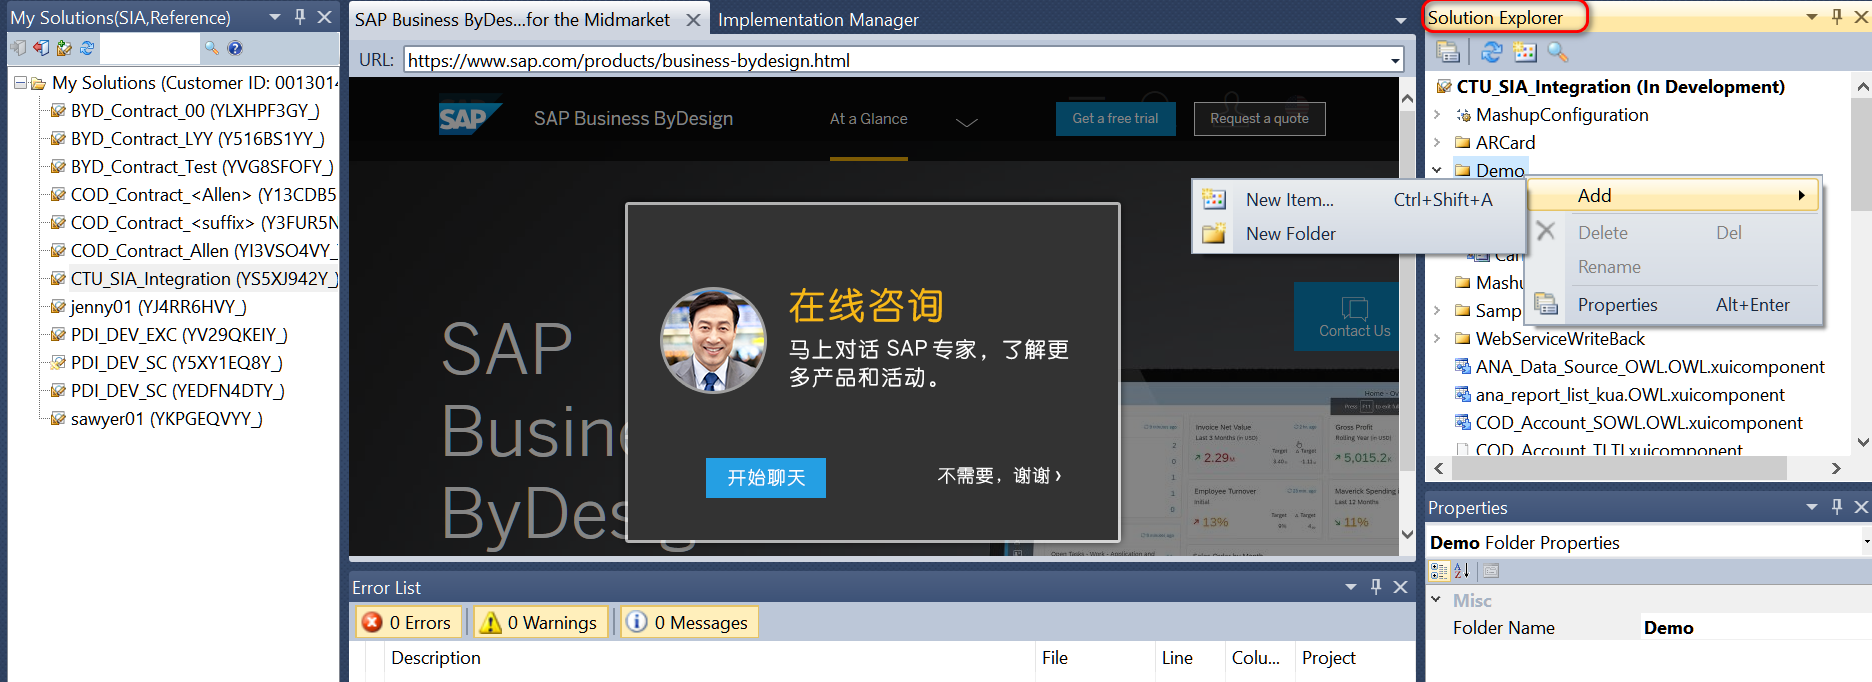
新建一个Business Object,取名CarPark:


源代码如下:
import AP.FO.BusinessPartner.Global;
import AP.Common.GDT as apCommonGDT;
businessobject CarPark
// *Further Development*
// declare an error message that is called if the BO fails validation
// raises Message_Car_Park_Full
{
// Root node must not be specified, it is created implicitly
//
// Add elements here.
//
// To declare an element as alternative key, use the [AlternativeKey]
// annotation.
//Please note:
// - An alternative key of type UUID exists implicitly for each node, enabling
// the node to be used as an association target.
// - The QueryByElements query is created automatically for each node.
// Code completion is available with CTRL + SPACE.
// *Further Development*
// define an error message to be displayed if the BO fails validation
// message Message_Car_Park_Full text "The car park is full - no spaces available";
// Car Park ID - (the company may have multiple car parks)
// - therefore we use this ID to identify the individual car park
element CarParkID : ID;
// additional information on the car park
element CarParkName : LANGUAGEINDEPENDENT_LONG_Text;
element CarParkDescription : LANGUAGEINDEPENDENT_LONG_Description;
element Number_of_ParkingSpaces : IntegerValue;
// *Further Development*
// add an element to display how many parking spaces are available
// element Number_of_ParkingSpaces_Available : IntegerValue;
// declare an action to calculate the available car spaces
// action Update_AvailableParkingSpaces;
// *Further Development*
// add an element to record location information
// this field is used with a URL mashup to display the location of the car park
// element CarParkLocation : LANGUAGEINDEPENDENT_MEDIUM_Description;
// each car park will have multiple parking spaces
// we create a node with 0 to n parking spaces
node ParkingSpace [0,n] {
// each parking space is assigned a unique identifier
element ParkingSpaceID : ID;
// display the ID of the Employee assigned to the parking space
element ParkingSpace_AssignedEmployeeID : ID;
// a parking space may be designated as a "Disabled Friendly" parking space
element ParkingSpace_Disabled : Indicator;
// is there an electric charging station for this parking space ?
element ParkingSpace_ElectricChargeStation : Indicator;
// display the license plate number of the employee's car
element Vehicle_RegistrationNumber : LANGUAGEINDEPENDENT_MEDIUM_Text;
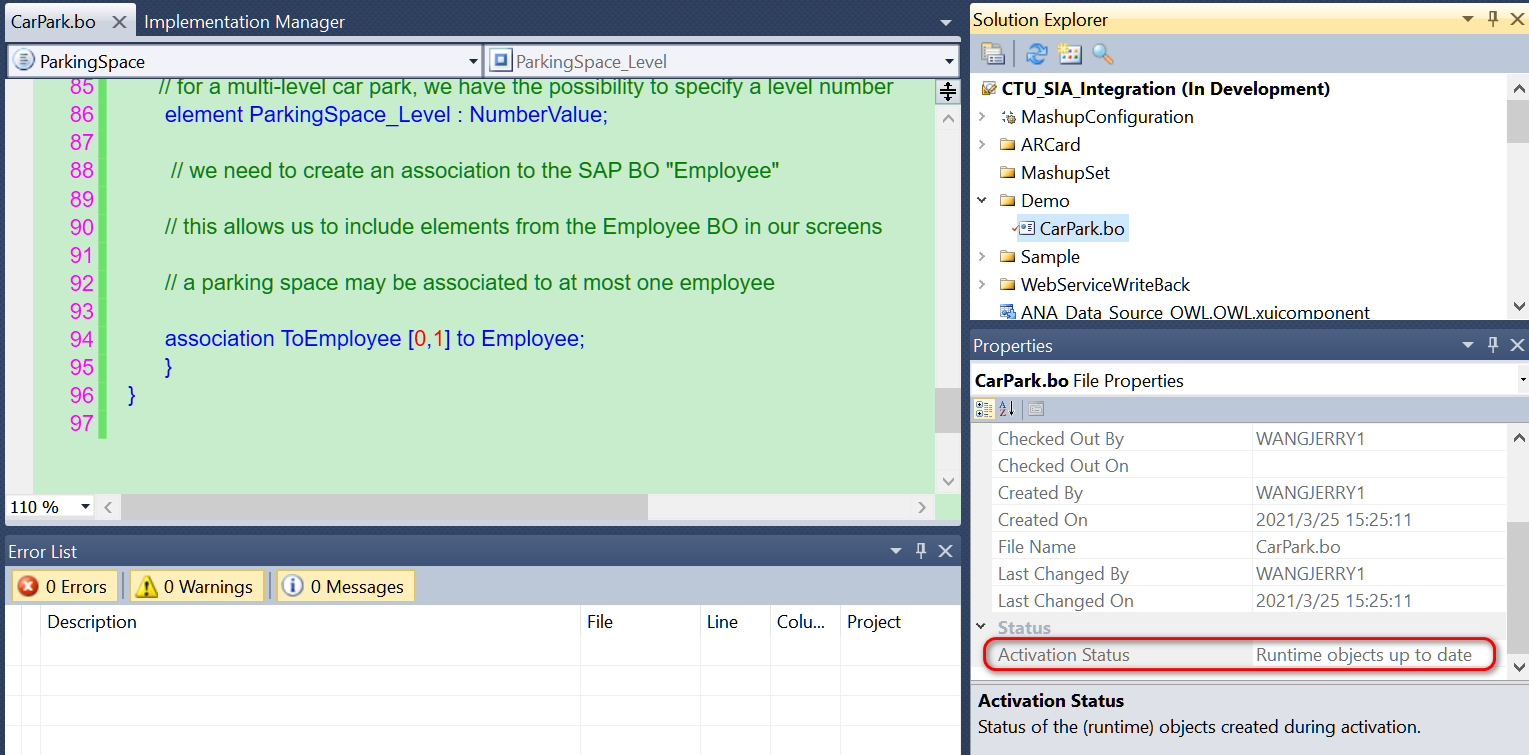
// for a multi-level car park, we have the possibility to specify a level number
element ParkingSpace_Level : NumberValue;
// we need to create an association to the SAP BO "Employee"
// this allows us to include elements from the Employee BO in our screens
// a parking space may be associated to at most one employee
association ToEmployee [0,1] to Employee;
}
}
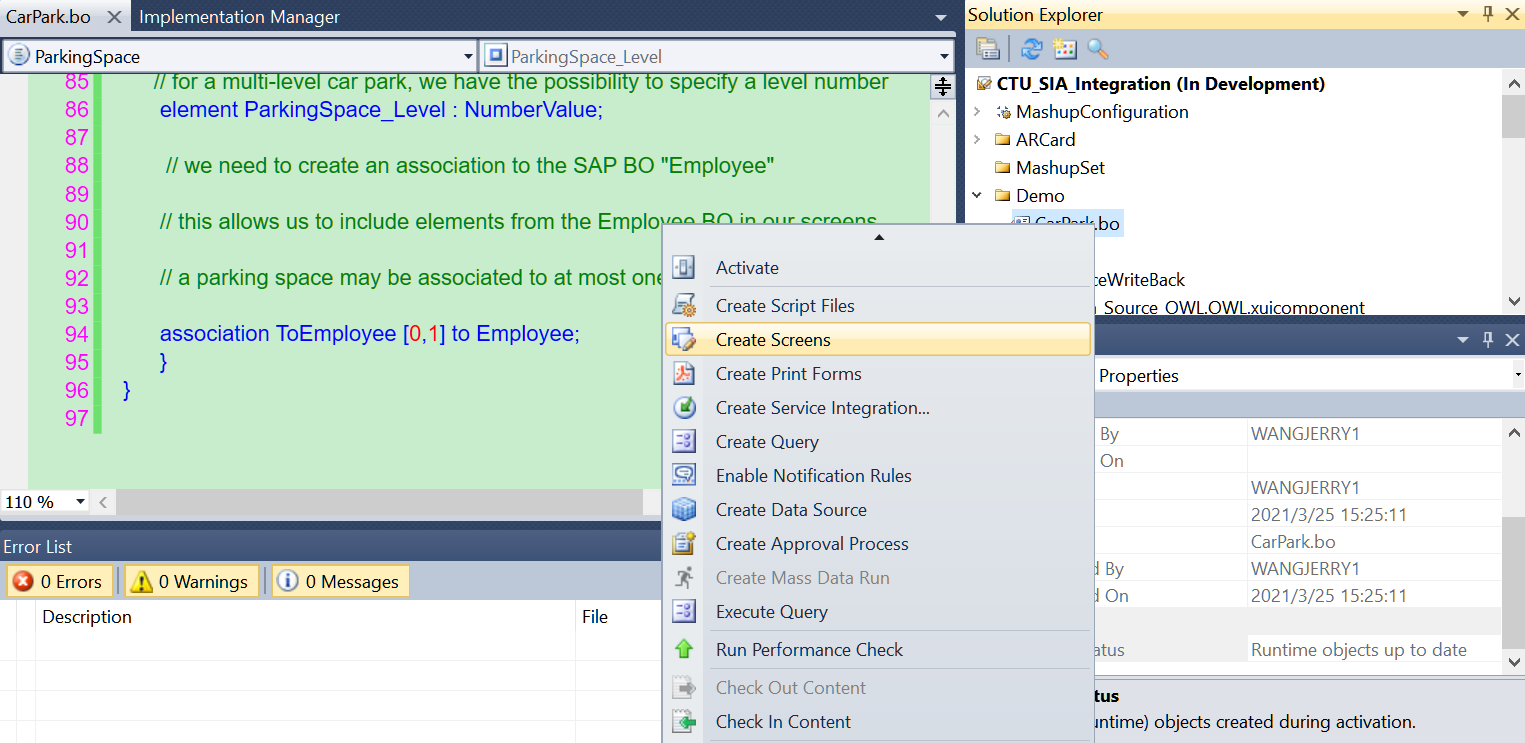
激活该BO,确保Activation Status为Runtime Objects up to date:
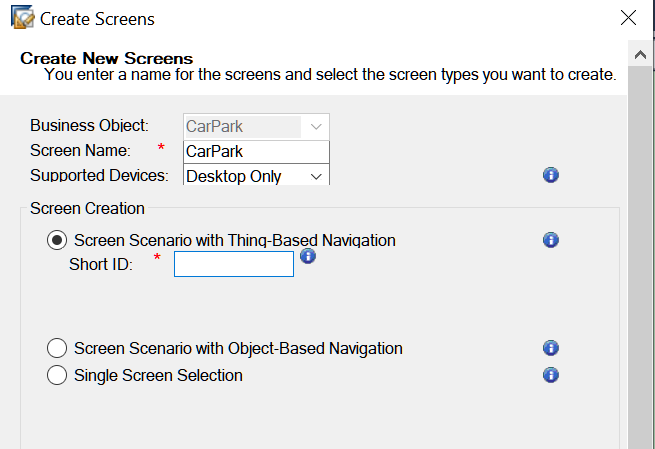
BO激活后,右键菜单选择Create Screens:
选择Screen Scenario with Thing-Based navigation:
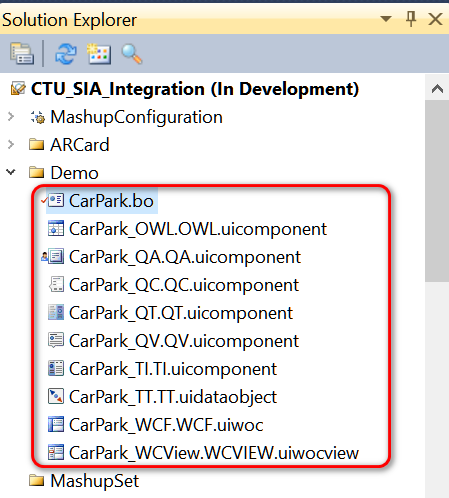
会自动生成很多SAP Cloud for Customer 屏幕:
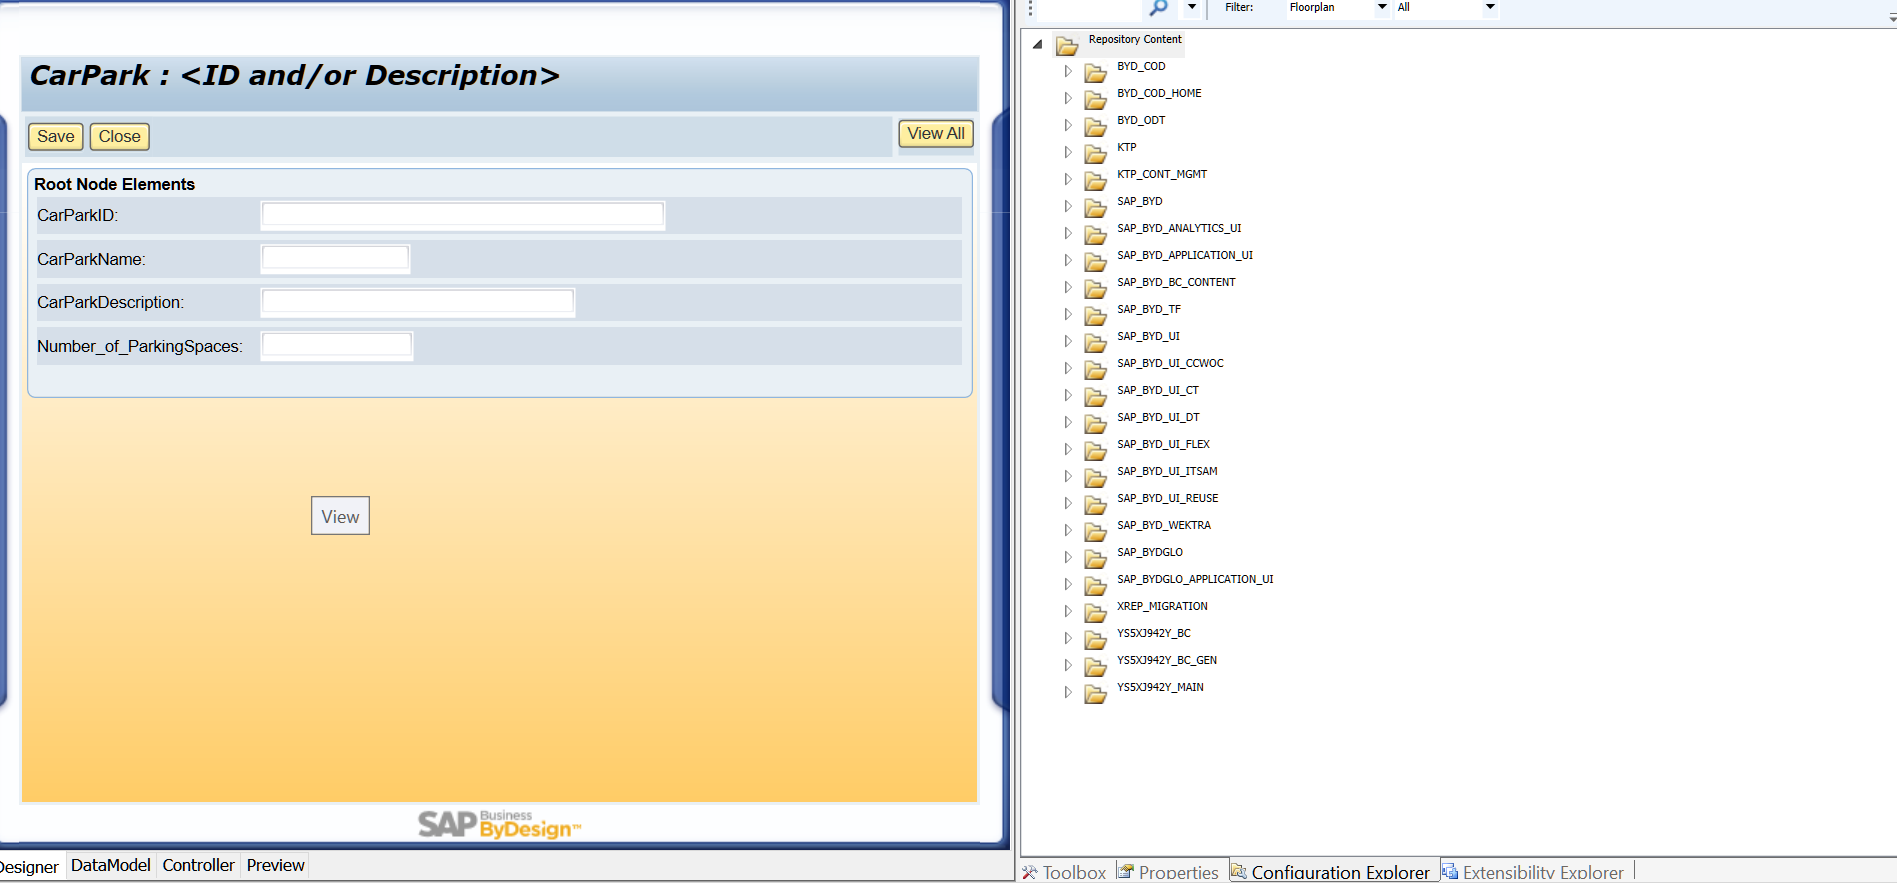
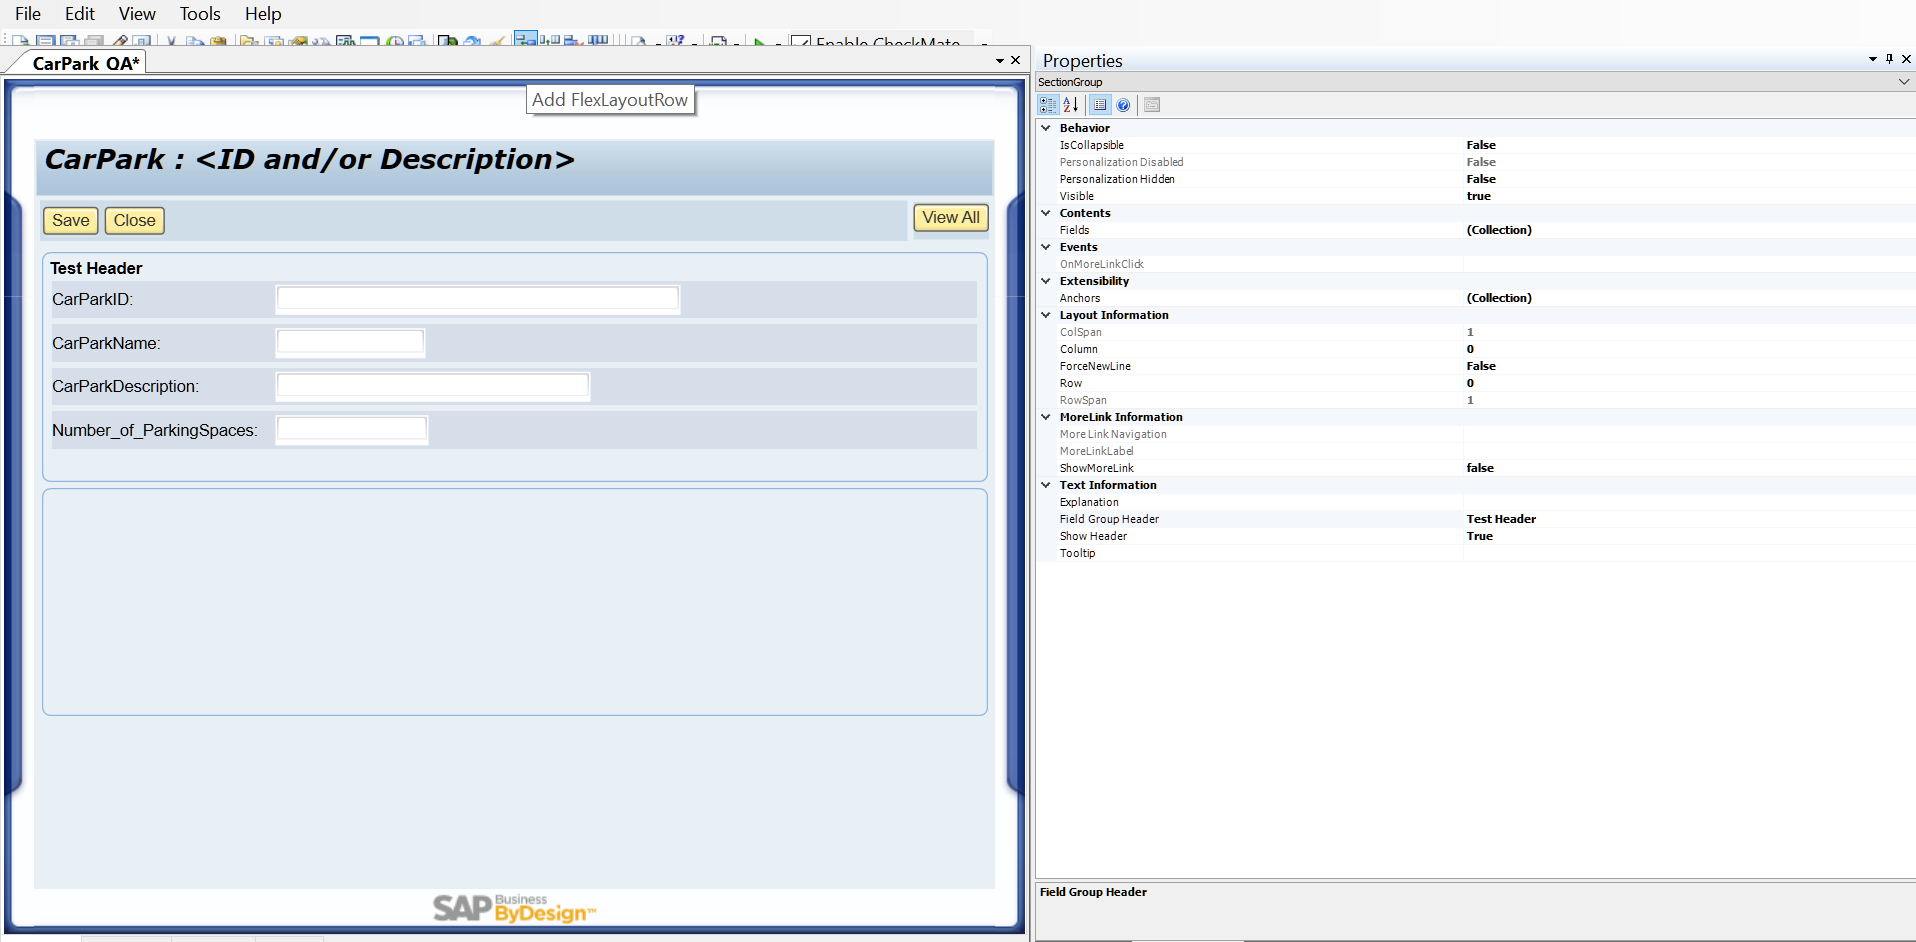
双击QA打开自动生成的UI,发现上面已经有一些来自BO抬头级别的字段了:

点工具栏上这个AddFlexLayoutRow按钮:
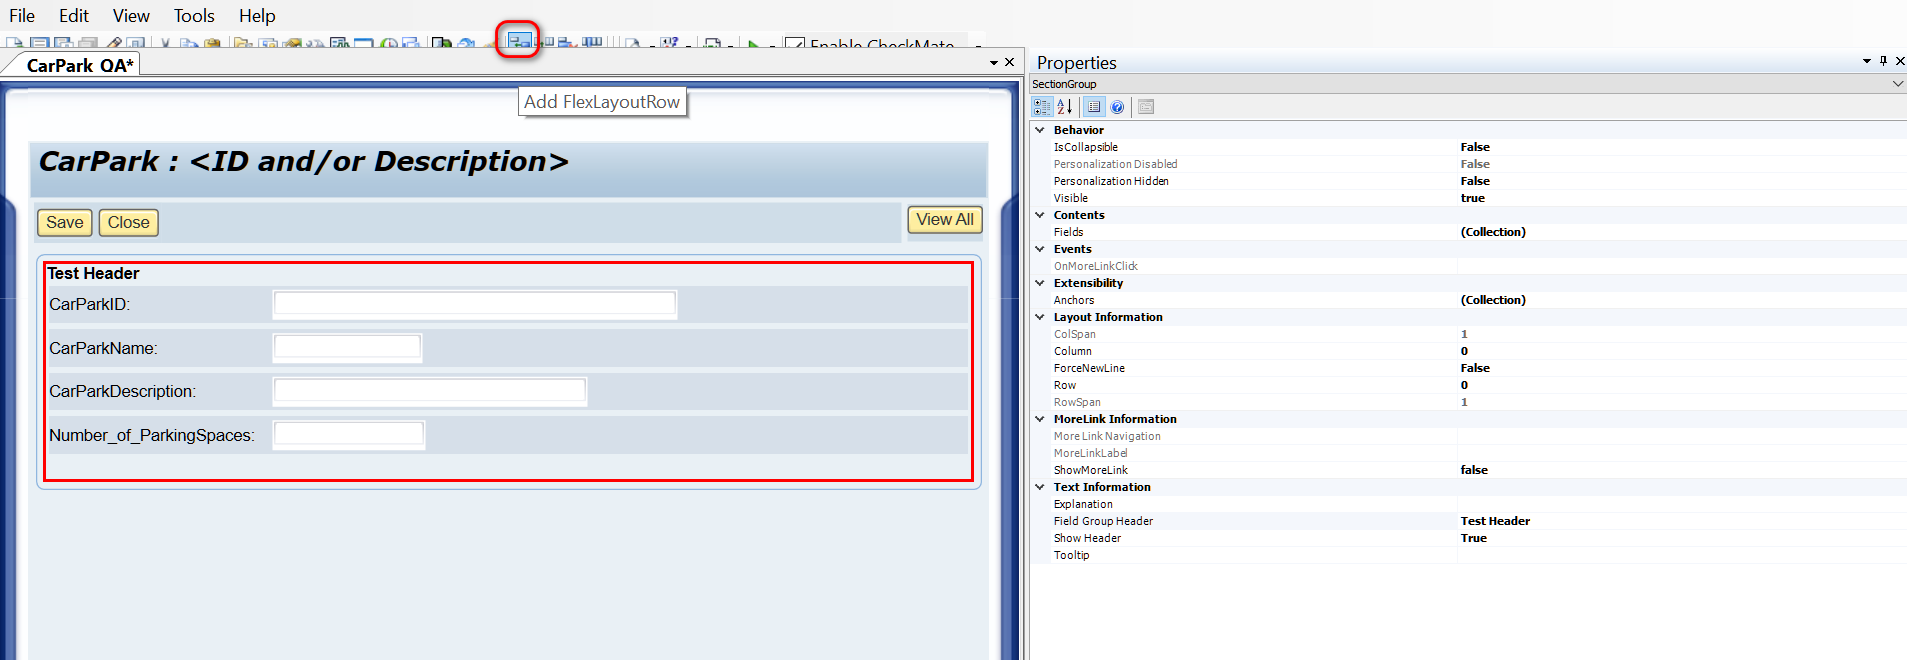
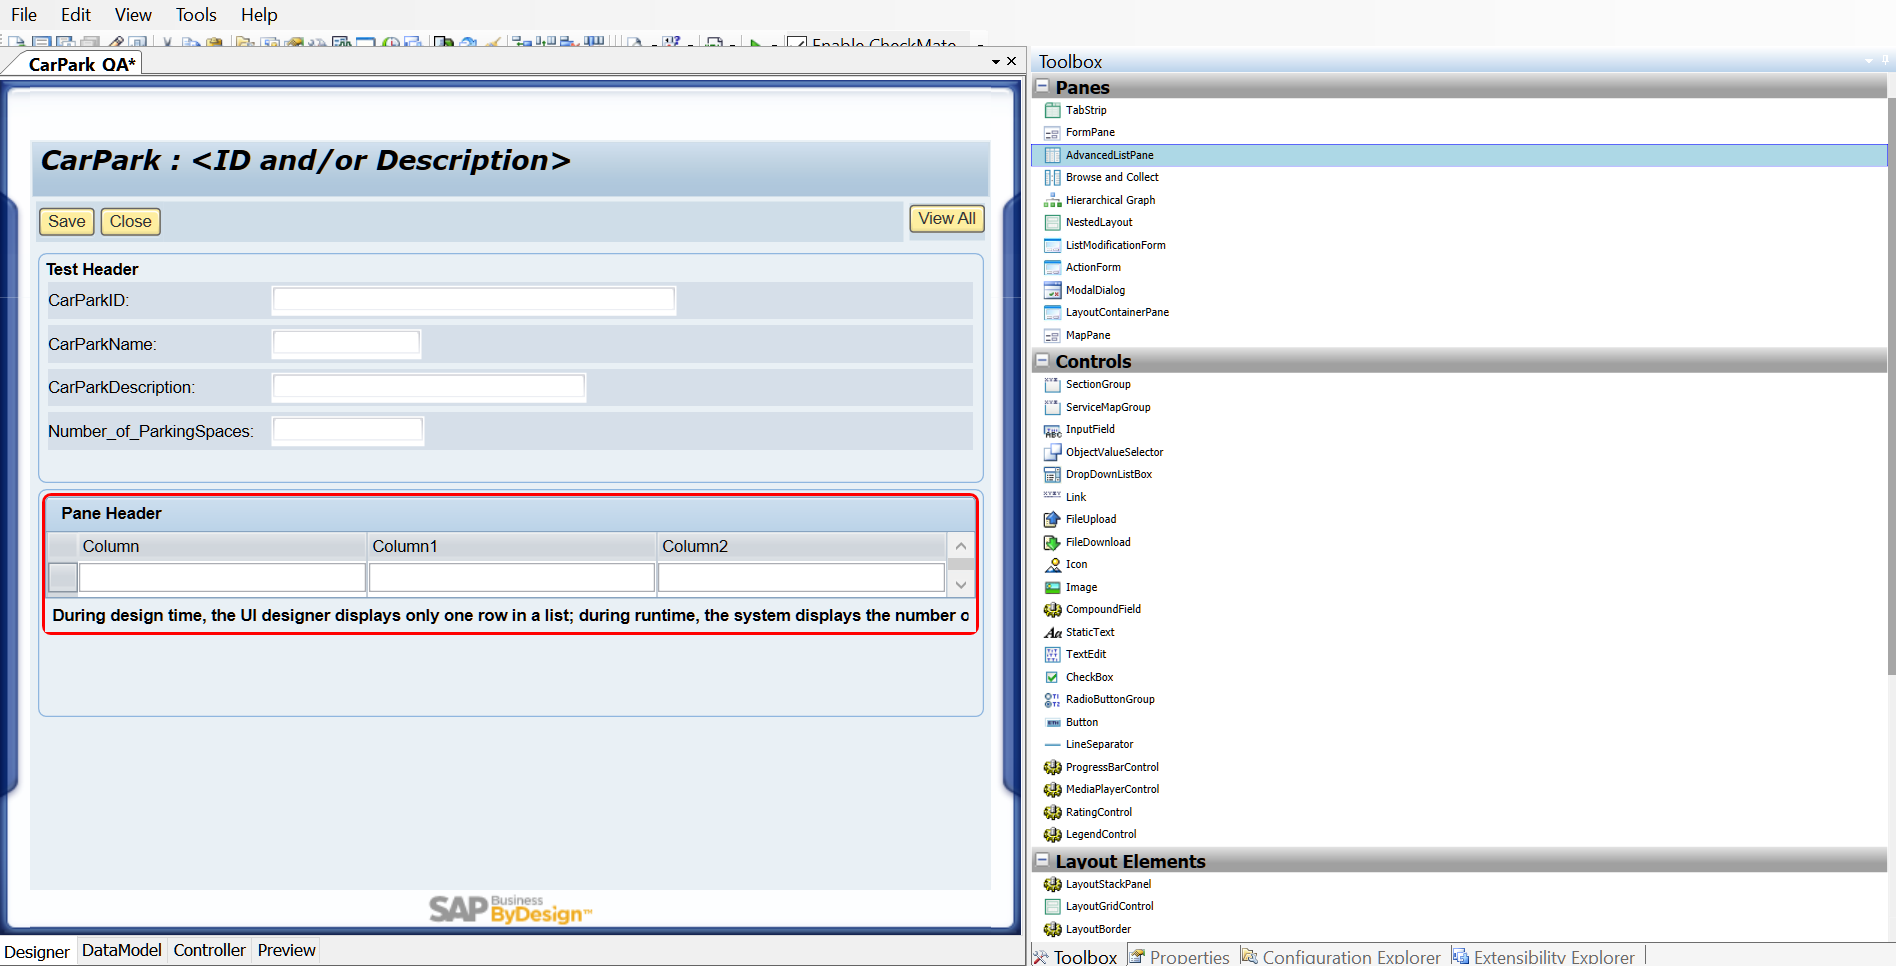
出现一个新的空白行:
将Toolbox里的控件AdvancedListPane拖到新建的FlexLayoutRow里:
选中某一个column,右键菜单里添加一个新的column:
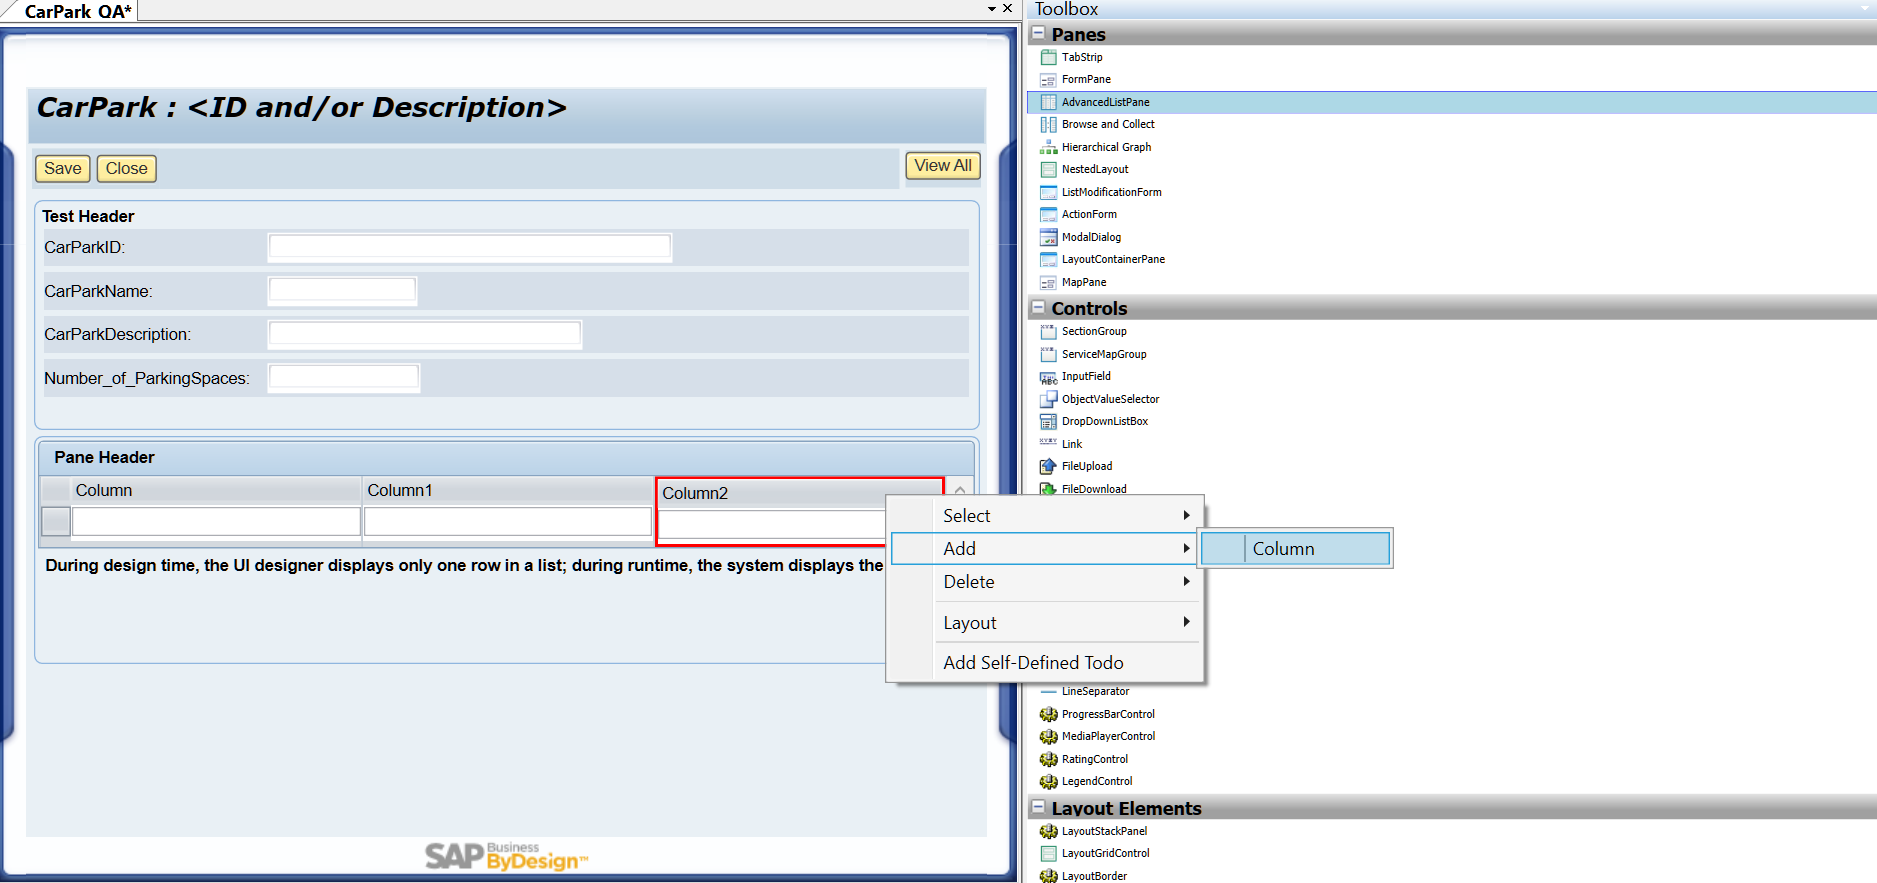
现在我们有了一个表格,包含四列:

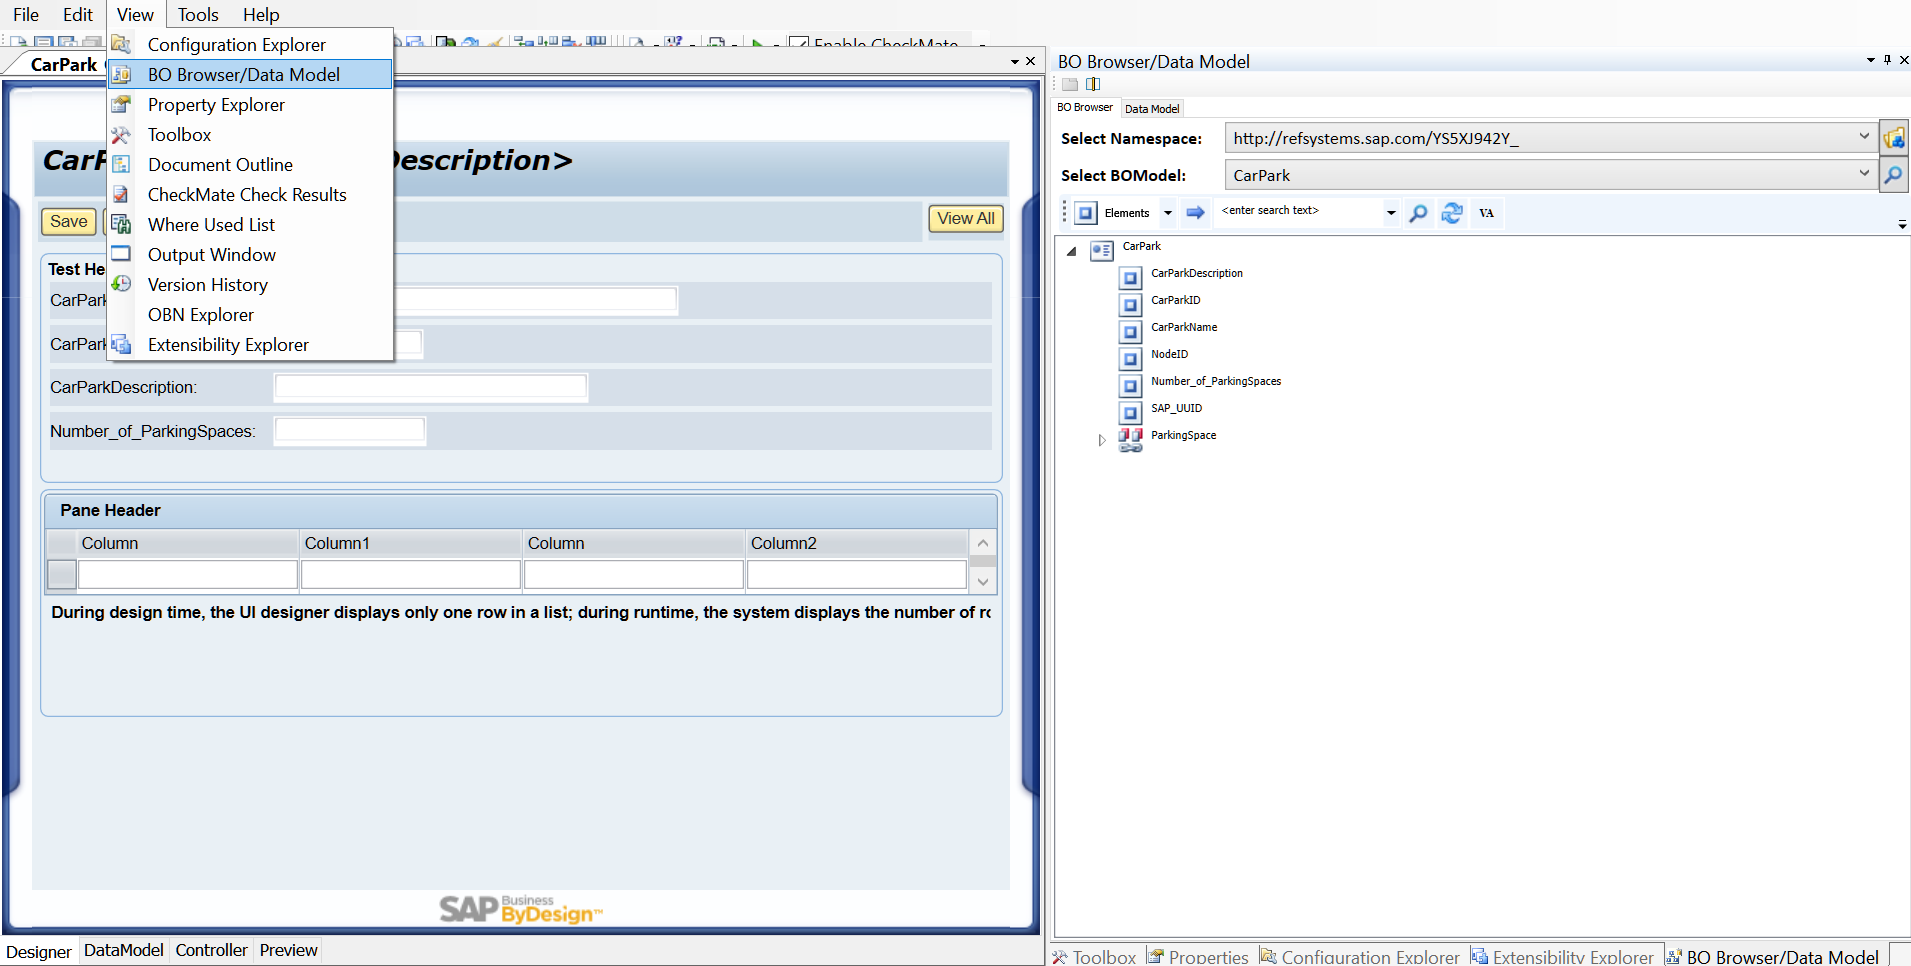
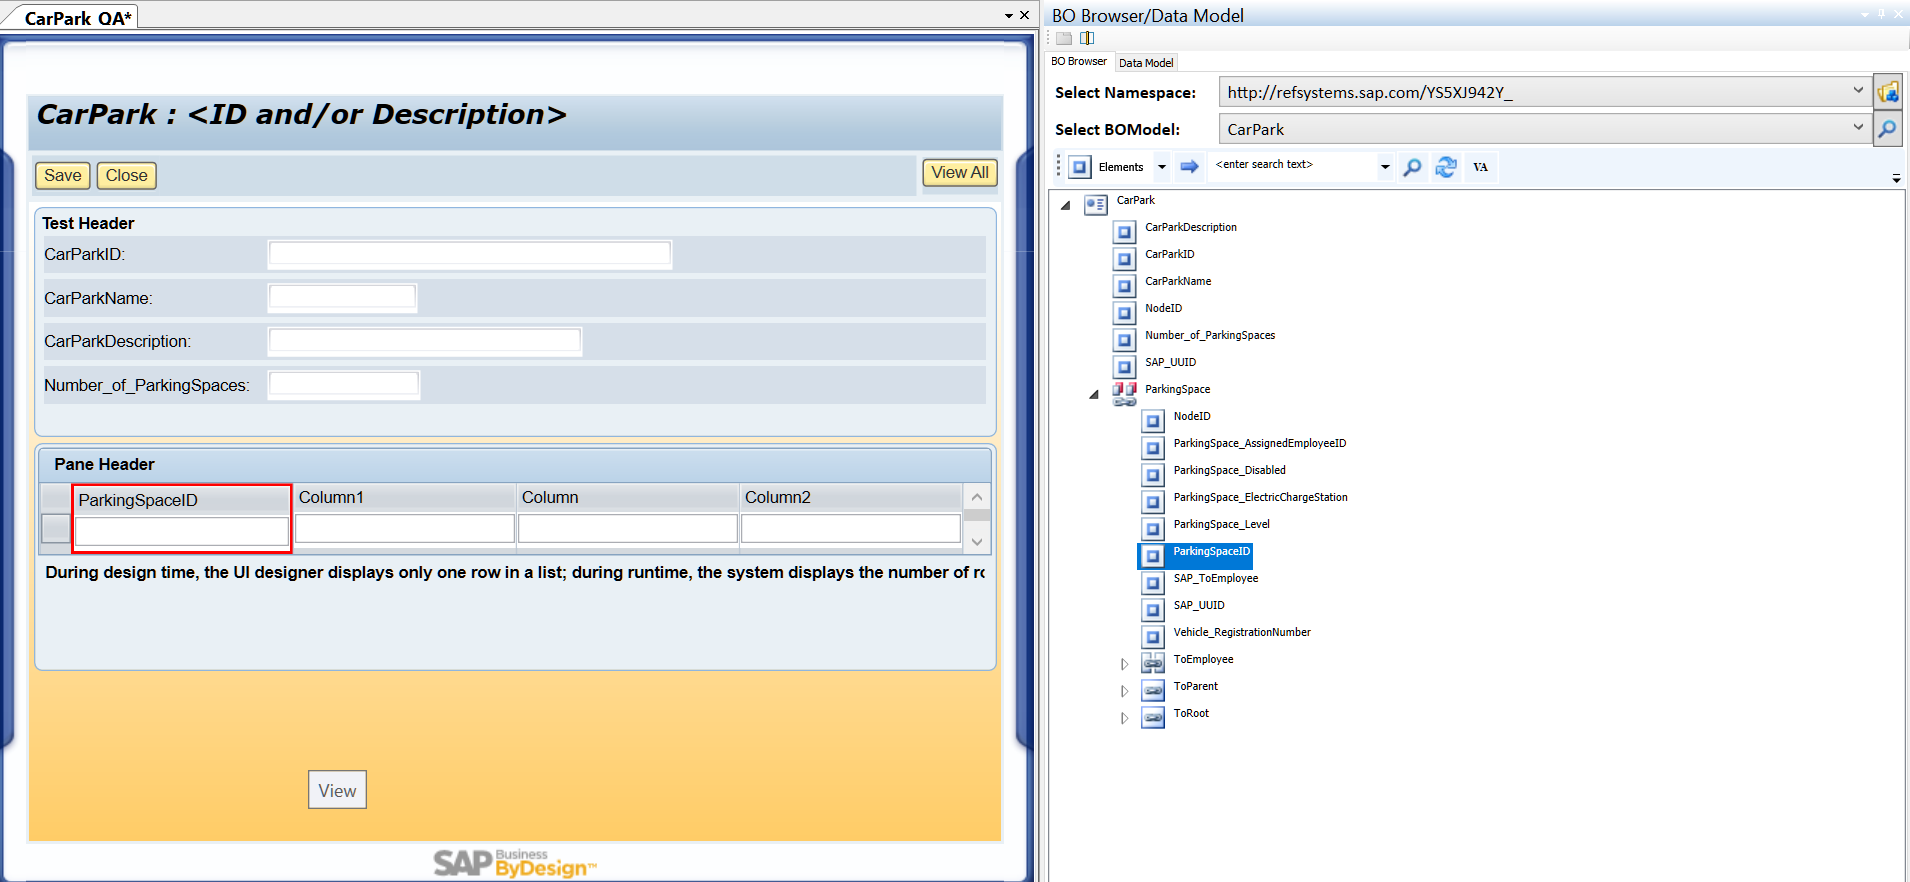
View菜单里打开:BO Browser / Data Model,使其显示在屏幕右边:
把ParkingSpaceID拖拽到第一列上去:

选择No:
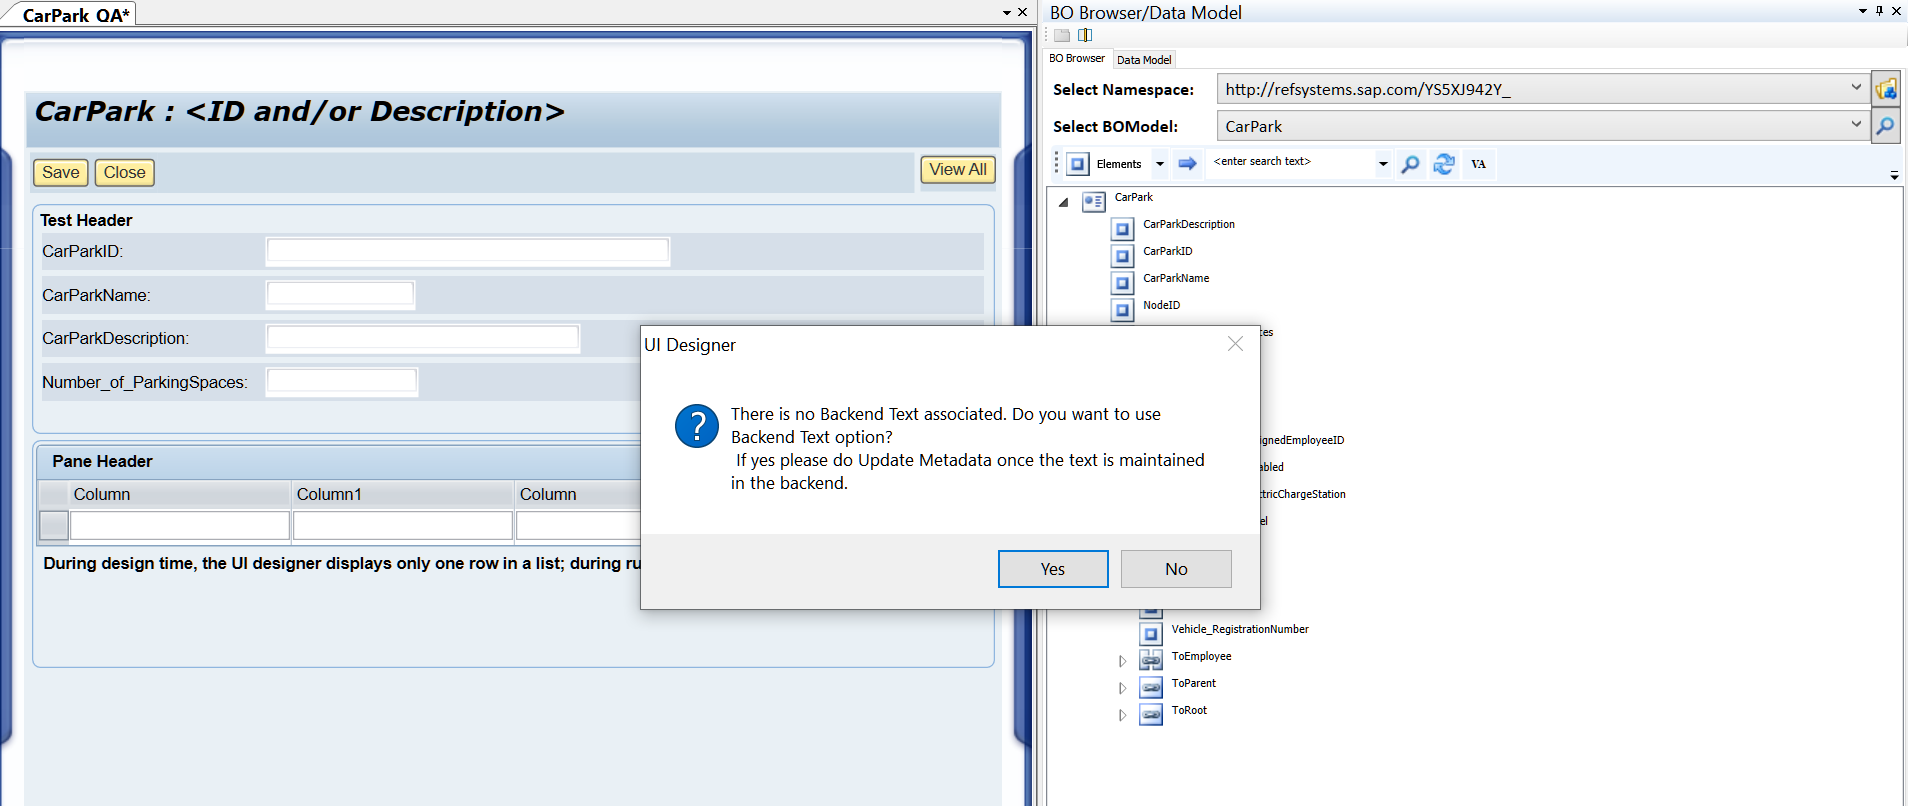
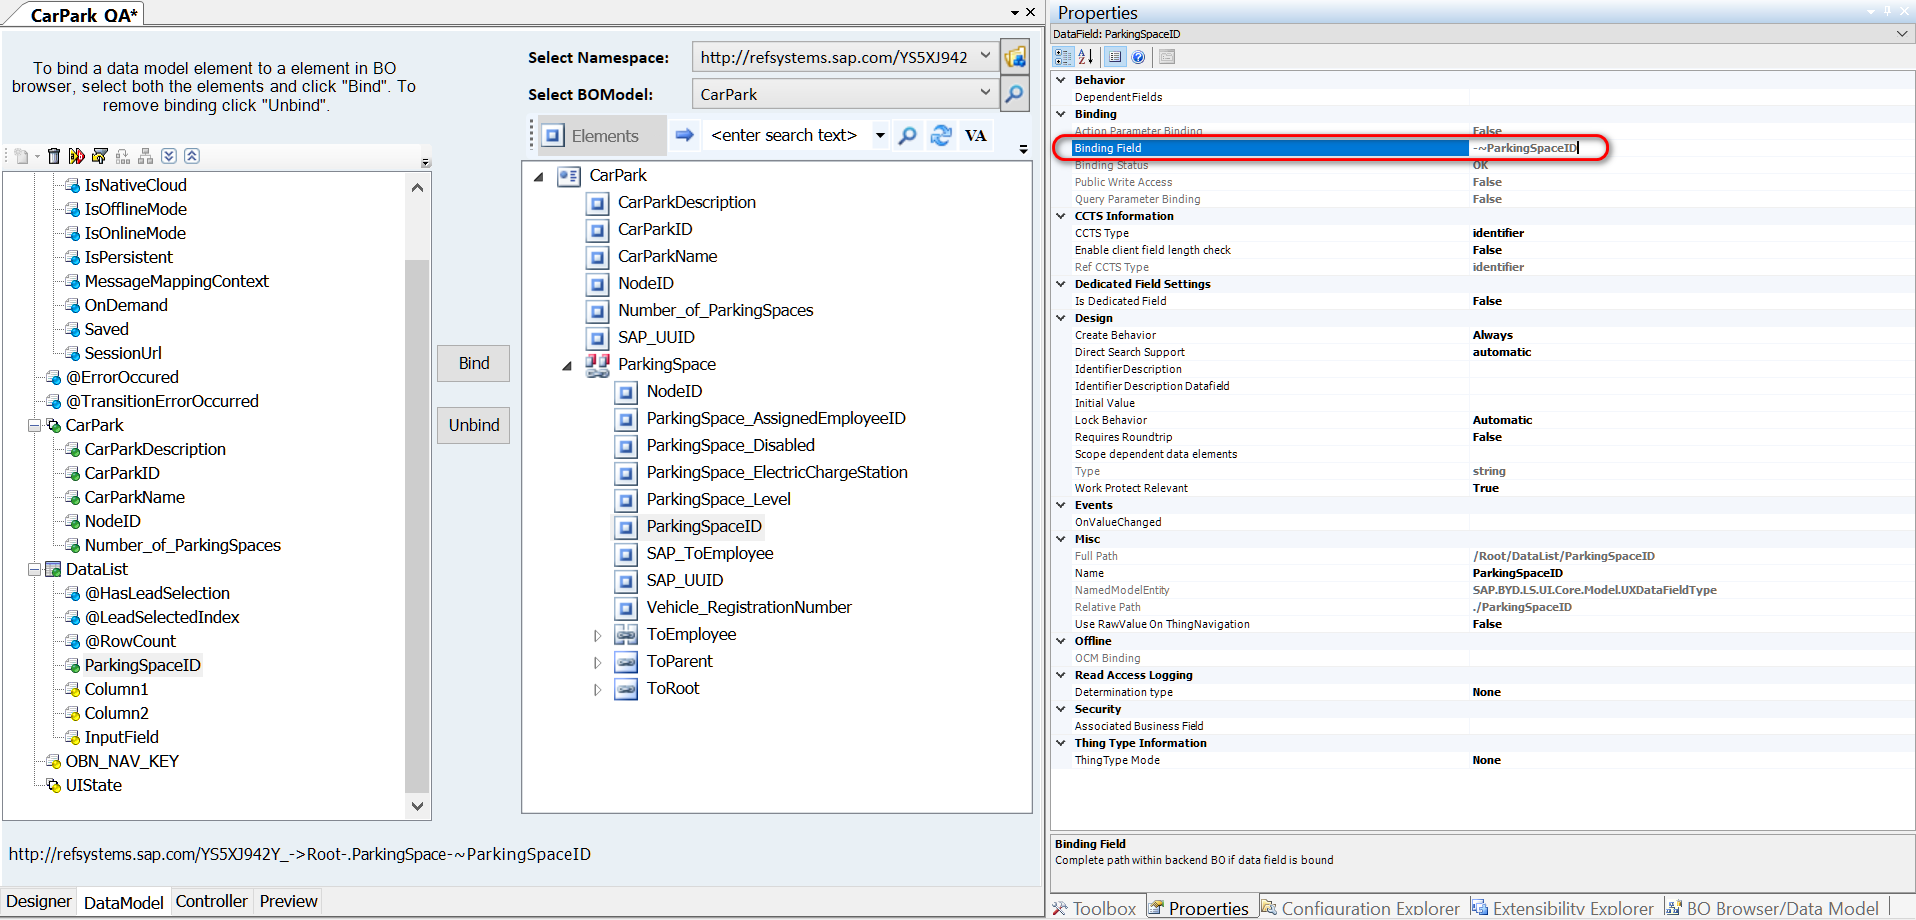
从而建立了UI字段和BO 模型字段的绑定关系:
此处查看绑定关系:
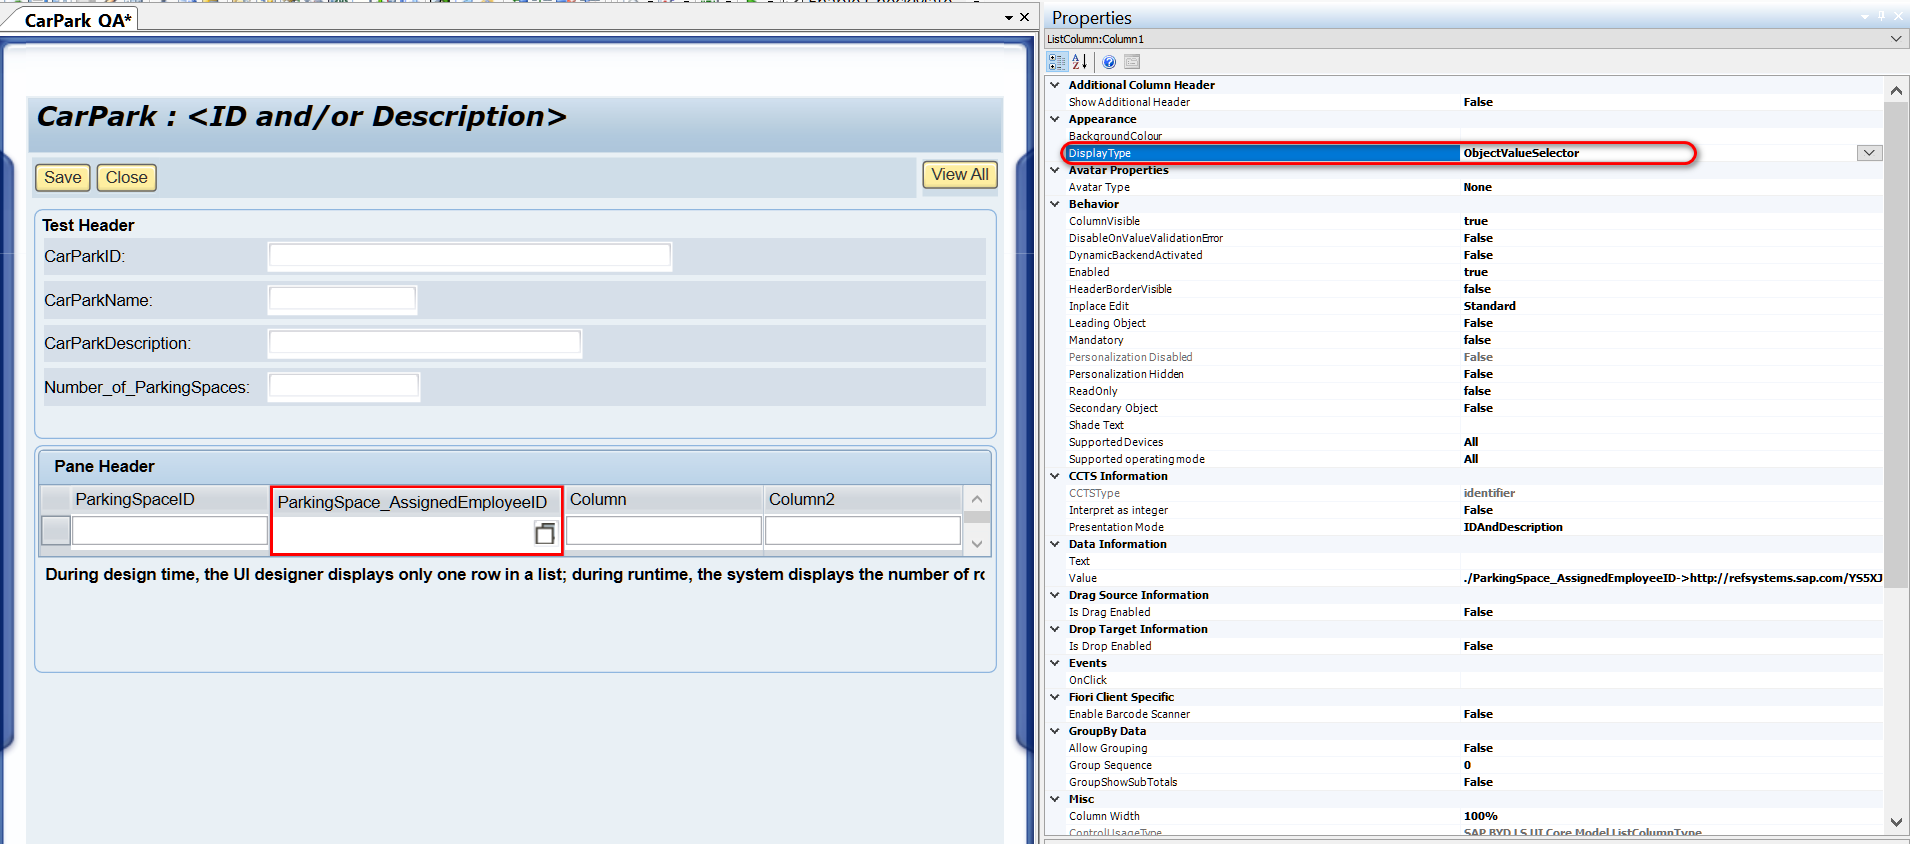
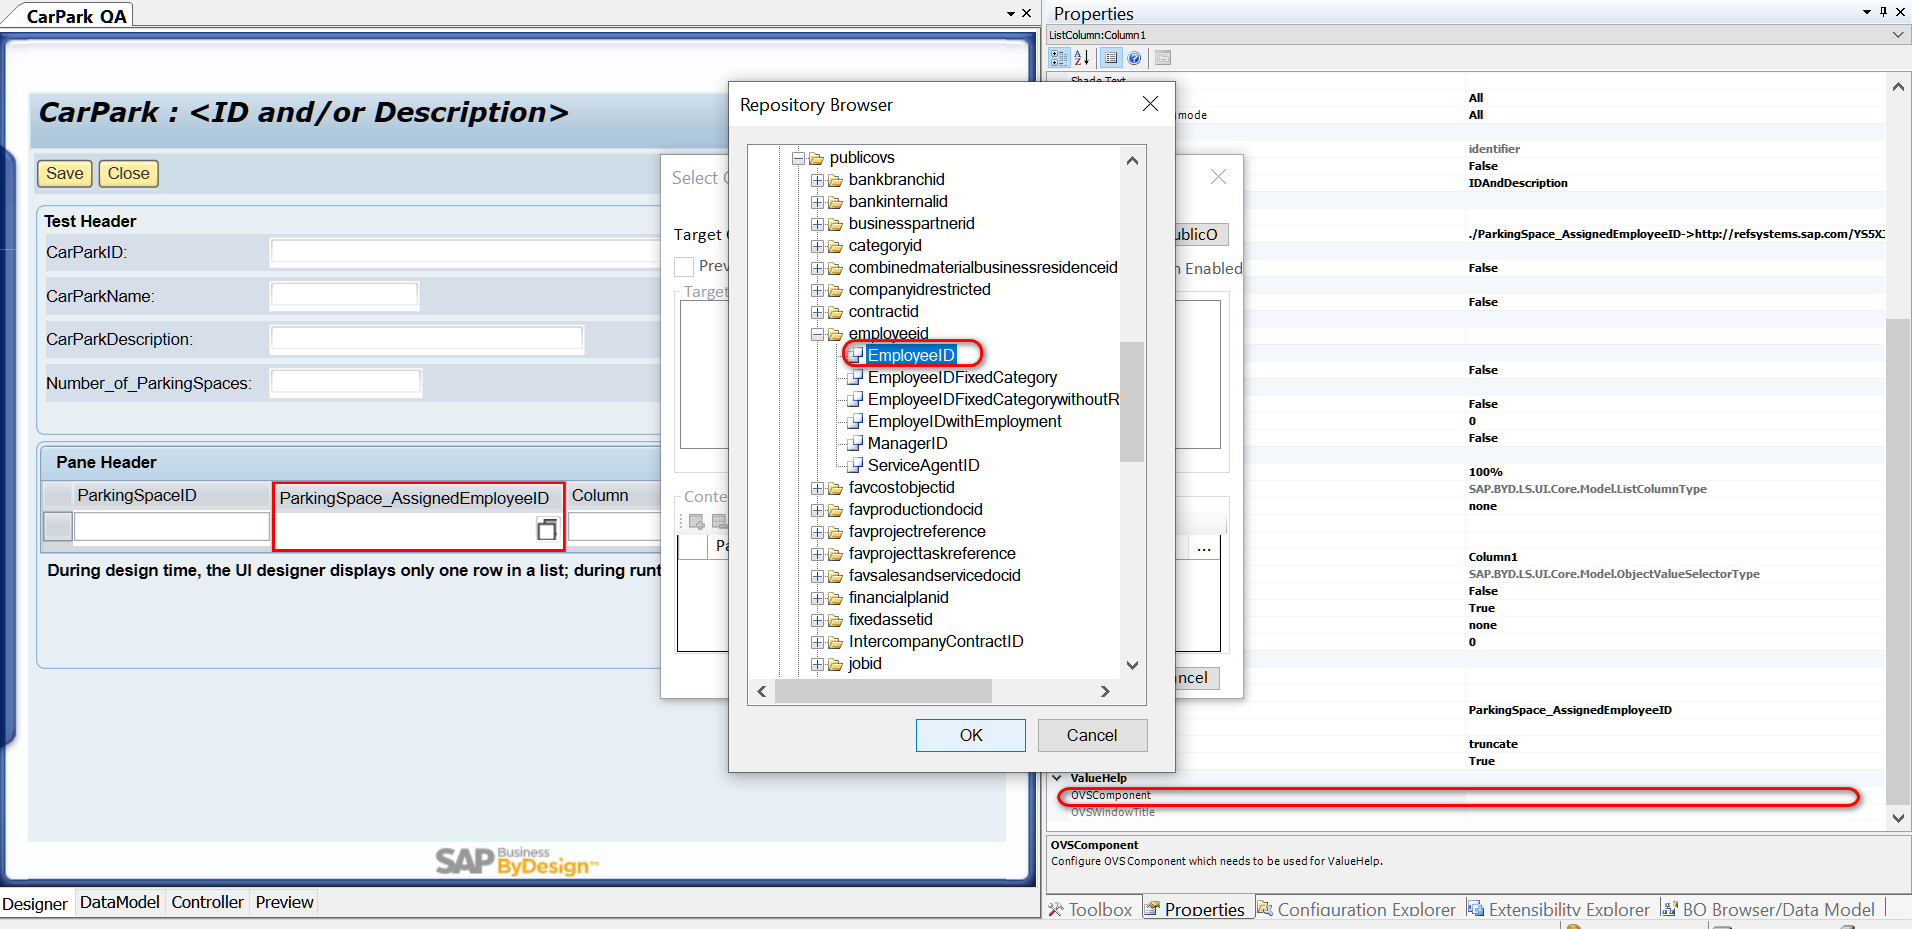
显示employee ID的字段默认是input field,需要将其改成value help:

改成Object Value Selector:OVS
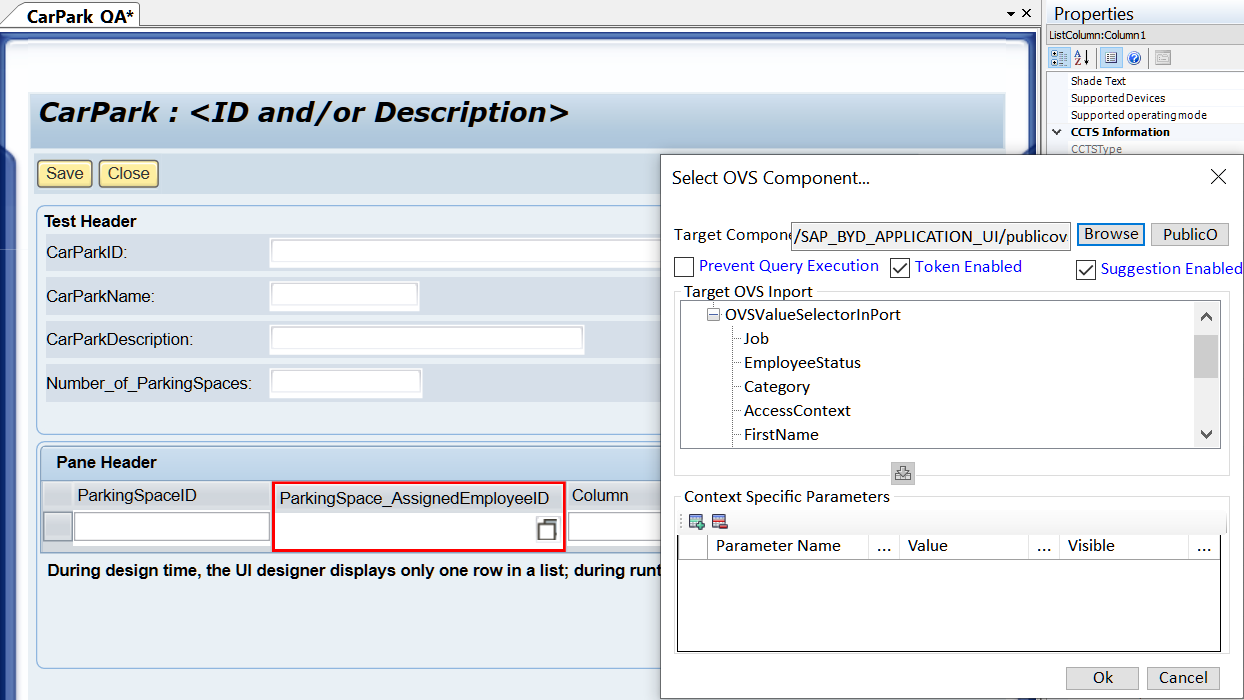
选择/SAP_BYD_APPLICATION_UI/publicovs/employeeid/
EmployeeID: 作为OVS Component:
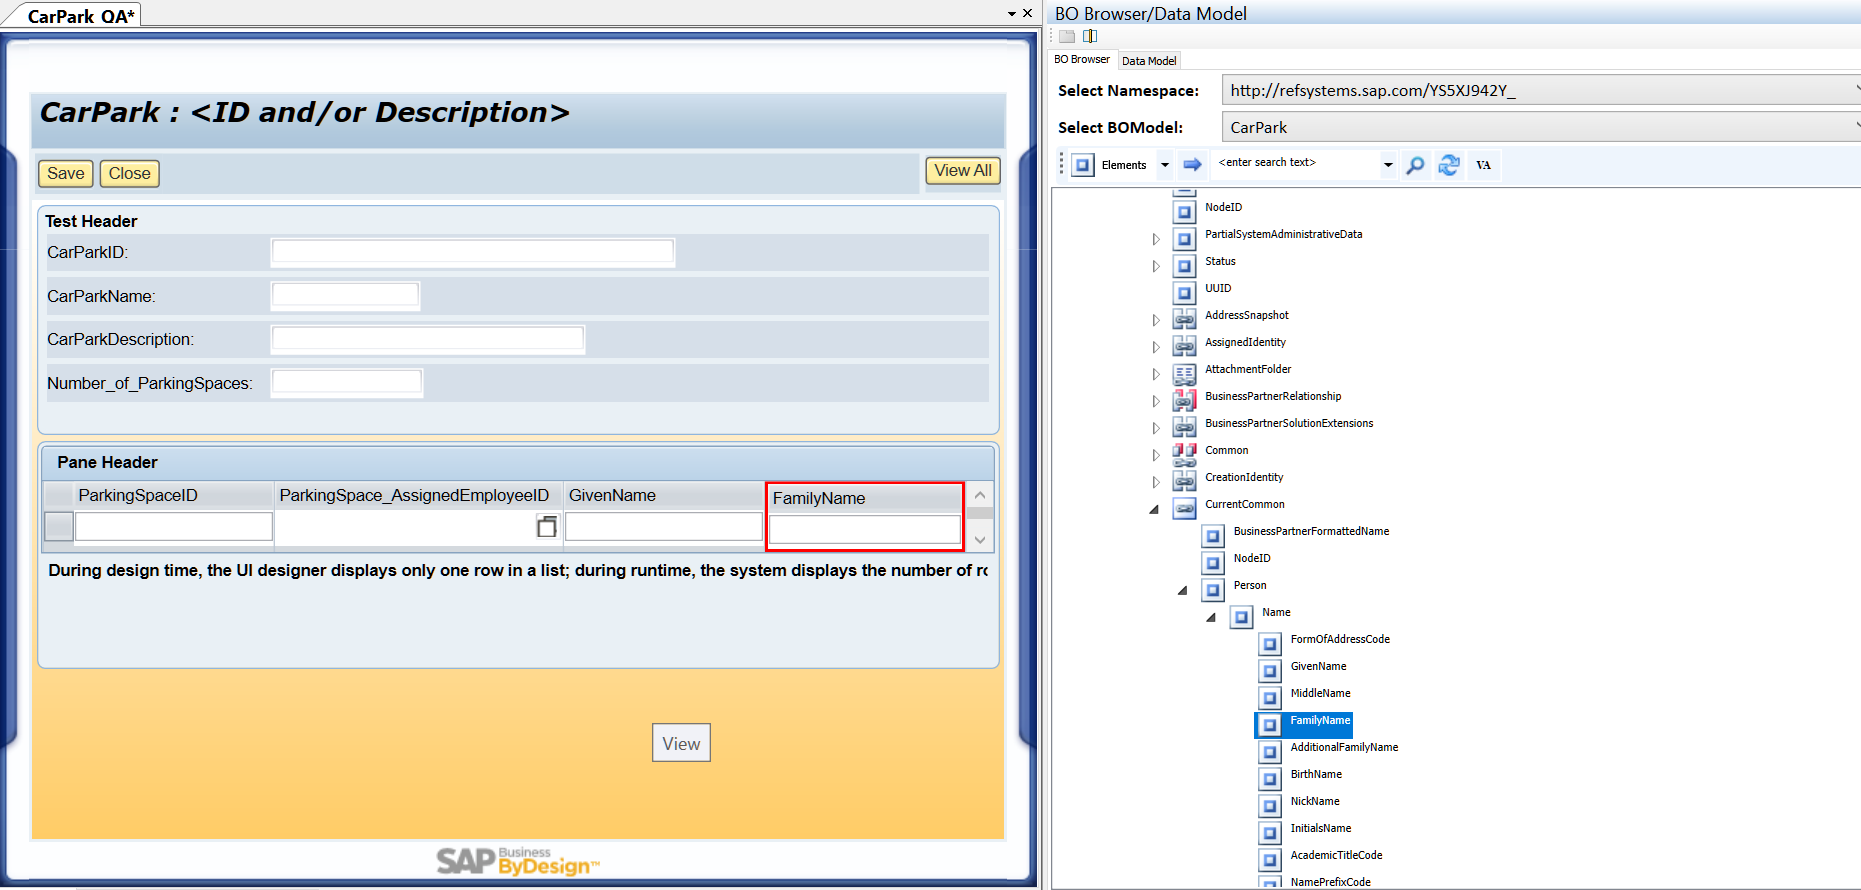
把字段:ToEmployee.CurrentCommon.Person.Name.GivenName拖到第三列:

familyName拖到第四列:
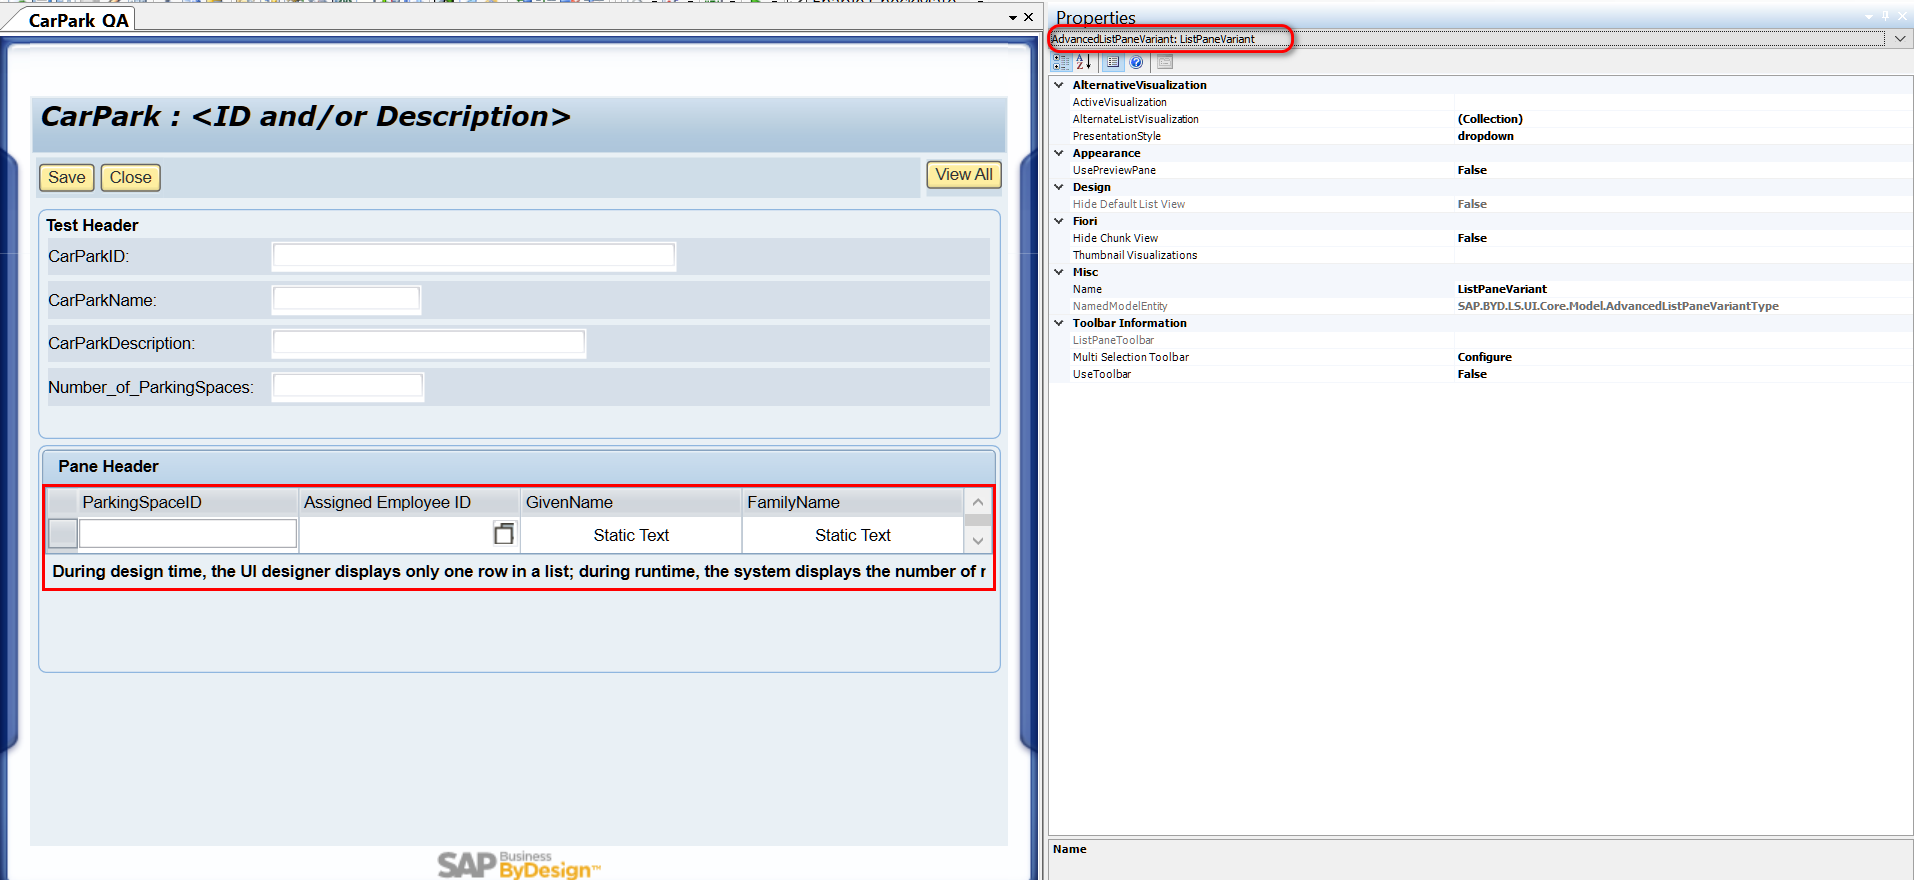
把GivenName的display type设置为Static Text:

右边properties下拉菜单里,选择AdvancedListPaneVariant: ListPaneVariant:
useToolbar从false改成true:
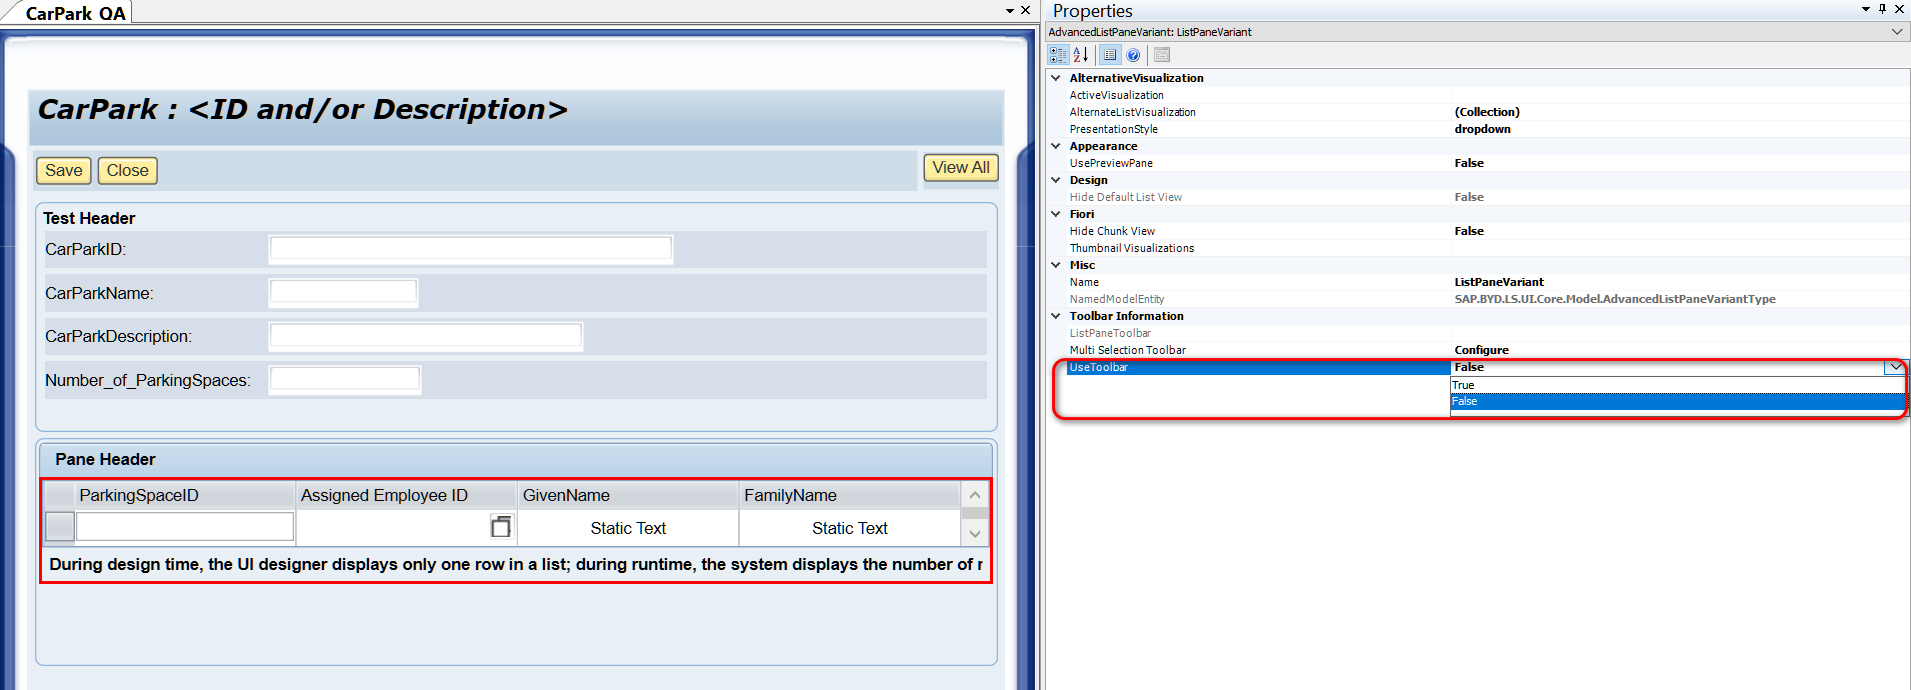
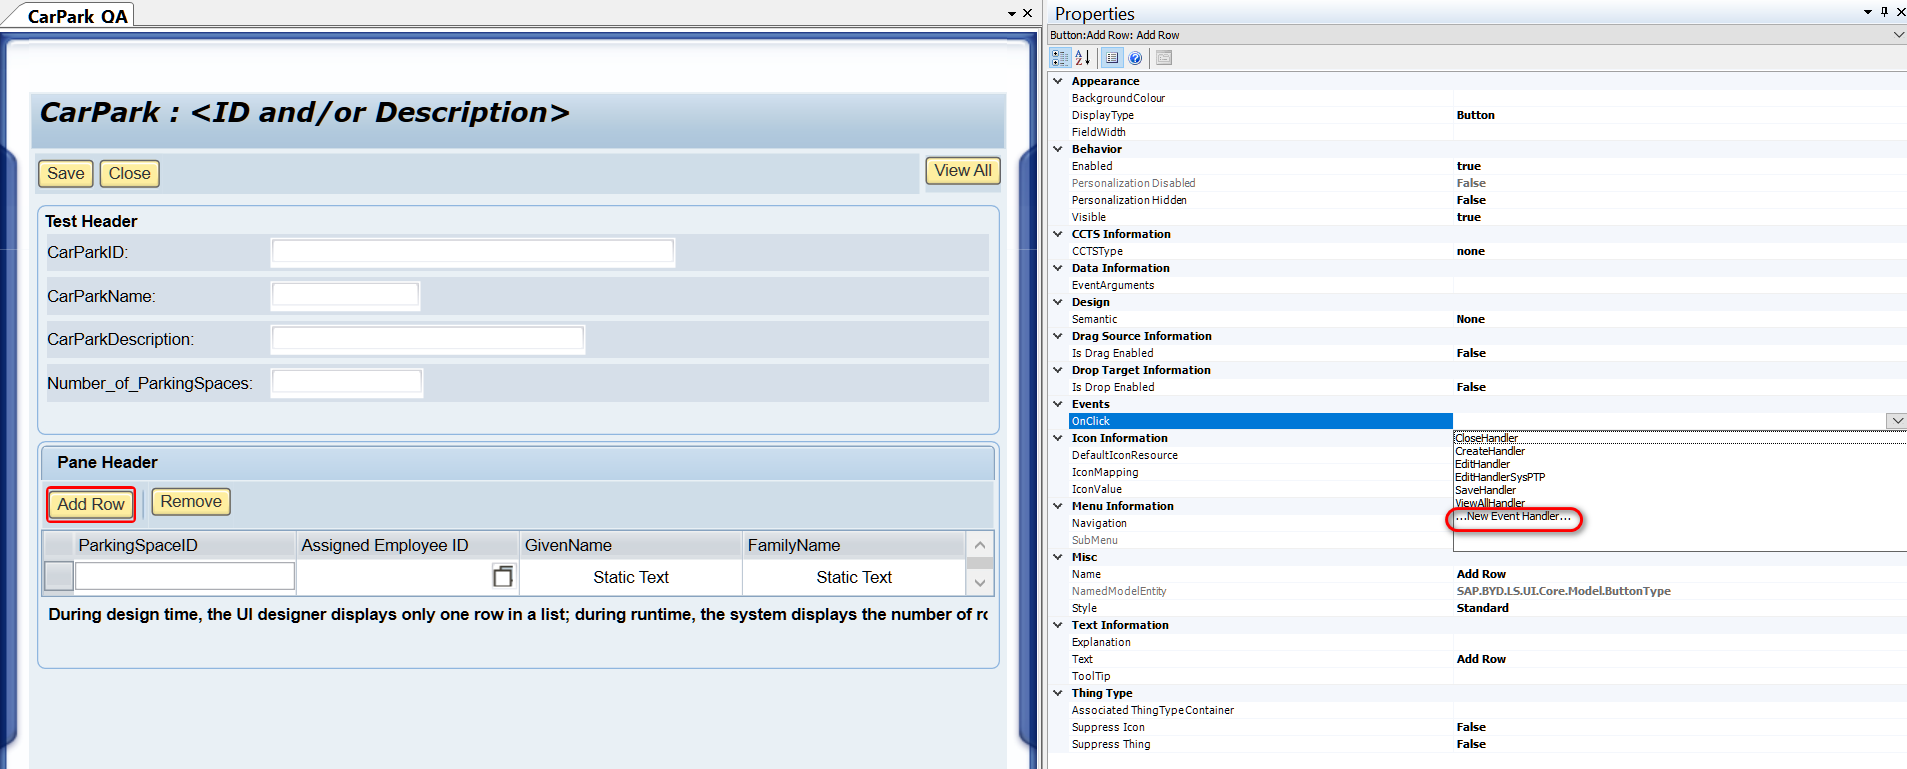
设置成true之后,多了两个按钮:Add Row和Remove.
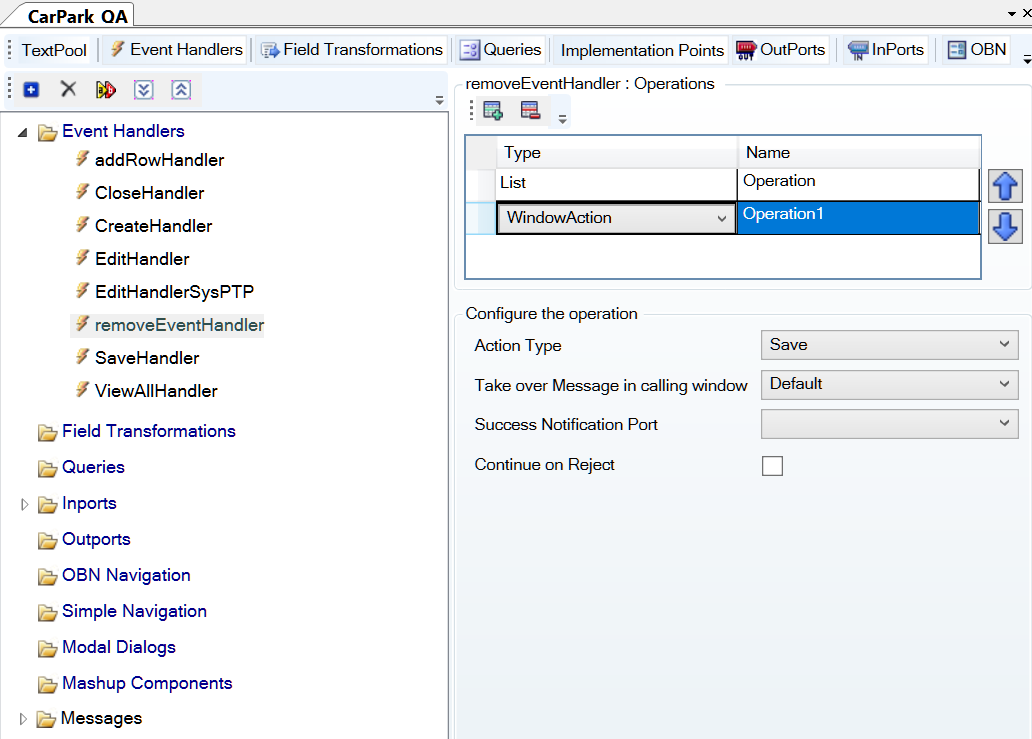
选中Add Row按钮,新建一个Event handler:
新建一个operation,类型为List:
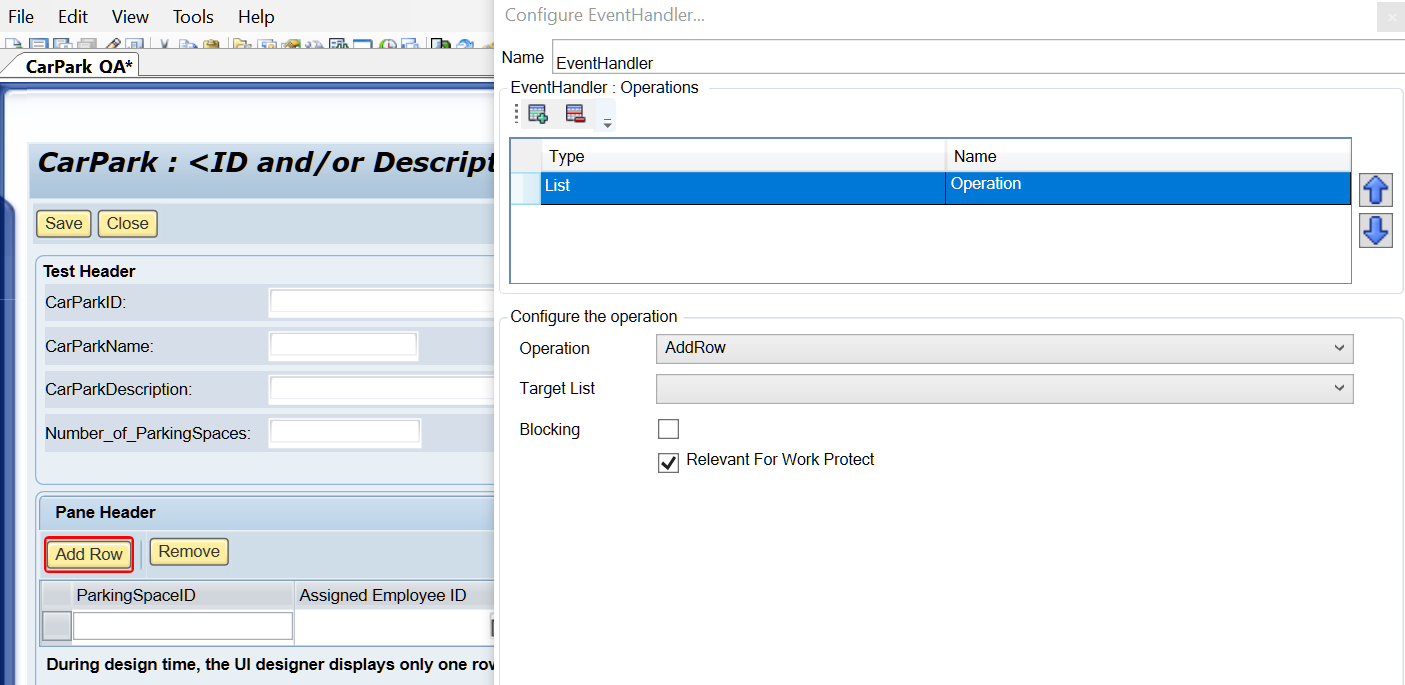
Target List里,从下拉菜单选择/Root/DataList:

给Remove按钮也添加一个event handler:
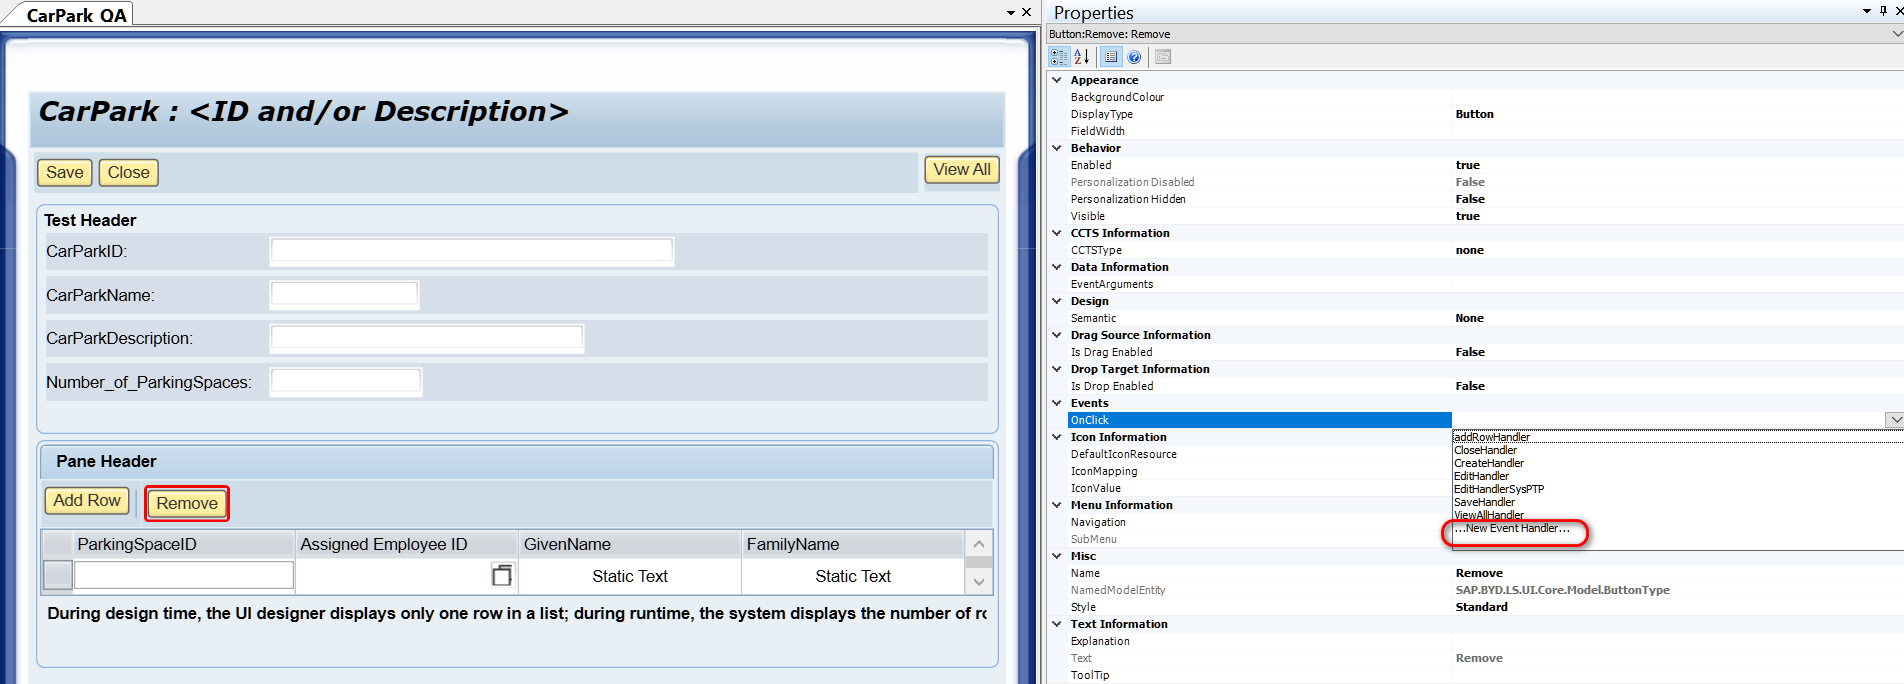

再添加一个save action,确保Row被删除后自动保存:
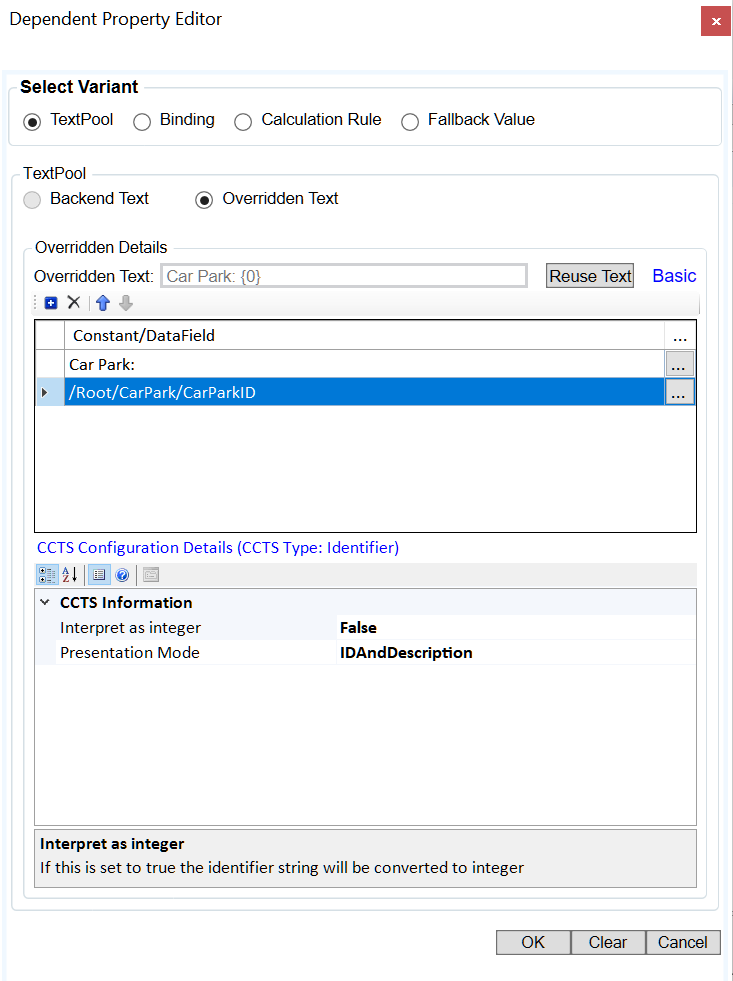
选中identificationRegion:
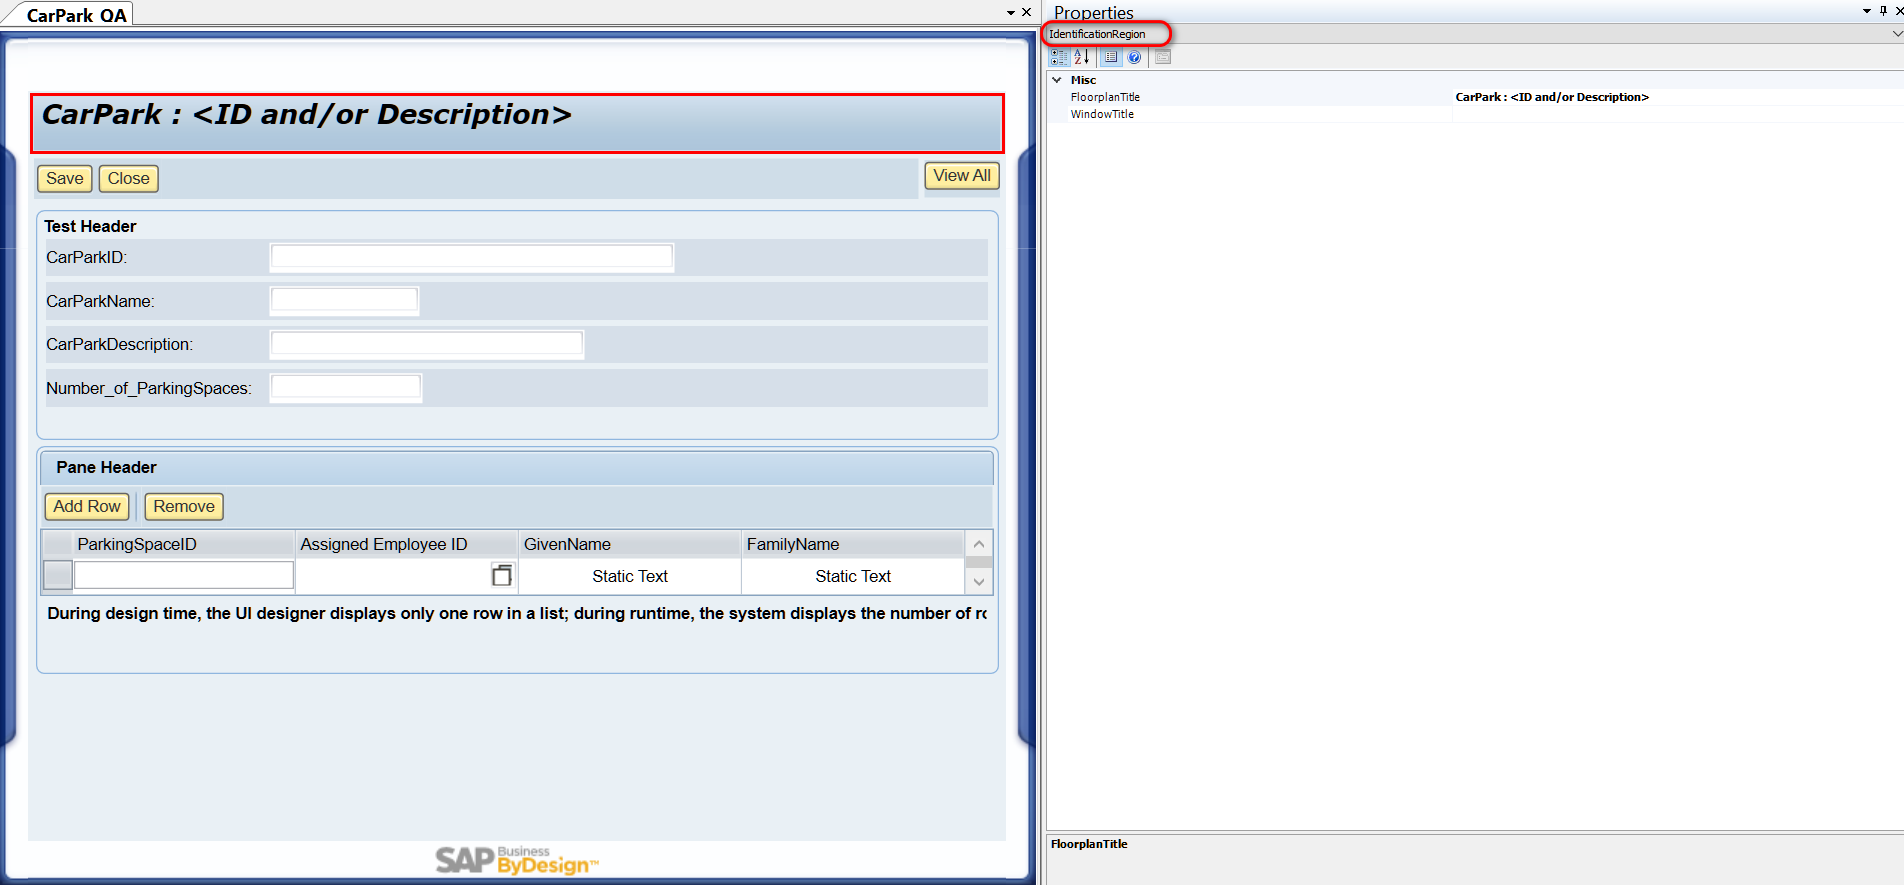
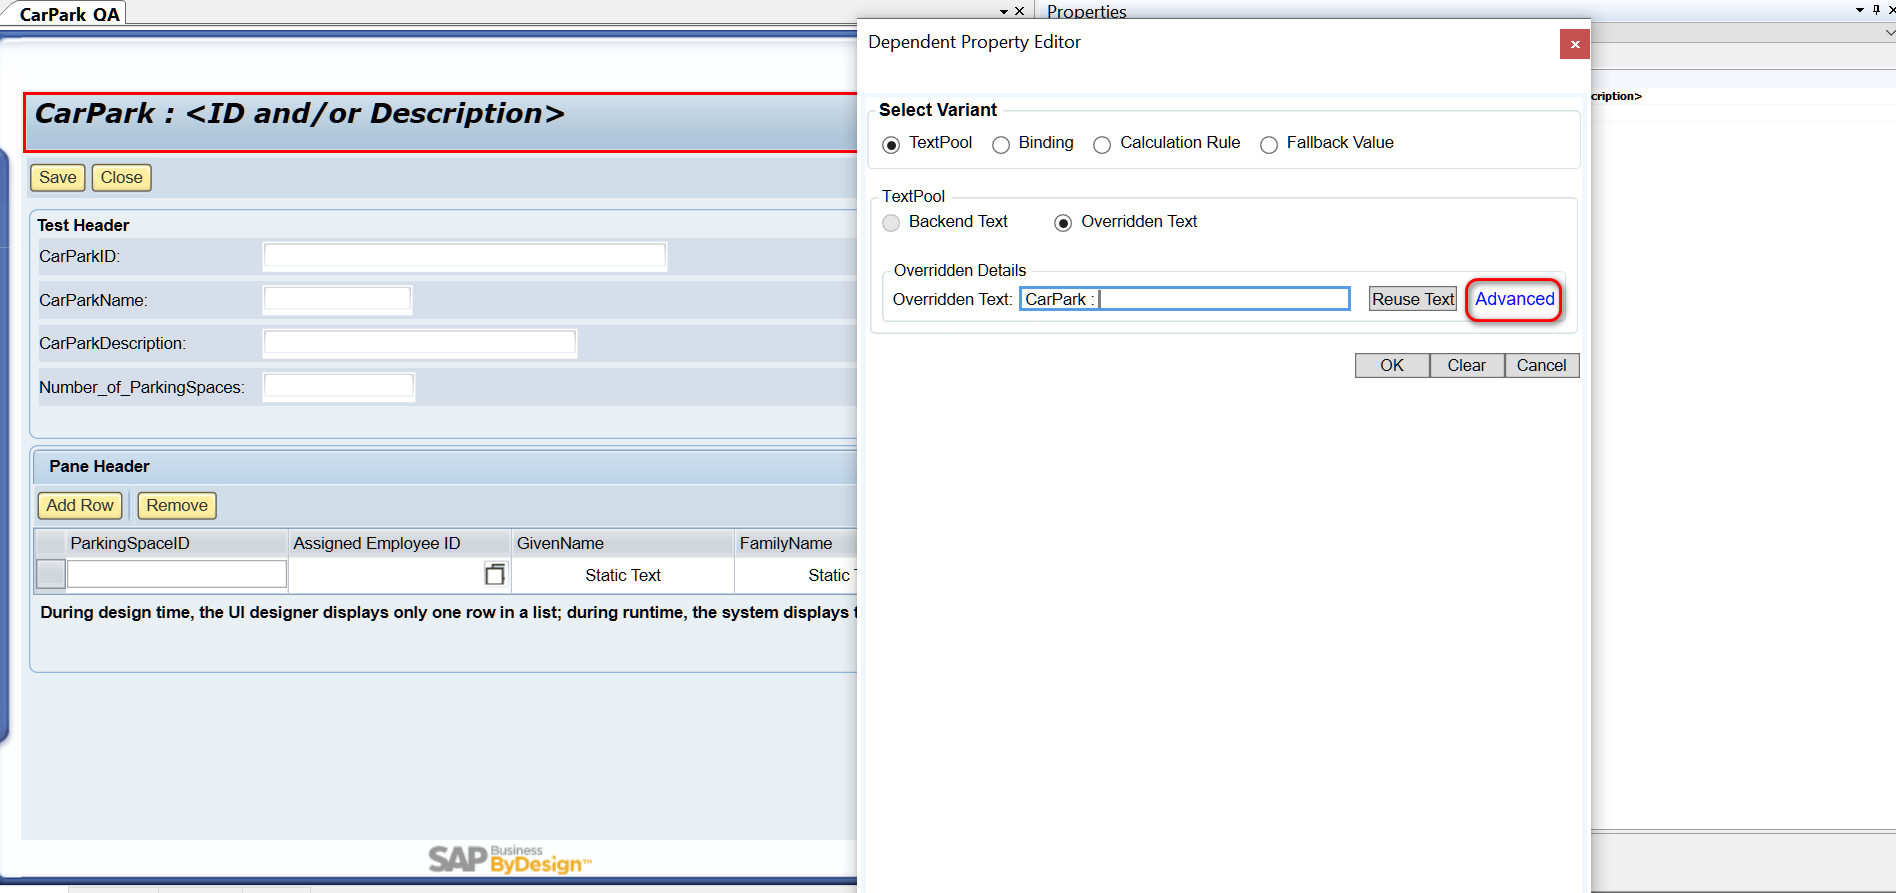
点击Advanced:
选择CarParkID:
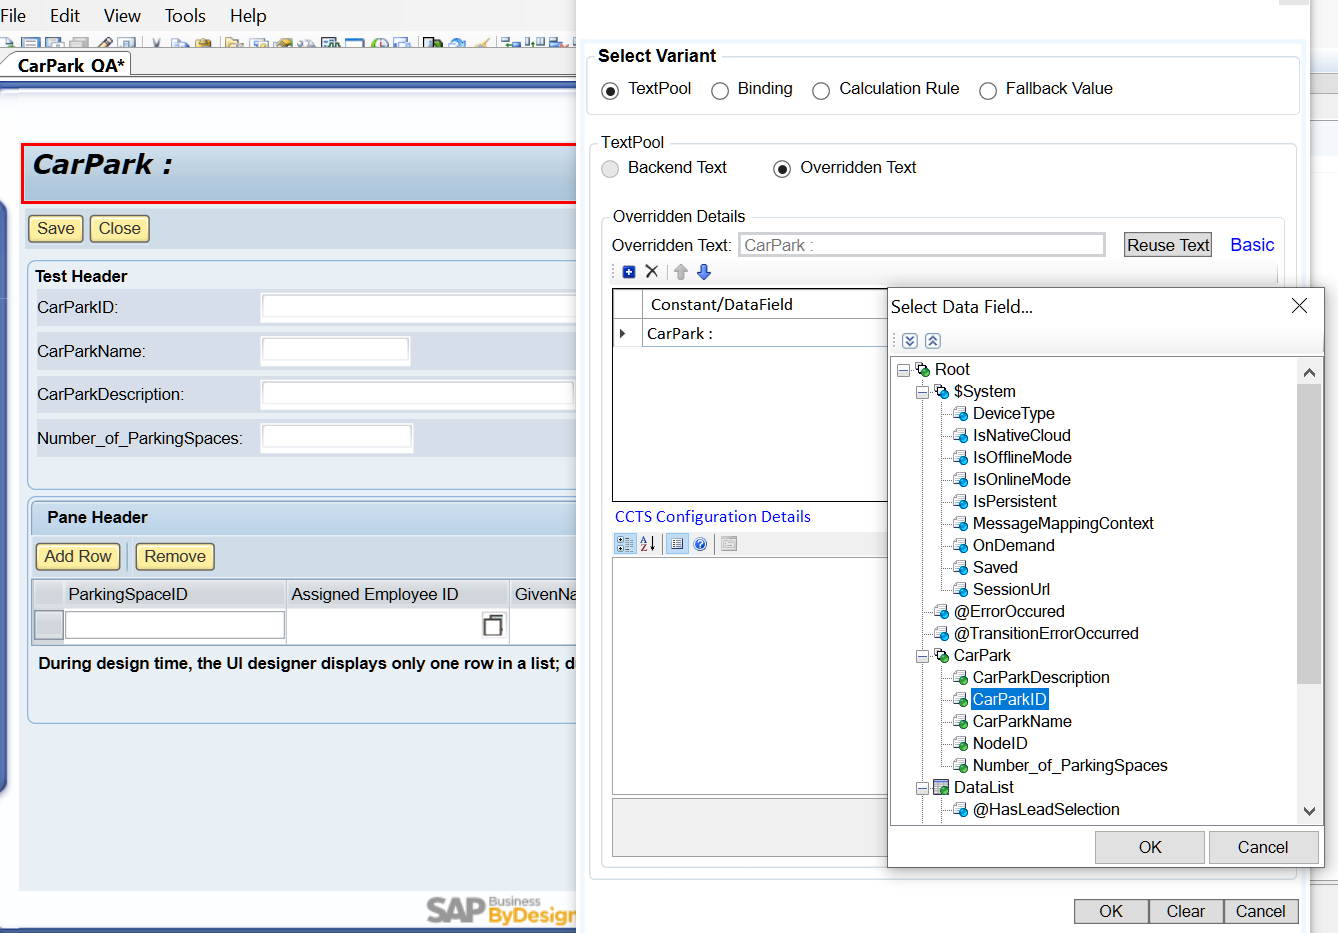
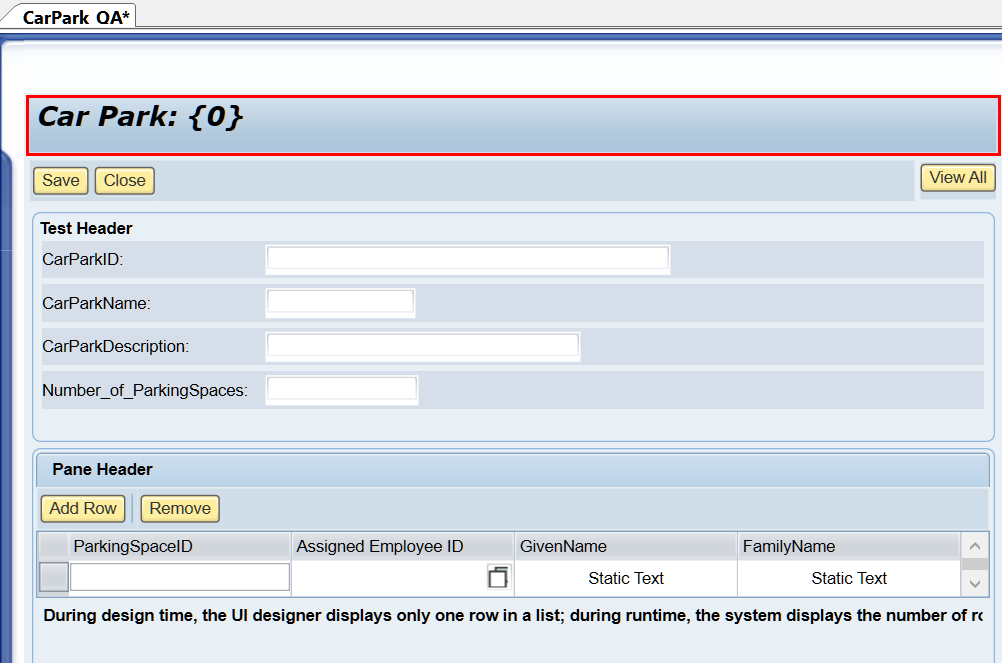
最终效果:
选中SectionGroup,可以对里面的字段进行位置顺序调整:

最后把用户分配到这个新建好的work center即可:

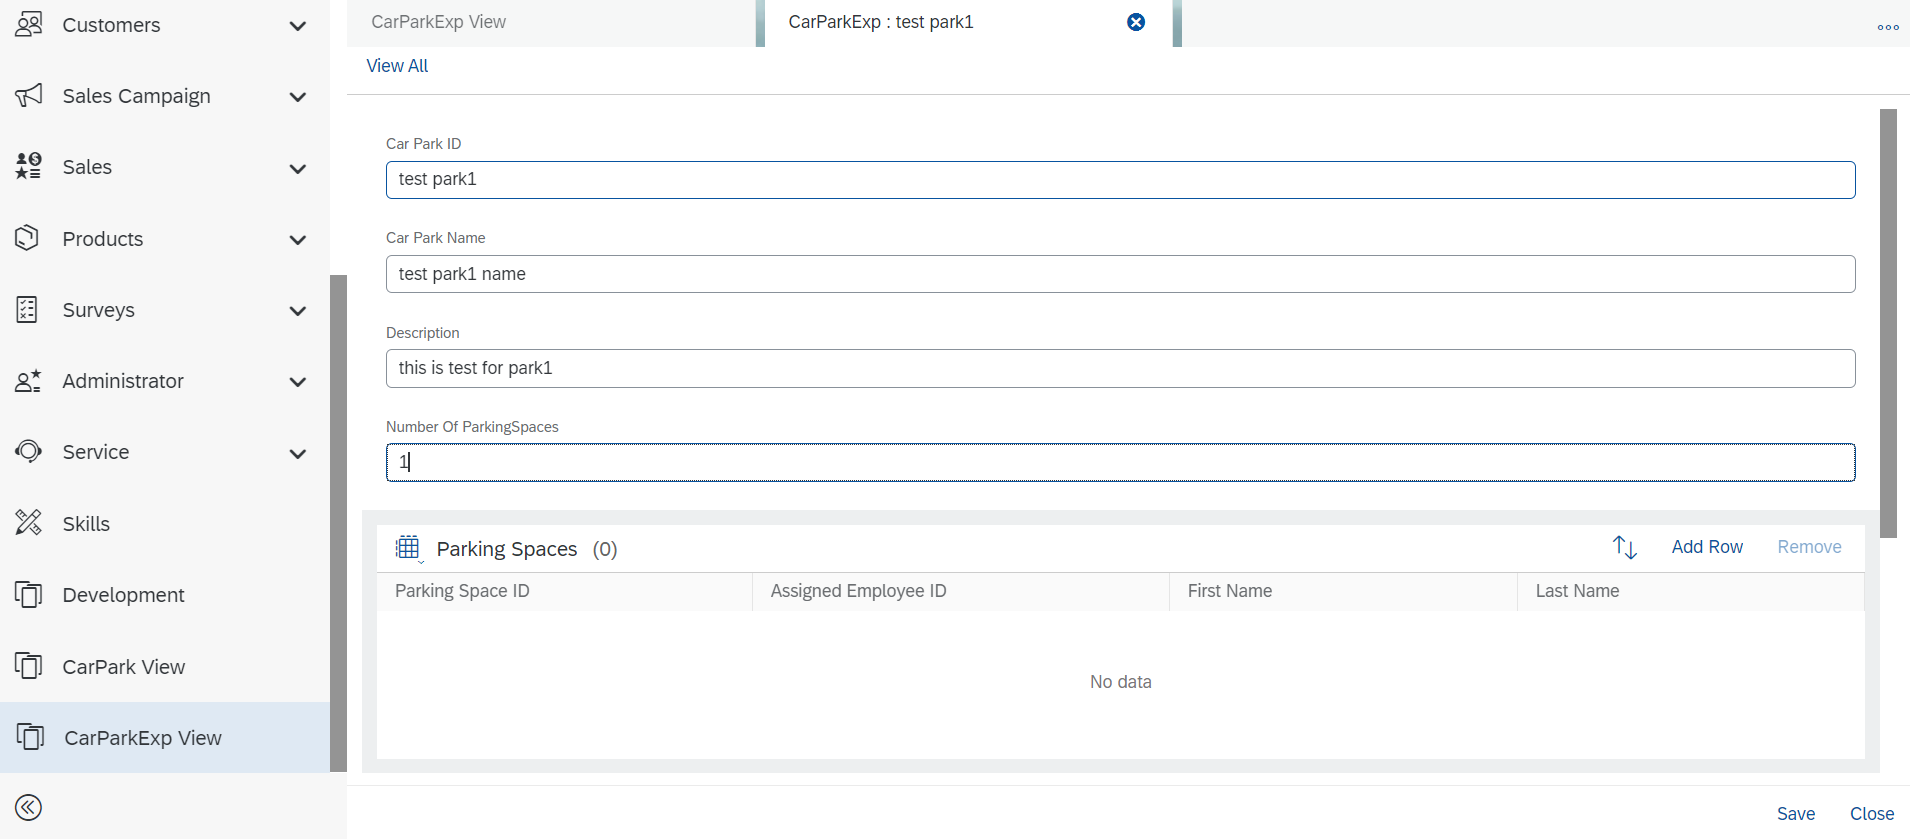
现在就可以进行测试了:
更多Jerry的原创文章,尽在:"汪子熙":