1.一个简单的flask项目
hello.py 文件
from flask import Flask
app = Flask(__name__)
@app.route("/")
def index():
    return "hello"
if __name__ == '__main__':
    app.run(host='0.0.0.0', port=8000, debug=True)
2. 虚拟环境使用
https://www.cnblogs.com/sc-1067178406/p/10624075.html
3. gunicorn 配置
pip3 install gunicorn
①添加 gunicorn.py 文件
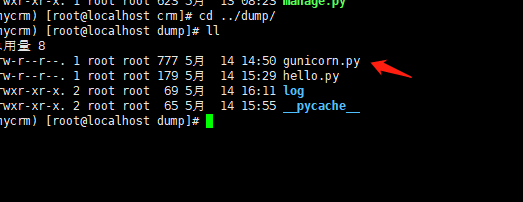
gunicorn.py 文件
# -*- coding: utf-8 -*-
import os
import gevent.monkey
gevent.monkey.patch_all()
import multiprocessing
debug = True
loglevel = 'debug'
bind = '0.0.0.0:8000'
log_dir = os.path.join(os.path.dirname(__file__), 'log')
if not os.path.exists(log_dir):
    os.makedirs(log_dir)
p = os.path.join(log_dir, 'gunicorn.pid')
j = os.path.join(log_dir, 'debug.log')
a_ = os.path.join(log_dir, 'access_log.log')
e_ = os.path.join(log_dir, 'error_log.log')

accesslog = a_
errorlog = e_
pidfile = p
logfile = j
#启动的进程数
workers = multiprocessing.cpu_count() * 2 + 1
worker_class = 'gunicorn.workers.ggevent.GeventWorker'
x_forwarded_for_header = 'X-XUBOGZF-FOR'
print("项目启动")
② 测试启动
gunicorn -w 4 -b 0.0.0.0:5000 hello:app
4. 安装 supervisor
https://www.cnblogs.com/sc-1067178406/p/10645966.html#_label2
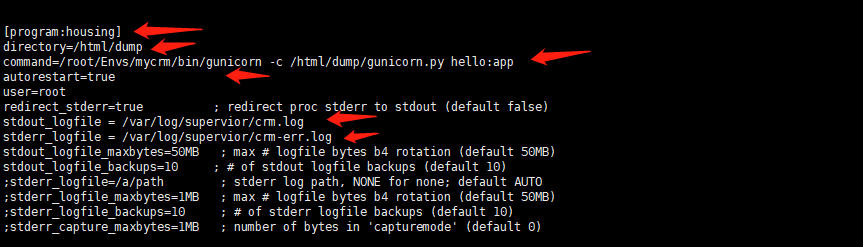
①添加配置
(加在 supervisor.conf 文件最后 )
[program:housing]
directory=/html/dump
command=/root/Envs/mycrm/bin/gunicorn -c /html/dump/gunicorn.py hello:app
autorestart=true
user=root
redirect_stderr=true          ; redirect proc stderr to stdout (default false)
stdout_logfile = /var/log/supervior/crm.log
stderr_logfile = /var/log/supervior/crm-err.log
stdout_logfile_maxbytes=50MB   ; max # logfile bytes b4 rotation (default 50MB)
stdout_logfile_backups=10     ; # of stdout logfile backups (default 10)
②web的管理界面(打开 supervisor.conf 中的注释)
[inet_http_server]         ; inet (TCP) server disabled by default
port=127.0.0.1:9001        ; (ip_address:port specifier, *:port for all iface)
username=user              ; (default is no username (open server))
password=123               ; (default is no password (open server))

[supervisorctl]
serverurl=unix:///tmp/supervisor.sock ; use a unix:// URL  for a unix socket
serverurl=http://127.0.0.1:9001 ; use an http:// url to specify an inet socket
username=user              ; should be same as http_username if set
password=123                ; should be same as http_password if set
;prompt=mysupervisor         ; cmd line prompt (default "supervisor")
;history_file=~/.sc_history  ; use readline history if available
③ 启动
启动 supervisord -c /etc/supervisor.conf
  status housing #查看状态
    start housing #启动任务
    stop  housing #停止任务

    start all
    stop  all  #启停所有的任务
5.nginx 配置
①安装
https://www.cnblogs.com/sc-1067178406/p/10639740.html
② .conf 文件 配置
server {
    listen  9999;
    server_name _;
   #服务
    location / {
            client_max_body_size 100m;
            proxy_pass_header Server;
            proxy_set_header Host $http_host;
            proxy_redirect off;
            proxy_set_header X-Real-IP $remote_addr;
            proxy_set_header X-Scheme $scheme;
            proxy_pass http://0.0.0.0:8000;
      }

      location /status  {
        stub_status on;
    }
}