上一篇主要讲解了如何搭建基于CodeFirst的ORM,并且在章节末我们获取了上下文对象的实例:BookContext。这节主要承接上一篇,来讲解如何整合Spring IOC容器实现控制反转,依赖注入功能。
首先,我们来定义一个接口IBookRepository,用于描述所有的元数据操作集合,所谓元数据操作集合,是指不含有任何业务逻辑的操作集合,只是针对单表操作:
1: public interface IBookRepository
2: {
3: IQueryable<Book> GetAllBooks();
4: Book GetBook(int bookID);
5: bool InsertBook(Book book);
6: bool UpdateBook(Book originalBook, Book updatedBook);
7: bool DeleteBook(int id);
8: //==============================
9: IQueryable<BookLend> GetAllBookLends();
10: BookLend GetBookLend(int bookLendID);
11: bool InsertBookLend(BookLend bookLend);
12: bool UpdateBookLend(BookLend originalBookLend, BookLend updatedBookLend);
13: bool DeleteBookLend(int id);
14: //==============================
15: IQueryable<BookType> GetAllBookTypes();
16: BookType GetBookType(int bookTypeID);
17: bool InsertBookType(BookType bookType);
18: bool UpdateBookType(BookType originalBookType, BookType updatedBookType);
19: bool DeleteBookType(int id);
20: //==============================
21: IQueryable<BookPlace> GetAllBookPlaces();
22: BookPlace GetBookPlace(int bookPlaceID);
23: bool InsertBookPlace(BookPlace bookPlace);
24: bool UpdateBookPlace(BookPlace originalBookPlace, BookPlace updatedBookPlace);
25: bool DeleteBookPlace(int id);
26: //==============================
27: IQueryable<Student> GetAllStudents();
28: Student GetStudent(int studentID);
29: bool InsertStudent(Student student);
30: bool UpdateStudent(Student originalStudent, Student updatedStudent);
31: bool DeleteStudent(int id);
32:
33: //=====================================
34: IQueryable<Student> GetStudentsByBookLend(int bookLendID);
35: IQueryable<Book> GetBooksByBookLend(int bookLendID);
36: IQueryable<Book> GetBookByType(int bookTypeID);
37: IQueryable<Book> GetBookByPlace(int bookPlaceID);
38: }
然后新建一个BookRepository类,用于提供其实现,由于这里篇幅有限,我就只实现GetAllBooks方法和GetBook(int bookID)方法:
1: public class BookRepository:IBookRepository
2: {
3: public BookRepository()
4: {
5: this.context = new BookContext();
6: }
7:
8: private BookContext context;
9:
10: public IQueryable<Book> GetAllBooks()
11: {
12: return context.Books.AsQueryable();
13: }
14:
15: public Book GetBook(int bookID)
16: {
17: return context.Books.Where(c => c.ID == bookID).FirstOrDefault();
18: }
19:
20: //comment here...
21: }
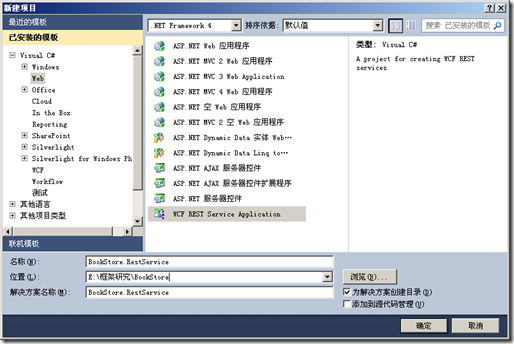
建立好以后,我们新建一个基于WCF REST Service Application模板的Web项目项目,并命名为BookStore.RestService,用来消费刚刚创建的操作:
当这个项目创建好以后,我们首先需要添加对Spring的引用:
Common.Logging.dll
Spring.Aop.dll
Spring.Core.dll
然后新建一个ServiceBase类,用于初始化IOC容器:
1: using System;
2: using System.Collections.Generic;
3: using System.Linq;
4: using System.Web;
5: using Spring.Context.Support;
6: using Spring.Context;
7:
8: namespace BookStore.RestService
9: {
10: public class ServiceBase
11: {
12: public ServiceBase()
13: {
14: applicationContext = ContextRegistry.GetContext();
15: }
16: protected IApplicationContext applicationContext = null;
17: }
18: }
创建完毕后,新建一个BookService类,继承自ServiceBase类:
1: namespace BookStore.RestService
2: {
3: [ServiceContract]
4: [AspNetCompatibilityRequirements(RequirementsMode = AspNetCompatibilityRequirementsMode.Allowed)]
5: [ServiceBehavior(InstanceContextMode = InstanceContextMode.Single)]
6: public class BookService:ServiceBase
7: {
8: public BookService()
9: : base()
10: {
bookRepository = (IBookRepository)applicationContext["BookRepository"];
12: }
13:
14: private IBookRepository bookRepository;
15:
16: [WebInvoke(
17: Method = "GET",
18: ResponseFormat = WebMessageFormat.Xml,
19: BodyStyle = WebMessageBodyStyle.Bare,
20: UriTemplate = "/GetAllBooks/")]
21: public List<Book> GetAllBooks()
22: {
23: return bookRepository.GetAllBooks().ToList();
24: }
25:
26: [WebInvoke(
27: Method = "GET",
28: ResponseFormat = WebMessageFormat.Xml,
29: BodyStyle = WebMessageBodyStyle.Bare,
30: UriTemplate = "/GetBookByID/?id={id}")]
31: public Book GetBookByID(int id)
32: {
33: return bookRepository.GetBook(id);
34: }
35: }
36: }
大家可以参看我之前的文章来了解如何创建基于WCF 的Restful Service,这里我就不细讲了。
需要注意的是,首先我们初始化了一个IBookRepository 接口,然后在其构造函数中,我们从Spring容器中去拿继承自IBookRepository接口的操作实例。其中,applicationContext["BookRepository"]代码段表明我们是要去web.config配置文件中去取BookRepository的节点声明。下面是配置节点部分:
首先是configSections节点声明,用于引入Spring类库配置:
1: <configSections>
2: <sectionGroup name="spring">
3: <section name="context" type="Spring.Context.Support.ContextHandler, Spring.Core"/>
4: <section name="objects" type="Spring.Context.Support.DefaultSectionHandler, Spring.Core"/>
5: </sectionGroup>
其次是<spring>节点,用于容器配置:
1: <spring>
2: <context>
3: <resource uri="config://spring/objects"/>
4: </context>
5:
6: <objects xmlns="http://www.springframework.net">
7: <object name="BookRepository" type="BookStore.Data.BookRepository, BookStore.Data" singleton="false"/>
8: </objects>
9: </spring>
由于配置比较简单,我这里就不多说了。这样进行依赖注入后的好处就是,当以后业务需求变更,无论是增加新的功能,还是更换现有的功能,无需将整个项目编译,只需要将更改的部分编译过,然后将dll在配置文件中指定一下,就可以轻松实现业务追加或者更新了,非常便于维护。
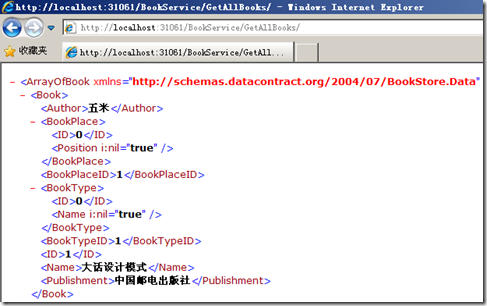
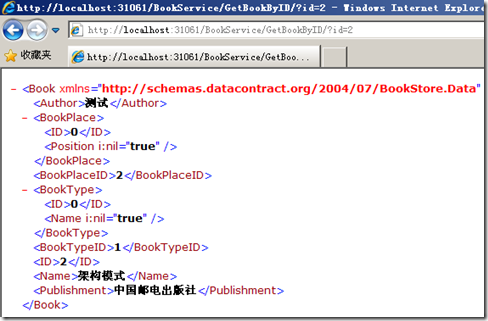
配置完成后,当我们运行之后,就可以看到正确的浏览效果了:
这节就到这里,下节准备讲解如何实现日志拦截和用户认证拦截。


