转:http://www.cnblogs.com/justinzhang/p/4983633.html
一个Eclipse的工程,在pom中配置了若干依赖,需要将pom中所有的依赖全部打包进一个jar包中,可以选择的方案有maven-assembly-plugin和fatjar。以前采用fatjar进行打包,但是fatjar有不少问题,
1. 最近一次更新是在09年,无法支持新版本的eclipse。
2.支持最高的jdk版本是1.7
3. 打包速度慢(不是一般的慢)
4. 打成的jar包体积略大。
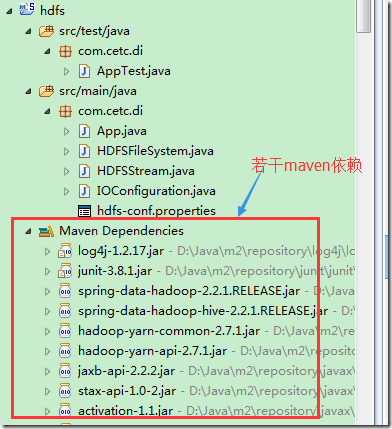
下面是一个Eclipse的工程,其中含有不少的maven依赖包:
采用export成runnable jar包的方式是行不通的,正确做法是在工程的pom.xml文件中配置maven-assembly-plugin,pom.xml的配置如下:
<project xmlns="http://maven.apache.org/POM/4.0.0" xmlns:xsi="http://www.w3.org/2001/XMLSchema-instance"
    xsi:schemaLocation="http://maven.apache.org/POM/4.0.0 http://maven.apache.org/xsd/maven-4.0.0.xsd">
    <modelVersion>4.0.0</modelVersion>

    <groupId>com.cetc.di</groupId>
    <artifactId>hdfs</artifactId>
    <version>1.0</version>
    <packaging>jar</packaging>

    <name>hdfs</name>
    <url>http://maven.apache.org</url>


    <properties>
        <project.build.sourceEncoding>UTF-8</project.build.sourceEncoding>
        <jdk.version>1.8</jdk.version>
    </properties>

    <build>
        <plugins>
            <plugin>
                <artifactId>maven-compiler-plugin</artifactId>
                <version>2.3.2</version>
                <configuration>
                    <source>1.8</source>
                    <target>1.8</target>
                </configuration>
            </plugin>

            <plugin>
                   <artifactId> maven-assembly-plugin </artifactId>
                   <configuration>
                        <descriptorRefs>
                             <descriptorRef>jar-with-dependencies</descriptorRef>
                        </descriptorRefs>
                        <archive>
                             <manifest>
                                  <mainClass>com.cetc.di.App</mainClass>
                             </manifest>
                        </archive>
                   </configuration>
                   <executions>
                        <execution>
                             <id>make-assembly</id>
                             <phase>package</phase>
                             <goals>
                                  <goal>single</goal>
                             </goals>
                        </execution>
                   </executions>
              </plugin>


        </plugins>
    </build>


    <dependencies>
        <dependency>
            <groupId>log4j</groupId>
            <artifactId>log4j</artifactId>
            <version>1.2.17</version>
        </dependency>

        <dependency>
            <groupId>junit</groupId>
            <artifactId>junit</artifactId>
            <version>3.8.1</version>
            <scope>test</scope>
        </dependency>


        <dependency>

            <groupId>org.springframework.data</groupId>
            <artifactId>spring-data-hadoop</artifactId>
            <version>2.2.1.RELEASE</version>
        </dependency>
    </dependencies>

</project>
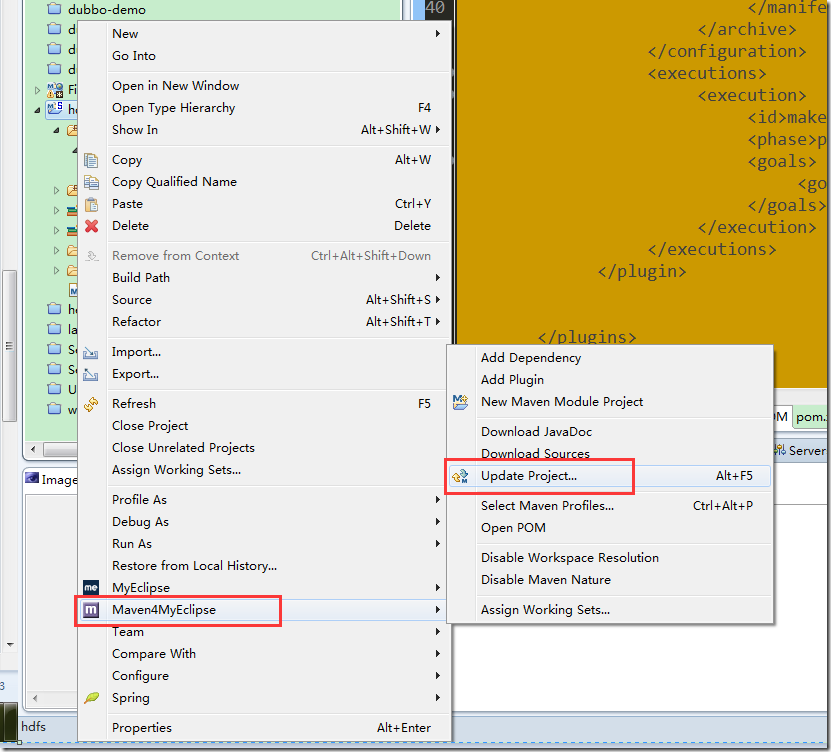
执行maven4MyEclipse->Update Project…
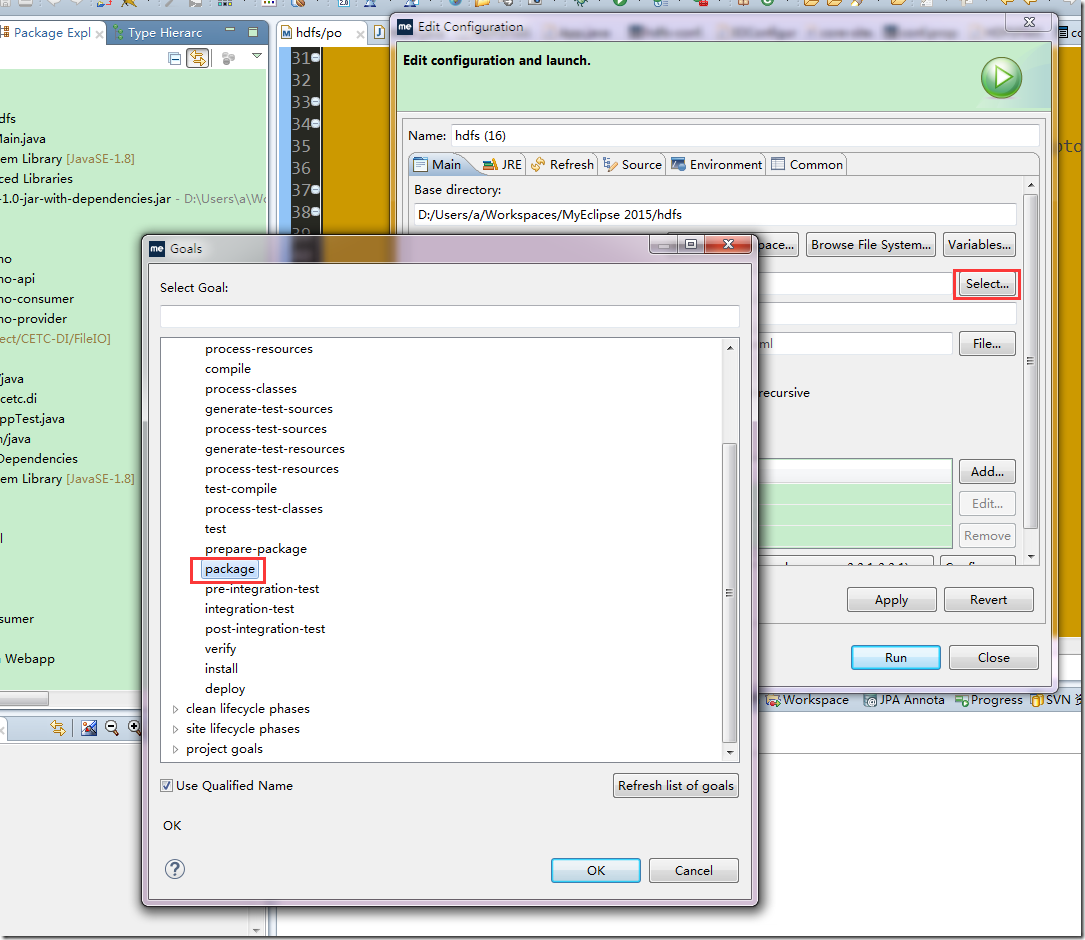
最后执行Run as->Maven build..->Select..->选择package目标。
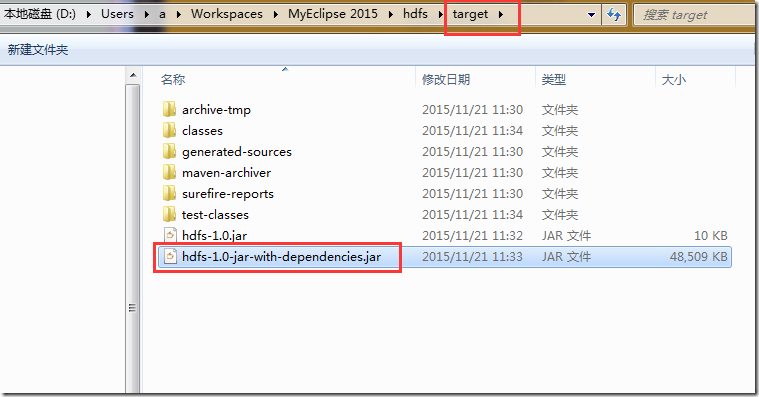
目标执行后,可以在target目录下,找到生成的jar包:
使用Java Decompiler可以看到打包后,jar包的内容如下:
PS.在这个打包的过程中,还发现了一个和Hadoop配置相关的问题,将在下一篇文中中介绍。


