今天学有所成,赶紧记下今天的成果
之前三篇文章分别演示了空间的大小改变,移动,及颜色变化。在后续研究旋转的过程中即为艰难
如果你是使用pyqt4,那么使用QGraphicsItemAnimation便可以轻松达到旋转的效果,这里不再详述
可惜到了pyqt5
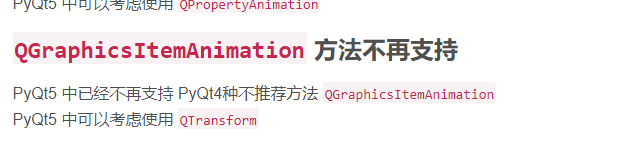
于是查阅各种英文资料,我分别尝试了QGraphicsRotation,QGraphicsTransform,QTransform效果都不太理想,QTransform是可以实现的,但是太复杂
最后我找到了一种极为简单的方法就是在使用QGraphicsView的各种item时,可以直接setRotation让对象旋转起来,下面来看看代码,这里直接在对象上写一个动画:
class Ball(QObject):
    def __init__(self):
        super().__init__()
        pixmap = QPixmap("../star.png")
        scaledPixmap = pixmap.scaled(50, 55)
        self.animation()

        self.pixmap_item = QGraphicsPixmapItem(scaledPixmap)
        self.pixmap_item.setTransformOriginPoint(25, 27.5)  # 设置中心为旋转
        self._set_pos(QPointF(5, 30))  # 设置图标的初始位置

    def _set_pos(self, pos):
        self.pixmap_item.setPos(pos)

    def _set_rotation(self, angle):
        self.pixmap_item.setRotation(angle.x())  # 旋转度数

    def animation(self):
        self.anim = QPropertyAnimation(self, b'pos')
        self.anim.setDuration(1000)
        self.anim.setStartValue(QPointF(5, 30))
        self.anim.setKeyValueAt(0.3, QPointF(144, 30))
        self.anim.setKeyValueAt(0.5, QPointF(54, 90))
        self.anim.setKeyValueAt(0.8, QPointF(240, 250))
        self.anim.setEndValue(QPointF(300, 60))

        self.anim2 = QPropertyAnimation(self, b'rotation')
        self.anim2.setDuration(1000)
        self.anim2.setStartValue(QPointF(0, 1))
        self.anim2.setEndValue(QPointF(360, 1))

    pos = pyqtProperty(QPointF, fset=_set_pos)
    rotation = pyqtProperty(QPointF, fset=_set_rotation)
这里可以看到我用QpointF把数字传进去,然后再取angle.x()作为度数,这样对象就可以旋转了
下面我对对象进行了加工,结合前面几篇动画文章,我做了一个按一定轨迹自转的动画。
这里使用了QGraphicsView界面,我们可以通过QGraphicsView这个界面创建各种QGraphicsScene场景,然后就可以把各种对象弄到这个场景里面去,非常方面
#!/usr/bin/python3
# -*- coding: utf-8 -*-

"""
Author: semishigure
Website: zetcode.com
Last edited: 2018.03.09
"""

from PyQt5.QtCore import *
from PyQt5.QtGui import *
from PyQt5.QtWidgets import *

import cgitb
import sys

cgitb.enable(format='text')  # 解决pyqt5异常只要进入事件循环,程序就崩溃,而没有任何提示


class Ball(QObject):
    def __init__(self):
        super().__init__()
        pixmap = QPixmap("../star.png")
        scaledPixmap = pixmap.scaled(50, 55)
        self.animation()

        self.pixmap_item = QGraphicsPixmapItem(scaledPixmap)
        self.pixmap_item.setTransformOriginPoint(25, 27.5)  # 设置中心为旋转
        self._set_pos(QPointF(5, 30))  # 设置图标的初始位置

    def _set_pos(self, pos):
        self.pixmap_item.setPos(pos)

    def _set_rotation(self, angle):
        self.pixmap_item.setRotation(angle.x())  # 旋转度数

    def animation(self):
        self.anim = QPropertyAnimation(self, b'pos')
        self.anim.setDuration(1000)
        self.anim.setStartValue(QPointF(5, 30))
        self.anim.setKeyValueAt(0.3, QPointF(144, 30))
        self.anim.setKeyValueAt(0.5, QPointF(54, 90))
        self.anim.setKeyValueAt(0.8, QPointF(240, 250))
        self.anim.setEndValue(QPointF(300, 60))

        self.anim2 = QPropertyAnimation(self, b'rotation')
        self.anim2.setDuration(1000)
        self.anim2.setStartValue(QPointF(0, 1))
        self.anim2.setEndValue(QPointF(360, 1))

    pos = pyqtProperty(QPointF, fset=_set_pos)
    rotation = pyqtProperty(QPointF, fset=_set_rotation)


class Myview(QGraphicsView):
    def __init__(self):
        super().__init__()
        self._set_color(QColor(105, 105, 105))
        self.iniAnimation()

    def _set_color(self, col):
        self.palette = QPalette()
        # self.palette.setColor(self.backgroundRole(), col)
        self.palette.setBrush(self.backgroundRole(), col)
        self.setPalette(self.palette)

    def iniAnimation(self):
        self.anim3 = QPropertyAnimation(self, b'color')
        self.anim3.setDuration(1000)
        self.anim3.setStartValue(QColor(105, 105, 105))
        self.anim3.setKeyValueAt(0.1, QColor(255, 255, 240))
        self.anim3.setKeyValueAt(0.3, QColor(219, 225, 171))
        self.anim3.setKeyValueAt(0.7, QColor(148, 214, 184))
        self.anim3.setEndValue(QColor(86, 199, 170))

    color = pyqtProperty(QColor, fset=_set_color)


class MainWindow(Myview):

    def __init__(self):
        super().__init__()

        self.initView()
        self.iniui()

    def initView(self):
        self.ball = Ball()
        self.scene = QGraphicsScene(self)
        self.scene.setSceneRect(0, 0, 300, 300)
        self.scene.addItem(self.ball.pixmap_item)
        self.setScene(self.scene)

        self.setWindowTitle("Ball animation")
        self.setRenderHint(QPainter.Antialiasing)
        self.setGeometry(300, 300, 500, 350)
        self.show()

    def iniui(self):
        self.btn = QPushButton("开始")
        self.maingrid = QHBoxLayout()
        self.maingrid.addStretch(1)
        self.maingrid.addWidget(self.btn)
        self.btn.clicked.connect(self.runAnim)

        self.maingrid2 = QVBoxLayout()
        self.maingrid2.addStretch(1)
        self.maingrid2.addLayout(self.maingrid)

        self.setLayout(self.maingrid2)

    def runAnim(self):
        self.ball.anim.start()
        self.ball.anim2.start()
        self.anim3.start()


if __name__ == '__main__':
    app = QApplication(sys.argv)
    ex = MainWindow()
    sys.exit(app.exec_())
界面效果:
备注:
让我们创建好QGraphicsView后,需要再创建一个QGraphicsScene场景,然后通过self.scene.addItem(self.ball.pixmap_item)把对象添加到场景里面,最后再通过self.setScene(self.scene)把场景添加进界面即可