vue-cli3 中构建多页面的应用
第一步:先创建一个 vue-cli3 的项目:vue create app
然后运行项目:npm run serve
现在开始多页面的应用:
首先在 src 的目录下面,创建一个 pages 的文件,然后如图,创建这样的目录结构,每一个文件夹,对应的是一个页面;

接下来说每个文件所对应的内容,所有的文件都是这样的套路
index.html
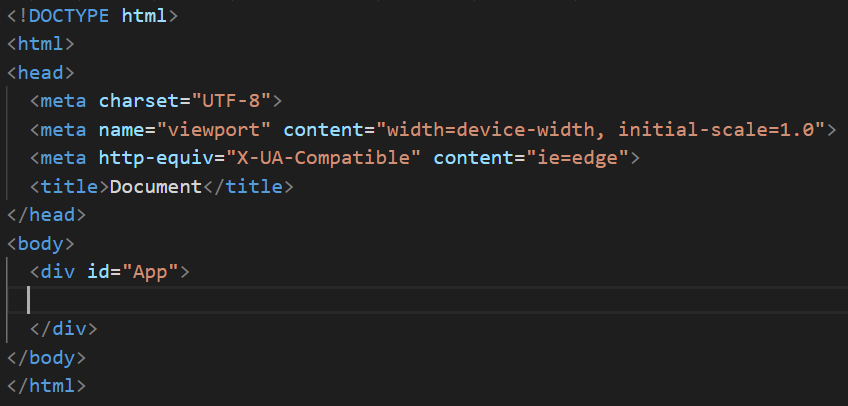
代码:
<!DOCTYPE html>
<html>
<head>
<meta charset="UTF-8">
<meta name="viewport" content="width=device-width, initial-scale=1.0">
<meta http-equiv="X-UA-Compatible" content="ie=edge">
<title>Document</title>
</head>
<body>
<div id="App">
</div>
</body>
</html>
index.js
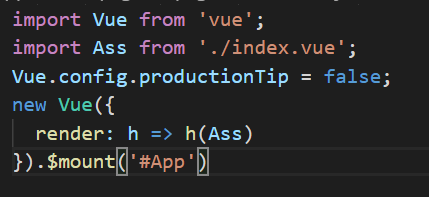
代码:
import Vue from 'vue';
import Ass from './index.vue';
Vue.config.productionTip = false;
new Vue({
render: h => h(Ass)
}).$mount('#App')
index.vue
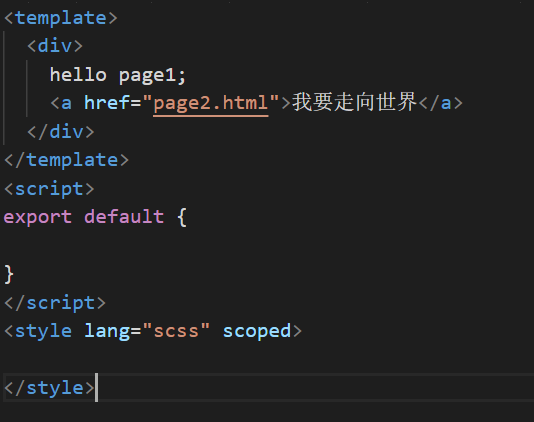
代码:
<template>
<div>
hello page1;
<a href="page2.html">我要走向世界</a>
</div>
</template>
<script>
export default {
}
</script>
<style lang="scss" scoped>
</style>
然后我们需要在跟目录下创建一个 vue.config.js 的文件
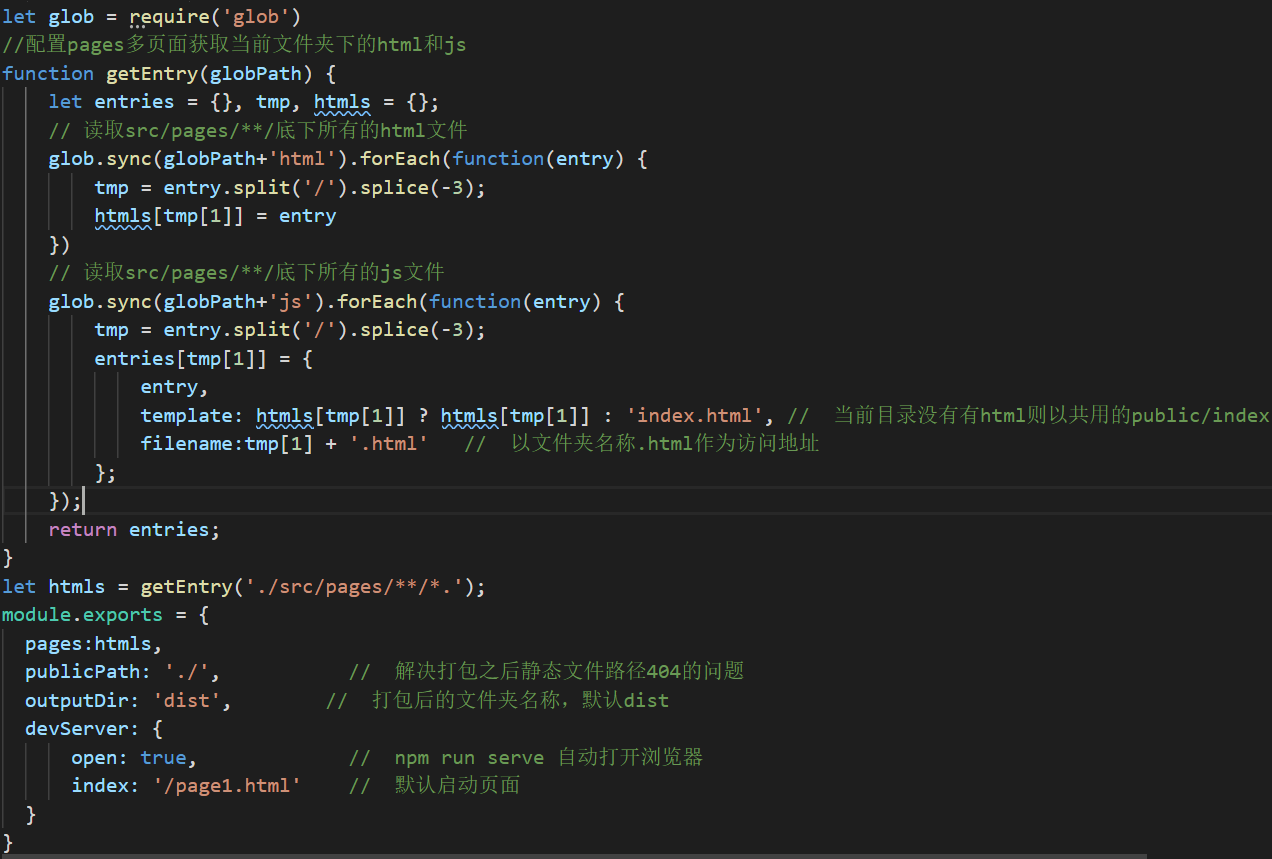
代码:
let glob = require('glob')
//配置pages多页面获取当前文件夹下的html和js
function getEntry(globPath) {
let entries = {}, tmp, htmls = {};
// 读取src/pages/**/底下所有的html文件
glob.sync(globPath+'html').forEach(function(entry) {
tmp = entry.split('/').splice(-3);
htmls[tmp[1]] = entry
})
// 读取src/pages/**/底下所有的js文件
glob.sync(globPath+'js').forEach(function(entry) {
tmp = entry.split('/').splice(-3);
entries[tmp[1]] = {
entry,
template: htmls[tmp[1]] ? htmls[tmp[1]] : 'index.html', // 当前目录没有有html则以共用的public/index.html作为模板
filename:tmp[1] + '.html' // 以文件夹名称.html作为访问地址
};
});
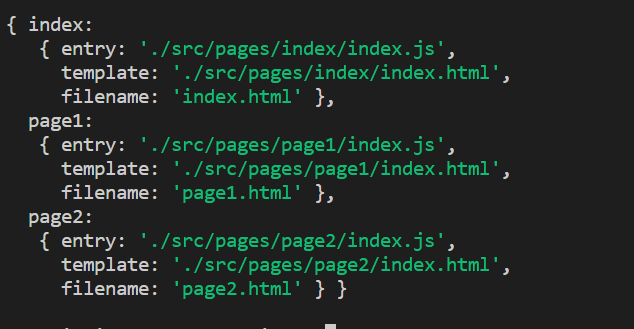
console.log(entries)
return entries;
}
let htmls = getEntry('./src/pages/**/*.');
module.exports = {
pages:htmls,
publicPath: './', // 解决打包之后静态文件路径404的问题
outputDir: 'dist', // 打包后的文件夹名称,默认dist
devServer: {
open: true, // npm run serve 自动打开浏览器
index: '/page1.html' // 默认启动页面
}
}
然后我们打包指令:npm run build
我们跳转的方式就可以通过 a 标签来实现了
然后我们可以看到出口文件的打包情况