项目搭建的基本流程

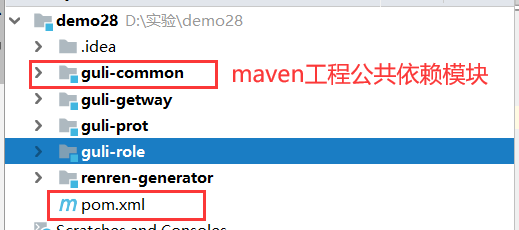
接下来说一说项目的目录结构
首先有个主目录用来聚合所有项目,然后再来一个公共的maven项目,用来让服务项目都依赖这个公共的项目

pom.xml 文件主要负责聚合项目
  <?xml version="1.0" encoding="UTF-8"?>
  <project xmlns="http://maven.apache.org/POM/4.0.0" xmlns:xsi="http://www.w3.org/2001/XMLSchema-instance"
         xsi:schemaLocation="http://maven.apache.org/POM/4.0.0 https://maven.apache.org/xsd/maven-4.0.0.xsd">
    <modelVersion>4.0.0</modelVersion>
    <groupId>com.shang.example</groupId>
    <artifactId>guli</artifactId>
    <packaging>pom</packaging>
    <version>0.0.1-SNAPSHOT</version>
    <name>guli</name>
    <description>聚合服务</description>
    <modules>
        <module>guli-prot</module>
        <module>guli-role</module>
        <module>guli-common</module>
        <module>renren-generator</module>
    </modules>
  </project>
guli-common 目录负责安装依赖
下面所有的项目都依赖 guli-common
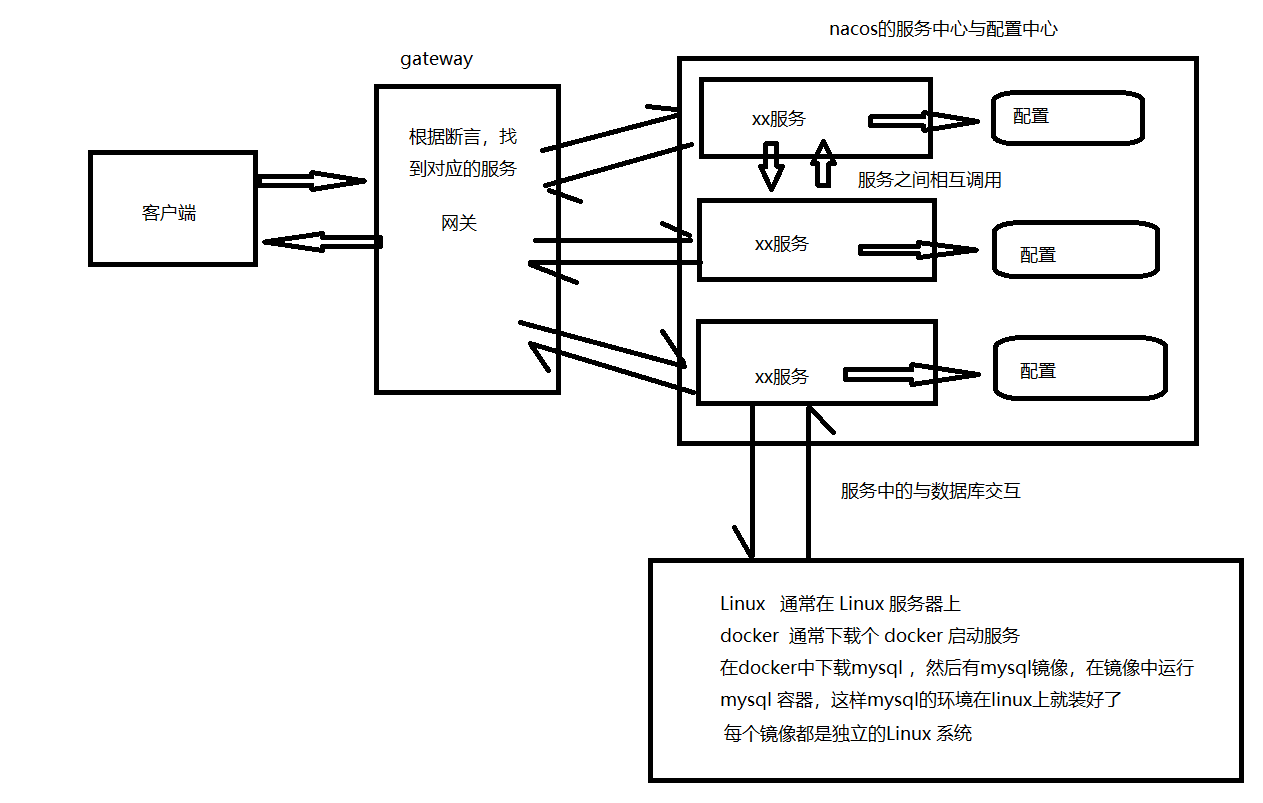
接下是 nacos 的使用:可以做的功能 服务注册,配置中心,服务间的调用
我们需要下载 nacos 的服务
第一步:打开网址 https://gitee.com/mirrors/Spring-Cloud-Alibaba?_from=gitee_search
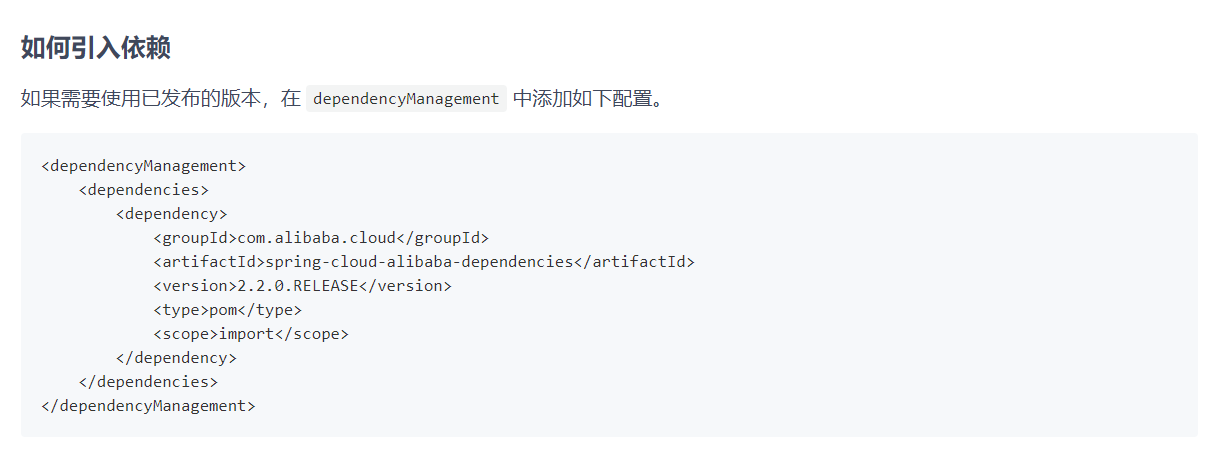
在 guli-common 上安装依赖,因为所有的项目都需要使用这个功能

  <dependencyManagement>
      <dependencies>
          <dependency>
              <groupId>com.alibaba.cloud</groupId>
              <artifactId>spring-cloud-alibaba-dependencies</artifactId>
              <version>2.2.0.RELEASE</version>
              <type>pom</type>
              <scope>import</scope>
          </dependency>
      </dependencies>
  </dependencyManagement>

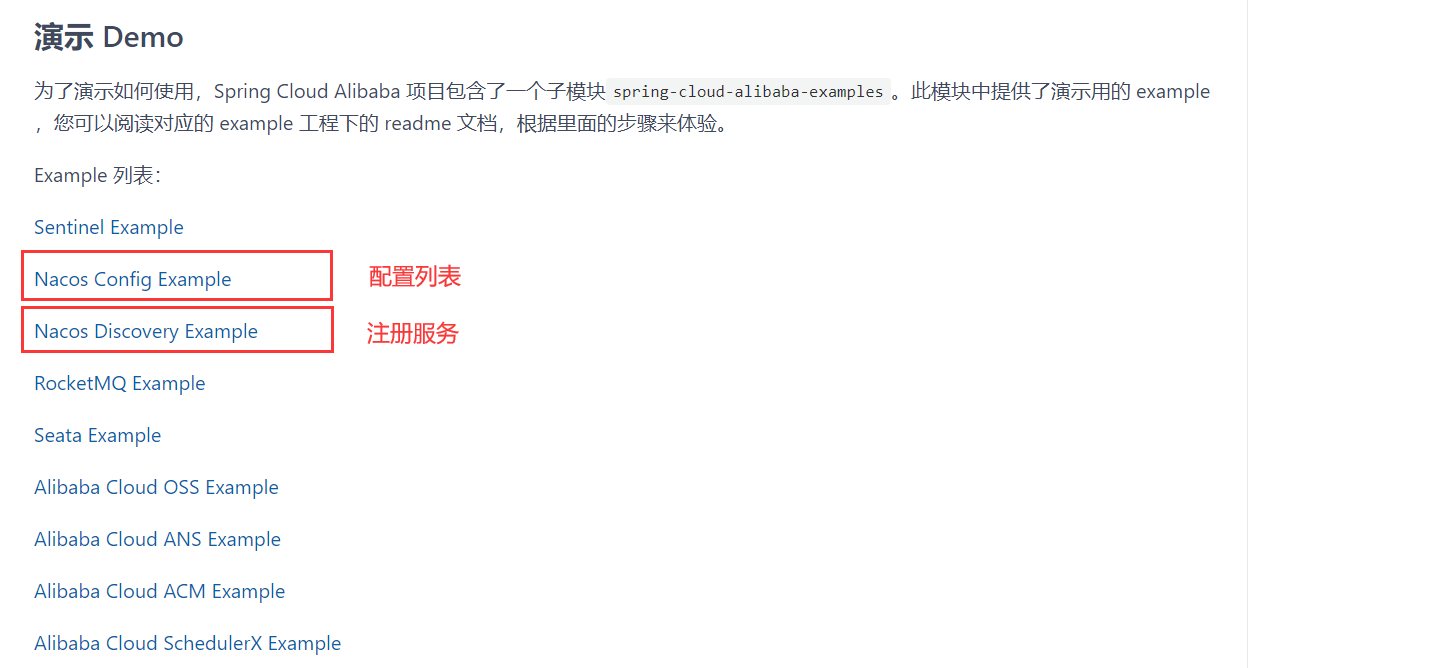
只有注册服务之后,才能对服务进行配置
点进去按照步骤进行配置
我们的 gateway 网关,我们专门创建一个spring boot 项目,里面就依赖一个 gateway 并注册服务到 nacos 上面 , 接下来我们在 aplication.yaml 中进行配置
spring:
  cloud:
    gateway:
      routes:
        - id: test
          uri: lb://guli-role
          predicates:
            - Path=/api/**
          filters:
            - RewritePath=/api/(?<segment>.*),/guliprot/role/${segment}

这里便是配置的方法