安装过程ambari-server实战:
Step1: Download the Ambari repository on the Ambari Server host
For Redhat/CentOS/Oracle: cd /etc/yum.repos.d/ wget <ambari-repo-url>Step 2: Install, Setup, and Start Ambari Server
For Redhat/CentOS/Oracle: yum install ambari-server -y[root@master ~]# ambari-server setup Using python /usr/bin/python2.6 Setup ambari-server Checking SELinux... SELinux status is 'disabled' Customize user account for ambari-server daemon [y/n] (n)? y Enter user account for ambari-server daemon (root): Adjusting ambari-server permissions and ownership... Checking firewall status... Checking JDK... [1] Oracle JDK 1.8 + Java Cryptography Extension (JCE) Policy Files 8 [2] Oracle JDK 1.7 + Java Cryptography Extension (JCE) Policy Files 7 [3] Custom JDK ============================================================================== Enter choice (1): #这里选择安装的jdk版本;1就是选择jdk1.8 To download the Oracle JDK and the Java Cryptography Extension (JCE) Policy Files you must accept the license terms found at http://www.oracle.com/technetwork/java/javase/terms/license/index.html and not accepting will cancel the Ambari Server setup and you must install the JDK and JCE files manually. Do you accept the Oracle Binary Code License Agreement [y/n] (y)? Downloading JDK from http://public-repo-1.hortonworks.com/ARTIFACTS/jdk-8u40-linux-x64.tar.gz to /var/lib/ambari-server/resources/jdk-8u40-linux-x64.tar.gz jdk-8u40-linux-x64.tar.gz... 100% (165.2 MB of 165.2 MB) Successfully downloaded JDK distribution to /var/lib/ambari-server/resources/jdk-8u40-linux-x64.tar.gz Installing JDK to /usr/jdk64/ Successfully installed JDK to /usr/jdk64/ Downloading JCE Policy archive from http://public-repo-1.hortonworks.com/ARTIFACTS/jce_policy-8.zip to /var/lib/ambari-server/resources/jce_policy-8.zip Successfully downloaded JCE Policy archive to /var/lib/ambari-server/resources/jce_policy-8.zip Installing JCE policy... Completing setup... Configuring database... Enter advanced database configuration [y/n] (n)? Configuring database... Default properties detected. Using built-in database. Configuring ambari database... Checking PostgreSQL... Running initdb: This may take upto a minute. Initializing database: [ OK ] About to start PostgreSQL Configuring local database... Connecting to local database...connection timed out...retrying (1) Connecting to local database...done. Configuring PostgreSQL... Restarting PostgreSQL Extracting system views... ...ambari-admin-2.1.2.377.jar ... Adjusting ambari-server permissions and ownership... Ambari Server 'setup' completed successfully. [root@master ~]# ambari-server start Using python /usr/bin/python2.6 Starting ambari-server Ambari Server running with administrator privileges. Organizing resource files at /var/lib/ambari-server/resources... Server PID at: /var/run/ambari-server/ambari-server.pid Server out at: /var/log/ambari-server/ambari-server.out Server log at: /var/log/ambari-server/ambari-server.log Waiting for server start.................... Ambari Server 'start' completed successfully.
[root@master java]# java -version ###我们看到的java 版本是1.7 ,而上面我们选择安装的1.8
java version "1.7.0_79"
OpenJDK Runtime Environment (rhel-2.5.5.4.el6-x86_64 u79-b14)
OpenJDK 64-Bit Server VM (build 24.79-b02, mixed mode)
[root@master ~]# which java
/usr/bin/java
[root@master ~]# ll /usr/jdk64/jdk1.8.0_40/bin/java ##这个才是我们刚刚安装的jdk1.8
-rwxr-xr-x 1 root root 7734 Feb 11 2015 /usr/jdk64/jdk1.8.0_40/bin/java
[root@master ~]# rm /usr/bin/java
rm: remove symbolic link `/usr/bin/java'? y
[root@master ~]# ln -s /usr/jdk64/jdk1.8.0_40/bin/java /usr/bin/java
[root@master ~]# java -version
java version "1.8.0_40"
Java(TM) SE Runtime Environment (build 1.8.0_40-b25)
Java HotSpot(TM) 64-Bit Server VM (build 25.40-b25, mixed mode)
[root@master ~]# vim /etc/profile
export PATH=$PATH:/usr/jdk64/jdk1.8.0_40/bin
[root@master ~]# source /etc/profile
[root@master ~]# jps
4117 Jps
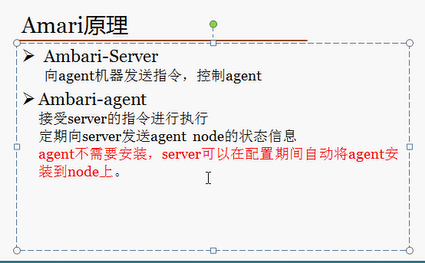
3814 AmbariServer
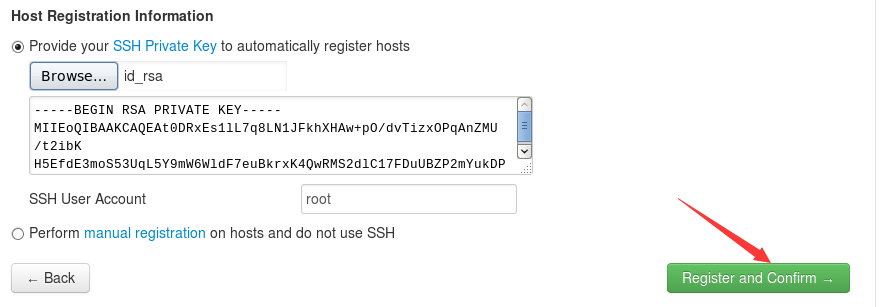
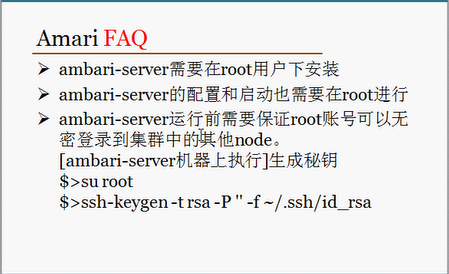
配置免密钥登录:
[root@master ~]# ssh-keygen -t rsa
Generating public/private rsa key pair.
Enter file in which to save the key (/root/.ssh/id_rsa):
Enter passphrase (empty for no passphrase):
Enter same passphrase again:
Your identification has been saved in /root/.ssh/id_rsa.
Your public key has been saved in /root/.ssh/id_rsa.pub.
The key fingerprint is:
28:2e:7c:be:ad:53:82:f5:5d:7a:3a:f0:68:47:29:04 root@master
The key's randomart image is:
+--[ RSA 2048]----+
| |
| E |
| . |
| . .. . |
| o.o..S+ |
| .....= = . |
| o oo * o |
| +..o = |
| +=.. . |
+-----------------+
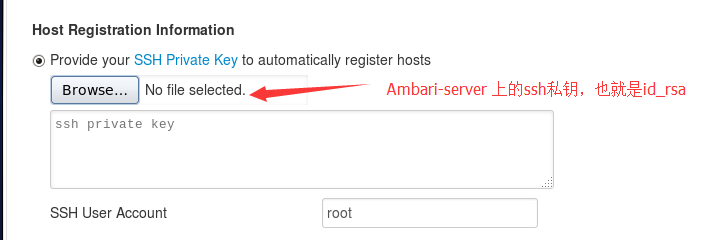
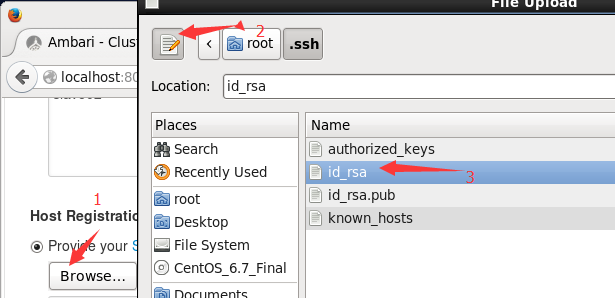
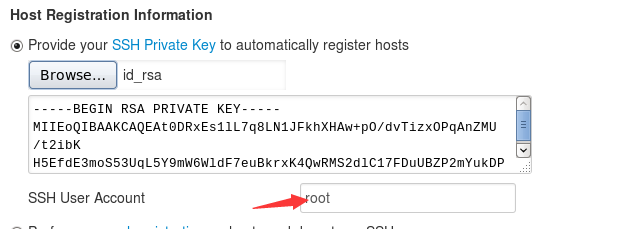
[root@master ~]# ll /root/.ssh/
total 8
-rw------- 1 root root 1675 Jun 7 14:56 id_rsa
-rw-r--r-- 1 root root 393 Jun 7 14:56 id_rsa.pub
[root@master ~]# cd /root/.ssh/
[root@master .ssh]# cat id_rsa.pub >> authorized_keys
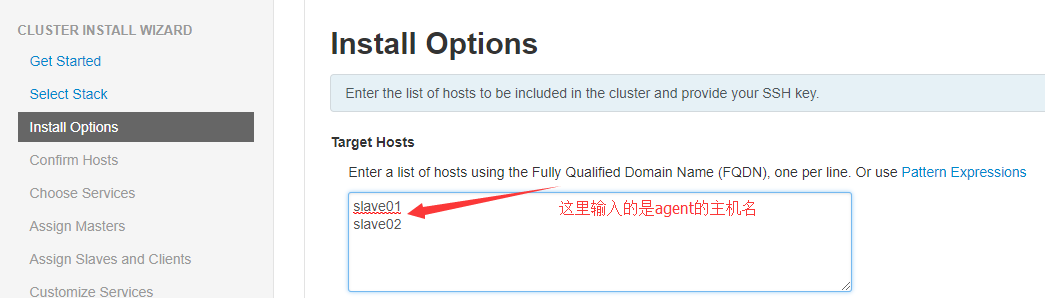
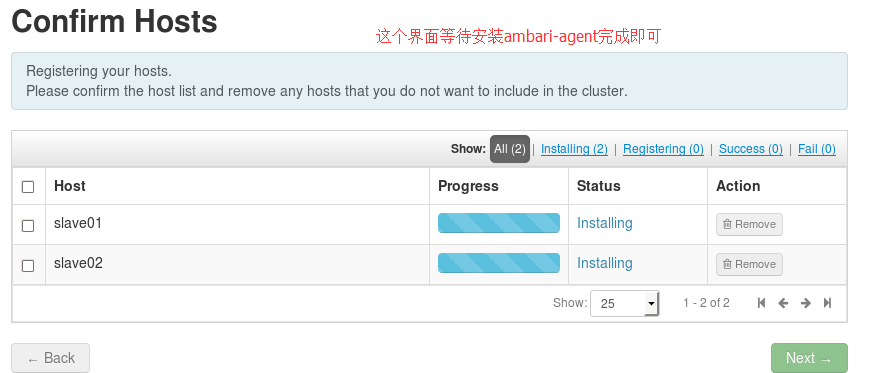
[root@master .ssh]# scp authorized_keys root@slave01:/root/.ssh
[root@master .ssh]# scp authorized_keys root@slave02:/root/.ssh
[root@master .ssh]# ll
total 16
-rw-r--r-- 1 root root 393 Jun 7 15:04 authorized_keys
-rw------- 1 root root 1675 Jun 7 14:56 id_rsa
-rw-r--r-- 1 root root 393 Jun 7 14:56 id_rsa.pub
-rw-r--r-- 1 root root 810 Jun 7 15:06 known_hosts
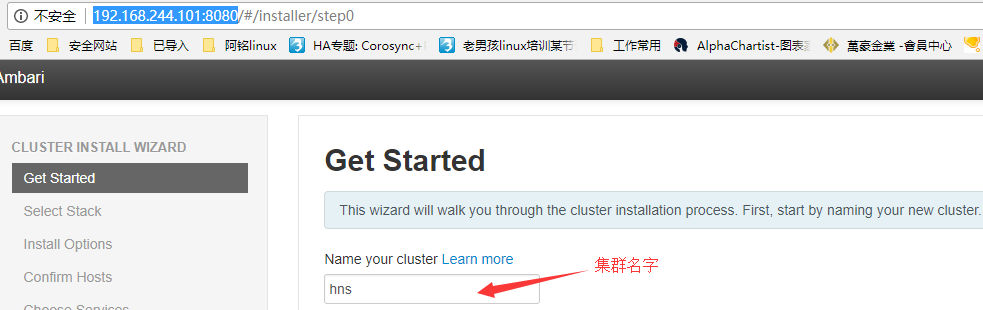
完成之后;登录网页:
Step 3: Deploy Cluster using Ambari Web UI
Open up a web browser and go to http://<ambari-server-host>:8080.
Log in with username admin and password admin and follow on-screen instructions.
###############################################3
创建一个集群:
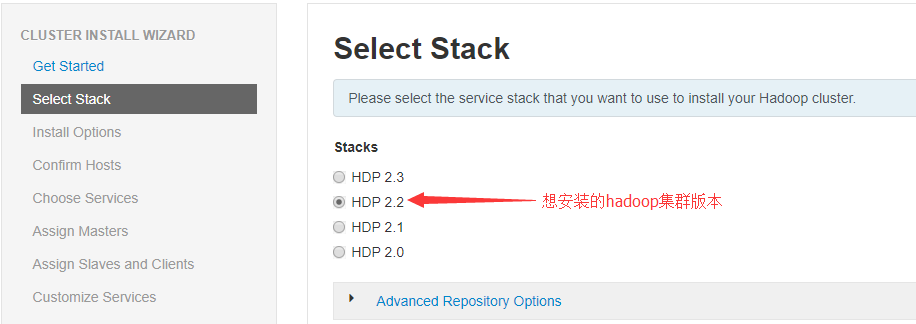
点击下一步:
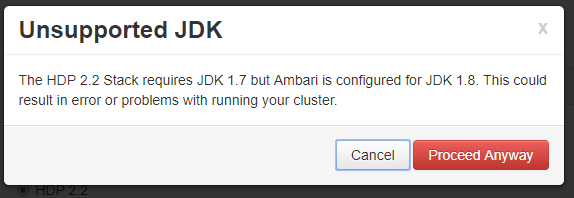
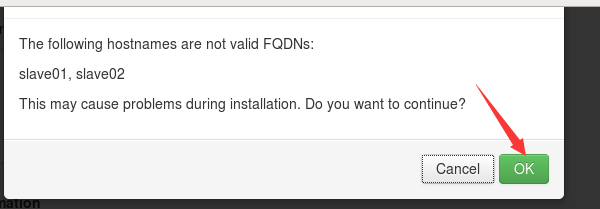
这一步没有问题,直接Proceed Anyway(这属于jdk版本问题)