1.Environment
Ubuntu 12.04 x86_64
Vivado 2013.4
SDK 2013.4
2.Pre-requisites
2.1 CodeSourcery arm-gcc toolchain lite 32-bit compatible
git clone https://github.com/xupsh/CodeSourcery.git
echo “export PATH=~/CodeSourcery/bin:$PATH” >> ~/.bashrc
echo “export CROSS_COMPILE=arm-xilinx-linux-gnueabi-“ >> ~/.bashrc
arm-xilinx-linux-gnueabi-gcc –v
2.2 fsbl Download
http://pan.baidu.com/s/1jGj1yLK
LinaroDemo-> boot_image
2.3 u-boot Download
http://pan.baidu.com/s/1dD6D2pz
git clone https://github.com/Xilinx/u-boot-xlnx.git
Click Download ZIP right hand
2.4 devicetree Download
http://pan.baidu.com/s/1pJyR4pl
2.5 Kernel Download
http://pan.baidu.com/s/1pJqec35
https://github.com/Xilinx/linux-xlnx
branch->tags->Xilinx-v2013.4
2.6Randisk Download
wget http://www.wiki.xilinx.com/file/view/arm_ramdisk.image.gz/419243558/arm_ramdisk.image.gz
3.Hardware
Open vivado,Create a new project named zybo_gpio_demo,Click next。
In the device selection pannel,we choose xc7z010clg400-1 destdevice。
Add a new block design,named design_1。
Click Add Ip button in the view window,and add ZYNQ IP Core.
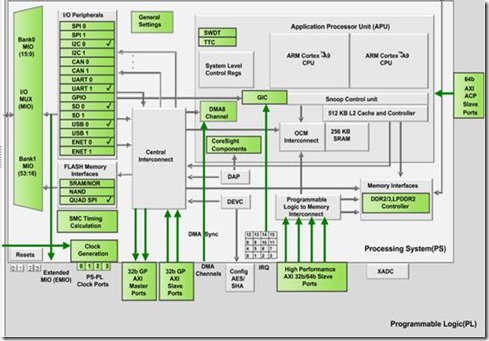
Double Click IP Core to configure it。
Choose Import XPS Settings,Add ZYBO_zynq_def.xml,click OK。
Download Link:
http://www.digilentinc.com/Data/Products/ZYBO/ZYBO_def.zip
Now ZYNQ has been configured and fit for zybo。
Click OK,go back to block design,click Add Ip button again,Insert GPIO IP core。
Double click GPIO core to config it:
The configuration is as follows:open Dual Channel,Set the bit width of each channel to 4bit。
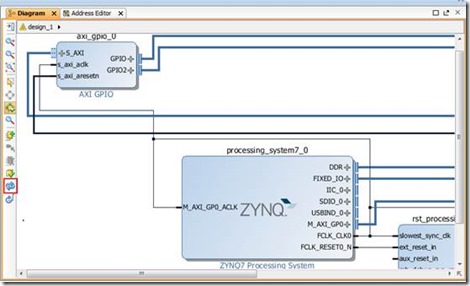
Click Run Block Automation in the, and Run Connection Automation tips column, and Vivado will auto connection and configure。Click ok in all the pop-up dialogs。
Click refresh button at bottom left,the result is as follows。
In Source window, choose Sources tab,right click design_1, choose Generate Output Products…
Right click zynq_system_1,choose Create HDL Wrapper,Keep default,click OK, Vivado will generate a top file for IP subsystem。
Right click Constraints->constrs_1 and choose Add Source。
In the pop-up dialog,choose Create File…,rename it to system.xdc。
http://www.digilentinc.com/Data/Products/ZYBO/ZYBO_Master_xdc.zip
reference ZYBO_Master.xdc, add LED and SW constraints altogether 8 lines。
Finally,In Flow Navigator,expand Program and Debug,click Generate Bitstream.
When bitstream generated,Bitstream Generation successful completed dialog will be open, Choose Open Implementation Design,Click OK to finish.
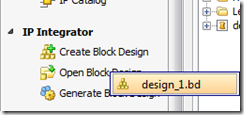
In IP Integrator Item, click Open Block Design,choose zynq_system_1.bd,reopen the Block Design we built.
Choose File > Export > Export Hardware for SDK….,Export Hardware for SDK dialogue will be open,make sure Include bitstream and Launch SDK has been choosed.
4.Linux
4.1Compile u-boot
Enter u-boot source code folder and modify the boot file:
vi ./include/configs/zynq_zed.h
Modify line 39, insert code:
#define CONFIG_ZYNQ_PS_CLK_FREQ 50000000UL
Run the following command in u-boot source code folder.
make zynq_zed config
make
cp u-boot u-boot.elf
4.2Compile Kernel
Enter kernel source code folder, and run the following command.
cd linux-xlnx-xilinx-v2013.4
make ARCH=arm xilinx_zynq_defconfig
make ARCH=arm UIMAGE_LOADADDR=0x8000 uImage
cp arch/arm/boot/uImage .
4.3 Change Randisk
Run the following command and do the modify:
cp arm_ramdisk.image.gz ramdisk.image.gz
gunzip ramdisk.image.gz
mkdir file_tmp
mount ramdisk.image –o loop ./file_tmp/
Run the following command to repack to uramdisk:
sudo umount file_tmp/
gzip ramdisk.image
sudo apt-get install u-boot-tools
mkimage –A arm –T ramdisk –C gzip –d ramdisk.image.gz uramdisk.image.gz
5.References
5.1 My source references
http://pan.baidu.com/s/1bnq23UZ
5.2 Zybo Demo
http://www.digilentchina.com/product-more.asp?ClassId=1&Unid=367
5.3 Zybo Design Engineer Source
http://www.digilentinc.com/Products/Detail.cfm?Prod=ZYBO
6.Tips
6.1 If there are no mmcblk0p2 in the /dev/ folder?
You can connect the sdio(mmc) part to the arm processer in the ZYNQ IP configuration window
6.2 How to boot arm ubuntu with auto login?
solution: modify /etc/init/ttyPS0.conf, insert a line in the end,
exec /bin/login -f root < /dev/ttyPS0 > /dev/ttyPS0 2>&1


