目前,做数据分析工作,基本人手Numpy,pandas,scikit-learn。而这些计算程序包都是基于python平台的,所以搞数据的都得先装个python环境。。。(当然,你用R或Julia请忽略本文)
在macOS上,默认安装有python 2.7,鉴于python2即将停止更新,如果没有大量的python2代码需要维护,就直接安装python3吧。
版本选择
做数据运算,流行的方式是直接下载Anaconda安装包,大概500M左右,各种依赖包(绑定了四五百个科学计算程序包),开发工具(jupyter notebook,spyder)一股脑儿都包含了,按照步骤安装完成,开箱即用,不过装完后会占用几个G的硬盘空间。
我这边由于硬盘空间有限,采用Miniconda这个发行版本,最新的基于python3.7版本的不到50M。而Miniconda一样使用conda作为包管理器,可以轻松的安装自己需要的包,例如Numpy,pandas, matplotlib等等。
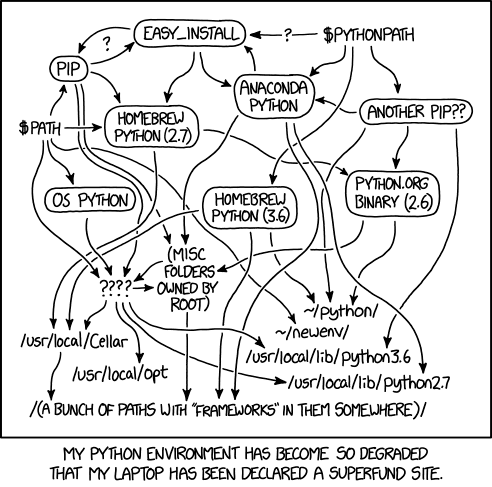
当然,也可以从安装包或homebrew开始装,然后再使用pip来安装相关的程序包。总体上来说,python自身的版本和执行路径是相当混乱的,可参考下图。
安装步骤
- 下载
先从官网https://docs.conda.io/en/latest/miniconda.html下载适合自己操作系统的版本,Miniconda
支持Windows/Linux/macOS这三种主流操作系统。如果遇到官网下载慢的问题,可以考虑国内的镜像站点,如https://mirrors.tuna.tsinghua.edu.cn/anaconda/miniconda/。
下载完成后,可以先核对下hash值,与官网的值(5cf91dde8f6024061c8b9239a1b4c34380238297adbdb9ef2061eb9d1a7f69bc)是否一致保证安装文件未被篡改。
$ shasum -a 256 Miniconda3-latest-MacOSX-x86_64.sh
5cf91dde8f6024061c8b9239a1b4c34380238297adbdb9ef2061eb9d1a7f69bc  Miniconda3-latest-MacOSX-x86_64.sh
- 执行安装
$ bash ./Miniconda3-latest-MacOSX-x86_64.sh

Welcome to Miniconda3 4.7.12

In order to continue the installation process, please review the license
agreement.
Please, press ENTER to continue


Do you accept the license terms? [yes|no]
[no] >>> yes

Miniconda3 will now be installed into this location:
/Users/shenfeng/miniconda3

  - Press ENTER to confirm the location
  - Press CTRL-C to abort the installation
  - Or specify a different location below

[/Users/shenfeng/miniconda3] >>>

>>>
按照提示,敲击回车。中间需要同意使用条款,需要输入yes,按照路径点回车默认即可。
Do you wish the installer to initialize Miniconda3
by running conda init? [yes|no]
[yes] >>> yes

==> For changes to take effect, close and re-open your current shell. <==

If you'd prefer that conda's base environment not be activated on startup,
   set the auto_activate_base parameter to false:

conda config --set auto_activate_base false

Thank you for installing Miniconda3!
最后的提示是,可以用conda config --set auto_activate_base false命令取消python3环境在启动时自行加载。
- 重新开一个新的终端
可以发现,python3的env已经生效了。
(base) my:~ shenfeng$ python
Python 3.7.4 (default, Aug 13 2019, 15:17:50)
[Clang 4.0.1 (tags/RELEASE_401/final)] :: Anaconda, Inc. on darwin
Type "help", "copyright", "credits" or "license" for more information.
>>>
- 查看env配置
$ conda env list
# conda environments:
#
base                  *  /Users/shenfeng/miniconda3
使用conda deactivate可以python3的执行环境,使用conda activate base可以激活默认的python3环境。
- 添加国内镜像源
由于conda的包服务器都在海外,直接连接安装可能出现连接超时无法完成的时候,所以可以通过修改用户目录下的.condarc文件。
channels:
  - defaults
show_channel_urls: true
default_channels:
  - https://mirrors.tuna.tsinghua.edu.cn/anaconda/pkgs/main
  - https://mirrors.tuna.tsinghua.edu.cn/anaconda/pkgs/free
  - https://mirrors.tuna.tsinghua.edu.cn/anaconda/pkgs/r
custom_channels:
  conda-forge: https://mirrors.tuna.tsinghua.edu.cn/anaconda/cloud
  msys2: https://mirrors.tuna.tsinghua.edu.cn/anaconda/cloud
  bioconda: https://mirrors.tuna.tsinghua.edu.cn/anaconda/cloud
  menpo: https://mirrors.tuna.tsinghua.edu.cn/anaconda/cloud
  pytorch: https://mirrors.tuna.tsinghua.edu.cn/anaconda/cloud
  simpleitk: https://mirrors.tuna.tsinghua.edu.cn/anaconda/cloud
- 使用conda安装相应的程序包
先使用conda list检查已经安装的包,使用conda install需要的程序包
$ $ conda list numpy
# packages in environment at /Users/shenfeng/miniconda3:
#
# Name                    Version                   Build  Channel

$ conda install numpy

$ conda list numpy
# packages in environment at /Users/shenfeng/miniconda3:
#
# Name                    Version                   Build  Channel
numpy                     1.17.3           py37h4174a10_0    defaults
numpy-base                1.17.3           py37h6575580_0    defaults
相同的方式,我们可以安装scipy,pandas等包,不再赘述。
交互式工具安装
大家耳熟能详的交互式工具肯定就是Jupyter notebook,但我在本机同样由于磁盘空间问题只安装ipython。实际上,Jupyter是基于ipython notebook的浏览器版本。
- 安装
$ conda install ipython
- 执行ipython交互
$ ipython
Python 3.7.4 (default, Aug 13 2019, 15:17:50)
Type 'copyright', 'credits' or 'license' for more information
IPython 7.9.0 -- An enhanced Interactive Python. Type '?' for help.

In [1]: import numpy as np
In [2]: dataset= [2,6,8,12,18,24,28,32]
In [3]: sd= np.std(dataset,ddof=1)
In [4]: print(sd)
10.977249200050075
样例数据处理
先从网上下载一个样例数据https://pan.baidu.com/s/1lXAnyvSoti-U44MU2fubgw,为excel文件,另存为成csv进行处理。
以下结合上周文章中的概括性度量,计算这组数据的概括性度量。
- 读取数据
import numpy as np
from scipy import stats

dataset = np.genfromtxt('/Users/shenfeng/Downloads/test1.csv',delimiter=',', skip_header=1)
print('Shape of numpy array: ', dataset.shape)
Shape of numpy array:  (699,)
集中趋势的度量
- 众数
mode = stats.mode(dataset)
print('该组数据的众数为: ', mode)
该组数据的众数为:  ModeResult(mode=array([1.]), count=array([145]))
# 结果说明众数为1,出现了145次
- 中位数
print('该组数据的中位数为: ', np.median(dataset))
该组数据的中位数为:  4.0
- 四分位数
# 不需要提前排序
print("1/4分位数: ", np.percentile(dataset, 25, interpolation='linear'))
1/4分位数:  2.0

print("1/2分位数: ", np.percentile(dataset, 50, interpolation='linear'))
1/2分位数:  4.0

print("3/4分位数: ", np.percentile(dataset, 75, interpolation='linear'))
3/4分位数:  6.0
- 平均数
print('该组数据的平均数为: ', np.mean(dataset))
该组数据的平均数为:  4.417739628040057
离散程度的度量
- 标准差
print('该组数据的总体标准差为: ', np.std(dataset,ddof=0))
该组数据的总体标准差为:  2.8137258170785375
- 标准分数
# 变量值与其平均数的离差除以标准差后的称为标准分数(standard score)
print('该组数据的标准分数为: ', stats.zscore(dataset))
该组数据的标准分数为:  [ 0.20693572  0.20693572 -0.50386559  0.56233637 -0.14846494  1.27313768
 -1.2146669  -0.85926625 -0.85926625 -0.14846494 -1.2146669  -0.85926625 ...省略 ]
- 离散系数
# 离散系数是测度数据离散程度的统计量,主要用于比较不同样本数据的离散程度。
print('该组数据的离散系数为: ', stats.variation(dataset))
该组数据的离散系数为:  0.6369152675317026
偏态与峰态的度量
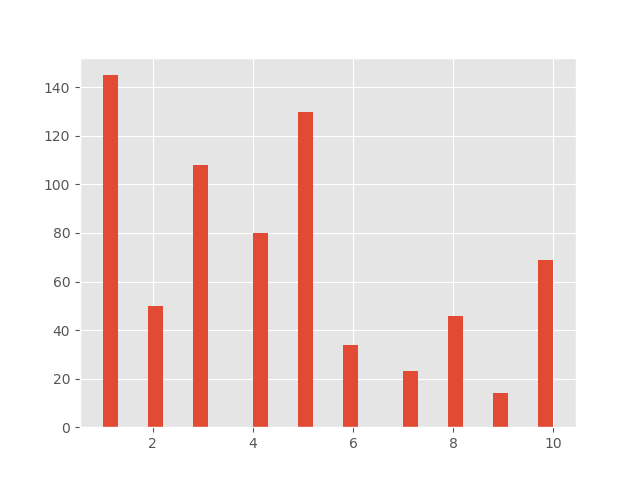
- 数据分布图
import matplotlib.pyplot as plt
plt.style.use('ggplot')
plt.hist(dataset, bins=30)
获得以下分布图
- 偏态
print('该组数据的偏态系数为: ', stats.skew(dataset))
该组数据的偏态系数为:  0.5915855449527385
# 偏态系数在0.5~1或-1~-0.5之间,则认为是中等偏态分布
- 峰态系数
print('该组数据的峰态系数为: ', stats.kurtosis(dataset))
该组数据的峰态系数为:  -0.6278342838815454
# 当K<0时为扁平分布,数据的分布更分散
总结
本文使用Miniconda发行版配置本地数据运算环境,并对样例做数据的概括性度量。