高度雾的实现思路非常简单,通过深度图还原出来的世界坐标的y值来做fog的lerp参数。
代码使用之前的体积光代码的基础上做了个加法,方便快速使用。
代码如下:
Shader "Unlit/VolumetricLightingShader"
{
    Properties
    {
        _MainTex ("Texture", 2D) = "white" {}
        _Intensity("Intensity",float) = 1
        _FogColor("Fog Color",Color) = (1,1,1,1)
        _FogHeight("Fog Height",float) = 1
            _HeightPower("Fog Height Power",float) = 1
    }
    SubShader
    {
        Tags { "RenderType"="Opaque" }
        LOD 100

        Pass
        {
            HLSLPROGRAM
            #pragma vertex vert
            #pragma fragment frag
            #define MAIN_LIGHT_CALCULATE_SHADOWS
            #include "Packages/com.unity.render-pipelines.universal/ShaderLibrary/Core.hlsl"
            #include "Packages/com.unity.render-pipelines.core/ShaderLibrary/CommonMaterial.hlsl"
            #include "Packages/com.unity.render-pipelines.universal/ShaderLibrary/Shadows.hlsl"
            #include "Packages/com.unity.render-pipelines.universal/Shaders/PostProcessing/Common.hlsl"
            #define STEP_TIME 64
            struct appdata
            {
                float4 vertex : POSITION;
                float2 uv : TEXCOORD0;
            };

            struct v2f
            {
                float2 uv : TEXCOORD0;
                float4 vertex : SV_POSITION;
                float3 worldPos:TEXCOORD1;
                float4 screenPos :TEXCOORD2;
            };

            TEXTURE2D_X_FLOAT(_CameraDepthTexture); SAMPLER(sampler_CameraDepthTexture);
            TEXTURE2D(_CameraOpaqueTexture); SAMPLER(sampler_CameraOpaqueTexture);
            TEXTURE2D(_MainTex); SAMPLER(sampler_MainTex);
            float _Intensity;
            half4 _FogColor;
            float _FogHeight;
            float _HeightPower;
            v2f vert (appdata v)
            {
                v2f o;

                o.vertex = TransformObjectToHClip(v.vertex);
                o.worldPos = mul(unity_ObjectToWorld, v.vertex).xyz;
                o.screenPos = ComputeScreenPos(o.vertex);
                return o;
            }

            half4 frag (v2f i) : SV_Target
            {
                half2 screenPos = i.screenPos.xy / i.screenPos.w;
                //rebuild world position according to depth
                float depth = SAMPLE_TEXTURE2D_X(_CameraDepthTexture,sampler_CameraDepthTexture, screenPos).r;
                depth = Linear01Depth(depth, _ZBufferParams);
                float2 positionNDC = screenPos * 2 - 1;
                float3 farPosNDC = float3(positionNDC.xy,1)*_ProjectionParams.z;
                float4 viewPos = mul(unity_CameraInvProjection,farPosNDC.xyzz);
                viewPos.xyz *= depth;
                float4 worldPos = mul(UNITY_MATRIX_I_V,viewPos);

                float noise = SAMPLE_TEXTURE2D(_MainTex, sampler_MainTex, screenPos*3).r;
                float3 startPos = i.worldPos;
                float3 dir = normalize(worldPos - startPos);
                startPos += dir * noise;
                worldPos.xyz += dir * noise;
                float len = length(worldPos - startPos);
                float3 stepLen = dir * len / STEP_TIME;
                half3 color = 0;

                half3 sceneColor = SAMPLE_TEXTURE2D(_CameraOpaqueTexture, sampler_CameraOpaqueTexture, screenPos).rgb;

                UNITY_LOOP
                for (int i = 0; i < STEP_TIME; i++)
                {
                    startPos += stepLen;
                    float4 shadowPos = TransformWorldToShadowCoord(startPos);
                    float intensity = MainLightRealtimeShadow(shadowPos)*_Intensity;
                    color += intensity*_MainLightColor.rgb;
                }

                color /= STEP_TIME;
                color += sceneColor;

                float heightOffset = pow(max((_FogHeight - worldPos.y)/_FogHeight,0), _HeightPower);
                color += heightOffset * _FogColor;
                return half4(color.xyz,1);
            }
            ENDHLSL
        }
    }
}
使用方法还是像之前一样在摄像机前面放一个片,快速的查看效果。
效果如下:
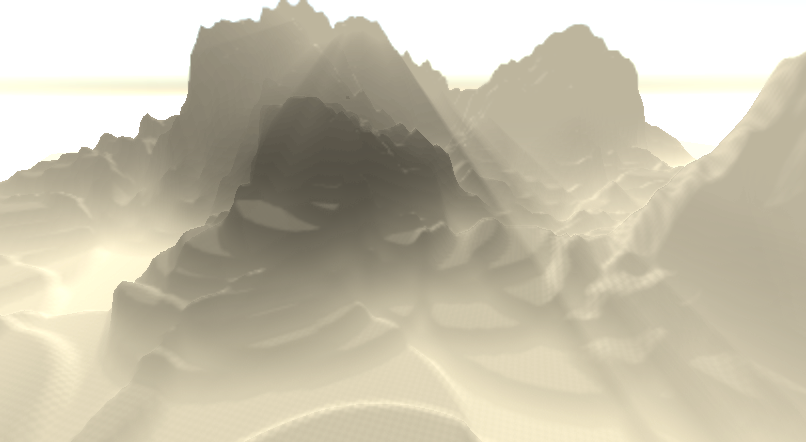
我们能看到天空已经曝的不成样子,通过tonemapping(aces)来解决。最后是这样子:
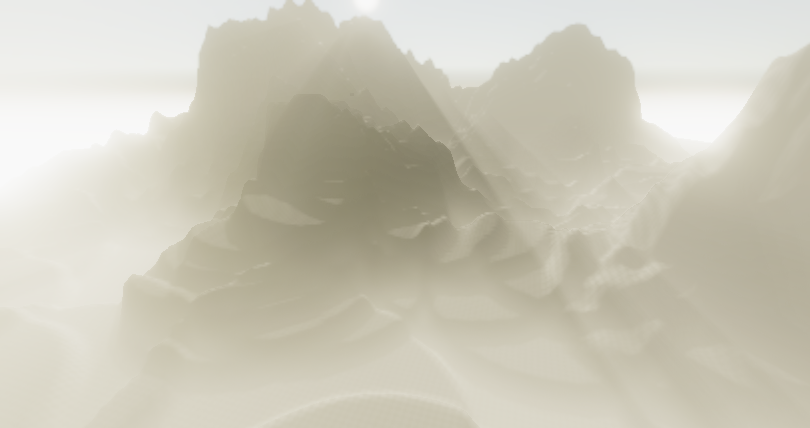
非常的有意境~哈哈哈哈,程序员觉得好看的美术可能看起来是一坨粑粑。