zoukankan      html  css  js  c++  java
  • maven 的ID配置方法

    1、前言

    maven说的简短一点就是一个大型的jar包管理工具,类似于工具人。
    只要有了maven,就不用去幸幸苦苦的找jar包了。wc,爽哉。
    好了,还是不多bb,我么还是直接干正事。

    (切记切记:安装maven必须装好jdk)

    2、下载

    首先我们还是去官网。瞅瞅最新版的是哪个版本。点我直达
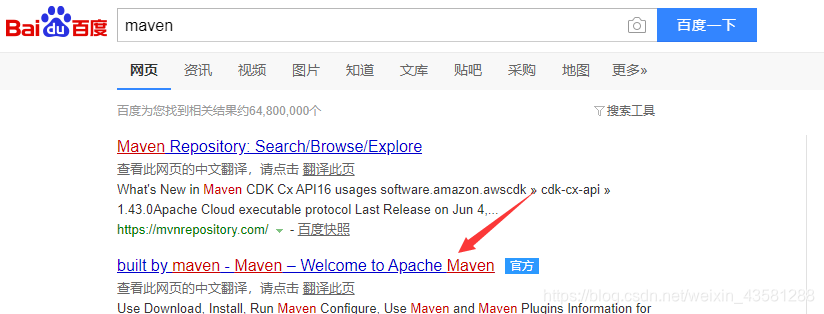
    在这里插入图片描述
    在这里插入图片描述
    当然,玩Windows的人都知道,我们下载打包文件都是下载bin目录下的文件,所以我们直接,tar.gz是Linux下的文件,你用的是Linux的话当然也可以下这个。

    下载之后我们能得到一个压缩包。我们解压之后就是想要的maven打包文件了。别慌,maven是没有那些什么exe文件的。所以,我们不需要去安装。

    在这里插入图片描述
    下载后得到的文件样式是这个样子。可能有的小伙伴儿下载下来解压之后有两层大目录,没事儿,删一个就行,不影响。
    接下来我们去配置maven的path

    3、配置PATH、settings.xml以及本地仓库

    为什么要配置path,我们都知道,path是全局变量,能够在整个Windows下访问到。既然我们需要用maven,那么就需要去配置这个。怎么配置,就是接下来的内容

    3.1、配置path

    首先怎么打开path我就不多说了吧,配过java的环境变量的人都知道。不知道你学个鬼的Java。

    在这里插入图片描述
    看这儿。很多人很好奇,为啥我这儿需要两个变量名。
    如果学过springboot的人可能知道一点。因为springboot和springcloud很多名字引用的都是系统下的M2_HOME环境,这儿这么配置是为了能够让springboot和sprintcloud能够访问到maven仓库。

    M2_HOME(我这后面的路径是你下载下来的文件包的路径)

    D:Program Filesapache-maven-3.6.3in
    
    • 1

    另一个MAVEN_HOME

    D:Program Filesapache-maven-3.6.3
    
    • 1

    然后把写好的路径加到path里面去(如果是win7的系统还需要在末尾加一个英文分号;用来分隔系统符号):
    在这里插入图片描述
    当然,你也可以直接引用M2_HOME的路径,就把上面那个变量改成%M2_HOME%(感谢评论区大佬的留言)

    然后到这儿就算是配置好了。保存好之后我们按住win+r,打开cmd,输入mvn -v出来以下界面
    在这里插入图片描述
    接着我们去设置maven的本地配置。

    3.2、配置settings.xml和本地仓库

    可能有人在看我这篇文章之前也看过其他很多人的maven配置文章。不过,我有自信我的比他们的好。(轻点喷,我瞎说的)
    我们直接打开maven的文件包下的conf文件。
    在这里插入图片描述
    这个就是我们maven下的配置。
    因为maven是国外的人写的,我们国内下载的话需要FQ,不FQ的话就会下载很慢很慢。不过呢,阿里爸爸很贴心,为我们准备了国内的镜像让我们下载。

    由于我们的maven是一个仓库管理工具。他会从maven的国外中央仓库里面去下载我们需要的jar包。但是下载下来之后,默认的保存位置是在c盘。玩计算机的人切记。别啥东西都放c盘。这些jar包动则几千上万个。你下载下来之后c盘都满了。

    所以我们就需要配置一个本地的仓库来保存下载下来的jar包,那就需要我们指定路径。
    所以,,你就直接复制我的这个settings.xml文件把源文件覆盖了就ok。

    <?xml version="1.0" encoding="UTF-8"?>
    <settings xmlns="http://maven.apache.org/SETTINGS/1.0.0" 
        xmlns:xsi="http://www.w3.org/2001/XMLSchema-instance" xsi:schemaLocation="http://maven.apache.org/SETTINGS/1.0.0 http://maven.apache.org/xsd/settings-1.0.0.xsd">
    
        <!-- 本地仓库的位置 -->
        <localRepository>D:Program FileslocalMavenRepoistory
    epository</localRepository>
      
        <!-- Apache Maven 配置 -->
        <pluginGroups/>
        <proxies/>
    
        <!-- 私服发布的用户名密码 -->
        <servers>
            <server>
                <id>releases</id>
                <username>deployment</username>
                <password>He2019</password>
            </server>
            <server>
                <id>snapshots</id>
                <username>deployment</username>
                <password>He2019</password>
            </server>
        </servers>
        
        <!-- 阿里云镜像 -->
        <mirrors>
            <mirror>
                <id>alimaven</id>
                <name>aliyun maven</name>
                <!-- https://maven.aliyun.com/repository/public/ -->
                <url>http://maven.aliyun.com/nexus/content/groups/public/</url>
                <mirrorOf>central</mirrorOf>
            </mirror>
        </mirrors>
    
        <!-- 配置: java8, 先从阿里云下载, 没有再去私服下载  -->
        <profiles>
            <!-- 全局JDK1.8配置 -->
            <profile>
                <id>jdk1.8</id>
                <activation>
                    <activeByDefault>true</activeByDefault>
                    <jdk>1.8</jdk>
                </activation>
                <properties>
                    <project.build.sourceEncoding>UTF-8</project.build.sourceEncoding>
                    <maven.compiler.source>1.8</maven.compiler.source>
                    <maven.compiler.target>1.8</maven.compiler.target>
                    <maven.compiler.compilerVersion>1.8</maven.compiler.compilerVersion>
                </properties>
            </profile>
    
            
            <!-- Nexus私服配置: 第三方jar包下载, 比如oracle的jdbc驱动等 -->
            <profile>
                <id>dev</id>
                <repositories>
                    <repository>
                        <id>nexus</id>
                        <url>http://nexus.hepengju.cn:8081/nexus/content/groups/public/</url>
                        <releases>
                            <enabled>true</enabled>
                        </releases>
                        <snapshots>
                            <enabled>true</enabled>
                        </snapshots>
                    </repository>
                </repositories>
                <pluginRepositories>
                    <pluginRepository>
                        <id>public</id>
                        <name>Public Repositories</name>
                        <url>http://nexus.hepengju.cn:8081/nexus/content/groups/public/</url>
                    </pluginRepository>
                </pluginRepositories>
            </profile>
            
            <!-- 阿里云配置: 提高国内的jar包下载速度 -->
            <profile>
                <id>ali</id>
                <repositories>
                    <repository>
                        <id>alimaven</id>
                        <name>aliyun maven</name>
                        <url>http://maven.aliyun.com/nexus/content/groups/public/</url>
                        <releases>
                            <enabled>true</enabled>
                        </releases>
                        <snapshots>
                            <enabled>true</enabled>
                        </snapshots>
                    </repository>
                </repositories>
                <pluginRepositories>
                    <pluginRepository>
                        <id>alimaven</id>
                        <name>aliyun maven</name>
                        <url>http://maven.aliyun.com/nexus/content/groups/public/</url>
                    </pluginRepository>
                </pluginRepositories>
            </profile>
    
        </profiles>
        
        <!-- 激活配置 --> 
        <activeProfiles>
            <activeProfile>jdk1.8</activeProfile>
            <activeProfile>dev</activeProfile>
            <activeProfile>ali</activeProfile>
        </activeProfiles>
    </settings>
    

    在最上方有一个本地仓库配置的注释,你把他换成你自己磁盘下的某个目录就行。(这个配置参考了网上大佬们的配置,都大同小异)

    这样就算是配置完了。

    4、在IDEA中配置Maven

    接下来我们配置好了,总要去使用对吧。。怎么创建maven项目我就不多说了,懂的都懂。我直接告诉你们怎么在idea中全局使用maven指定的配置和仓库。

    在这里插入图片描述
    我们来到这个主页,在这里插入图片描述
    进去之后在上面的搜索框搜maven
    在这里插入图片描述

    但是如果有细心的人会发现,好像idea自带了一个maven在这里插入图片描述
    确实是这样。也就是说我们即使不下载maven,也可以使用。但是不建议用这个。因为这是idea内部的一个插件,并不是idea帮我们下载下来的maven文件包。懂吧。

    还有的人看了其他的文章说c盘下的.m2文件夹下的本地仓库。这个仓库就是maven默认帮我们生成的仓库,如果你在idea中不配置自己的仓库,就会默认使用这个c盘下的仓库。但是你已经配置好了,也可以删了。

    还有的人说没找到c盘下的settings.xml,隐藏项目也没有,这个别问我,我找了半天也没找到。

    如果有人已经打开了你当前的Java项目,也可以进设置里面搜maven,改成本地的配置。

    重点:要是你按照我的方法配置然后进idea下载依赖的时候报错,说什么什么jar包not found,那肯定是你中间有个环节出了问题。因为我也是这个踩坑过来的。

  • 相关阅读:
    【Android
    梦想责任与团队
    在MySQL字段中使用逗号分隔符
    session_write_close() 用法
    课程-问题分析与解决
    团队管理:新业务团队如何结合绩效来度量开发目标
    Linux sort 排序 去重 统计
    nginx-404与fastcgi_intercept_errors指令
    nginx fastcgi_buffers to an upstream response is buffered to a temporary file
    10年软件开发中获得的最宝贵的经验!非常值得你一读
  • 原文地址:https://www.cnblogs.com/shiyueyangne/p/14227329.html
Copyright © 2011-2022 走看看