基于注解的配置: @Configuration, @Bean
前述
之前的注解文章仅仅只是叙述文章中心的注解, 仍旧基于XML配置而非注解扫描. (@Senyag)
Java:
1.8Maven:
3SpringFramework版本以及各组件成员:
5.1.1.RELEASE
- spring-context
- spring-core
- spring-beans
以下是官方文档说明:
Starting with Spring 3.0, many features provided by the Spring JavaConfig project became part of the core Spring Framework. Thus, you can define beans external to your application classes by using Java rather than XML files. To use these new features, see the @Configuration, @Bean, @Import, and @DependsOn annotations.
从Spring 3.0开始,Spring JavaConfig项目提供的许多功能都成为核心Spring Framework(Core)的一部分。因此,您可以使用Java而不是XML文件在应用程序类外部定义bean。要使用这些新功能,请参阅
@Configuration,@Bean,@Import和@DependsOn注解。
各注解说明
-
@Configuration- 表示这个类可以使用 Spring IoC 容器作为 bean 定义的来源。 -
@Bean- 表示方法生成由Spring容器管理的bean。 -
@Import- 表示要导入的一个或多个@Configuration类。 -
@DependsOn- 表明有依赖条件的一个类时, 那些被它依赖的Bean类将先被初始化.
(换句话说哪个Bean被注解了这个, 那么它所依赖的Bean都会先初始化)"Spring容器载入bean顺序是不确定的,Spring框架没有约定特定顺序逻辑规范。但spring保证如果A依赖B(如beanA中有@Autowired B的变量),那么B将先于A被加载。但如果beanA不直接依赖B,我们如何让B仍先加载呢?"
---- 引用自: https://blog.csdn.net/neweastsun/article/details/78775371
这里先了解
@Configuration和@Bean.@DependsOn和@Import后面再谈...
示例(@Configuration&@Bean的简单使用)
本示例参考: https://www.cnblogs.com/microcat/p/7074720.html
作用: 简单演示功能 -- 仅仅获取一个Bean并调用其中方法, 并不存在依赖关系.
将了解:
@Bean用于注册一个SpringBean.@Configuration表明这是个与Spring相关的类, 可以作为Bean定义的来源.
Bean - HelloWorld.java
非JavaBean规范
package yag;

public class HelloWorld {

    private String message;

    public String getMessage() {
        return message;
    }

    public void setMessage(String message) {
        this.message = message;
    }
}
Bean配置文件 - HelloConfig.java
package yag;


import org.springframework.context.annotation.Bean;
import org.springframework.context.annotation.Configuration;

@Configuration
public class HelloConfig {

    // 将HelloWrold类注册为一个Bean
    @Bean
    public HelloWorld helloWorld() {
        return new HelloWorld();
    }
}
相当于以下XML配置:
<beans>
	<bean class="yag.HelloWorld"/>
</beans>
注解扫描 - spring-beans.xml
<?xml version="1.0" encoding="UTF-8"?>
<beans xmlns="http://www.springframework.org/schema/beans"
       xmlns:xsi="http://www.w3.org/2001/XMLSchema-instance"
       xmlns:context="http://www.springframework.org/schema/context"
       xsi:schemaLocation="http://www.springframework.org/schema/beans http://www.springframework.org/schema/beans/spring-beans.xsd http://www.springframework.org/schema/context http://www.springframework.org/schema/context/spring-context.xsd">

    <context:annotation-config/>
    <context:component-scan base-package="yag"/>
</beans>
执行者 - Runner.java
package yag;

import org.springframework.context.ApplicationContext;
import org.springframework.context.annotation.AnnotationConfigApplicationContext;

public class Runner {

    public static void main(String[] args){
        ApplicationContext context = new AnnotationConfigApplicationContext(HelloConfig.class);
        // 获取这个bean
        HelloWorld helloWorld = context.getBean(HelloWorld.class);
        // 调用方法
        helloWorld.setMessage("Hello World");
        System.out.println(helloWorld.getMessage());
    }
}
执行结果
Hello World

Process finished with exit code 0
示例(使用@Autowired进行Setter方法注入)
在之前的文章中已经介绍了一些通过注解进行注入的示例了. 但那些文章目的仅仅是了解那些注解如何使用, 仍旧是基于XML配置环境的. 以下将了解在注解配置中的使用方式.
背景:
HelloWorld是一个bean. 至于Bean使用者就是HelloWorldUser, 它将调用HelloWorld中的sayHello()方法(这需要一个HelloWorld实例).
Bean - HelloWorld.java
非JavaBean规范
package yag;

import org.springframework.context.annotation.Configuration;

@Configuration
public class HelloWorld {

    public void sayHello(){
        System.out.println("Hello World");
    }
}
Bean的使用者 - HelloWorldUser.java
package yag;


import org.springframework.beans.factory.annotation.Autowired;
import org.springframework.context.annotation.Configuration;

@Configuration
public class HelloWorldUser {

    private HelloWorld helloWorld;

    @Autowired // 在setter方法上, 以实现byName装配(将匹配id="helloWorld"的Bean)
    public void setHelloWorld(HelloWorld helloWorld) {
        this.helloWorld = helloWorld;
    }

    public void useHelloWorld(){
        helloWorld.sayHello();
    }
}
Bean配置文件 - HelloConfig.java
package yag;


import org.springframework.context.annotation.Bean;
import org.springframework.context.annotation.Configuration;

@Configuration
public class HelloConfig {

    @Bean(name = "helloWorld") // id="helloWorld"
    public HelloWorld helloWorld(){
        return new HelloWorld();
    }

    @Bean
    public HelloWorldUser helloWorldUser(){
        return new HelloWorldUser();
    }
}
执行者 - Runner.java
package yag;

import org.springframework.context.ApplicationContext;
import org.springframework.context.annotation.AnnotationConfigApplicationContext;

public class Runner {

    public static void main(String[] args){
        ApplicationContext context = new AnnotationConfigApplicationContext(HelloConfig.class);
        HelloWorldUser helloWorldUser = context.getBean(HelloWorldUser.class);
        helloWorldUser.useHelloWorld();
    }
}
注解扫描配置 - spring-beans.xml
为了缩短篇幅, 就罗列这些, 具体的dtd可以从上面的示例找.
    <context:annotation-config/>
    <context:component-scan base-package="yag"/>
执行结果
Hello World

Process finished with exit code 0
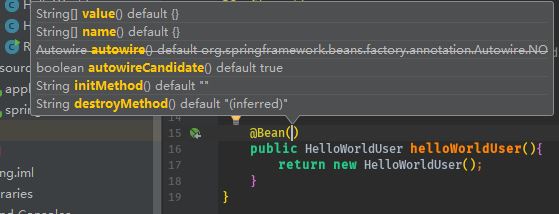
关于@Bean的随记
值得一提的是, @Bean提供了很多参数.