1.1进程与线程
进程:系统进行资源分配和调度的基本单位
线程:CPU分配的基本单位
一个进程包含很多个线程
1.2线程的创建和运行
三种方式:实现Runnable接口、继承Thread类、使用FutureTask方式(实现Callable接口中的call方法)
import java.util.concurrent.Callable;
import java.util.concurrent.ExecutionException;
import java.util.concurrent.FutureTask;

public class CallerTask implements Callable<String> {
    @Override
    public String call() throws Exception {
        return "您好啊";
    }

    public static void main(String[] args) throws ExecutionException, InterruptedException {

        FutureTask<String> futureTask = new FutureTask<String>(new CallerTask());
        new Thread(futureTask).start();

        String s = futureTask.get();

        System.out.println(s.toString());
    }
}
1.3线程通知与等待
线程的状态:
new:就绪,就是等待执行
runnable:执行
waiting:在等待队列里面
timewaiting:有时间的等待
blocked:阻塞状态
terminate:执行完毕或者中断了,反正就是终了
wait函数
手动实现消费者和生产者-----不太会,就写了一个脑残的版本!
import collection.Fu;
import com.sun.xml.internal.bind.v2.model.annotation.RuntimeAnnotationReader;

import java.util.LinkedList;
import java.util.Queue;

public class ProducerAndConsumer{

    public Queue<Integer> queue = new LinkedList<>();
    public int MAX_SIZE = 10;


    public class Producer1 implements Runnable{
        @Override
        public void run() {
            synchronized (queue){
                while (true){
                    while (queue.size() == MAX_SIZE){
                        try {
                            System.out.println("做好了");
                            queue.wait();
                        } catch (InterruptedException e) {
                            e.printStackTrace();
                        }
                    }
                    queue.add(1);
                    System.out.println("做了一个");
                    queue.notify();
                    try {
                        Thread.sleep(1000);
                    } catch (InterruptedException e) {
                        e.printStackTrace();
                    }
                }
            }
        }
    }


    public class Consumer1 implements Runnable{
        @Override
        public void run() {
            synchronized (queue){
                while (true){
                    while (queue.size() == 0){
                        try {
                            System.out.println("吃完了" + queue.size());
                            queue.wait();
                        } catch (InterruptedException e) {
                            e.printStackTrace();
                        }
                    }
                    queue.remove();
                    System.out.println("吃了一个");
                    queue.notify();
                    try {
                        Thread.sleep(1000);
                    } catch (InterruptedException e) {
                        e.printStackTrace();
                    }
                }
            }
        }
    }

    public static void main(String[] args) {

        ProducerAndConsumer procon = new ProducerAndConsumer();
        Producer1 producer1 = procon.new Producer1();
        Consumer1 consumer1 = procon.new Consumer1();
        Thread t_p = new Thread(producer1);
        Thread t_c = new Thread(consumer1);
        t_c.start();
        t_p.start();
    }
}
wait(long timeout)函数
public class WaitTimeOut {
    public static void main(String[] args) {
        String lock = "锁";
        new Thread(new Runnable() {
            @Override
            public void run() {
                synchronized (lock){
                    System.out.println("我开始了");
                    try {
                        lock.wait(2000);
                    } catch (InterruptedException e) {
                        e.printStackTrace();
                    }
                    System.out.println("我好了");
                }
            }
        }).start();

        new Thread(new Runnable() {
            @Override
            public void run() {
                synchronized (lock){
                    System.out.println("我直接冲");
                }
            }
        }).start();
    }
}
/**
 * 我开始了
 * 我直接冲
 * 我好了
 */
wait(long timeout, int nanos)函数
后面的nanos其实没什么用,就是nanos>0时,timeout + 1;没什么实际作用的
notify()函数
看上面的消费者与生产者例子:
当线程进入wait队列之后,在别的线程中,对象.notify()。就会在以这个对象为锁的wait队列里头唤醒一条线程。
notifyAll()函数
唤醒所有的wait队列里头的线程,然后再进行相互竞争锁的局面。害,其实我觉得没什么用的。
join()函数
在main线程中写:线程1.join()
表示:将main线程加到线程1的末尾,所以只有线程1执行完成之后,main线程才能执行。
sleep()函数
简单的让线程睡一会
yield函数
当前线程让出cpu,但是cpu不一定会让出去,只是想让罢了;
区别:
除了sleep、yield、join可以在随便一个调用外,其它的只能在同步代码快里头使用。没有竞争,哪里来的wait和唤醒呢。
线程中断
void interrupt()
随便一个地方中断线程,也就是给线程设置一下中断标志;如果此时线程在wait、sleep、join;那就最好了,直接抛出异常返回了。
boolean isInterrupted()
判断当前线程的中断标志为是否为真:是,返回true;否:返回false
boolean interrupted()
判断当前线程是否被中断,如果是返回true,然后清除中断标志!!!!,否就直接返回false;其实感觉并没有什么用;
public class InterruptedTest{
    public static void main(String[] args) {
        String lock = "锁住";
        Thread t1 = new Thread(new Runnable() {
            @Override
            public void run() {
                synchronized (lock) {
                    System.out.println("兄弟,我来了");
                    try {
                        lock.wait();
                    } catch (InterruptedException e) {
                        e.printStackTrace();
                        System.out.println("我被杀了");
                    }
                }
            }
        });

        Thread t2 = new Thread(new Runnable() {
            @Override
            public void run() {
                try {
                    Thread.sleep(1000);
                } catch (InterruptedException e) {
                    e.printStackTrace();
                }
                System.out.println("我是杀手,t1你去死吧");
                t1.interrupt();

            }
        });
        t1.start();
        t2.start();
    }


}
线程上下文切换
就是切来切去呗;
线程死锁
条件:
- 互斥条件,就是需要竞争资源
- 请求并持有条件:就是要了还想要
- 不可剥夺条件:资源使用完之前不能剥夺
- 环路等待条件:必须形成一个线程资源的环形链
避免死锁:
- 破坏请求并持有
- 破坏环路等待
守护线程和用户线程
守护线程
jvm的线程
用户线程
自己写的线程
手写线程.setDaemon(true):设置成守护线程
ThreadLocal
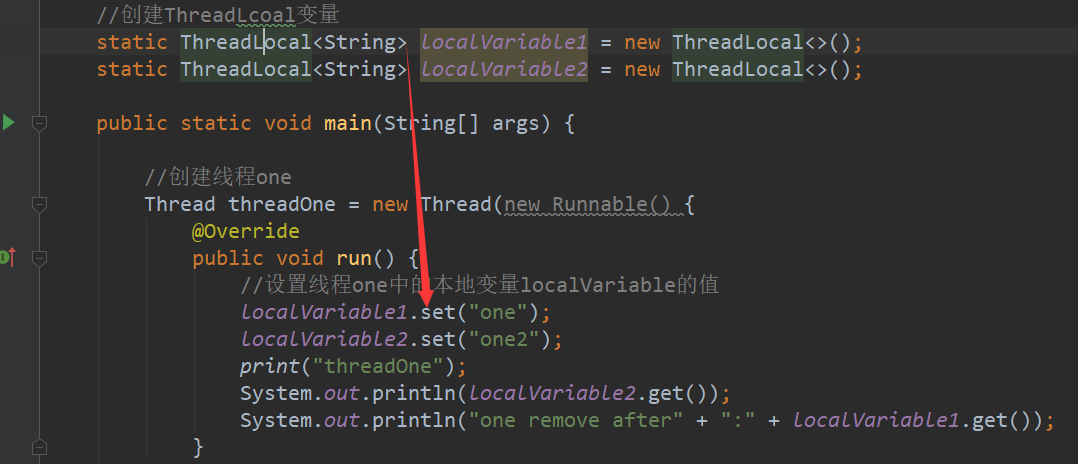
创建一个ThreadLocal变量,那么访问这个变量的每个线程都会有这个变量的一个本地副本。当多个线程操作这个变量时,实际操作的是自己本地内存里面的变量,从而避免线程安全问题。
创建一个ThreadLocal变量后,每个线程都会复制一个变量到自己的本地内存
public class ThreadLocalTest {

    static void print(String str){
        //但因当前线程本地内存中的localVariable变量的值
        System.out.println(str + ":" + localVariable.get());
    }

    //创建ThreadLcoal变量
    static ThreadLocal<String> localVariable = new ThreadLocal<>();

    public static void main(String[] args) {

        //创建线程one
        Thread threadOne = new Thread(new Runnable() {
            @Override
            public void run() {
                //设置线程one中的本地变量localVariable的值
                localVariable.set("one");
                print("threadOne");
                System.out.println("one remove after" + ":" + localVariable.get());
            }
        });

        //创建线程one
        Thread threadTwo = new Thread(new Runnable() {
            @Override
            public void run() {
                //设置线程one中的本地变量localVariable的值
                localVariable.set("two");
                print("threadTwo");
                System.out.println("two remove after" + ":" + localVariable.get());
            }
        });

        threadOne.start();
        threadTwo.start();
    }
}

/**
 * threadOne:haha
 * threadTwo:two
 * two remove after:two
 * one remove after:haha
 */

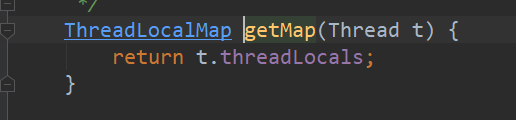
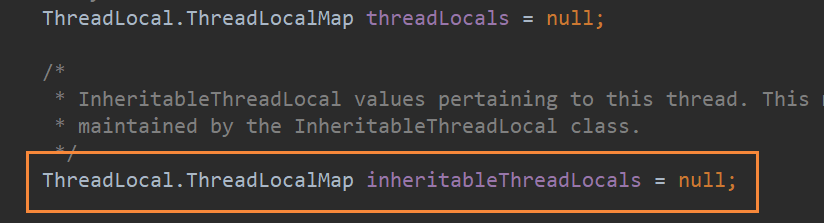
Thread类中有一个threadLocals和inheritableThreadLocals,它们是ThreadLocalMap类型的变量,而ThreadLocalMap是一个定制化的HashMap。
默认情况下,这两个变量都为null,只有当前线程第一次调用ThreadLocal的set或者get方法时才会创建它们。
其实每个线程的本地变量不是存放在ThreadLocal的实例里面,而是存放在调用线程的ThreadLocals变量里面。
也就是说,ThreadLocal类型的本地变量放在具体的线程空间里面。ThreadLocal类就是也给工具壳,它通过set方法把value值放入调用线程的threadLocals里面并存放起来;当调用的线程用get方法时,再从当前线程的threadLocals里面拿出来。
说了那么多:简单说就是:每个线程中有一个ThreadLocals变量:存放着很多ThreadLocal变量;threadLocals结构:hashMap<threadLocal, value>;

set的步骤
(1)获取当前的线程
(2)获取当前线程的threadLocals,也就是那个map
(3)map不为null,就将 <threadLocal的hash值作为key,值>,存入threadLocals中
(4)map为空的,那好说了,就创建一个,并进行(3)
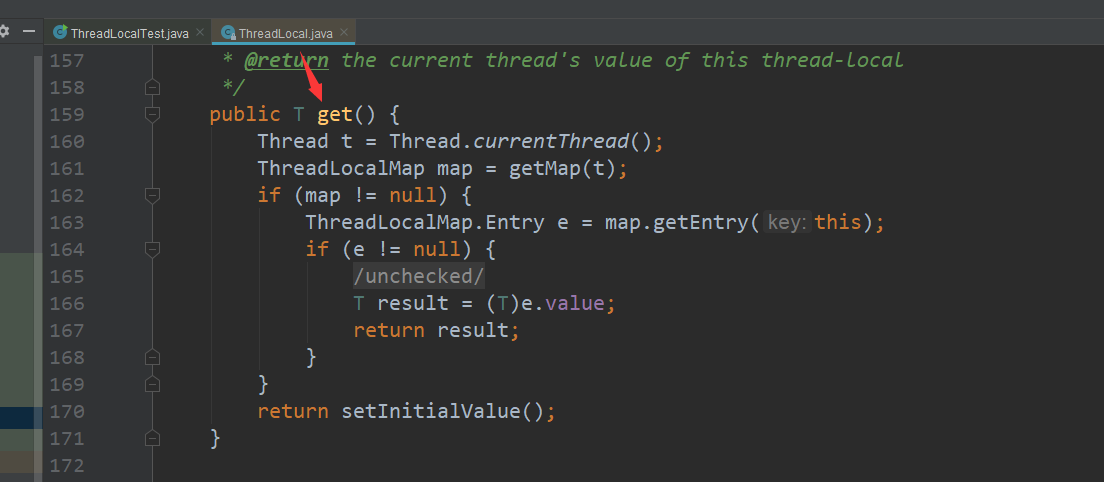
get步骤:其实就是将threadLocal的hash值作为key,在threadLocals的map中查找,如果这源码看不懂,那也没办法了。
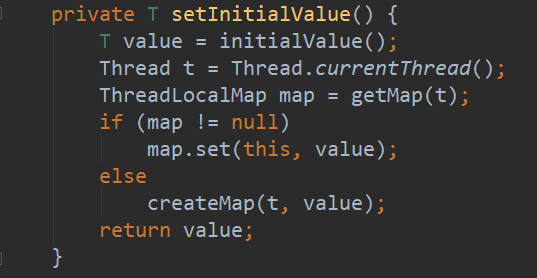
这个就是,如果get操作时,发现threadlocals为空,那就是找不到!那么就初始化threadLocals!!!!!!!
然后,这次没找到;那么将《threadlocal的hash值,null》插入到threadLocals中,不懂这样做有什么意义,骗自己嘛?
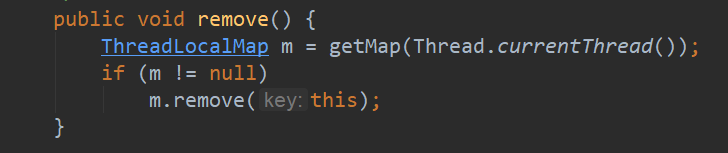
都这样了,就是threadlocals的map删除threalocal
不会真有人看不懂ThreadLocal的源码吧。好吧,我也是看了好久。
主要难点是没搞清楚:
Thread类中的threadLocals对应好多的ThreadLocal
还有这一句:
Thread t = Thread.currentThread();
怎么获取当前线程的?其实很简单,因为threadLocal.set()是在该线程的run方法中执行的,你说能不能获得当前的线程是哪个呢?
ThreadLocal不支持继承性
就是简单说,每个线程中的ThreadLocal都不是互通的!其实废话了!
但是你不会忘记了
见名知意:这个东东应该就是继承用的!
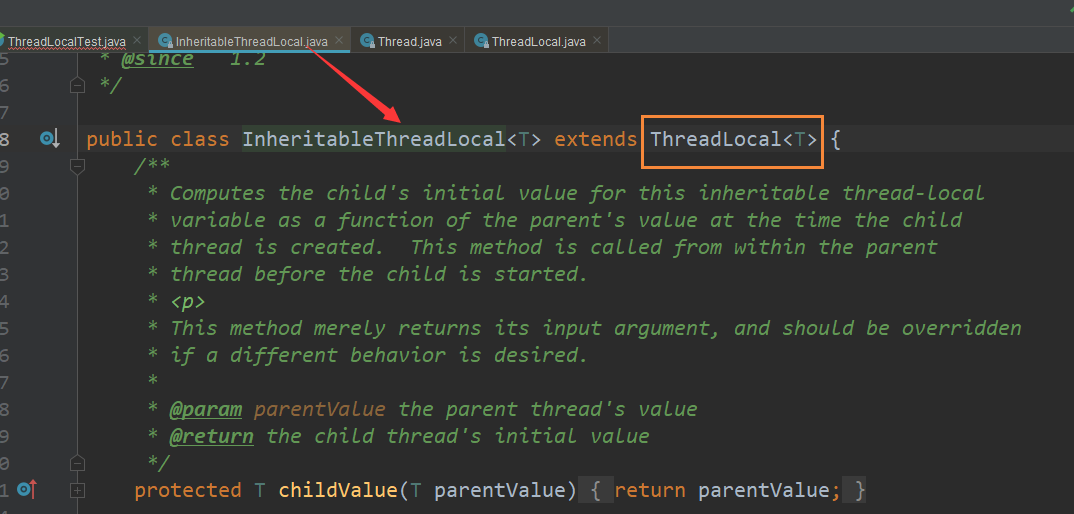
当然就有那么一个InheriatableThreadLocal类和inheritableThreadLocals对应咯
其实方法都差不多的,就是后者重写了ThreadLocal中的一些方法;简单说就是创建子线程的时候,会将父亲的inhereatableThreadLocals中的本地变量赋值到子线程中。
将父亲的inheriatableThreadLocal的赋值卸载儿子的后面结果:
public class ThreadLocalTest {

    public static void main(String[] args) {


        InheritableThreadLocal<String> fu1 = new InheritableThreadLocal<>();
        InheritableThreadLocal<String> fu2 = new InheritableThreadLocal<>();

        InheritableThreadLocal<String> zi1 = new InheritableThreadLocal<>();
        InheritableThreadLocal<String> zi2 = new InheritableThreadLocal<>();
        //创建线程one
        Thread threadOne = new Thread(new Runnable() {
            @Override
            public void run() {
                //设置线程one中的本地变量localVariable的值
                zi1.set("儿子1");
                zi2.set("儿子2");

                System.out.println(zi1.get());
                System.out.println(zi2.get());

                System.out.println(fu1.get());
                System.out.println(fu2.get());
            }
        });

        fu1.set("爸爸1");
        fu2.set("爸爸1");

        threadOne.start();
    }
}

/**结果
 * 儿子1
 * 儿子2
 * null
 * null
 */
将父亲的inheriatableThreadLocal的赋值卸载儿子的前面结果:
public class ThreadLocalTest {

    public static void main(String[] args) {


        InheritableThreadLocal<String> fu1 = new InheritableThreadLocal<>();
        InheritableThreadLocal<String> fu2 = new InheritableThreadLocal<>();

        InheritableThreadLocal<String> zi1 = new InheritableThreadLocal<>();
        InheritableThreadLocal<String> zi2 = new InheritableThreadLocal<>();

        fu1.set("爸爸1");
        fu2.set("爸爸1");
        //创建线程one
        Thread threadOne = new Thread(new Runnable() {
            @Override
            public void run() {
                //设置线程one中的本地变量localVariable的值
                zi1.set("儿子1");
                zi2.set("儿子2");

                System.out.println(zi1.get());
                System.out.println(zi2.get());

                System.out.println(fu1.get());
                System.out.println(fu2.get());
            }
        });


        threadOne.start();
    }
}

/**结果
 * 儿子1
 * 儿子2
 * 爸爸1
 * 爸爸1
 */
那么可以总结了:也就是子线程的inheritable初始化的那么一下将父线程的inheriatableThreadLocals的值复制一下,之后就不再保持一致了。