域名备案完成
一、HTTPS介绍
是以安全为目标的HTTP通道,在HTTP的基础上通过传输加密和身份认证保证了传输过程的安全性
HTTPS是在HTTP的基础下加入SSL层,HTTPS的安全基础是SSL,因此加密的详细内容就需要SSL
因此,部署https的时候需要申请或者生成ssl证书的
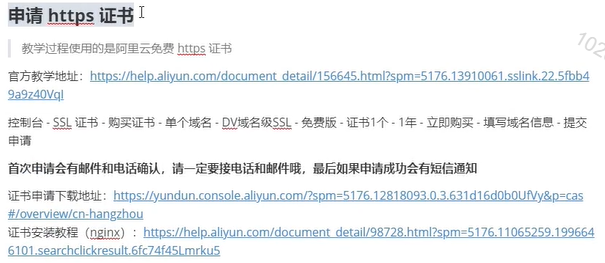
1、域名申请https证书 -- 两个文件 pem+key
| centos本地生成证书 (dev模式下的 server.crt+server.key) | ||
| 1 |
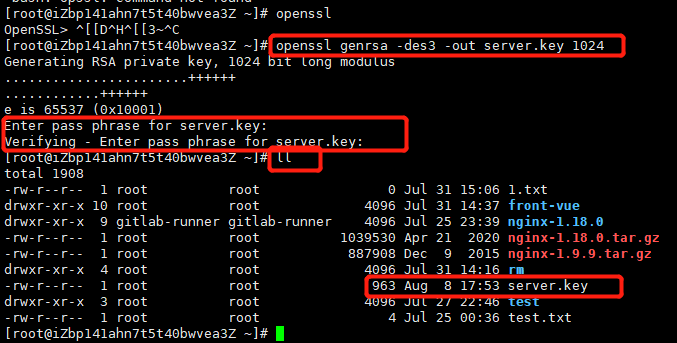
创建服务器证书密钥文件 : server.key |
openssl genrsa -des3 -out server.key 1024
|
| 2 |
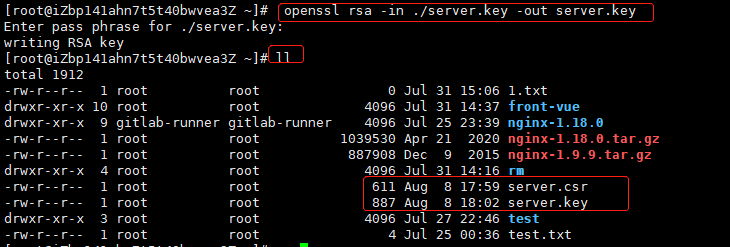
创建服务器证书的申请文件: server.csr |
openssl req -new -key server.key -out server.csr 输出内容为: 1 [lenin@archer ~]$ openssl req -new -key root.key -out root.csr 2 You are about to be asked to enter information that will be incorporated 3 into your certificate request. 4 What you are about to enter is what is called a Distinguished Name or a DN. 5 There are quite a few fields but you can leave some blank 6 For some fields there will be a default value, 7 If you enter ‘.’, the field will be left blank. 8 —– 9 Country Name (2 letter code) [AU]:CN ← 国家代号,中国输入CN 10 State or Province Name (full name) [Some-State]:BeiJing ← 省的全名,拼音 11 Locality Name (eg, city) []:BeiJing ← 市的全名,拼音 12 Organization Name (eg, company) []:MyCompany Corp. ← 公司英文名 13 Organizational Unit Name (eg, section) []: ← 可以不输入 14 Common Name (eg, YOUR name) []: ← 此时不输入 15 Email Address []:admin@mycompany.com ← 电子邮箱,可随意填 16 17 Please enter the following ‘extra’ attributes 18 to be sent with your certificate request 19 A challenge password []: ← 可以不输入 20 21 An optional company name []: ← 可以不输入 |
| 3 | 去除文件口令 |
openssl rsa -in ./server.key -out server.key
|
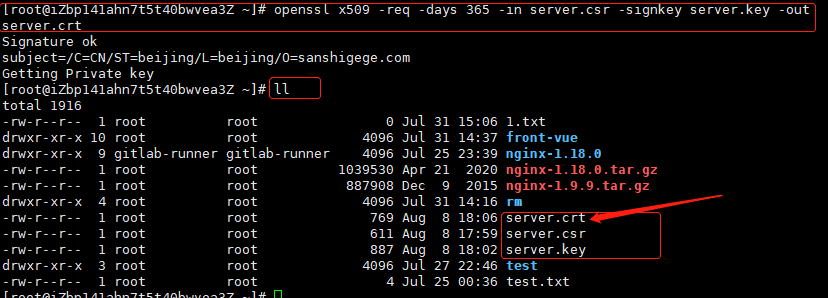
| 4 | 生成证书 |
openssl x509 -req -days 365 -in server.csr -signkey server.crt -out server.crt
|

2、nginx+https部署
| nginx支持https | ||
| 1 | 安装模块 | yum -y install openssl openssl-devel |
| 2 | 重新配置 |
./configure --prefix=/usr/local/nginx --with-http_stub_status_module --with-http_ssl_module 原来的配置:
|
| 3 | 重新编译 | make 记:make编译的,make install是安装 |
| 4 | 备份原有已经安装好的nginx |
cp /usr/local/nginx/sbin/nginx /usr/local/nginx/sbin/nginx.bak |
| 5 | 将刚刚编译好的nginx覆盖掉原来的nginx |
rm -rf /usr/local/nginx/sbin/ cp ./objs/nginx /usr/local/nginx/sbin/ 记:(ngixn必须停止) |
| 6 | 执行 进入目录, 启动 |
cd /usr/local/nginx/sbin/ ./nginx -s reload |

3、先打开443端口,放行443(https)端口
4、前端项目配置https配置server
1 # HTTPS server 2 # 3 server { 4 listen 443 ssl; // 开火墙,配置安全组 5 server_name localhost; 6 7 ssl_certificate /root/server.crt; # dev crt; online .pem 8 ssl_certificate_key /root/server.key; 9 10 ssl_session_cache shared:SSL:1m; 11 ssl_session_timeout 5m; 12 13 ssl_ciphers HIGH:!aNULL:!MD5; 14 ssl_prefer_server_ciphers on; 15 16 location / { 17 root /usr/local/nginx/html/dist; 18 index index.html index.htm; 19 } 20 } |
5、nodejs使用https证书
| nginx配置 |
# node-https server { listen 443 ssl; server_name localhost; ssl_certificate /root/server.crt; # dev crt; online pem ssl_certificate_key /root/server.key; ssl_session_cache shared:SSL:1m; ssl_session_timeout 5m; ssl_ciphers HIGH:!aNULL:!MD5; ssl_prefer_server_ciphers on; location / { proxy_redirect off; proxy_set_header Host $host; proxy_set_header X-Real-Ip $remote_addr; proxy_set_header X-Forwarded-For $proxy_add_x_forwarded_for; proxy_pass https://172.25.0.124:3001; } } |
| nodejs代码 |
const express = require('express')
const https = require('https')
const http = require('http')
const fs = require('fs')

// configure https
const httpsOption = {
  key: fs.readFileSync("/root/server.key"), // key
  cert: fs.readFileSync("/root/server.crt") // pem crt
}

console.log('httpsOption---', httpsOption)

const app = express()

// 开启https服务
https.createServer(httpsOption, app).listen(3001, () => {
  console.log('https 服务已经开启,端口号是 3001')
})
app.get('/apiHttps', function(req, res) {
  console.log('收到请求了,--,主机ip:', req.hostname)
  if(req.protocol === 'https') {
    res.status(200).send('https ----- Hello https!')
  } else {
    res.status(200).send('http ----- Hello http!')
  }
})

http.createServer(app).listen('3002', ()=> {
  console.log('http 服务已经开启,端口号是 3002')
})
|
拓展: