本帖针对Centos6/REHL6系统
Gitlab的安装过程主要包括以下组件的配置:
- 关闭selinux
# 修改/etc/selinux/config 文件
将SELINUX=enforcing改为SELINUX=disabled ,然后重启电脑
# sestatus -v 查看selinux状态
Current mode:                   permissive #说明已关闭selinux
- 安装软件包及解决依赖项
- 系统用户
- Ruby环境
- Go
- 数据库(Mysql/Postgresql)
- Redis
- Gitlab-CE
- Nginx
非必要条件:点击链接加入群【GitLab交流群】
1.安装软件包及解决依赖项
添加EPEL源:
# 下载EPEL的GPG KEY,导入到系统中
wget -O /etc/pki/rpm-gpg/RPM-GPG-KEY-EPEL-6 https://mirrors.tuna.tsinghua.edu.cn/epel/RPM-GPG-KEY-EPEL-6
rpm --import /etc/pki/rpm-gpg/RPM-GPG-KEY-EPEL-6
# 安装`epel-release-latest-6.noarch.rpm`包,启用EPEL
rpm -Uvh http://mirrors.ustc.edu.cn/epel/epel-release-latest-6.noarch.rpm
yum groupinstall "Development tools"
yum install gcc autoconf cmake unzip vim libcurl-devel zlib-devel curl-devel expat-devel gettext-devel openssl-devel perl-devel nodejs libicu-devel  wget curl
安装git
如果已经用yum安装过git,并且版本低于2.7.4,要先卸载掉旧的版本
yum remove git
使用源码编译安装git
mkdir /tmp/git && cd /tmp/git
curl -O --progress https://www.kernel.org/pub/software/scm/git/git-2.7.4.tar.gz
tar -xzf git-2.7.4.tar.gz
cd git-2.7.4
./configure
make prefix=/usr/local all
# 安装到/usr/local/bin
make prefix=/usr/local install
# 验证git版本号
git --version
#查看git安装路径
which git

# 编辑 config/gitlab.yml (第5步中), 修改 git 路径为 /usr/local/bin/git
2.添加系统用户
我们添加一个用来管理运行Gitlab的用户git
adduser -c 'Gitlab' -s /bin/bash git
# 修改git用户的环境变量PATH,以root用户运行
visudo
# 找到下面一行
Defaults    secure_path = /sbin:/bin:/usr/sbin:/usr/bin
#修改为
Defaults    secure_path = /sbin:/bin:/usr/sbin:/usr/bin:/usr/local/bin:
3.安装ruby环境
在Gitlab生产环境使用Ruby版本管理工具RVM,rbenv或者chruby常常会带来很多疑难杂症.比如Gitlab-shell版本管理器调用OpenSSH的功能以防止越过ssh对仓库进行pull和push操作.而前面提到的三个版本管理器不支持这样的功能,所以我们强烈建议大家按照下面的方式来安装Ruby.
- 如果系统上存在旧的Ruby1.8,先删除掉:
yum remove ruby
- 下载Ruby源码,编译安装:
mkdir /tmp/ruby && cd /tmp/ruby
# 这里替换官方文档的下载地址为mirrors.ustc.edu.cn提供的镜像地址
curl -O --progress http://mirrors.ustc.edu.cn/ruby/2.1/ruby-2.1.8.tar.gz
tar xzf ruby-2.1.8.tar.gz
cd ruby-2.1.8
./configure --disable-install-rdoc
make && make install
- 国内使用Ruby的Gem和Bundler必须要做的事情:
# 修改git用户gem安装源为中科大源
$  gem sources --add https://gems.ruby-china.org/ --remove https://rubygems.org/
# 确保git用户当前gems源为中科大源
$  gem sources -l
*** CURRENT SOURCES ***

https://gems.ruby-china.org/
- 安装bundle包
gem install bundler --no-ri --no-rdoc
# 修改bundler的源为中科大源
sudo -u git -H bundle config mirror.https://rubygems.org https://gems.ruby-china.org/
4.安装GO
从Gitlab8.0开始,Git的HTTP请求由gitlab-git-http-server来处理.我们需要Go编译器来安装gitlab-git-http-server.下面一系列的指令都将假定你用的是64位的Linux系统.你也可以在GoLang官方网站下载其他平台的Go编译器.
$ mkdir /tmp/go && cd /tmp/go
$ curl -O --progress http://www.golangtc.com/static/go/1.5.3/go1.5.3.linux-amd64.tar.gz
$ tar -C /usr/local -xzf go1.5.3.linux-amd64.tar.gz
$ sudo ln -sf /usr/local/go/bin/{go,godoc,gofmt} /usr/local/bin/
$ rm go1.5.3.linux-amd64.tar.gz
#验证go是否安装正确
$ go version
go version go1.5.3 linux/amd64
5.安装数据库
Gitlab官方建议我们用PostgreSQL数据库.如果喜欢用Mysql请前往Gitlab使用Mysql数据库的安装说明.
配置postgresql安装源:
https://wiki.postgresql.org/wiki/YUM_Installation#Configure_your_YUM_repository
# 修改/etc/yum.repos.d/CentOS-Base.repo,在[base]和[update]段落添加下面的配置
exclude=postgresql*
# 安装postgresql源
yum localinstall http://mirrors.ustc.edu.cn/postgresql/repos/yum/9.5/redhat/rhel-6-x86_64/pgdg-centos95-9.5-1.noarch.rpm
# 安装postgresql
yum install postgresql95-server postgresql95-devel postgresql95-contrib
# 默认情况下,postgresql的数据库文件存放在
/var/lib/pgsql/9.5/data
# 初始化
mv /etc/init.d/{postgresql-9.5,postgresql}
service postgresql initdb
# 启动postgresql
service postgresql start
# 配置postgresql自启动
chkconfig postgresql on
# 为Gitlab创建一个用户,用户名为git
sudo -u postgres psql -d template1 -c "CREATE USER git CREATEDB;"
# 创建Gitlab生产环境数据库并赋予git用户属主权限
sudo -u postgres psql -d template1 -c "CREATE DATABASE gitlabhq_production OWNER git;"
# 用git用户测试下是否能登录刚才创建的数据库
sudo -u git -H psql -d gitlabhq_production
# 退出数据库会话
gitlabhq_production> q
# 创建pg_config的软连接
ln -s /usr/pgsql-9.5/bin/pg_config /usr/bin/pg_config
# 添加postgresql扩展
sudo -u postgres -H psql -d gitlabhq_production
gitlabhq_production=#  CREATE EXTENSION IF NOT EXISTS pg_trgm;
6.Redis
版本要求: redis版本不低于2.8.
添加redis用户和组
groupadd redis && useradd -g redis redis -s /sbin/nologin
- 编译安装redis
mkdir /tmp/redis && cd /tmp/redis
curl -O --progress http://download.redis.io/releases/redis-3.0.7.tar.gz
tar zxf redis-3.0.7.tar.gz
cd redis-3.0.7
make && make install
mkdir -p /etc/redis
cp redis.conf /etc/redis
- 修改redis配置
cp /etc/redis/redis.conf /etc/redis/redis.conf.orig
# 把'post'设置为0以禁止监听TCP端口
sed 's/^port .*/port 0/' /etc/redis/redis.conf.orig | sudo tee /etc/redis/redis.conf
# 让redis以socket方式启动
echo 'unixsocket /var/run/redis/redis.sock' | sudo tee -a /etc/redis/redis.conf
# 启动守护进程
sed -i 's/daemonize no/daemonize yes/g' /etc/redis/redis.conf
# 创建存放socket的目录
mkdir /var/run/redis
sudo chown redis:redis /var/run/redis
sudo chmod 755 /var/run/redis
# Persist the directory which contains the socket, if applicable
if [ -d /etc/tmpfiles.d ]; then
  echo 'd  /var/run/redis  0755  redis  redis  10d  -' | sudo tee -a /etc/tmpfiles.d/redis.conf
fi
# 把git用户加入redis组
sudo usermod -aG redis git
# 下载redis init 脚本
$ curl -L http://packages.gitlab.cc/install/init-script/redis/cenots6/redis-server -o /etc/init.d/redis-server
$ chmod +x /etc/init.d/redis-server
- 启动Redis
# 启动redis服务
$ service redis-server start
# 将redis加入自启动
$ chkconfig redis-server on
7.安装GitLab-CE
# 我们将gitlab安装到git用户的HOME目录
cd /home/git
克隆gitlab-ce源码
sudo -u git -H git clone https://git.oschina.net/qiai365/gitlab-ce.git -b 8-7-stable gitlab
Note: 你可以修改8-7-stable为master,这样就可以体验到最新的版本,但是生产环境不要用master分支哦
配置GitLab-CE
# 进入gitlab目录
cd /home/git/gitlab

# 复制gitlab.yml(Gitlab的主配置文件)
sudo -u git -H cp config/gitlab.yml.example config/gitlab.yml

# 修改gitlab.yml
sudo -u git -H vim config/gitlab.yml
####修改第32行 host: localhost为 host: 你的域名或者ip
####修改第435行 bin_path: /usr/bin/git 为bin_path: /usr/local/bin/git

# 复制 secrets 文件
sudo -u git -H cp config/secrets.yml.example config/secrets.yml
sudo -u git -H chmod 0600 config/secrets.yml

# 修改 log/ 和 tmp/ 文件夹权限
sudo chown -R git log/
sudo chown -R git tmp/
sudo chmod -R u+rwX,go-w log/
sudo chmod -R u+rwX tmp/

# 修改 tmp/pids/ 个 tmp/sockets/ 文件夹权限
sudo chmod -R u+rwX tmp/pids/
sudo chmod -R u+rwX tmp/sockets/

# 创建 public/uploads/ 文件夹
sudo -u git -H mkdir public/uploads/

# 修改 public/uploads/ 文件夹权限,只有git用户有访问权限
# now that files in public/uploads are served by gitlab-workhorse
sudo chmod 0700 public/uploads

# 修改 CI build traces are stored 文件夹的权限
sudo chmod -R u+rwX builds/

# 修改 CI artifacts are stored 文件夹的权限
sudo chmod -R u+rwX shared/artifacts/

# 复制 Unicorn 配置文件
sudo -u git -H cp config/unicorn.rb.example config/unicorn.rb

# 查询CPU核心数
nproc

# 如果你想搭建一个高负载的Gitlab实例,可启用集群模式.
# 修改'worker_processes'参数,至少要跟cpu核心数一样.
# 举例:2G RAM的服务器修改workers数量为3
sudo -u git -H vim config/unicorn.rb

# 复制Rack attack 配置文件
sudo -u git -H cp config/initializers/rack_attack.rb.example config/initializers/rack_attack.rb

# Configure Git global settings for git user
# 'autocrlf' is needed for the web editor
sudo -u git -H git config --global core.autocrlf input

# Disable 'git gc --auto' because GitLab already runs 'git gc' when needed
sudo -u git -H git config --global gc.auto 0

# 复制 Redis 连接配置文件
sudo -u git -H cp config/resque.yml.example config/resque.yml

# 如果之前修改过redis socket的路径,在这个配置文件里面修改为当前的路径.
sudo -u git -H vim config/resque.yml
修改GitLab DB 设置
# 此命令仅针对PostgreSQl:
sudo -u git cp config/database.yml.postgresql config/database.yml
# 如果使用Mysql,执行下面命令
sudo -u git cp config/database.yml.mysql config/database.yml

# 以下修改针对MySQL和远程PostgreSQL:
# 修改username/password.
# 生产环境只需要修改第一部分即可.
# 修改'secure password' 为你设置的密码
# 密码字段可以使用"双引号"
sudo -u git -H vim config/database.yml

# PostgreSQL MySQL都适用:
# 修改database.yml的权限,确保git用户可以读取该文件.
sudo -u git -H chmod o-rwx config/database.yml
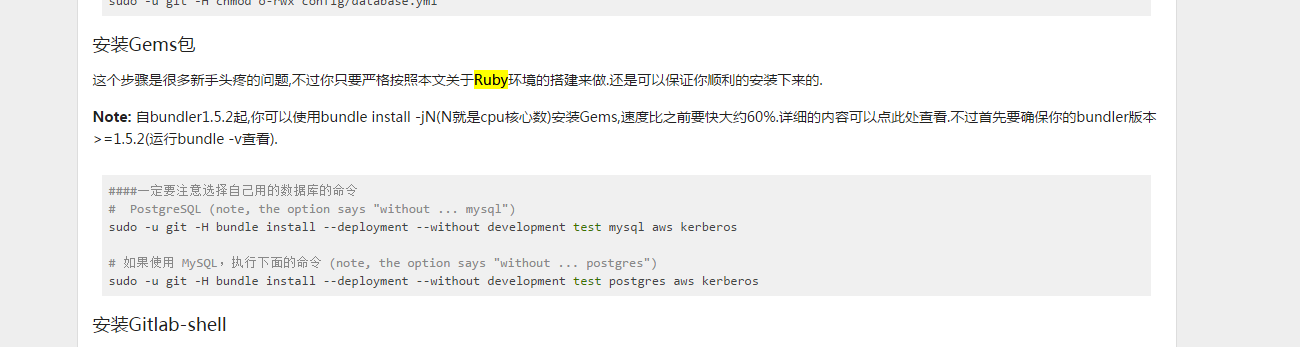
安装Gems包
这个步骤是很多新手头疼的问题,不过你只要严格按照本文关于Ruby环境的搭建来做.还是可以保证你顺利的安装下来的.
Note: 自bundler1.5.2起,你可以使用bundle install -jN(N就是cpu核心数)安装Gems,速度比之前要快大约60%.详细的内容可以点此处查看.不过首先要确保你的bundler版本>=1.5.2(运行bundle -v查看).
####一定要注意选择自己用的数据库的命令
#  PostgreSQL (note, the option says "without ... mysql")
sudo -u git -H bundle install --deployment --without development test mysql aws kerberos

# 如果使用 MySQL,执行下面的命令 (note, the option says "without ... postgres")
sudo -u git -H bundle install --deployment --without development test postgres aws kerberos
安装Gitlab-shell
GitLab Shell是专为GitLab开发的ssh访问和仓库管理的软件.
# 修改gitlab 安装 gitlab-shell的rake任务脚本
sudo -u git -H sed -i 's/https://gitlab.com/gitlab-org/gitlab-shell.git/https://git.oschina.net/qiai365/gitlab-shell.git/g'  /home/git/gitlab/lib/tasks/gitlab/shell.rake

# 运行安装gitlab shell的任务 (根据自己的redis安装情况修改`REDIS_URL`),这里如果你事先没有clone gitlab-shell的仓库,就会自动clone官方的仓库进行安装:
sudo -u git -H bundle exec rake gitlab:shell:install REDIS_URL=unix:/var/run/redis/redis.sock RAILS_ENV=production

# 默认情况下,gitlab-shell的配置是根据Gitlab的配置生产的.
# 你可以运行下面的命令查看和修改gitlab-shell的配置:
sudo -u git -H vim /home/git/gitlab-shell/config.yml
Note: Make sure your hostname can be resolved on the machine itself by either a proper DNS record or an additional line in /etc/hosts (“127.0.0.1 hostname”). This might be necessary for example if you set up GitLab behind a reverse proxy. If the hostname cannot be resolved, the final installation check will fail with “Check GitLab API access: FAILED. code: 401” and pushing commits will be rejected with “[remote rejected] master -> master (hook declined)”.
安装成功如图所示:

安装gitlab-workhorse
cd /home/git
sudo -u git -H git clone https://gitlab.com/gitlab-org/gitlab-workhorse.git
cd gitlab-workhorse
sudo -u git -H git checkout v0.7.1
sudo -u git -H make
初始化数据库,激活高级特性
cd /home/git/gitlab

sudo -u git -H bundle exec rake gitlab:setup RAILS_ENV=production

# 输入 'yes' 以创建数据库表

# 当看到 'Administrator account created:' 表示已经安装完成
安全设置 secrets.yml
secrets.yml文件为每个会话和安全变量存储密钥.把这个文件备份到别的地方,但是不要和数据库备份放在一块,否则你的数据库备份损坏会导致这个文件丢失.
安装Gitlab init脚本
sudo cp lib/support/init.d/gitlab /etc/init.d/gitlab

#复制下面这个配置文件,如果你的gitlab不是安装在/home/git/gitlab目录,根据自己情况修改这个文件。

sudo cp lib/support/init.d/gitlab.default.example /etc/default/gitlab
设置GItlab为自启动
chkconfig gitlab on
安装Logrotate
sudo cp lib/support/logrotate/gitlab /etc/logrotate.d/gitlab
检查GitLab环境配置
sudo -u git -H bundle exec rake gitlab:env:info RAILS_ENV=production
效果如图

生成GitLab前端资源
sudo -u git -H bundle exec rake assets:precompile RAILS_ENV=production
启动GitLab
sudo service gitlab start
# 或者
sudo /etc/init.d/gitlab restart
再检查一次Gitlab的所有组件
sudo -u git -H bundle exec rake gitlab:check RAILS_ENV=production
# 如果上面的检查有错误,按照提示修复下,再重启GitLab即可.
通过修改/home/git/gitlab/config/unicorn.rb的listen端口,然后重启gitlab服务,就可以直接访问服务器ip加端口来访问gitlab了
使用Nginx绑定域名,代理GitLab
注意: GitLab的安装请查看 GitLab安装方法汇总帖里面的源码安装部分。
Nginx的安装
推荐使用nginx官方提供的packages。详细内容请查看官方文档
Centos上的安装方法
# 创建/etc/yum.repos.d/nginx.repo
touch /etc/yum.repos.d/nginx.repo

# 编辑nginx.repo,把下面的内容写入;
# 注意修改OS和OSRELEASE,如centos6则把OS改成centos, OSRELEASE改成6;
[nginx]
name=nginx repo
baseurl=http://nginx.org/packages/mainline/OS/OSRELEASE/$basearch/
gpgcheck=0
enabled=1

#更新yum缓存并安装nginx
yum update
yum install -y nginx
使用nginx代理gitlab-workhorse.socket,并绑定域名访问GitLab
# 复制gitlab的nginx配置文件到nginx的conf.d目录
cp /home/git/gitlab/lib/support/nginx/gitlab /etc/nginx/conf.d/gitlab

#修改gitlab的nginx配置文件
vim /etc/nginx/conf.d/gitlab
找到server_name YOUR_SERVER_FQDN,将YOUR_SERVER_FQDN修改为你的域名,如demo.gitlab,cc;
# 修改nginx.conf,引入gitlab的nginx配置文件
vim /etc/nginx/nginx.conf

/etc/nginx/nginx.conf
……
    include /etc/nginx/conf.d/*.conf;
    include /etc/nginx/conf.d/gitlab; #在最后一个大括号上面加入这段
}

# 修改/home/git/目录的权限
sudo chmod 755 /home/git/

# 修改gitlab.yml
vim /home/git/gitlab/config/gitlab.yml
找到 host: ,修改为host: demo.gitlab.cc

# 重启nginx
service nginx restart
Initial Login
默认的用户名是 root,一开始会要求重新设置密码
root
5iveL!fe
代码更新
修改Github上的代码,然后更新到服务器上
cd /home/git/gitlab/

git fetch origin
git merge origin/7-5-zh

# 重启 gitlab
service gitlab restart
Gitlab 备份
官网的备份说明
https://gitlab.com/gitlab-org/gitlab-ce/blob/master/doc/raketasks/backup_restore.md
查看备份设置
vim /home/git/gitlab/config/gitlab.yml
检查Backup Settings设置项
默认情况下,备份文件是存放在/home/git/gitlab/tmp/backups/
执行备份
sudo service gitlab stop # 先停止Gitlab,可以不暂停
cd /home/git/gitlab/
sudo -u git -H bundle exec rake gitlab:backup:create RAILS_ENV=production
执行完成后,会在/home/git/gitlab/tmp/backups/目录下创建一个备份俄文件,以时间戳_gitlab_backup命名如 1417040627_gitlab_backup.tar
重新启动
sudo service gitlab start
sudo service nginx restart
还原
需要给其他用户配置读写执行的权限
chmod o+wrx /home/git/.ssh/authorized_keys.lock
否则会出现如下错误,是由于没有权限
/home/git/gitlab-shell/lib/gitlab_keys.rb:101:in
`initialize’: Permission denied @ rb_sysopen -
/home/git/.ssh/authorized_keys.lock (Errno::EACCES)
需要使用 git 用户来执行,否则会没有权限操作 git 目录下的文件,timestamp_of_backup为时间戳如 1417040627
sudo service gitlab stop
cd /home/git/gitlab/
sudo -u git -H bundle exec rake gitlab:backup:restore BACKUP=timestamp_of_backup RAILS_ENV=production
如果是从全新部署的 gitlab 还原,需要执行这一步
sudo -u git -H bundle exec rake gitlab:satellites:create RAILS_ENV=production
重启 gitlab
sudo service gitlab start
sudo service nginx restart

sudo -u git -H bundle exec rake gitlab:check RAILS_ENV=production
设置自动备份
sudo service gitlab stop;
cd /home/git/gitlab;
sudo -u git -H editor config/gitlab.yml;
# Enable keep_time in the backup section to automatically delete old backups
keep_time参数默认是604800(单位是秒),因此会保留最近7天内的备份
sudo -u git crontab -e # Edit the crontab for the git user
将如下内容添加到文件末尾
# Create a full backup of the GitLab repositories and SQL database every day at 2am
0 2 * * * cd /home/git/gitlab && PATH=/usr/local/bin:/usr/bin:/bin bundle exec rake gitlab:backup:create RAILS_ENV=production CRON=1
每天凌晨2点自动备份
The CRON=1 environment setting tells the backup script to suppress all progress output if there are no errors. This is recommended to reduce cron spam.
重新启动
sudo service gitlab start;
sudo service nginx restart;
sudo -u git -H bundle exec rake gitlab:check RAILS_ENV=production;
忘记管理员密码
可以参考这篇文章
Gitlab 服务器上使用
|
1
2
3
4
|
# Gitlab 安装路径
cd /home/git/gitlab
# 进入Rails控制台
sudo -u git -H bundle exec rails console production
|
ominbus上使用
|
1
2
3
|
sudo gitlab-rails console
# 或者
sudo gitlab-rake rails console
|
进入控制台,如果知道需要修改用户的邮箱,使用如下,直接修改
|
1
2
3
4
|
user = User.find_by(email: 'admin@example.com')
user.password = 'secret_password'
user.password_confirmation = 'secret_password'
user.save
|
如果不知道具体邮箱,可以通过find来查找邮箱
|
1
|
user = User.find(1)
|
参考文档
- https://gitlab.com/gitlab-org/gitlab-recipes/tree/master/install/centos
- https://www.dwhd.org/20160406_094416.html
参考文章:
https://bbs.gitlab.cc/topic/35/gitlab-ce-8-7-%E6%BA%90%E7%A0%81%E5%AE%89%E8%A3%85%E6%89%8B%E5%86%8C-centos6-rehl6
http://www.dwhd.org/20150930_163302.html
安装的时候在这里报错了
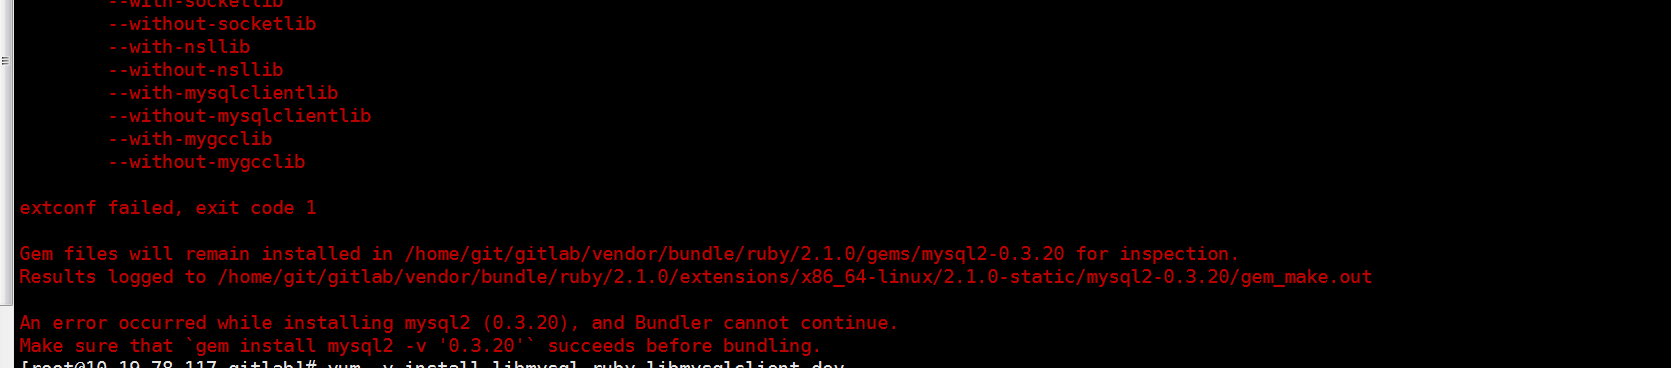
这里我的数据库是MySQL,且是源码安装的,可能是没有MySQL的一些依赖
所以这里我使用下面的额方法把mysql-libs和mysql-devel给装上
rpm -ivh http://repo.mysql.com/mysql-community-release-el6-5.noarch.rpm
yum install mysql mysql-server mysql-devel -y
sudo -u git -H bundle install --deployment --without development test postgres aws kerberos
这样就不会报错了