在上节中,我们运行CAS服务器是打成war包在tomcat中进行运行,这节介绍在IDEA中运行CAS服务器。
1.下载CAS 模板 Overlay Template,我这里使用 Apereo CAS 5.3.x 版本,JDK需要1.8+
地址:https://github.com/apereo/cas-overlay-template/tree/5.3
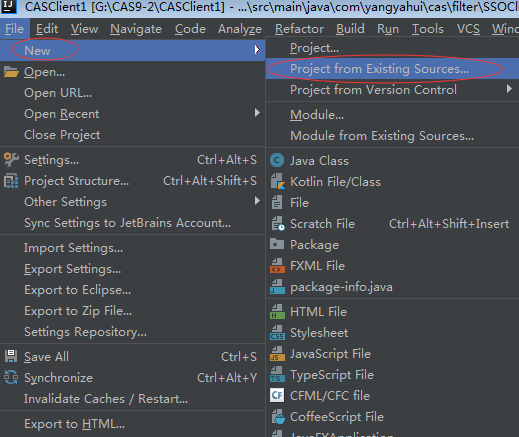
2.进行解压,使用IDEA添加解压的项目,点击File—>New—>Project from Existing Sources...
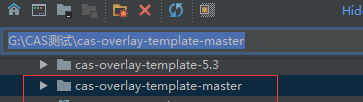
选择解压好的项目
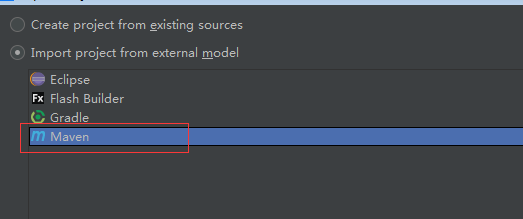
选择Maven
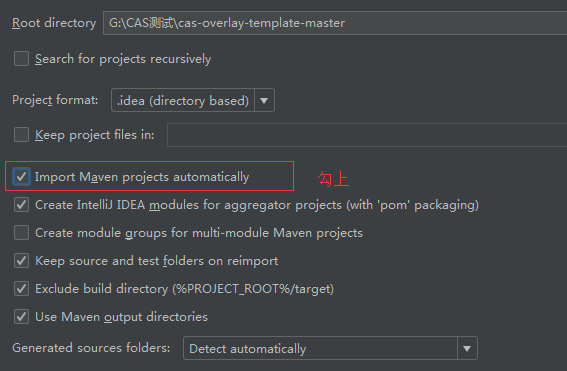
点击next,next...直到finish 项目加载。加载完成后,项目结构是这样子的
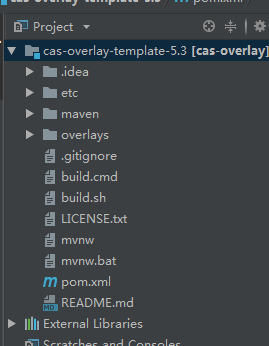
项目是一个overlay项目,下一节进行讲解
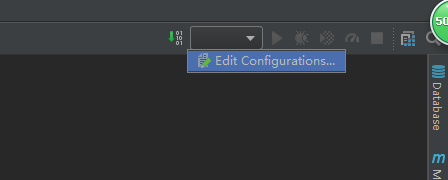
3.项目加载完成后,我们要在IDEA中配置tomcat,点击右上角的下三角,选择Edit Configurations...
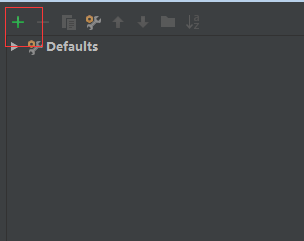
点击+号
向下拉,会有tomcat server,
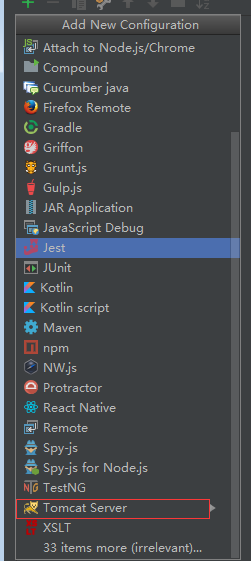
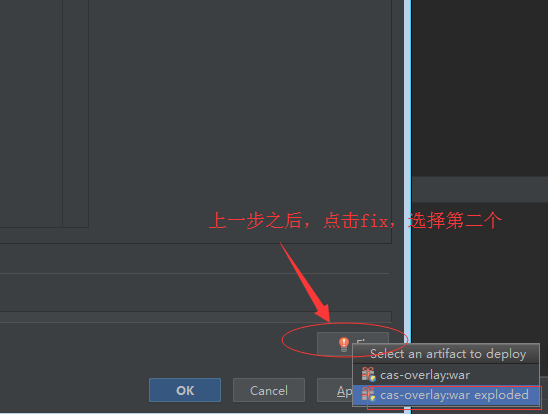
点击选择本地的,tomcat


打包完成后的目录结构

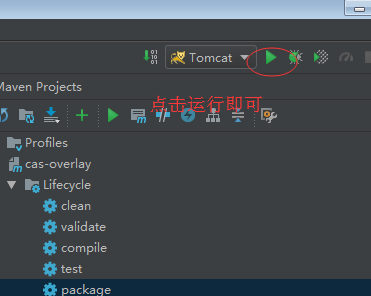
运行成功后就会加载界面了

三:springBoot客户端
3.1 导包

    <parent>
        <groupId>org.springframework.boot</groupId>
        <artifactId>spring-boot-starter-parent</artifactId>
        <version>1.5.13.RELEASE</version>
        <relativePath/> <!-- lookup parent from repository -->
    </parent>
    <properties>
        <project.build.sourceEncoding>UTF-8</project.build.sourceEncoding>
        <project.reporting.outputEncoding>UTF-8</project.reporting.outputEncoding>
        <java.version>1.8</java.version>
    </properties>

    <dependencies>
        <!--web场景启动器,包含 Tomcat 和 spring-mvc restful  aop jackjson支持。 -->
        <dependency>
            <groupId>org.springframework.boot</groupId>
            <artifactId>spring-boot-starter-web</artifactId>
        </dependency>
        <!-- CAS依赖包 -->
        <dependency>
            <groupId>net.unicon.cas</groupId>
            <artifactId>cas-client-autoconfig-support</artifactId>
            <version>1.5.0-GA</version>
        </dependency>
    </dependencies>
3.2 application.properties
server.port=8081

cas.server-url-prefix=http://127.0.0.1:9080/cas
cas.server-login-url=http://127.0.0.1:9080/cas/login
cas.client-host-url=http://127.0.0.1:8081
cas.validation-type=CAS
3.3 配置类
import net.unicon.cas.client.configuration.CasClientConfigurerAdapter;
import net.unicon.cas.client.configuration.EnableCasClient;
import org.springframework.boot.web.servlet.FilterRegistrationBean;
import org.springframework.context.annotation.Configuration;

@Configuration
@EnableCasClient
public class CasConfigure extends CasClientConfigurerAdapter {
@Override
public void configureAuthenticationFilter(FilterRegistrationBean authenticationFilter) {
    super.configureAuthenticationFilter(authenticationFilter);
        authenticationFilter.getInitParameters().put("authenticationRedirectStrategyClass","com.patterncat.CustomAuthRedirectStrategy");
    }
}
3.4 控制器
@RestController
public class IndexController {

    @RequestMapping("/login")
    public String auth() {
        return "login success";
    }
}
3.5 主函数
@SpringBootApplication
public class Application {

     private static Logger log = Logger.getLogger(Application.class);

     public static void main(String[] args) {
            SpringApplication.run(Application.class, args);
            log.info("SpringBoot Start Success");
        }
}