网上有很多vue实现todoList的Demo,个人感觉还是这篇讲的更透彻--->地址:https://mp.weixin.qq.com/s/YTaDc5nAuasySK24SCHQnA
今天跟着写了一遍,记录下来方便以后复习,推荐看原文讲解,思路清晰!
实现步骤:
第一步:创建Vue实例,实现数据绑定
通过v-model指令,把页面用户输入的内容与task的content绑定
     <div id="app">
            <input class="edit" type="text" v-model="task.content" placeholder="编写任务" />
        </div>
        <script>
        var app = new Vue({
            el:"#app",
            data:{
                //默认
                task:{
                    content:'',//内容为空
                    finished: false,//未完成
                    deleted: false//未删除
                }
            }
        });
        </script>
.edit{
    display: block;
    width: 50%;
    height: 35px;
    line-height: 35px;
    margin: 30px auto;
    box-sizing: border-box;
    padding-left: 4px;
    border-radius: 4px;
    border: 1px solid #ccc;
    outline: 0;
    box-shadow: 0 0 5px #ccc;
}

第二步:按键修饰符:
2.1 用一个list[ ]数组来存储用户输入的每一个任务task。
2.2 用户输入任务内容后,按下enter键把task.content存储起来
<input @keydown.enter="addTask" class="edit" type="text" v-model="task.content" placeholder="编写任务" />
 1 <script>
 2         var app = new Vue({
 3             el:"#app",
 4             data:{
 5                 //默认初始化任务task
 6                 task:{
 7                     content:'',//内容为空
 8                     finished: false,//未完成
 9                     deleted: false//未删除
10                 },
11                 //任务列表:存储用户输入的每一个任务task
12                 list:[]
13             },
14             methods:{
15                 addTask:function(){
16                     //将task存入list数组
17                     this.list.push(this.task);
18                     //存入list[]后,重置task
19                     this.task ={
20                         content:'',//内容为空
21                         finished: false,//未完成
22                         deleted: false//未删除
23                     }
24                 }
25             }
26         });
27         </script>
2.3 用v-for遍历list数组,并展示出来
       <div class="list">
                <div class="unit" v-for="(item,index) in list">
                    <input type="checkbox" />
                    <span>{{index+1}}.{{item.content}}</span>
                </div>
            </div>
2.4 同时加上CSS样式:
 1 .list{
 2     margin: 0 auto;
 3     width: 50%;
 4 }
 5 .unit{
 6     position: relative;
 7     padding: 10px 0;
 8     border-bottom: 1px solid #efefef;
 9 }
10 .unit:last-child{
11     border-bottom: 0;/*最后一条list的底框不用显示*/
12 }
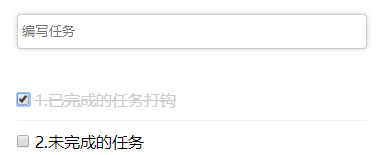
第三步:动态修改样式:勾选框被选中时,表示任务已完成,切换相应的样式;未选中时,表示任务未完成,也要切换样式。(切换true或false)
3.1 为每一个checkbox绑定点击事件,并动态渲染是否选中
3.2 动态的修改class,在页面看到相应效果

1 //点击修改任务状态
2                 changeState:function(index){
3                     let curState = this.list[index].finished;
4                     this.list[index].finished = !curState;
5                 }
3.3 finish样式代码:
1 .finish{
2     text-decoration: line-through;
3     color:#ccc;
4 }
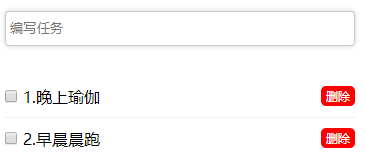
第四步:删除任务:为每个任务添加删除按钮,输入错误时,可点击删除按钮删掉
1        <div class="list">
2                 <div class="unit" v-for="(item,index) in list">
3                     <!--省略-->
4                     <button @click="removeTask(index)" class="del">删除</button>
5                 </div>
6             </div>
1          removeTask:function(index){
2                     //使用splice操作删除数组指定项
3                     this.list.splice(index,1);
4                 }
 1 .del{
 2     background: red;
 3     text-decoration: none;
 4     position: absolute;
 5     right: 0;
 6     border: 0;
 7     outline: 0;
 8     padding: 2px 5px;
 9     border-radius: 5px;
10     font-size: 12px;
11     color: #fff;
12 }
第五步:“暂无任务”文字提示:使用v-if 当list[ ]数组的长度为0时,表示无任务,可展示“暂无任务”,反之则不渲染。
<p v-if="list.length == 0" class="empty">暂无任务</p>
1 .empty{
2     font-size: 13px;
3     color: #ccc;
4     text-align: center;
5     padding: 10px 0;
6 }

完整代码和实现效果如下:
 1 <!DOCTYPE html>
 2 <html>
 3     <head>
 4         <meta charset="utf-8" />
 5         <title>todolist</title>
 6         <!--引入CSS样式-->
 7         <link type="text/css" rel="stylesheet" href="css/style.css"/>
 8         <!--引入vue2.0+开发版的CND,和 npm 发布的最新版本一致。-->
 9         <script src="https://unpkg.com/vue@2.3.3/dist/vue.js"></script>
10     </head>
11     <body>
12         <div id="app">
13             <input @keydown.enter="addTask" class="edit" type="text" v-model="task.content" placeholder="编写任务" />
14             <div class="list">
15                 <div class="unit" v-for="(item,index) in list">
16                     <input @click = "changeState(index)" :checked="item.finished" type="checkbox" />
17                     <span :class="{'finish':item.finished}">{{index+1}}.{{item.content}}</span>
18                     <button @click="removeTask(index)" class="del">删除</button>
19                 </div>
20             </div>
21             <p  v-if="list.length == 0" class="empty">暂无任务</p>
22         </div>
23         <script>
24         var app = new Vue({
25             el:"#app",
26             data:{
27                 //默认
28                 task:{
29                     content:'',//内容为空
30                     finished: false,//未完成
31                     deleted: false//未删除
32                 },
33                 //任务列表:存储用户输入的每一个任务task
34                 list:[]
35             },
36             methods:{
37                 addTask:function(){
38                     //将task存入list数组
39                     this.list.push(this.task);
40                     //存入list[]后,重置task
41                     this.task ={
42                         content:'',//内容为空
43                         finished: false,//未完成
44                         deleted: false//未删除
45                     }
46                 },
47                 //点击修改任务状态
48                 changeState:function(index){
49                     let curState = this.list[index].finished;
50                     this.list[index].finished = !curState;
51                 },
52                 removeTask:function(index){
53                     //使用splice操作删除数组指定项
54                     this.list.splice(index,1);
55                 }
56             }
57         });
58         </script>
59     </body>
60 </html>
 1 *{
 2     margin: 0;
 3     padding: 0;
 4 }
 5 .edit{
 6     display: block;
 7     width: 50%;
 8     height: 35px;
 9     line-height: 35px;
10     margin: 30px auto;
11     box-sizing: border-box;
12     padding-left: 4px;
13     border-radius: 4px;
14     border: 1px solid #ccc;
15     outline: 0;
16     box-shadow: 0 0 5px #ccc;
17 }
18 .list{
19     margin: 0 auto;
20     width: 50%;
21 }
22 .unit{
23     position: relative;
24     padding: 10px 0;
25     border-bottom: 1px solid #efefef;
26 }
27 .unit:last-child{
28     border-bottom: 0;/*最后一条list的底框不用显示*/
29 }
30 .finish{
31     text-decoration: line-through;
32     color:#ccc;
33 }
34 .del{
35     background: red;
36     text-decoration: none;
37     position: absolute;
38     right: 0;
39     border: 0;
40     outline: 0;
41     padding: 2px 5px;
42     border-radius: 5px;
43     font-size: 12px;
44     color: #fff;
45 }
46 .empty{
47     font-size: 13px;
48     color: #ccc;
49     text-align: center;
50     padding: 10px 0;
51 }