Jumpserver 环境要求:
硬件配置: 2个CPU核心, 4G 内存, 50G 硬盘(最低)
操作系统: Linux 发行版 x86_64
Python = 3.6.x
Mysql Server ≥ 5.6
Mariadb Server ≥ 5.5.56
Redis
[root@test ~]# cat /etc/redhat-release
CentOS Linux release 7.4.1708 (Core)
配置yum源
cd /etc/yum.repos.d/
for i in `ls`;do mv $i{,.bak};done
mv CentOS-Base.repo.bak CentOS-Base.repo
mv CentOS-Media.repo.bak CentOS-Media.repo
yum -y install vim git
修改本地yum源
vim CentOS-Media.repo
[c7-media]
name=CentOS-$releasever - Media
baseurl=file:///mnt/usb1/
# file:///media/cdrom/
# file:///media/cdrecorder/
gpgcheck=0
enabled=1
gpgkey=file:///etc/pki/rpm-gpg/RPM-GPG-KEY-CentOS-7
创建挂载点(光盘的)
mkdir /mnt/usb{1..3}
mount /dev/sr0 /mnt/usb1
关闭selinux
setenforce 0
sed -i "s/SELINUX=enforcing/SELINUX=disabled/" /etc/selinux/config
关闭防火墙
systemctl stop firewalld
systemctl disable firewalld
cd
安装python3.6 (https://www.cnblogs.com/charles8866/p/8366695.html)
安装依赖:yum -y install openssl-devel bzip2-devel expat-devel gdbm-devel readline-devel sqlite-devel wget gcc gcc-c++
下载python源码包:wget https://www.python.org/ftp/python/3.6.0/Python-3.6.0.tgz
解包:
tar -xzvf Python-3.6.0.tgz -C /usr/local
cd /usr/local/Python-3.6.0
./configure --prefix=/usr/local && make && make altinstall
更改/usr/bin/python链接
ln -s /usr/local/bin/python3.6 /usr/bin/python3
cd
安装MySQL5.7
wget https://repo.mysql.com//mysql57-community-release-el7-11.noarch.rpm
yum -y install mysql57-community-release-el7-11.noarch.rpm
yum -y install mysql-community-server
systemctl start mysqld
systemctl enable mysqld
systemctl daemon-reload
查看数据库临时的root密码
cat /var/log/mysqld.log |grep "localhost"|awk -F 'localhost' '{print $2}'|awk -F ': ' '{print $2}'
登录数据库
mysql -u root -p
修改数据库root用户的默认密码
ALTER USER 'root'@'localhost' IDENTIFIED BY 'Flz_3qc.';
设置root用户允许远程登录mysql(默认不允许)
GRANT ALL PRIVILEGES ON *.* TO 'root'@'%' IDENTIFIED BY 'Flz_3qc.' WITH GRANT OPTION;
配置数据库默认编码为UTF-8
vim /etc/my.cnf
[mysqld] #在该区域内添加以下2行
character_set_server=utf8
init_connect='SET NAMES utf8'
重启MySQL
systemctl restart mysqld
创建Jumpserver数据库并授权
mysql -uroot -p -e "create database jumpserver default charset 'utf8'; grant all on jumpserver.* to 'jumpserver'@'127.0.0.1' identified by 'Flz_3qc.'; flush privileges;"
安装redis
yum -y install epel-release
yum -y install redis
systemctl start redis
systemctl status redis
安装jumeserver
先在本机生成秘钥
ssh-keygen -t rsa
查看公钥
cat ~/.ssh/id_rsa.pub
注:将公钥上传到github上即可
将上述公钥添加到github上
#因为该项目较大,所以在克隆时会慢,为了解决克隆慢的问题所以要在hosts文件中添加一些东西
vim /etc/hosts
140.82.114.4 github.com
192.30.255.119 gist.github.com
185.199.110.153 assets-cdn.github.com
151.101.228.133 raw.githubusercontent.com
151.101.228.133 gist.githubusercontent.com
151.101.228.133 cloud.githubusercontent.com
151.101.228.133 camo.githubusercontent.com
151.101.228.133 avatars0.githubusercontent.com
151.101.228.133 avatars1.githubusercontent.com
151.101.228.133 avatars2.githubusercontent.com
151.101.228.133 avatars3.githubusercontent.com
151.101.228.133 avatars4.githubusercontent.com
151.101.228.133 avatars5.githubusercontent.com
151.101.228.133 avatars6.githubusercontent.com
151.101.228.133 avatars7.githubusercontent.com
151.101.228.133 avatars8.githubusercontent.com
185.199.109.154 github.githubassets.com
151.101.109.194 github.global.ssl.fastly.net
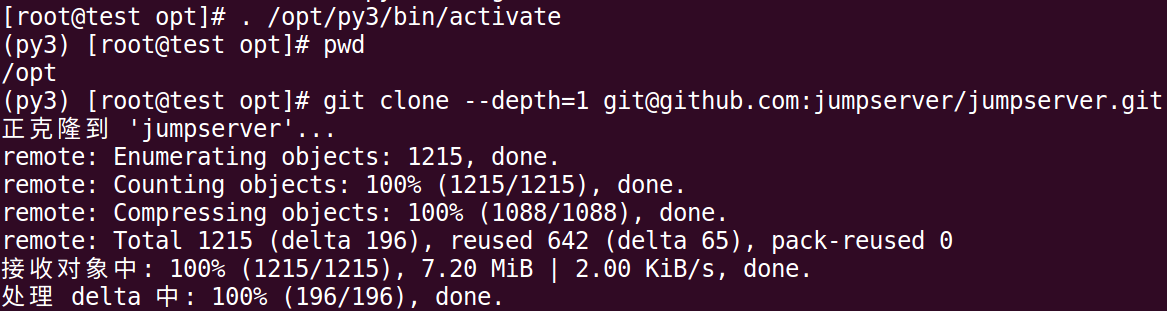
克隆项目(py3虚拟环境下搭建)
cd /opt/
python3 -m venv py3
. /opt/py3/bin/activate
自动载入虚拟环境
echo 'source /opt/py3/bin/activate' >> ~/.bashrc
source ~/.bashrc
安装依赖 RPM 包
cd jumpserver/requirements/
yum -y install $(cat rpm_requirements.txt)
pip3 install --upgrade pip setuptools -i https://mirrors.aliyun.com/pypi/simple/ #国内源
pip3 install -r requirements.txt -i https://mirrors.aliyun.com/pypi/simple/ #国内源
pip3 install --upgrade pip setuptools
pip3 install -r requirements.txt
注:安装python-gssapi-0.6.4.tar.gz包可能会卡住,ctrl +c取消掉重新执行即可
生成随机的SECRET_KEY,生成命令:
cat /dev/urandom | tr -dc A-Za-z0-9 | head -c 50
输出:iGbv7mflo0IQQ8lSJHPbJBy2ZEPkc9QqOo5jR0msIpFrQjnhP3
生成随机BOOTSTRAP_TOKEN,生成命令:
cat /dev/urandom | tr -dc A-Za-z0-9 | head -c 16
输出:DXVwZ1dZPIiFnKIa
修改jumpserver配置文件
cd /jumpserver
cp config_example.yml config.yml
vim config.yml
SECRET_KEY: oJ2wVMLAhG7C6zHWBL6N2wUWLNpH3jAwFF4S5yF5tVvZhV5Pin #中间要有空格
BOOTSTRAP_TOKEN: dGeWuTVIkJaxta7p #中间要有空格
DEBUG: false #中间要有空格
LOG_LEVEL: ERROR #中间要有空格
SESSION_EXPIRE_AT_BROWSER_CLOSE: true #中间要有空格
DB_ENGINE: mysql
DB_HOST: 127.0.0.1
DB_PORT: 3306
DB_USER: jumpserver
DB_PASSWORD: Flz_3qc. #手动添加该项,该项文档上面安装MySQL时给jumpserver用户授权的密码
DB_NAME: jumpserver
生成数据库表结构和初始化数据文件
cd /jumpserver/utils/
bash make_migrations.sh
cd ..
运行 Jumpserver
./jms start all
注:启动方式./jms start|stop|status|restart all 后台运行请添加 -d 参数,例如./jms start -d

注:因为现在还没安装nginx所以上图只显示了文字,内存使用情况如下图。帐密:admin / admin

Jumpserver 插件安装
Jumpserver本身的功能已经足够强大,但是加上以下几个组件更是让Jumpserver锦上添花。
组件如下:
Coco:Coco为 SSH Server 和 Web Terminal Server。用户可以通过使用自己的账户登录 SSH 或者 Web Terminal直接访问被授权的资产。不需要知道服务器的账户和密码,现在 Coco 已经被 koko 取代。
Luna:luna 为 Web Terminal Server 前端页面,用户使用 Web Terminal 方式登录时所需要的插件。
Guacamole:Guacamole 为 Windows 组件,用户可以通过 Web Terminal 来连接 Windows 资产(暂时只能通过 Web Terminal来访问)
各个组件所监听的端口如下:
Jumpserver:8080/tcp
Redis:6379/tcp
MySQL/Mariadb:3306/tcp
Nginx:80/tcp
Koko:SSH为2222/tcp,Web Terminal为5000/tcp
Guacamole:8081/tcp
正常部署 koko 组件
cd /opt
# 访问 https://github.com/jumpserver/koko/releases 下载对应 release 包并解压到 /opt目录
wget https://github.com/jumpserver/koko/releases/download/1.5.4/koko-master-linux-amd64.tar.gz
tar xf koko-master-linux-amd64.tar.gz
chown -R root:root kokodir
cd kokodir
cp config_example.yml config.yml
vim config.yml
NAME: "coco" #项目名称, 会用来向Jumpserver注册, 识别而已, 不能重复
CORE_HOST: http://127.0.0.1:8080 #Jumpserver项目的url, api请求注册会使用
BOOTSTRAP_TOKEN: dGeWuTVIkJaxta7p
注:BOOTSTRAP_TOKEN预共享秘钥, 用来注册coco使用的service account和terminal,请和jumpserver 配置文件中的 BOOTSTRAP_TOKEN 保持一致,注册完成后可以删除
启动 Koko
#先重启下 Jumpserver
/opt/jumpserver/jms restart
#先进行前台启动 koko,如果前台没问题,则使用 nohup & 命令来后台启动
/opt/kokodir/koko start #前台
nohup ./koko & #后台
#查看koko进程
ps -ef|grep koko
ss -anplt | grep koko

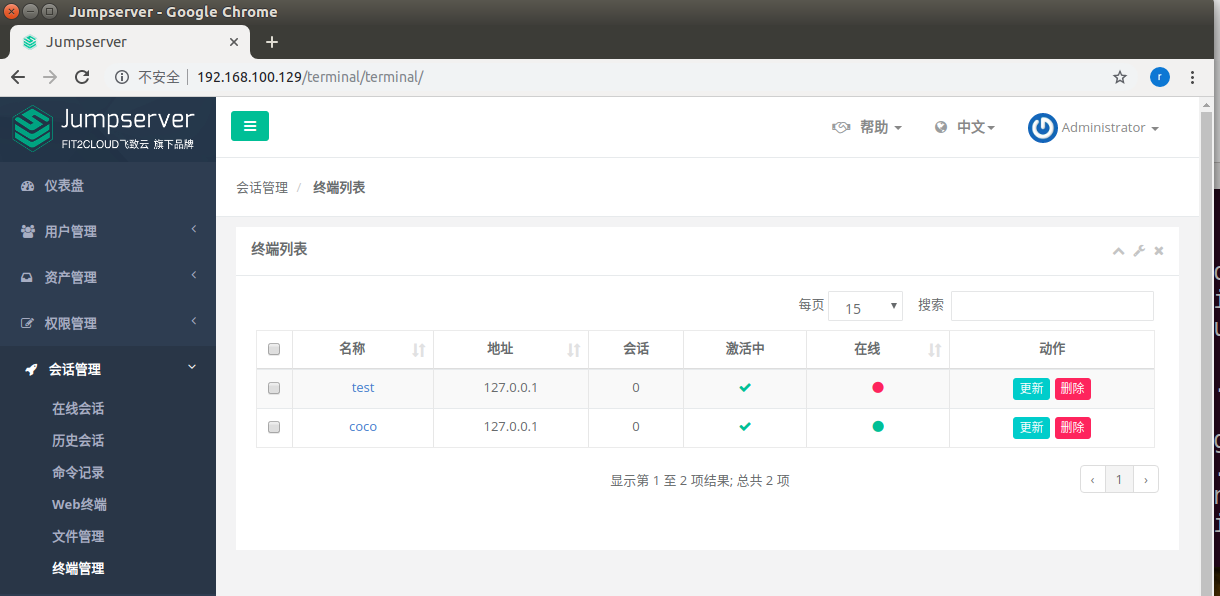
启动成功后去Jumpserver 会话管理-终端管理(http://192.168.100.129:8080/terminal/terminal/)接受coco的注册,如果页面不正常可以等部署完成后再处理
安装 Web Terminal 前端: Luna
Luna 已改为纯前端,需要 Nginx 来运行访问
访问(https://github.com/jumpserver/luna/releases)下载对应版本的 release 包,直接解压,不需要编译
cd /opt/
wget https://github.com/jumpserver/luna/releases/download/1.5.4/luna.tar.gz
tar -zxvf luna.tar.gz
chown -R root.root luna
配置Nginx整合各组件
yum -y install yum-utils
vim /etc/yum.repos.d/nginx.repo
[nginx-stable]
name=nginx stable repo
baseurl=http://nginx.org/packages/centos/$releasever/$basearch/
enabled=1
gpgcheck=0
gpgkey=https://nginx.org/keys/nginx_signing.key
yum makecache fast
yum -y install nginx
rm -rf /etc/nginx/conf.d/default.conf
systemctl enable nginx
准备配置文件,修改/etc/nginx/conf.d/jumpserver.conf
vim /etc/nginx/conf.d/jumpserver.conf
server {
listen 80;
client_max_body_size 100m; # 录像及文件上传大小限制
location /luna/ {
try_files $uri / /index.html;
alias /opt/luna/; # luna 路径, 如果修改安装目录,此处需要修改
}
location /media/ {
add_header Content-Encoding gzip;
root /opt/jumpserver/data/; # 录像位置, 如果修改安装目录,此处需要修改
}
location /static/ {
root /opt/jumpserver/data/; # 静态资源, 如果修改安装目录,此处需要修改
}
location /socket.io/ {
proxy_pass http://localhost:5000/socket.io/;
proxy_buffering off;
proxy_http_version 1.1;
proxy_set_header Upgrade $http_upgrade;
proxy_set_header Connection "upgrade";
proxy_set_header X-Real-IP $remote_addr;
proxy_set_header Host $host;
proxy_set_header X-Forwarded-For $proxy_add_x_forwarded_for;
access_log off;
}
location /coco/ {
proxy_pass http://localhost:5000/coco/;
proxy_set_header X-Real-IP $remote_addr;
proxy_set_header Host $host;
proxy_set_header X-Forwarded-For $proxy_add_x_forwarded_for;
access_log off;
}
location /guacamole/ {
proxy_pass http://localhost:8081/;
proxy_buffering off;
proxy_http_version 1.1;
proxy_set_header Upgrade $http_upgrade;
proxy_set_header Connection $http_connection;
proxy_set_header X-Real-IP $remote_addr;
proxy_set_header Host $host;
proxy_set_header X-Forwarded-For $proxy_add_x_forwarded_for;
access_log off;
}
location / {
proxy_pass http://localhost:8080;
proxy_set_header X-Real-IP $remote_addr;
proxy_set_header Host $host;
proxy_set_header X-Forwarded-For $proxy_add_x_forwarded_for;
}
}
运行 Nginx
nginx -t # 确保配置没有问题,有问题请先解决
systemctl start nginx
systemctl enable nginx
测试jumpser功能
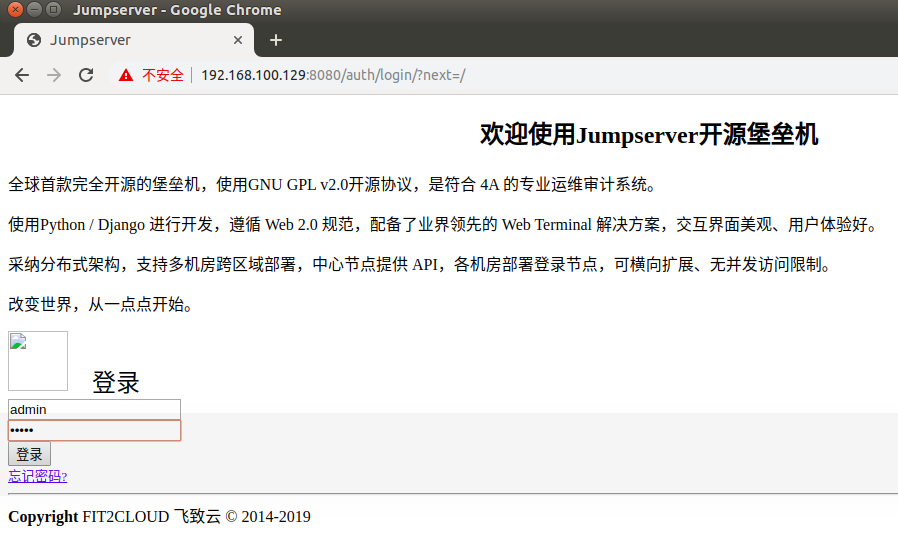
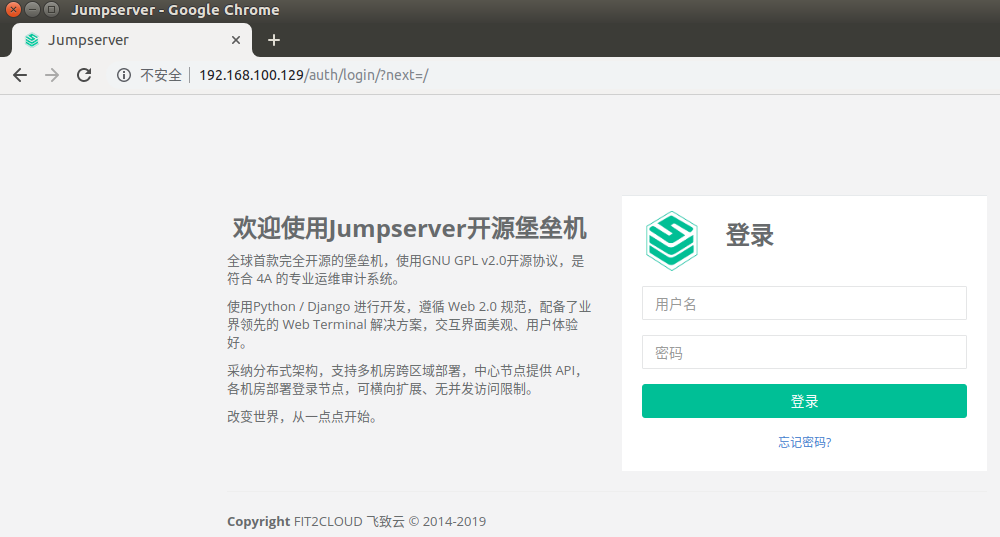
1、检查web页面是否已经正常运行
服务全部启动后, 访问 http://192.168.1000.129(ip地址是你安装Nginx的那台机器的ip), 访问nginx代理的端口(也就是80端口), 不要再通过8080端口访问
默认账号: admin 密码: admin
到Jumpserver 会话管理-终端管理 检查 Coco Guacamole 等应用的注册。
注:接下来的图可能会有问题,如您在按图操作的时候出现问题请自行处理,因为我这里还有工作该问题暂不做处理
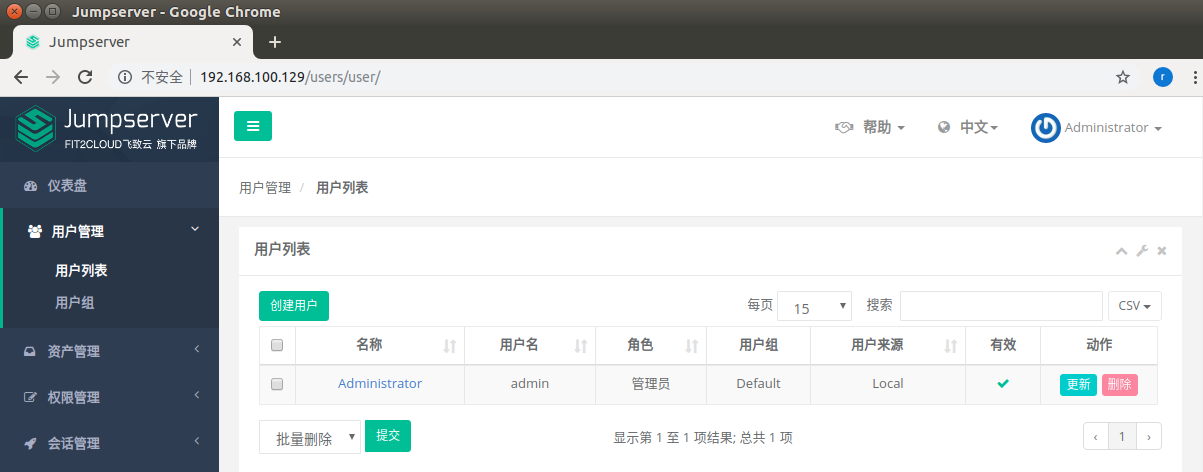
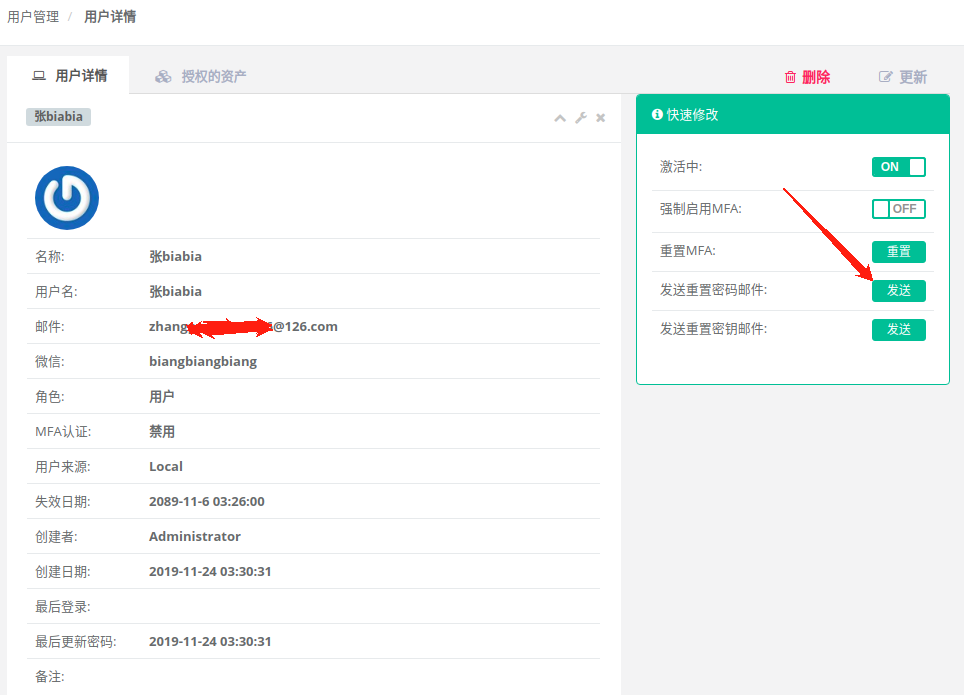
创建用户
用户列表---创建用户


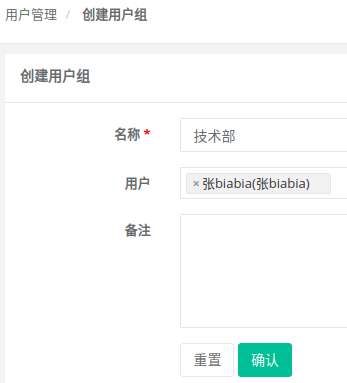
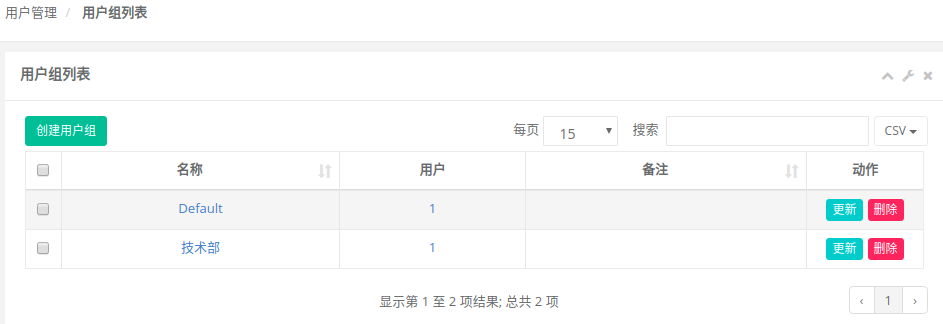
创建用户组
用户组,顾名思义,给用户分组。用户组信息很有用,在分配资产权限的时候,针对的某个用户组下的所有用户,可以为一个用户分配多个用户组。
点击页面左侧“用户管理”菜单下的”用户组“,进入用户组列表页面,点击创建用户组
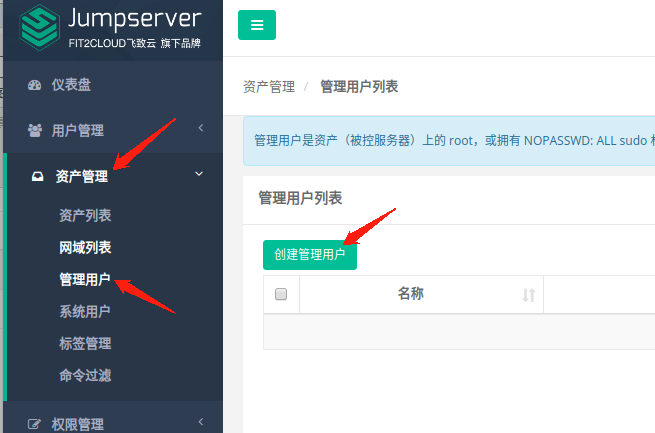
添加管理用户(也就是被管理端的管理员用户)

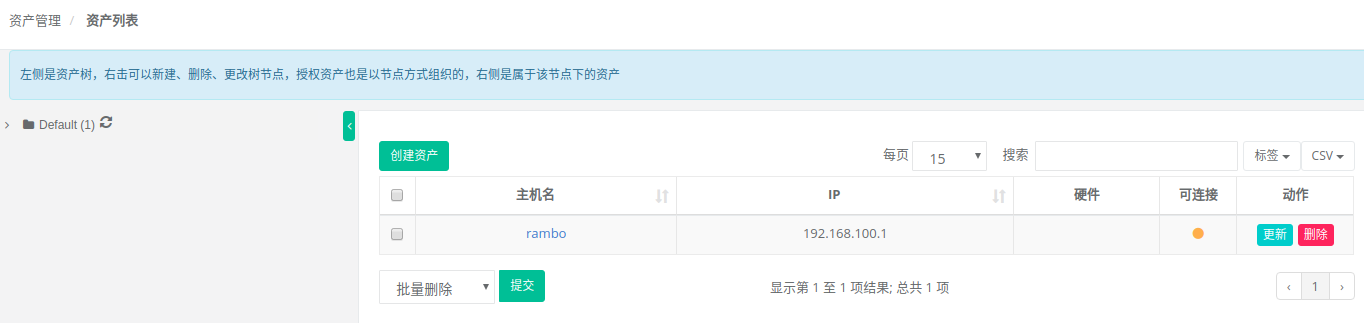
资产列表添加资产

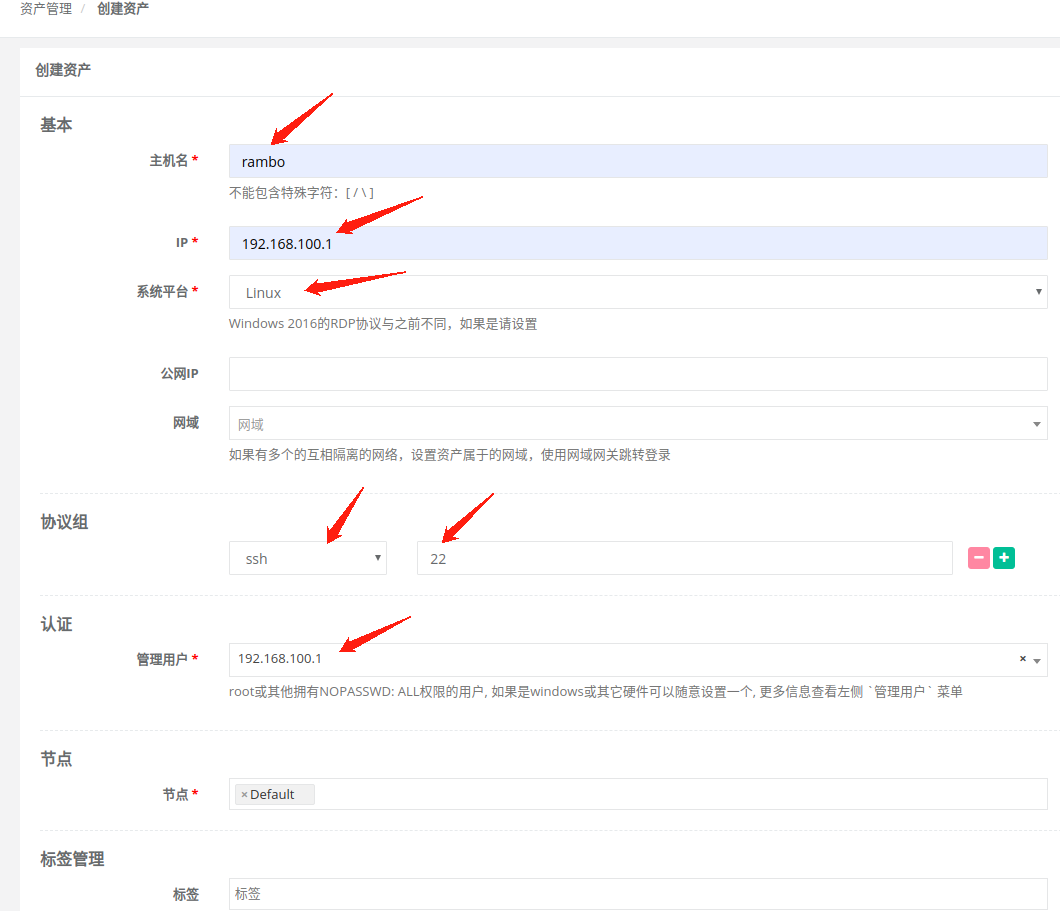
注:上图的主机名是100.1机器的,上图中“管理用户”栏中是个IP是因为在添加管理用户时“名称”栏里是写的IP地址,其实是用户名+密码