1 Emqtt简单搭建
1.1 介绍:EMQ:EMQ 2.0,号称百万级开源MQTT消息服务器,基于Erlang/OTP语言平台开发,支持大规模连接和分布式集群,发布订阅模式的开源MQTT消息服务器。
EMQ 默认开启的 MQTT 服务 TCP 端口:
| 1883 | MQTT 协议端口 |
| 8883 | MQTT/SSL 端口 |
| 8083 | MQTT/WebSocket 端口 |
| 8084 | MQTT/WebSocket/SSL 端口 |
防火墙根据使用的 MQTT 接入方式,开启上述端口的访问权限。
EMQ 节点集群使用的 TCP 端口:
| 4369 | 集群节点发现端口 |
| 6369 | 集群节点控制通道 |
集群节点间如有防护墙,需开启上述 TCP 端口互访权限
1.2 集群创建方式
NGINX Plus -> EMQ 集群
NGINX Plus 产品作为 EMQ 集群 LB,并终结 SSL 连接:
- 注册 NGINX Plus 试用版,Ubuntu 下安装: https://cs.nginx.com/repo_setup
- 创建 EMQ 节点集群,例如:
| 节点 | IP 地址 |
|---|---|
| emq1 | 192.168.0.2 |
| emq2 | 192.168.0.3 |
-
配置 /etc/nginx/nginx.conf,示例:
stream {
    # Example configuration for TCP load balancing

    upstream stream_backend {
        zone tcp_servers 64k;
        hash $remote_addr;
        server 192.168.0.2:1883 max_fails=2 fail_timeout=30s;
        server 192.168.0.3:1883 max_fails=2 fail_timeout=30s;
    }

    server {
        listen 8883 ssl;
        status_zone tcp_server;
        proxy_pass stream_backend;
        proxy_buffer_size 4k;
        ssl_handshake_timeout 15s;
        ssl_certificate     /etc/emqttd/certs/cert.pem;
        ssl_certificate_key /etc/emqttd/certs/key.pem;
    }
}
1.3 搭建EMQTT单机版
通用包下载地址:
| CentOS7 | http://emqtt.com/downloads/latest/centos7 |
[root@emq-node1 opt]# ll
total 20020
-rw-r--r-- 1 root root 20497451 Aug 23  2018 emqttd-centos7-v2.3.11.zip
[root@emq-node1 opt]# unzip emqttd-centos7-v2.3.11.zip  &>/dev/null
[root@emq-node1 opt]# cd emqttd/
#启动EMQTT
[root@emq-node1 emqttd]# ./bin/emqttd start
emqttd 2.3.11 is started successfully!
#查看EMQTT集群状态
[root@emq-node1 emqttd]# ./bin/emqttd_ctl status
Node 'emq@127.0.0.1' is started
emqttd 2.3.11 is running
#WEB的URL状态监控
[root@emq-node1 emqttd]# curl http://localhost:8080/status
Node emq@127.0.0.1 is started
emqttd is running
1.4 单机变器群
#emqttd-node1先关闭服务
[root@emq-node1 emqttd]# ./bin/emqttd stop
#原配置文件
[root@emq-node1 emqttd]# egrep '127.0.0.1' etc/emq.conf|egrep -v '#'
node.name = emq@127.0.0.1
listener.tcp.internal = 127.0.0.1:11883
#更改配置文件
[root@emq-node2 emqttd]# hostname -I
10.0.0.101
[root@emq-node1 emqttd]# sed -i 's#127.0.0.1#10.0.0.101#g' etc/emq.conf
[root@emq-node1 emqttd]# egrep '10.0.0.101' etc/emq.conf|egrep -v '#'
node.name = emq@10.0.0.101
listener.tcp.internal = 10.0.0.101:11883
#在启动服务
[root@emq-node1 emqttd]# ./bin/emqttd start
emqttd 2.3.11 is started successfully!
#emqttd-nod2重复操作
[root@emq-node2 emqttd]# ./bin/emqttd stop
ok
[root@emq-node2 emqttd]# hostname -I
10.0.0.102
[root@emq-node2 emqttd]# sed -i 's#127.0.0.1#10.0.0.102#g' etc/emq.conf
[root@emq-node2 emqttd]# ./bin/emqttd start
emqttd 2.3.11 is started successfully!
#手动加入集群
[root@emq-node2 emqttd]# ./bin/emqttd_ctl cluster join emq@10.0.0.101
Join the cluster successfully.
Cluster status: [{running_nodes,['emq@10.0.0.101','emq@10.0.0.102']}]
[root@emq-node2 emqttd]# ./bin/emqttd_ctl cluster status
Cluster status: [{running_nodes,['emq@10.0.0.101','emq@10.0.0.102']}]
#重节点中删除
[root@emq-node2 emqttd]# ./bin/emqttd_ctl cluster leave
Leave the cluster successfully.
Cluster status: [{running_nodes,['emq@10.0.0.102']}]
#配置文件中指定集群节点,两台机器操作一致先关闭EMQTT
[root@emq-node1 emqttd]# egrep -n "cluster.static.seeds|cluster.discovery" etc/emq.conf
23: cluster.discovery = static   #默认是manual手动创建集群,集群节点
49:cluster.static.seeds = emq@10.0.0.101,emq@10.0.0.102
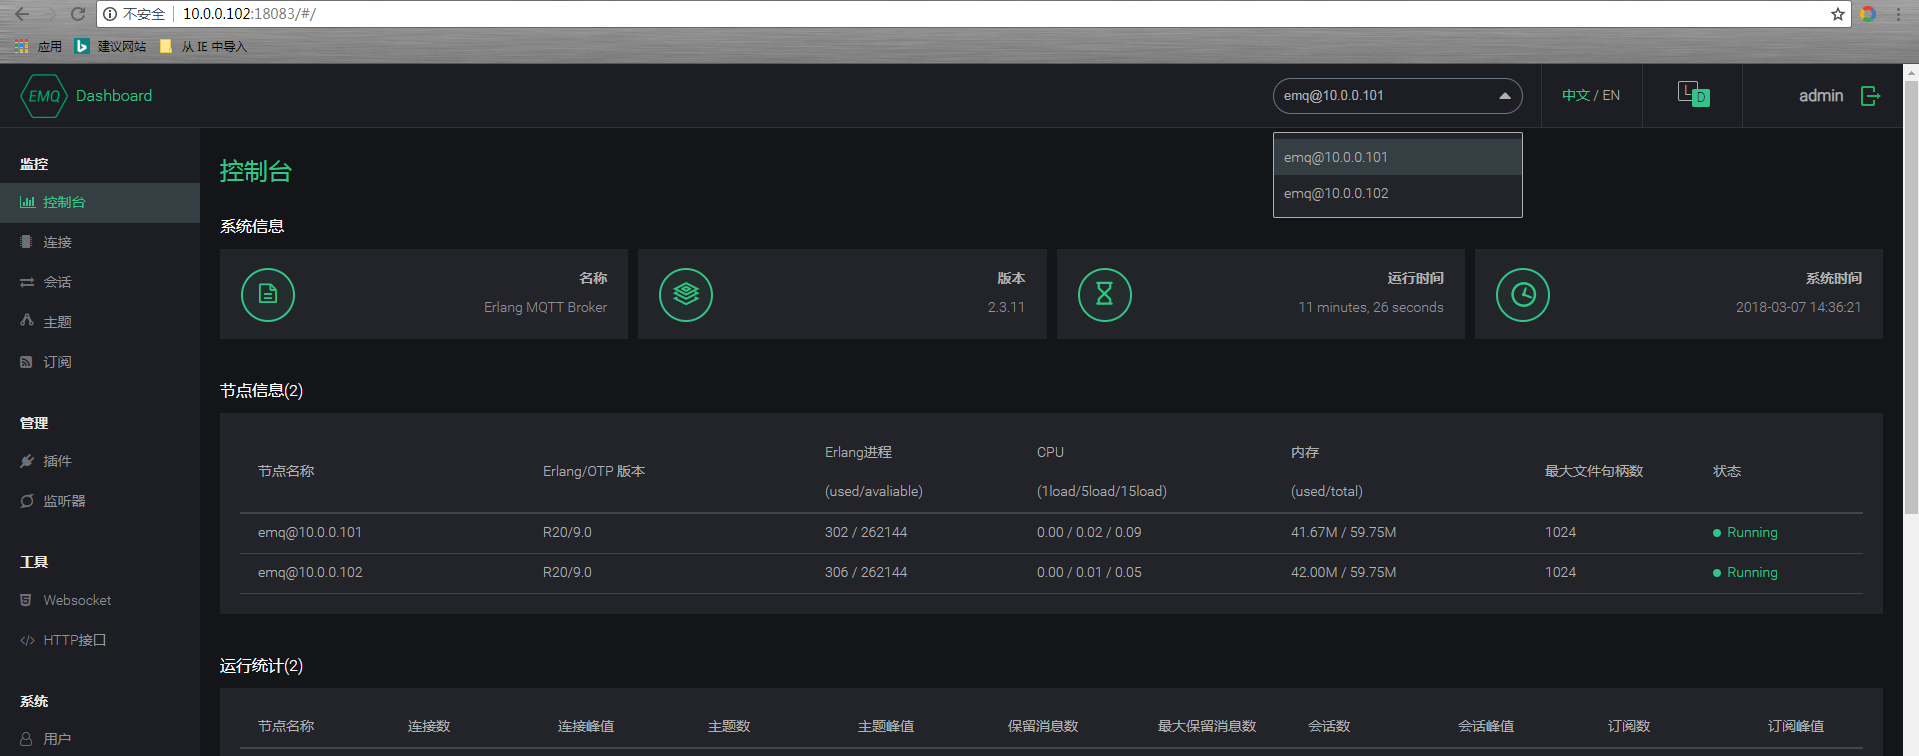
1.5 Web管理界面
#默认账号密码admin public

扩展插件以及优化详见官方文档:http://emqtt.com/docs/v2/index.html